If you have purchased a recorder without a hard drive, or wish to install an additional hard drive to a recorder, follow the steps below.
We use and recommend the use of Seagate Surveillance hard drives, as they are designed for 24/7 data writing, unlike standard hard drives which designed for reading data more than writing data.
Step by Step Picture Instructions
- Open recorder's lid by removing the Phillips screws, and sliding the lid towards the rear of the recorder. Some recorders have additional screws on the side.

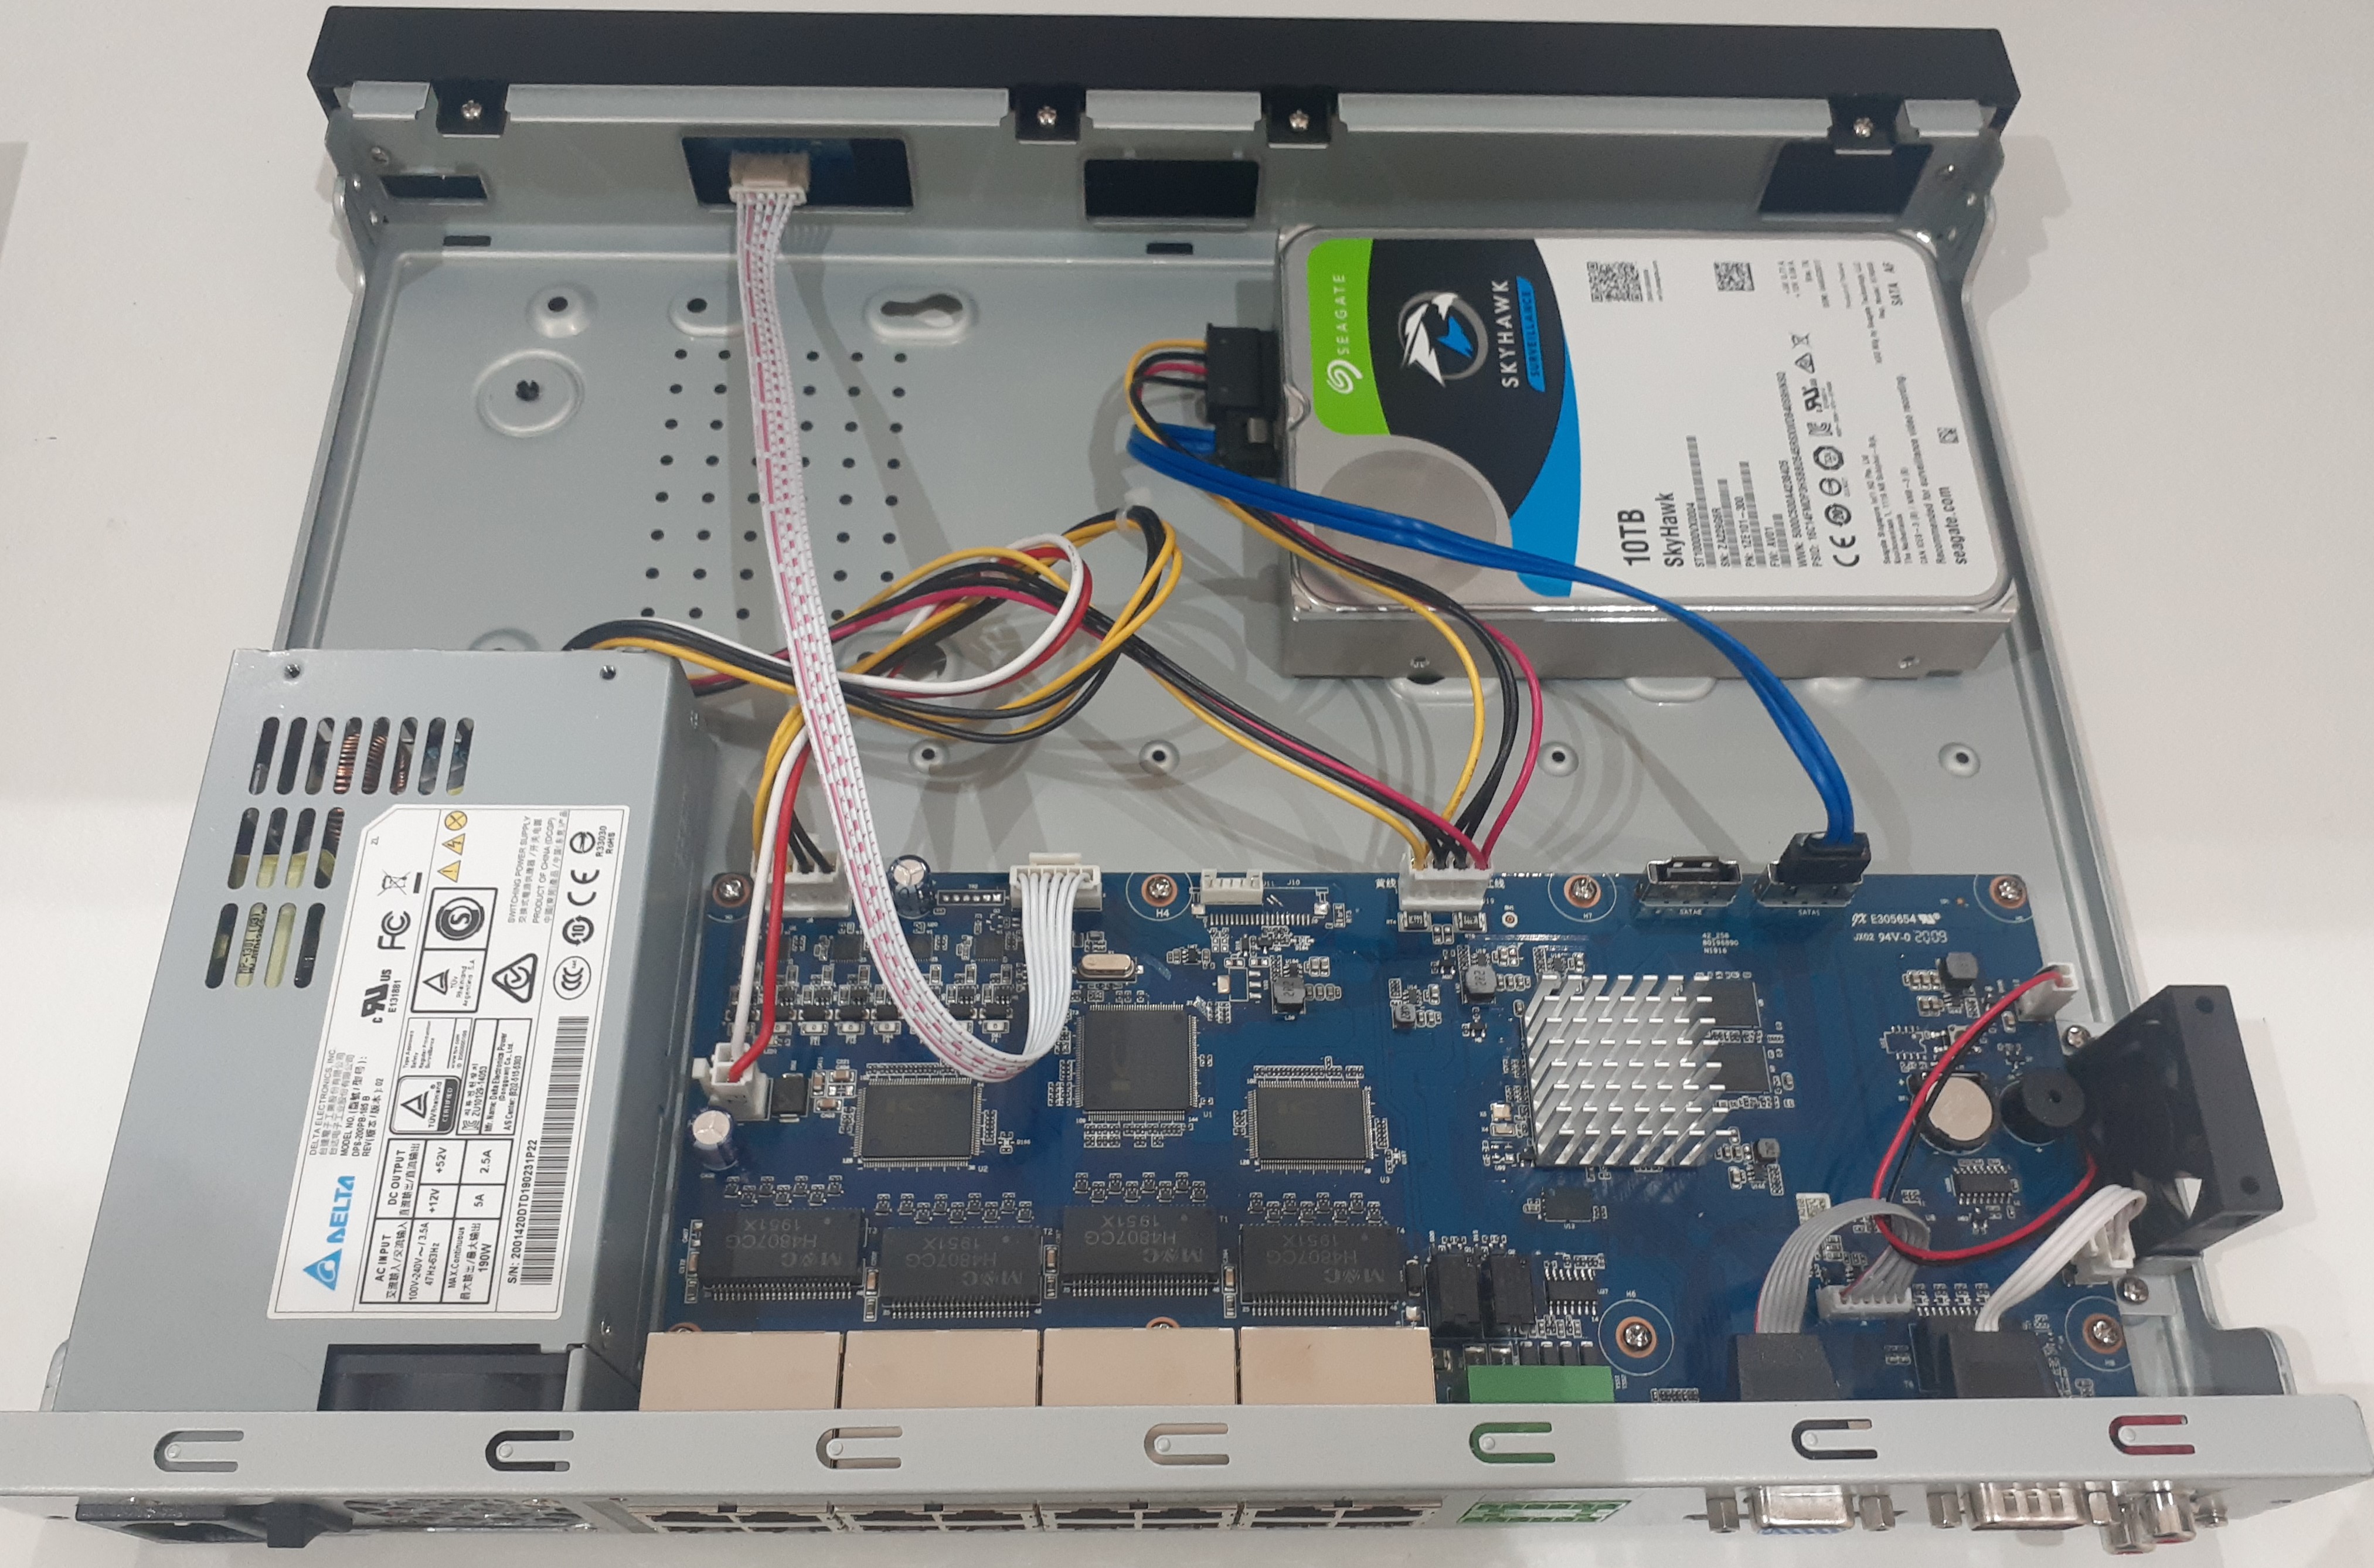
- Carefully place the hard drive on recorder, with sticker surface at the top and hard drive ports facing to the centre of the recorder.
- While holding the hard drive, flip the recorder upside down and adjust the hard drive until 4 screw holes are aligned, there a 6 screw holes, only 4 screws are required.
- Now, screw the hard drive in with the screws supplied in the box. They should be snug, do not over tighten.

- Once, the hard drive is securely in place, connect the SATA cable (small blue cable) and the hard drive power supply cable to the hard drive and the other ends of each cable connect to the recorder. The cables can be found in the accessories box included with the recorder.


- Put the lid back onto the recorder, and reinstall the screws.
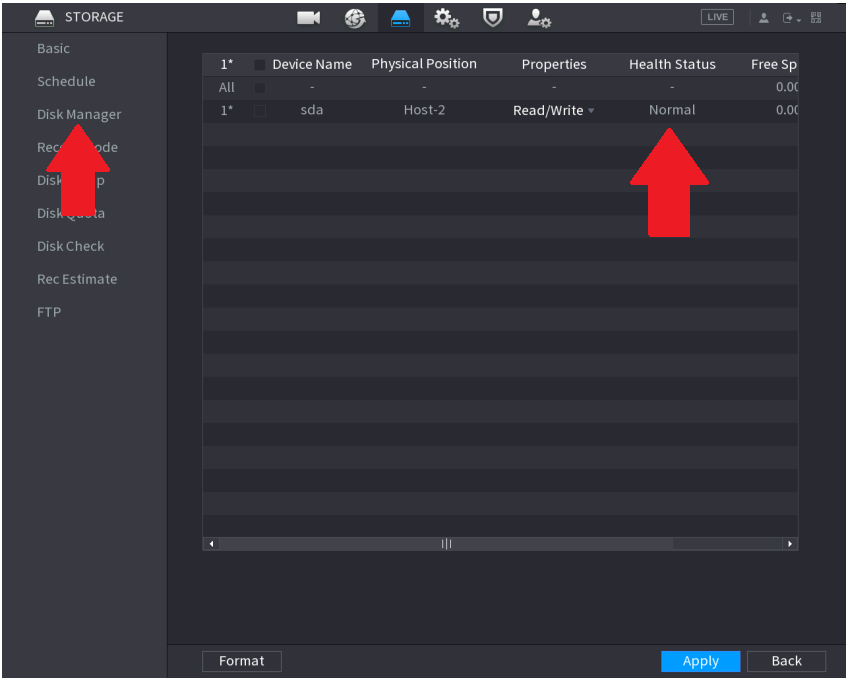
- Plug the recorder in, and go to the Storage menu, then select Disk Manager, ensure the HDD is listed, and the status is Normal. If the status is not Normal, perform a format.