The Alarm Input/Output is a feature which allows the camera to connect to external devices.
This can be useful to trigger the cameras output from a motion event, or to trigger the camera to begin recording based on an alarm input from a sensor.
Examples of external devices that can be used to trigger the Alarm In include external relays, push buttons or any device that can send a trigger signal.
Examples of external devices that can be used to trigger the Alarm Out include lights, sirens or any kind of device that can be triggered by dry contact output.
Enabling Alarm Output
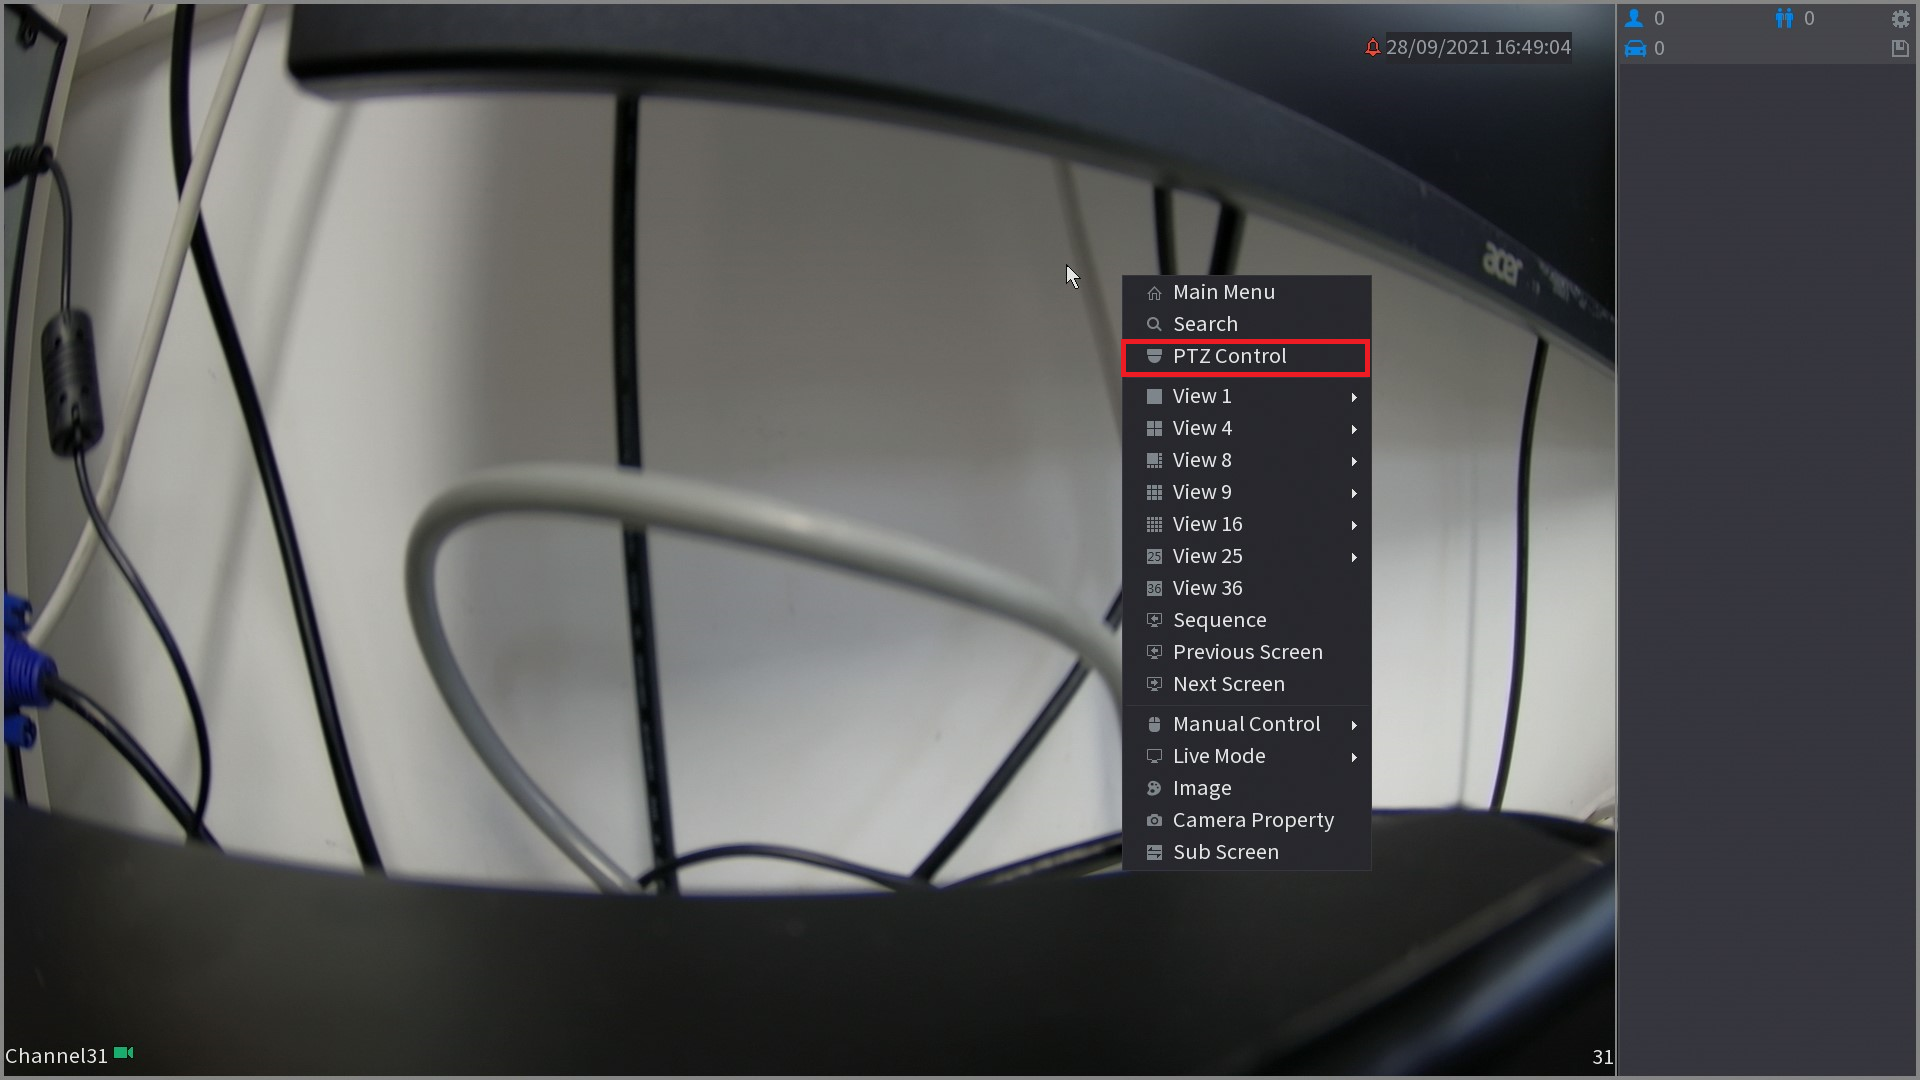
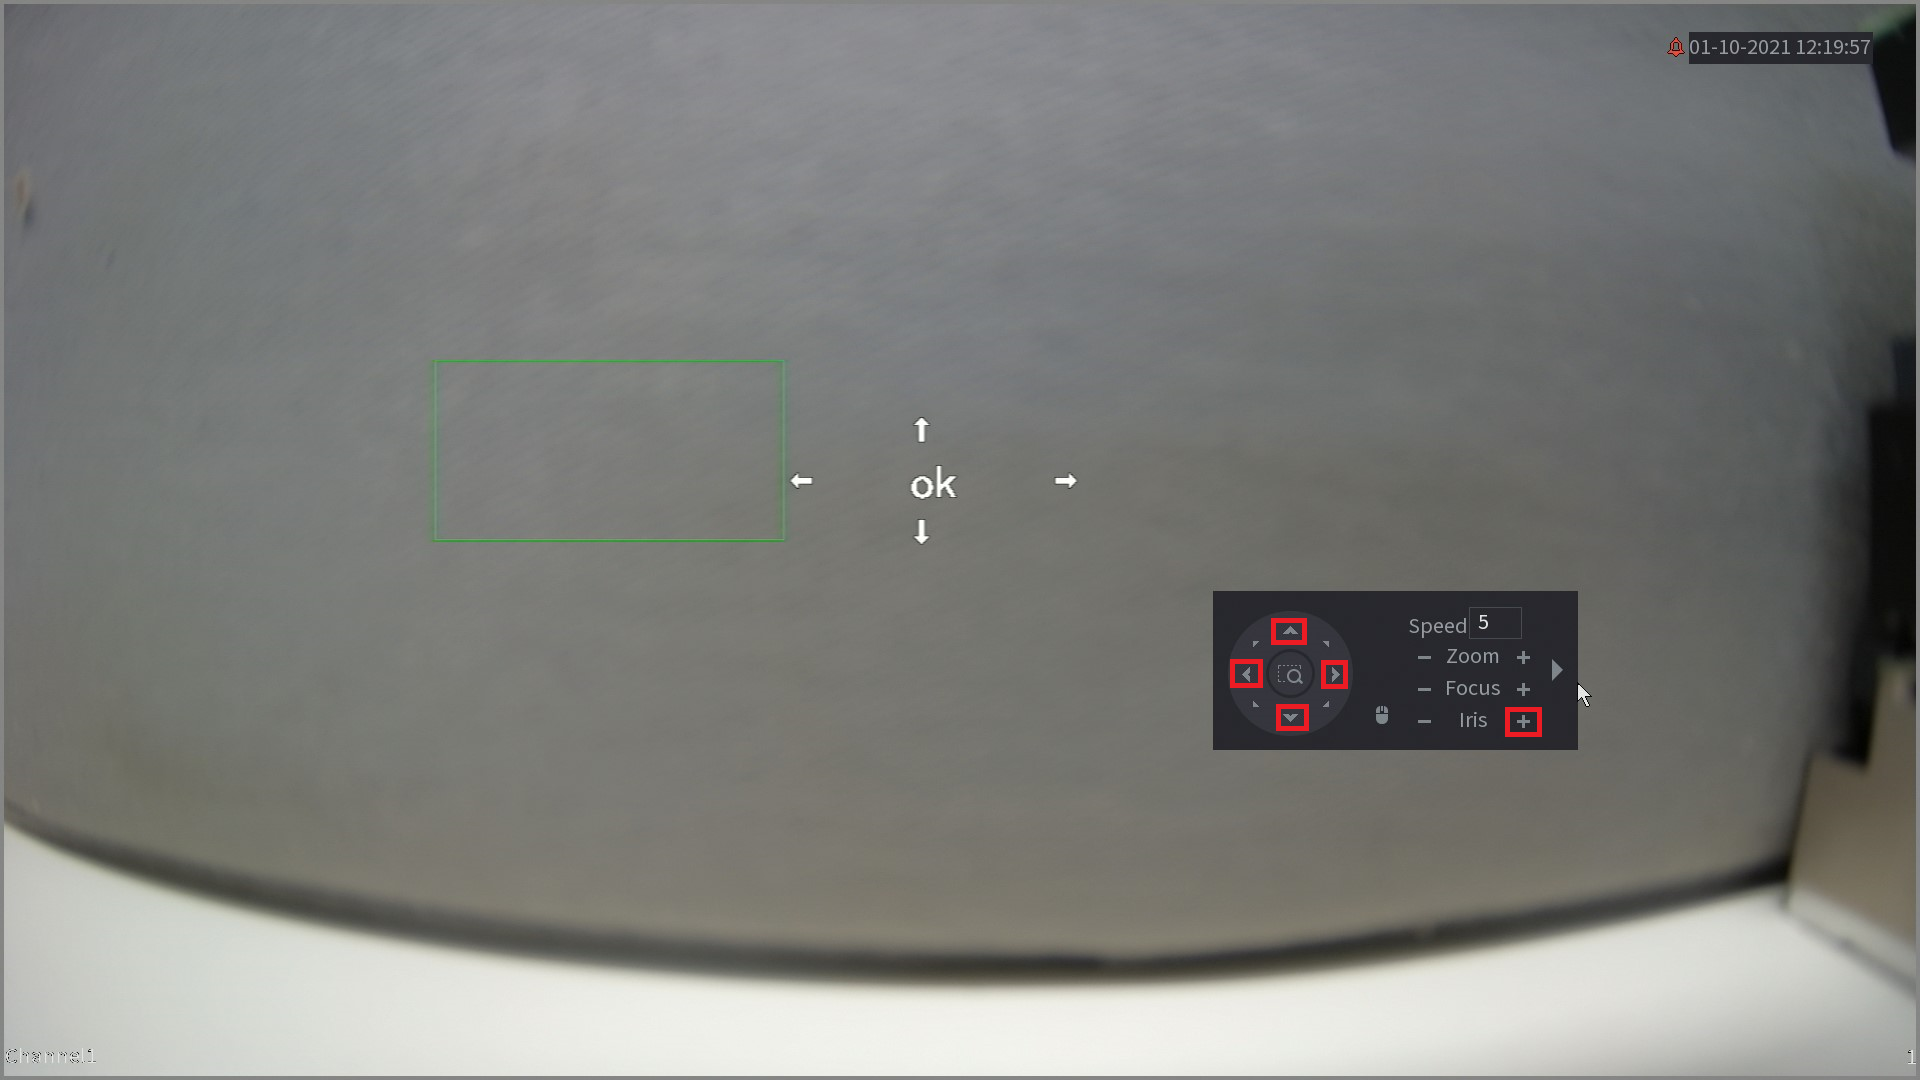
- From the live view screen, Right Click on the mouse and select PTZ Control.
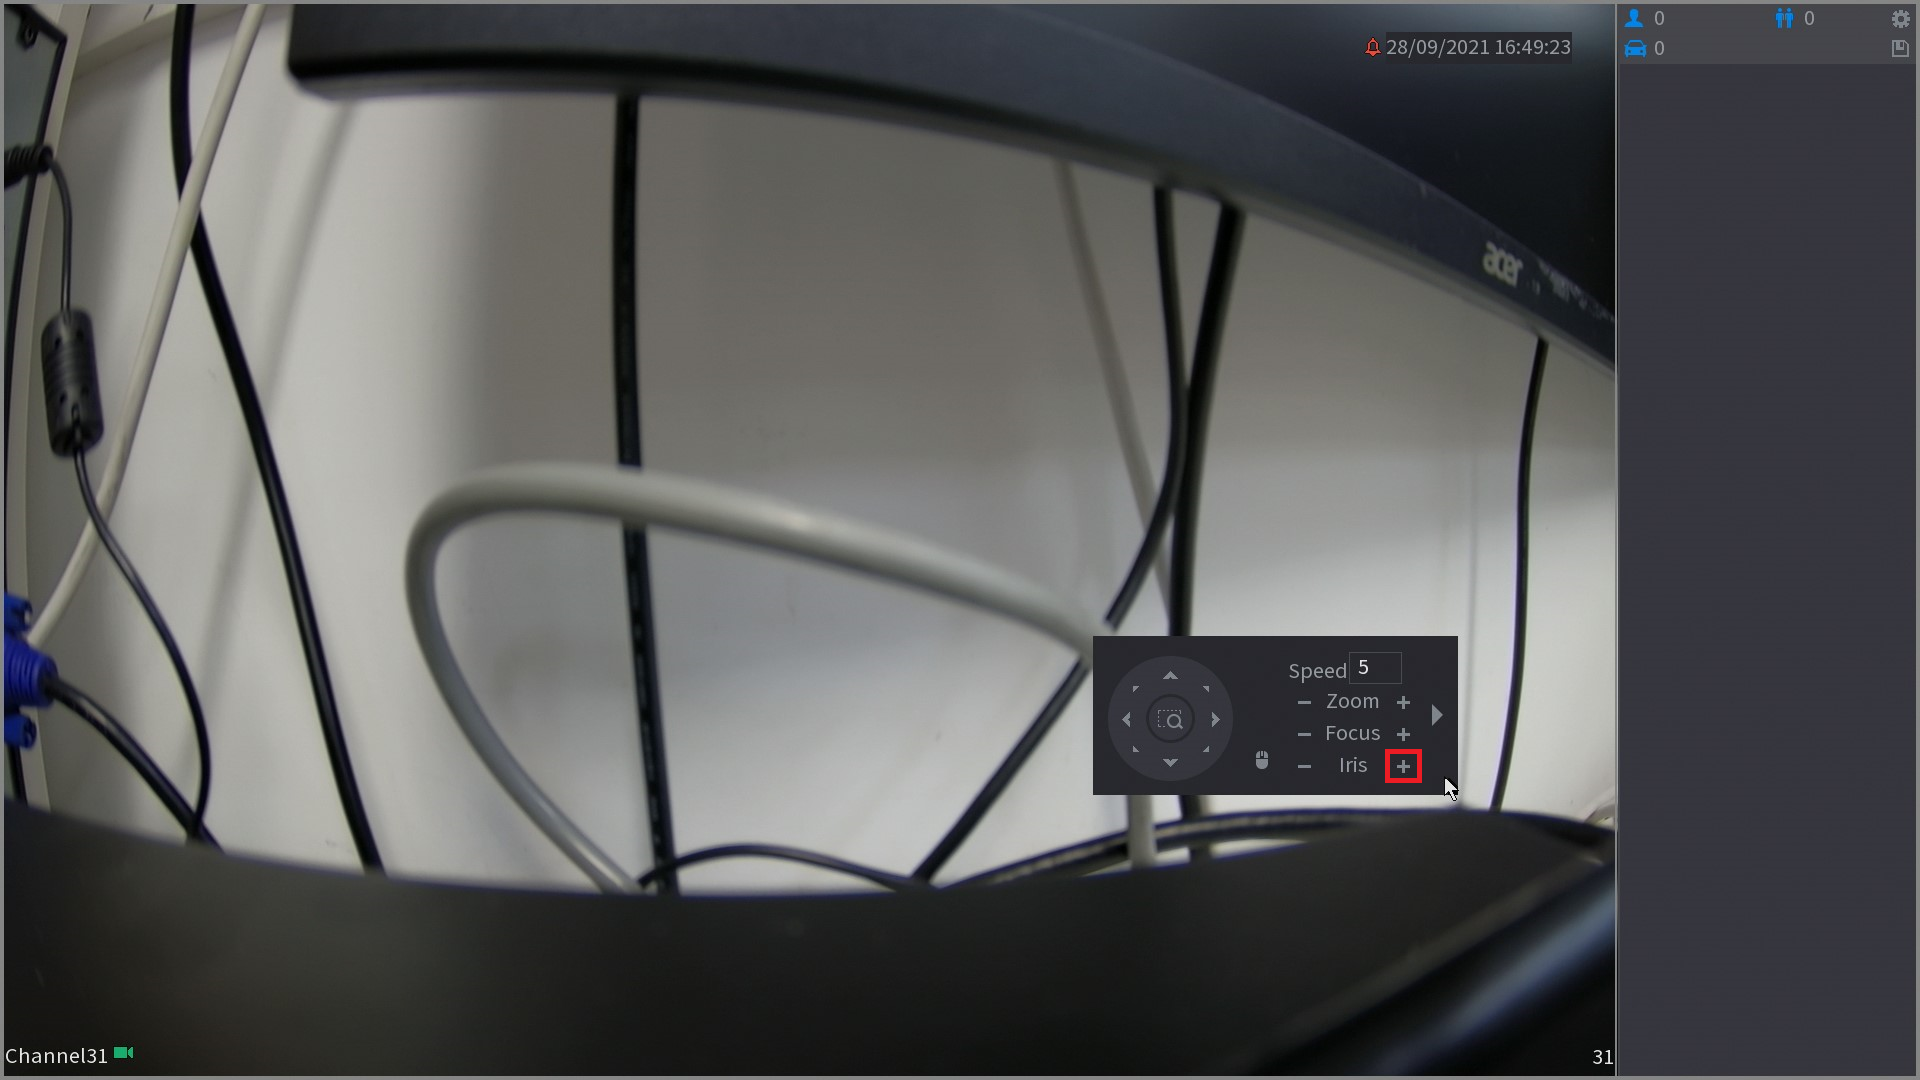
- Click on the + icon next to Iris.
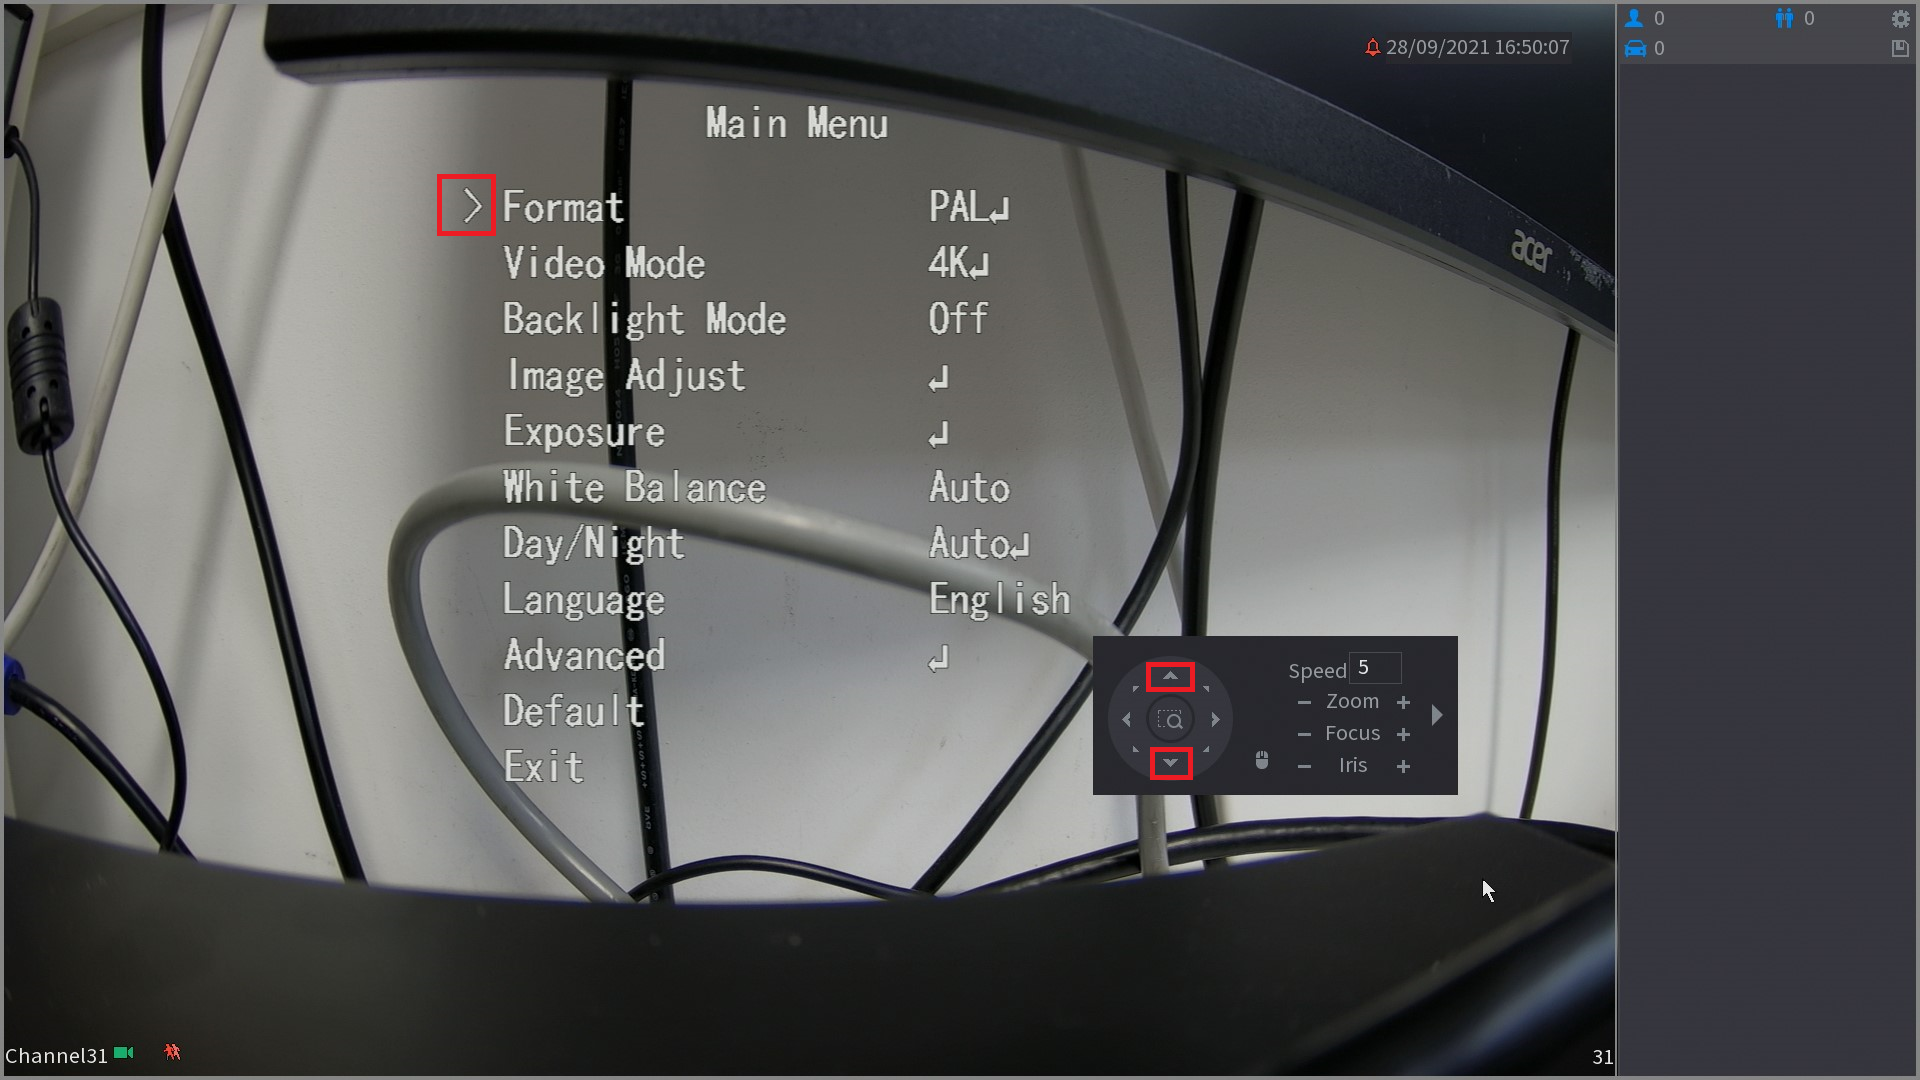
- Use the directional buttons to navigate Up and Down.
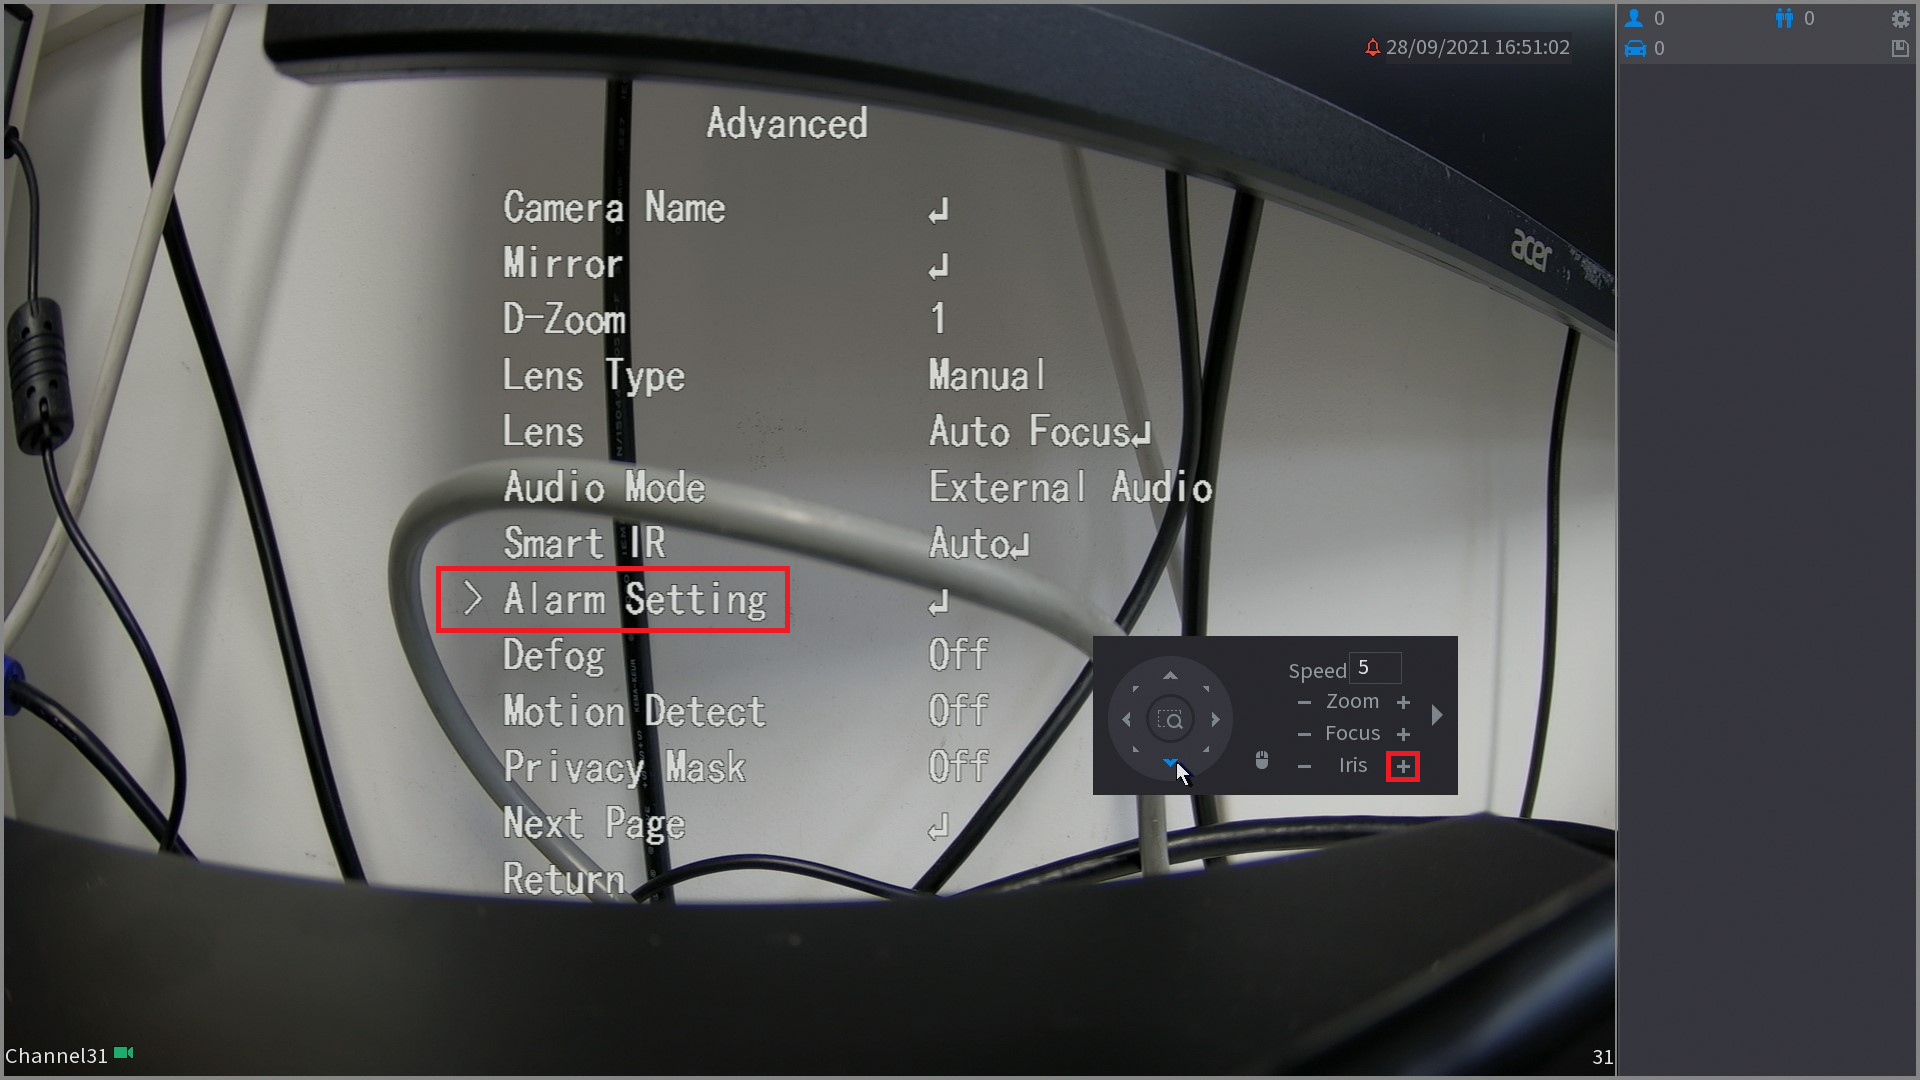
- Navigate to Advanced, then click on the + icon next to Iris.

- Navigate to Alarm Setting, then press the + icon.
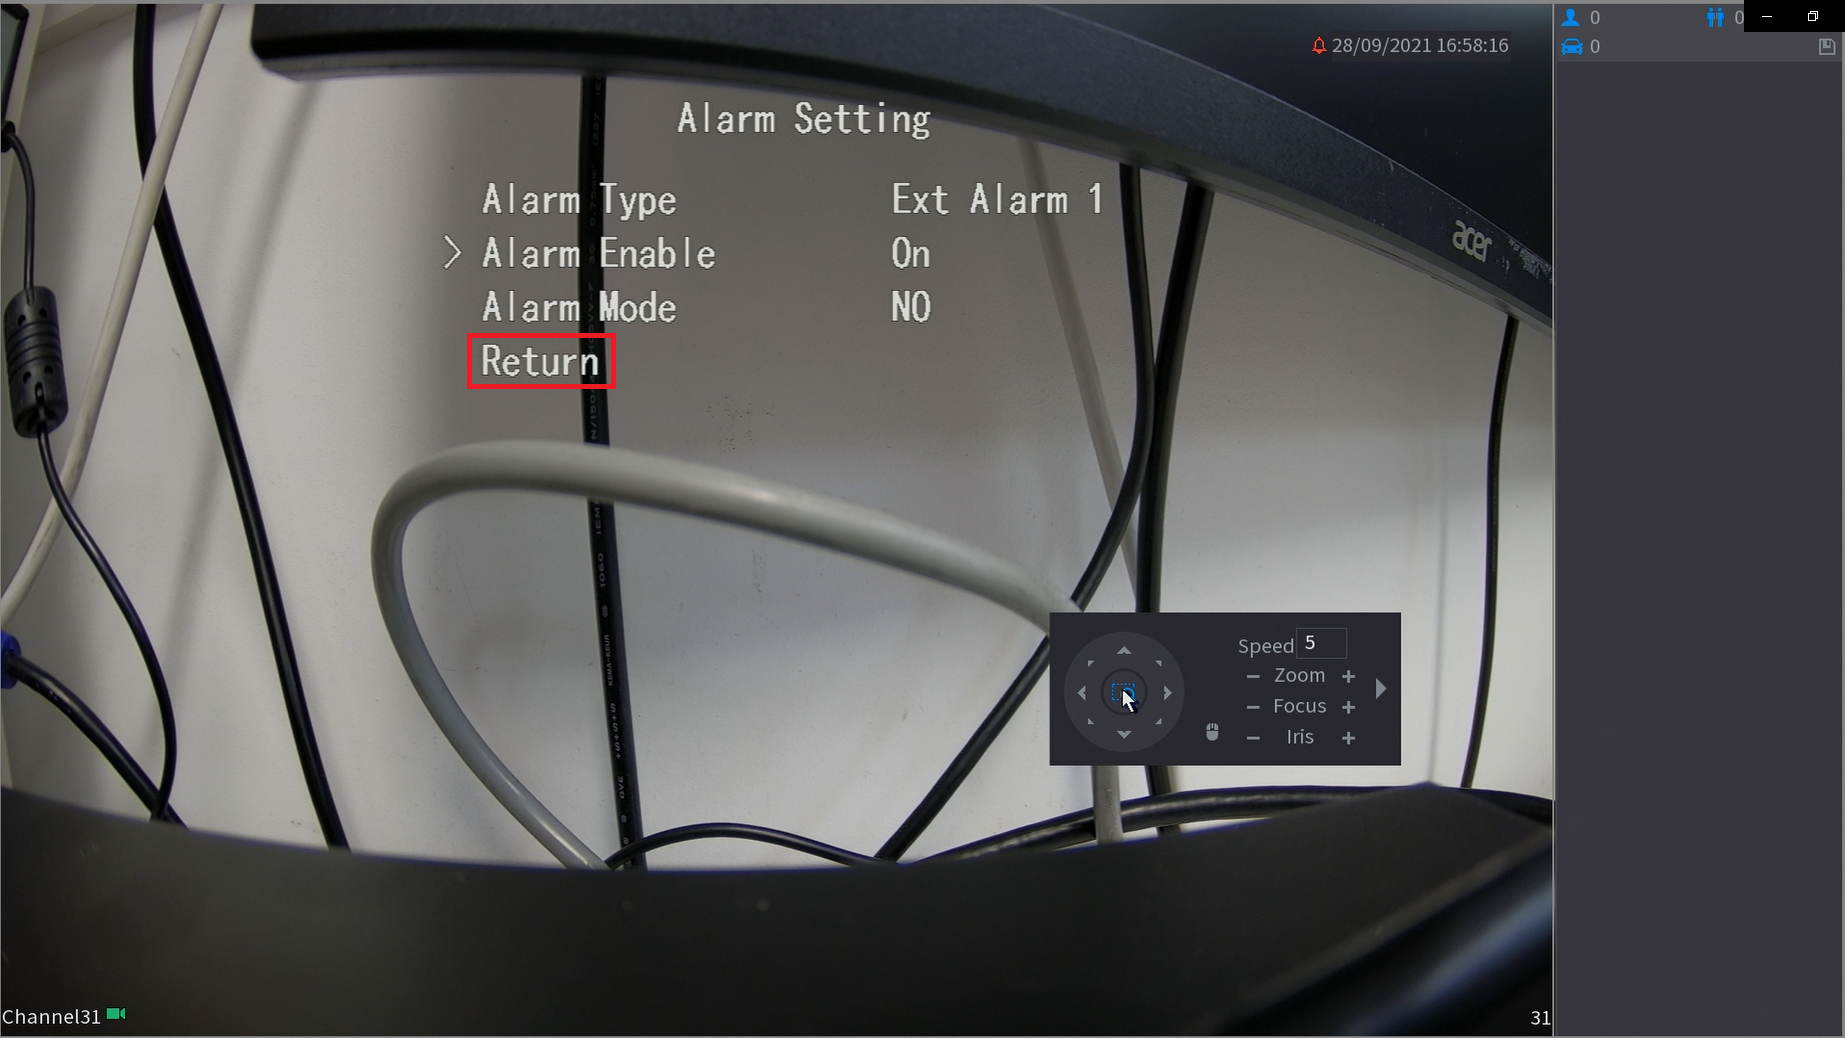
- Navigate to Alarm Enable, then use the Left and Right arrow keys to change the status from Off to On.
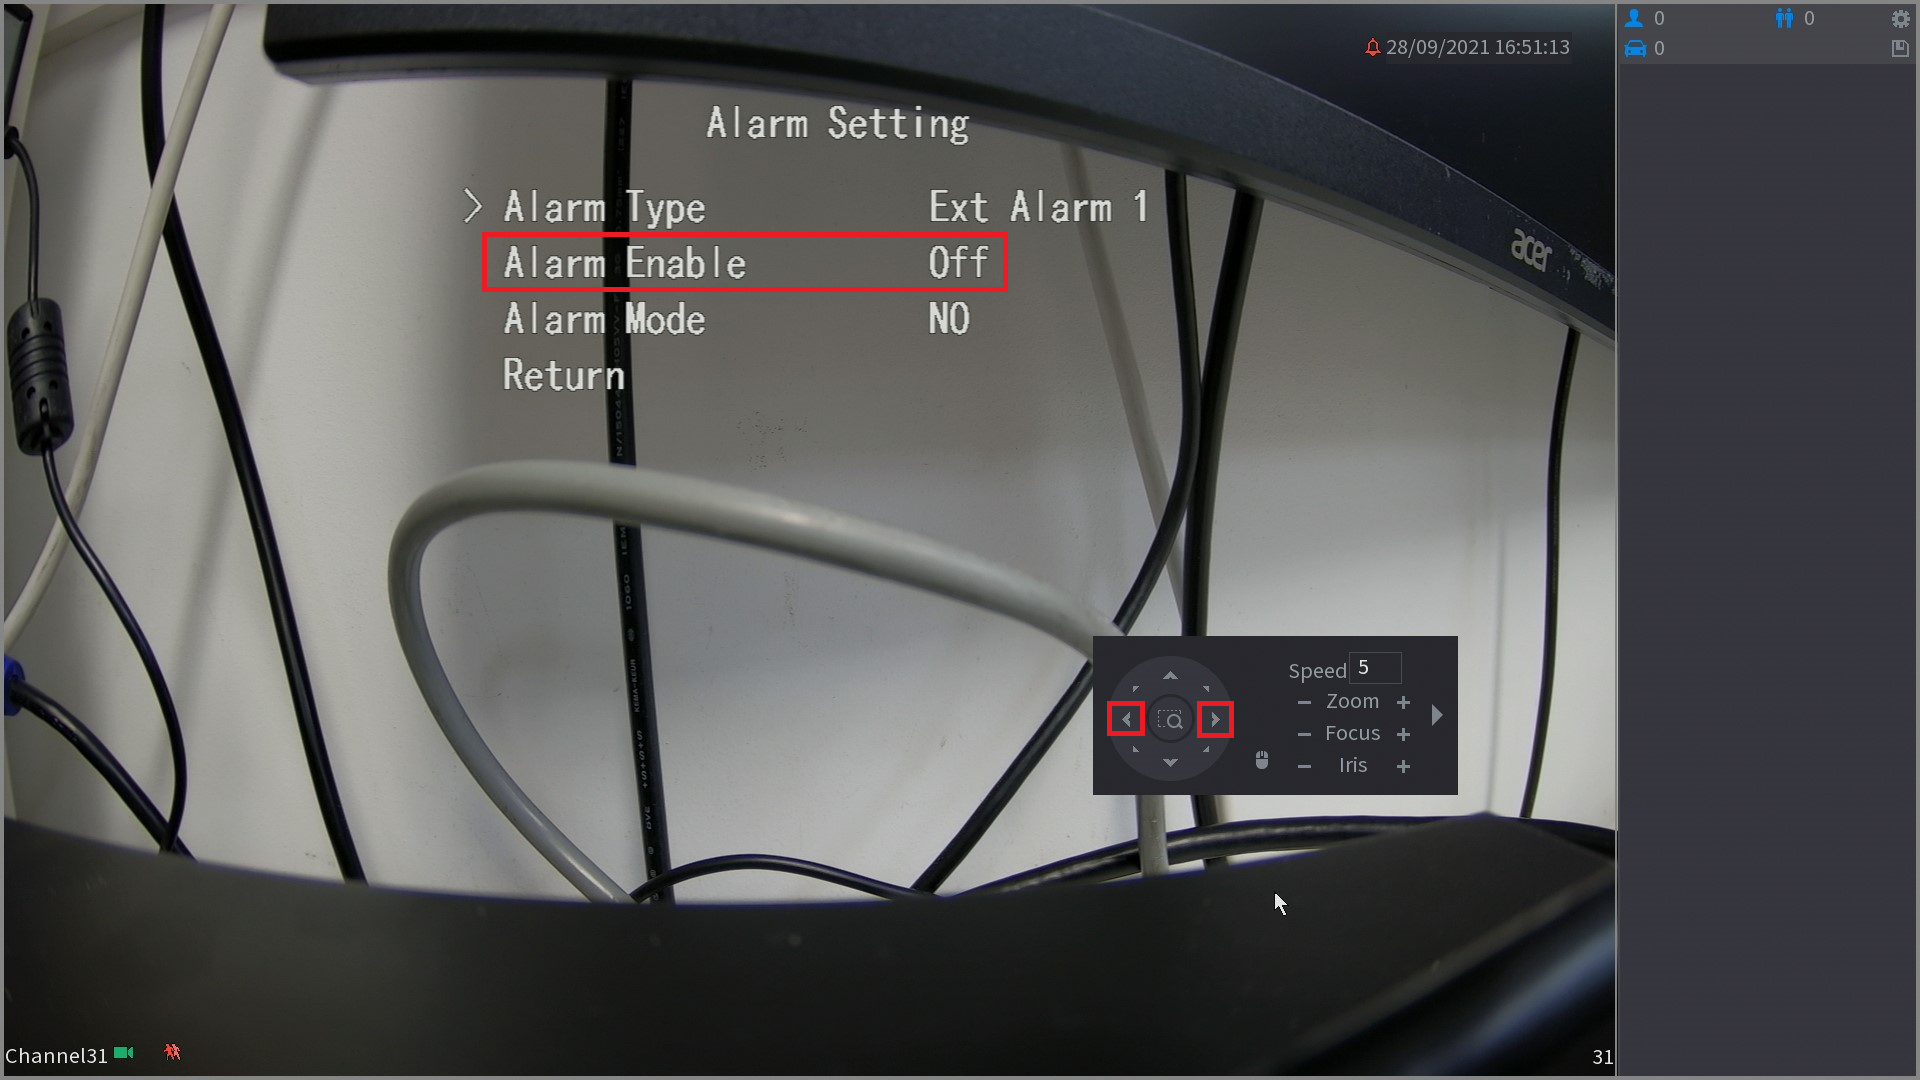
- Navigate to Alarm Mode, then use the Left and Right arrow buttons to set the mode to NO (Normally Open) or NC (Normally Closed).

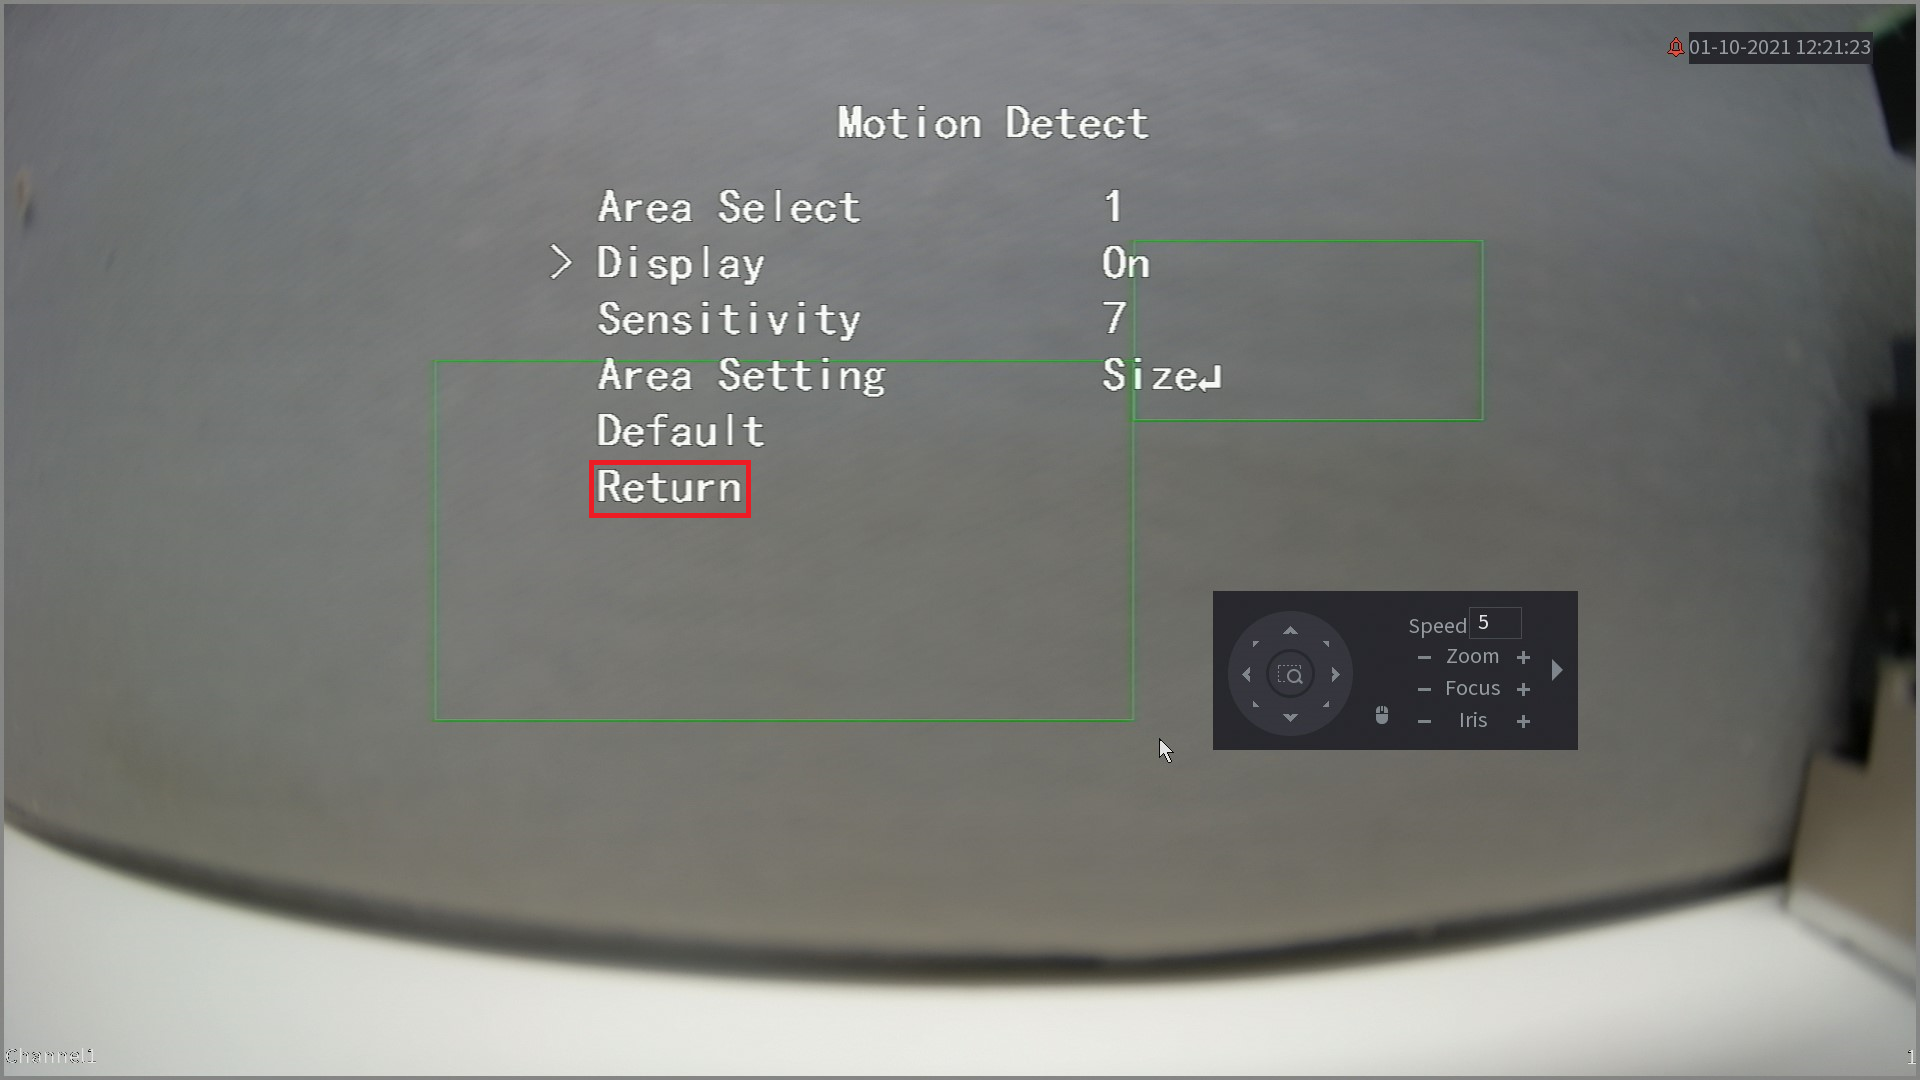
- Navigate to Return, then press + to save.
- Navigate to Return, then press +.

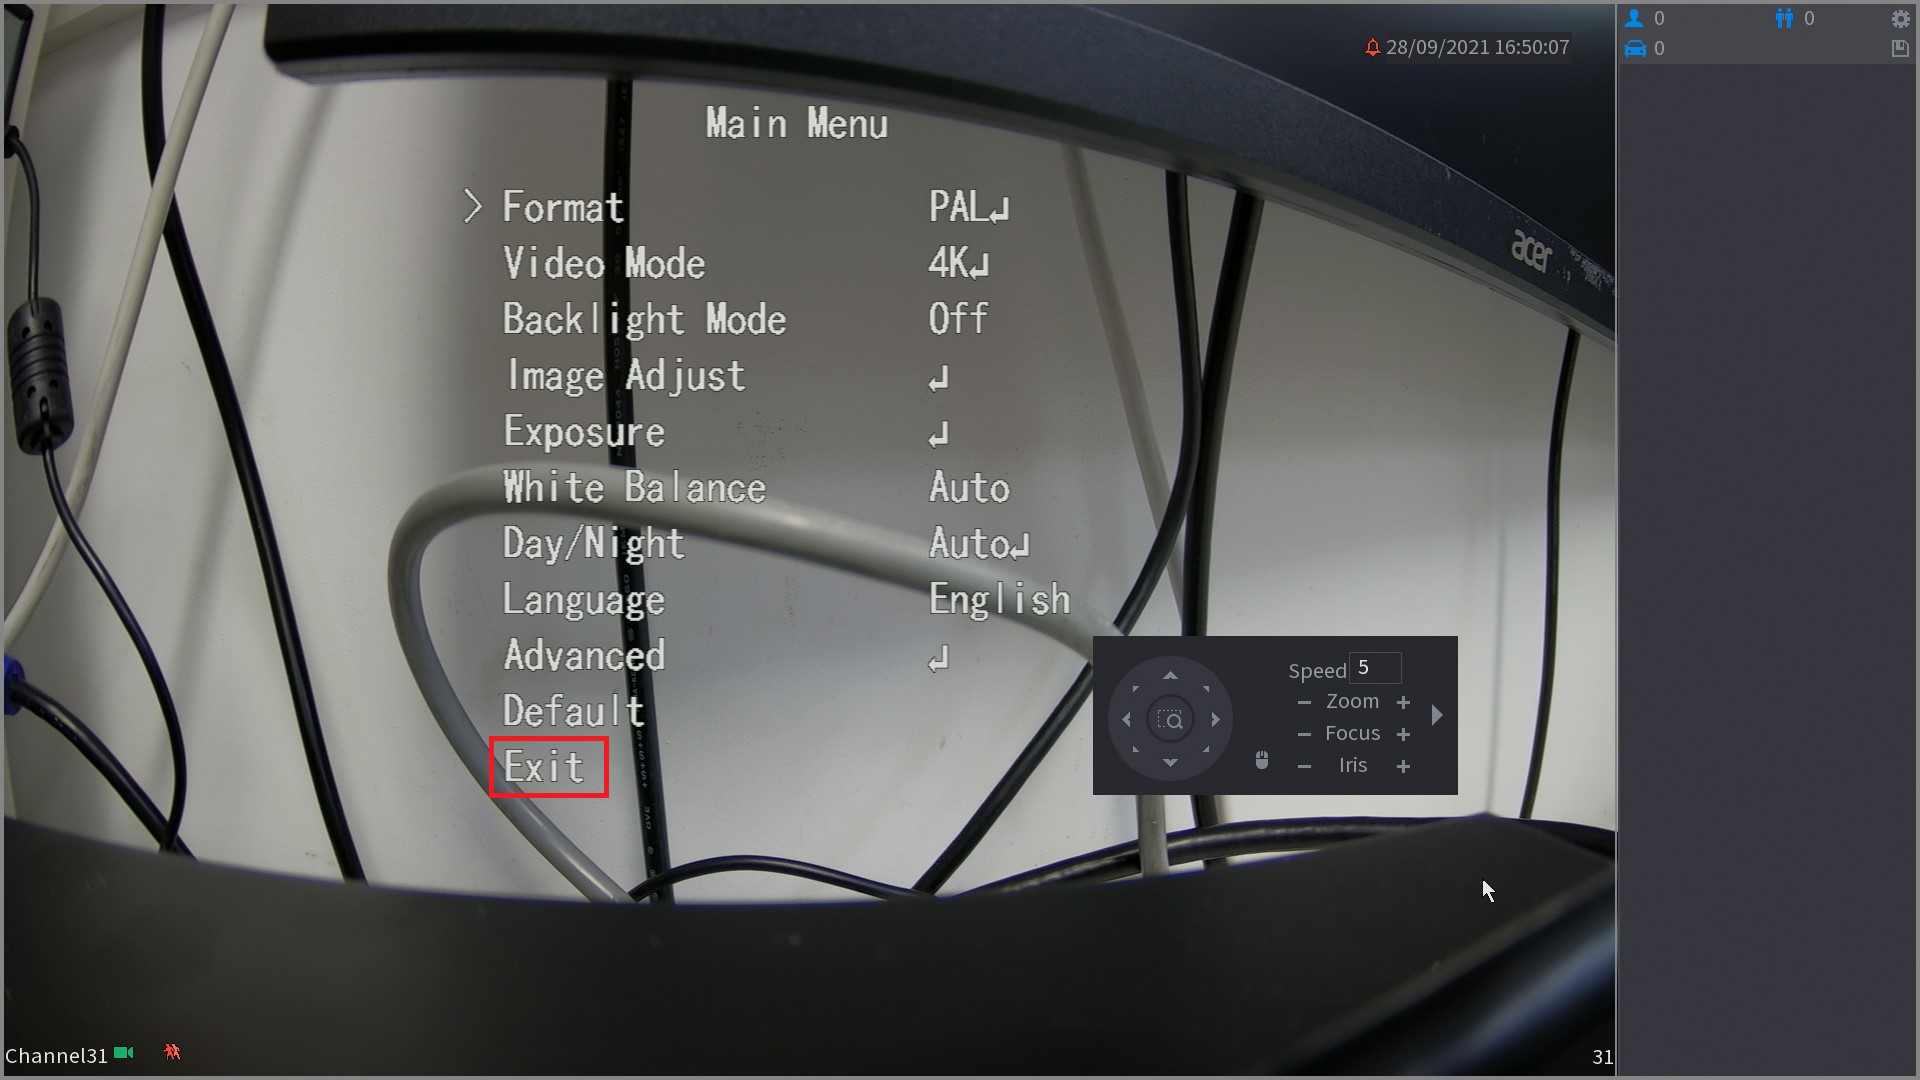
- Navigate to Exit, then press +.
Triggering Alarm Output Via Motion Detection
- From the live view screen, Right Click on the mouse and select PTZ Control.
- Click on the + icon next to Iris.
- Use the directional buttons to navigate Up and Down.
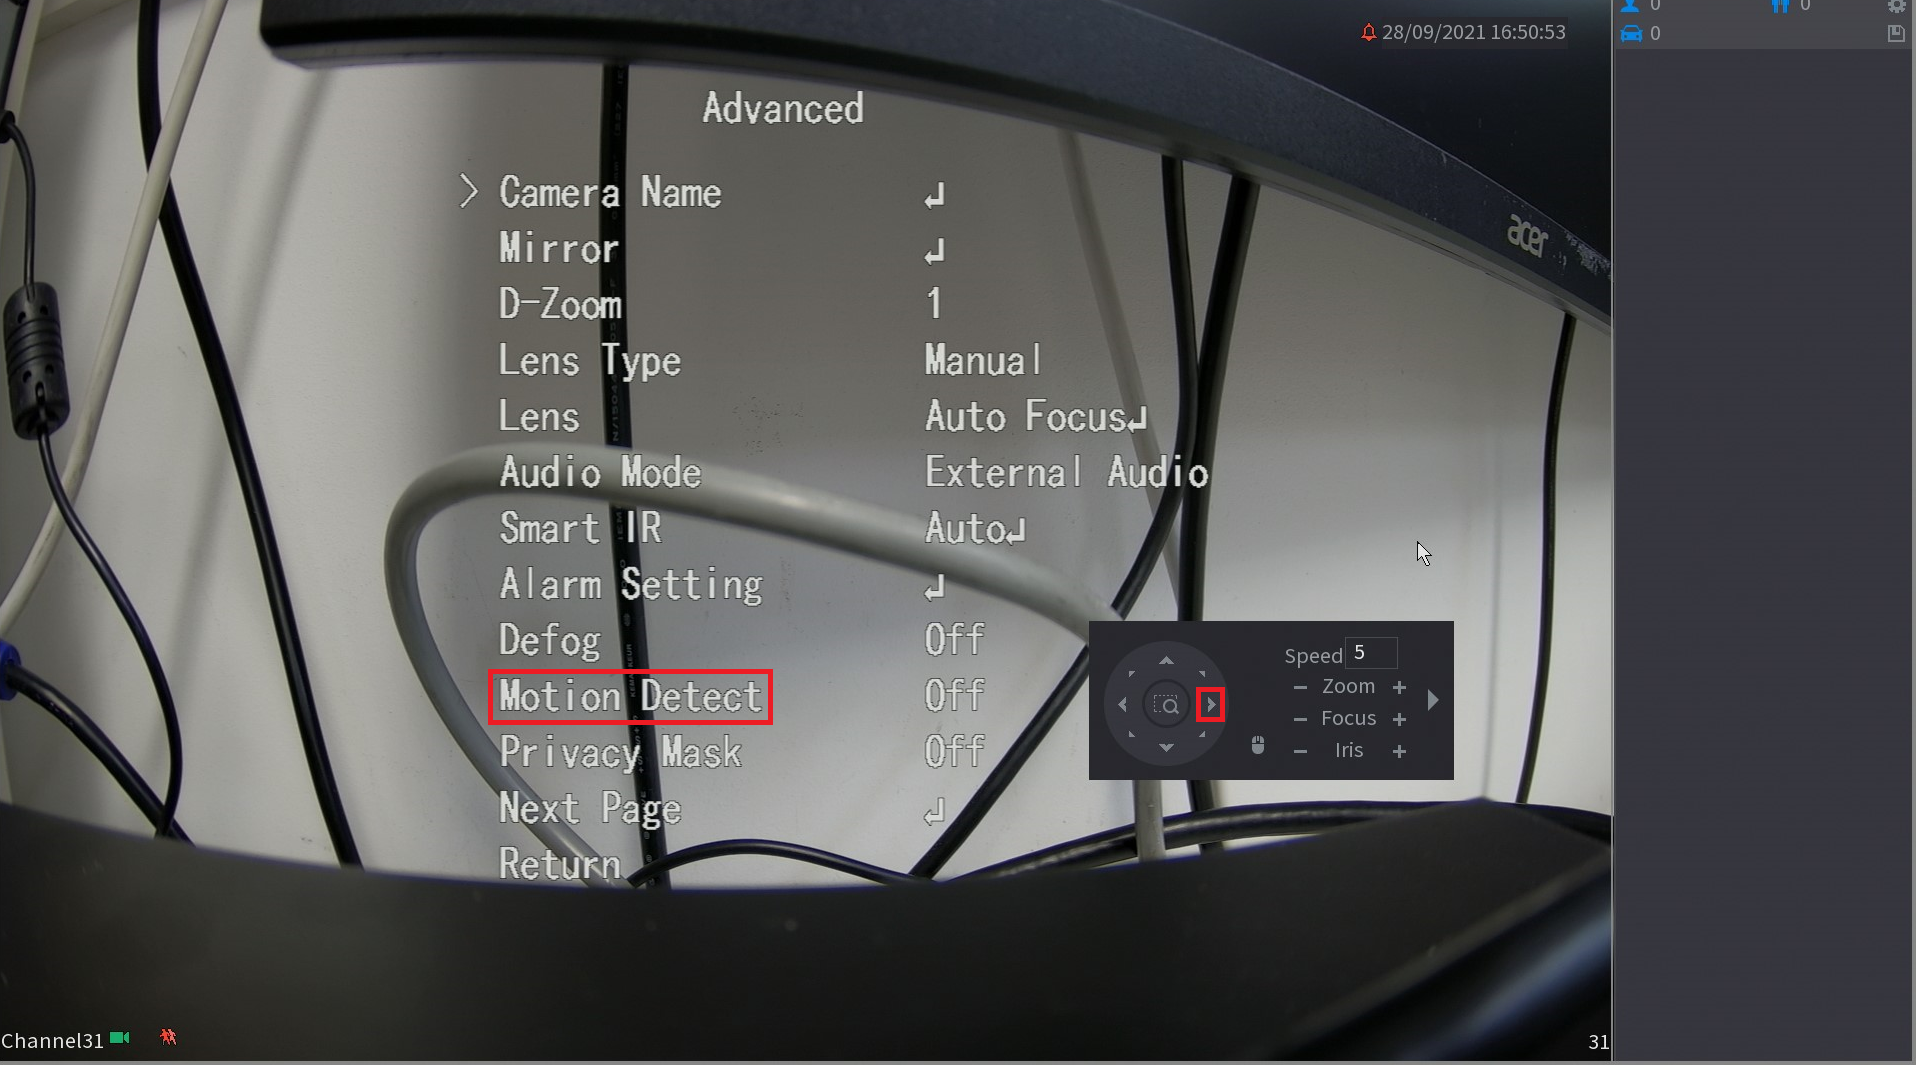
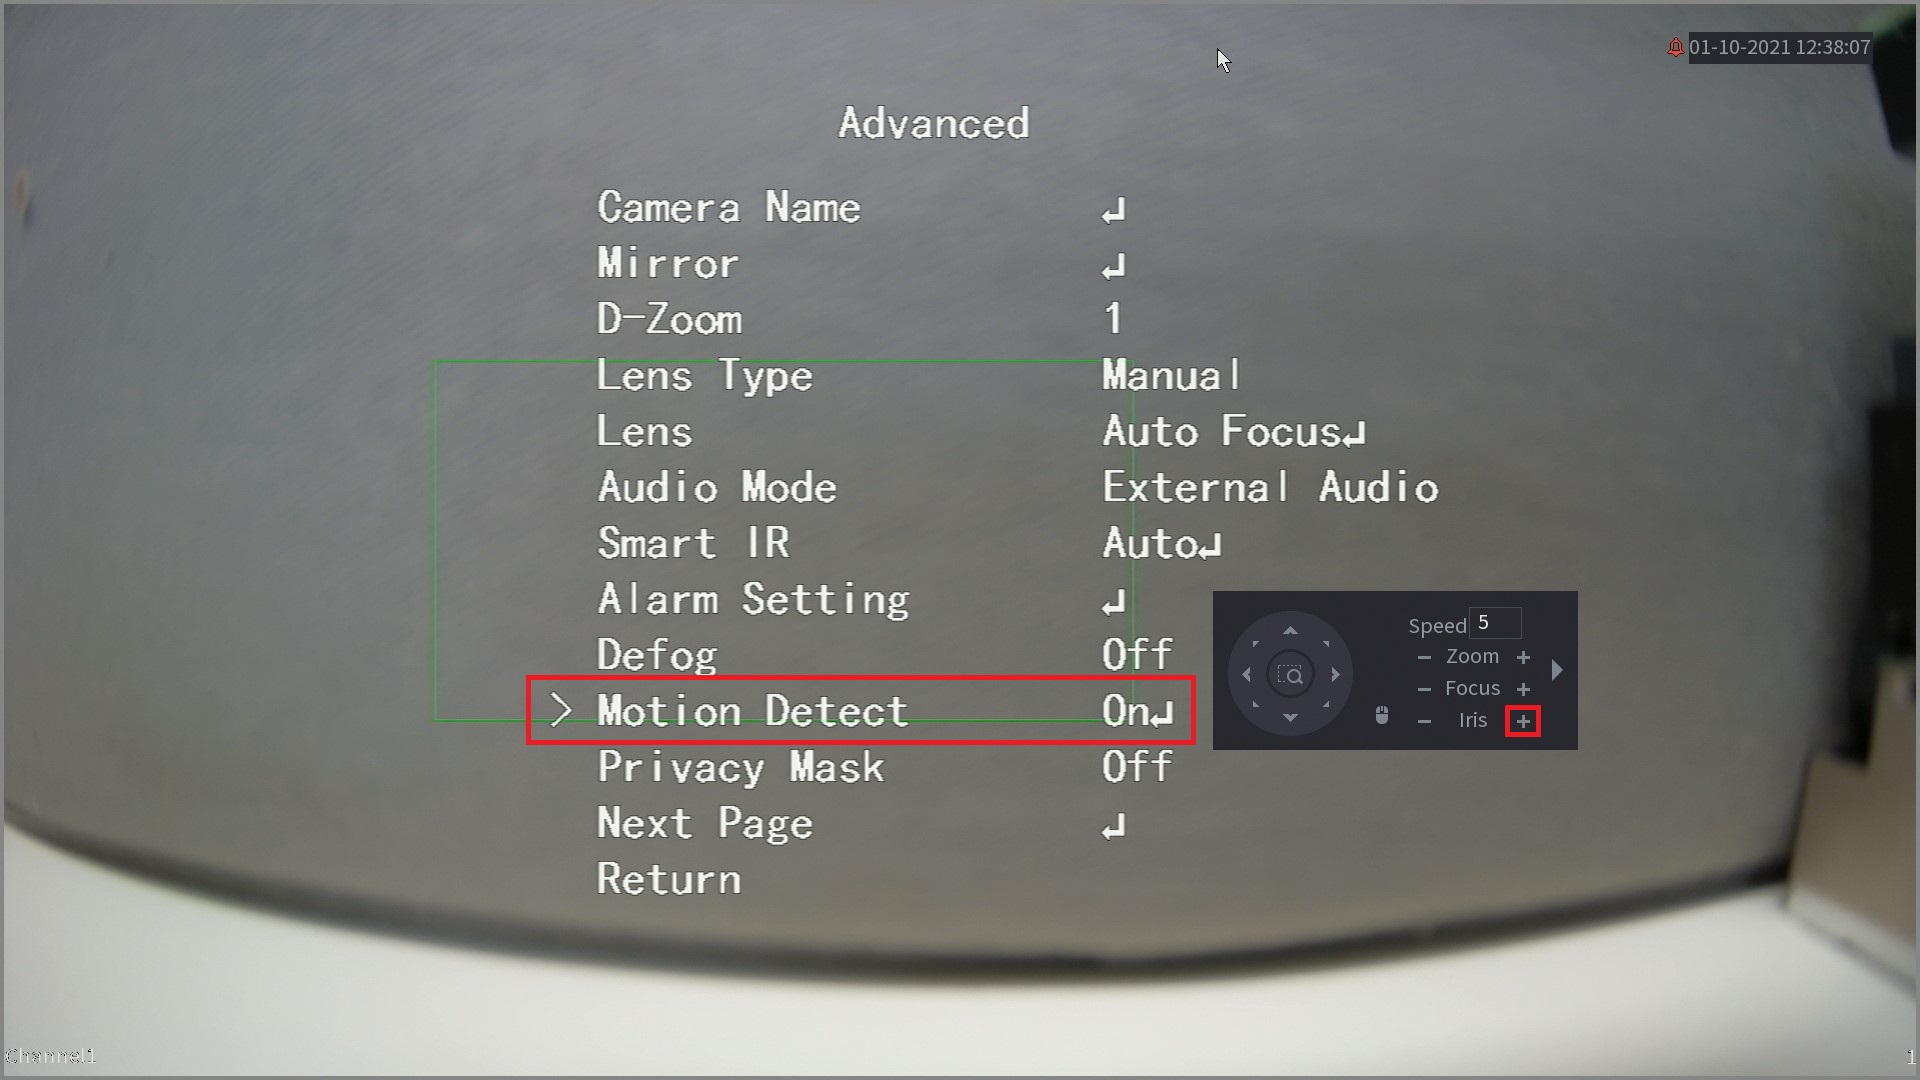
- Navigate to Advanced, then click on the + icon next to Iris.
- Navigate to Motion Detect, then press the Left Arrow button to toggle On.
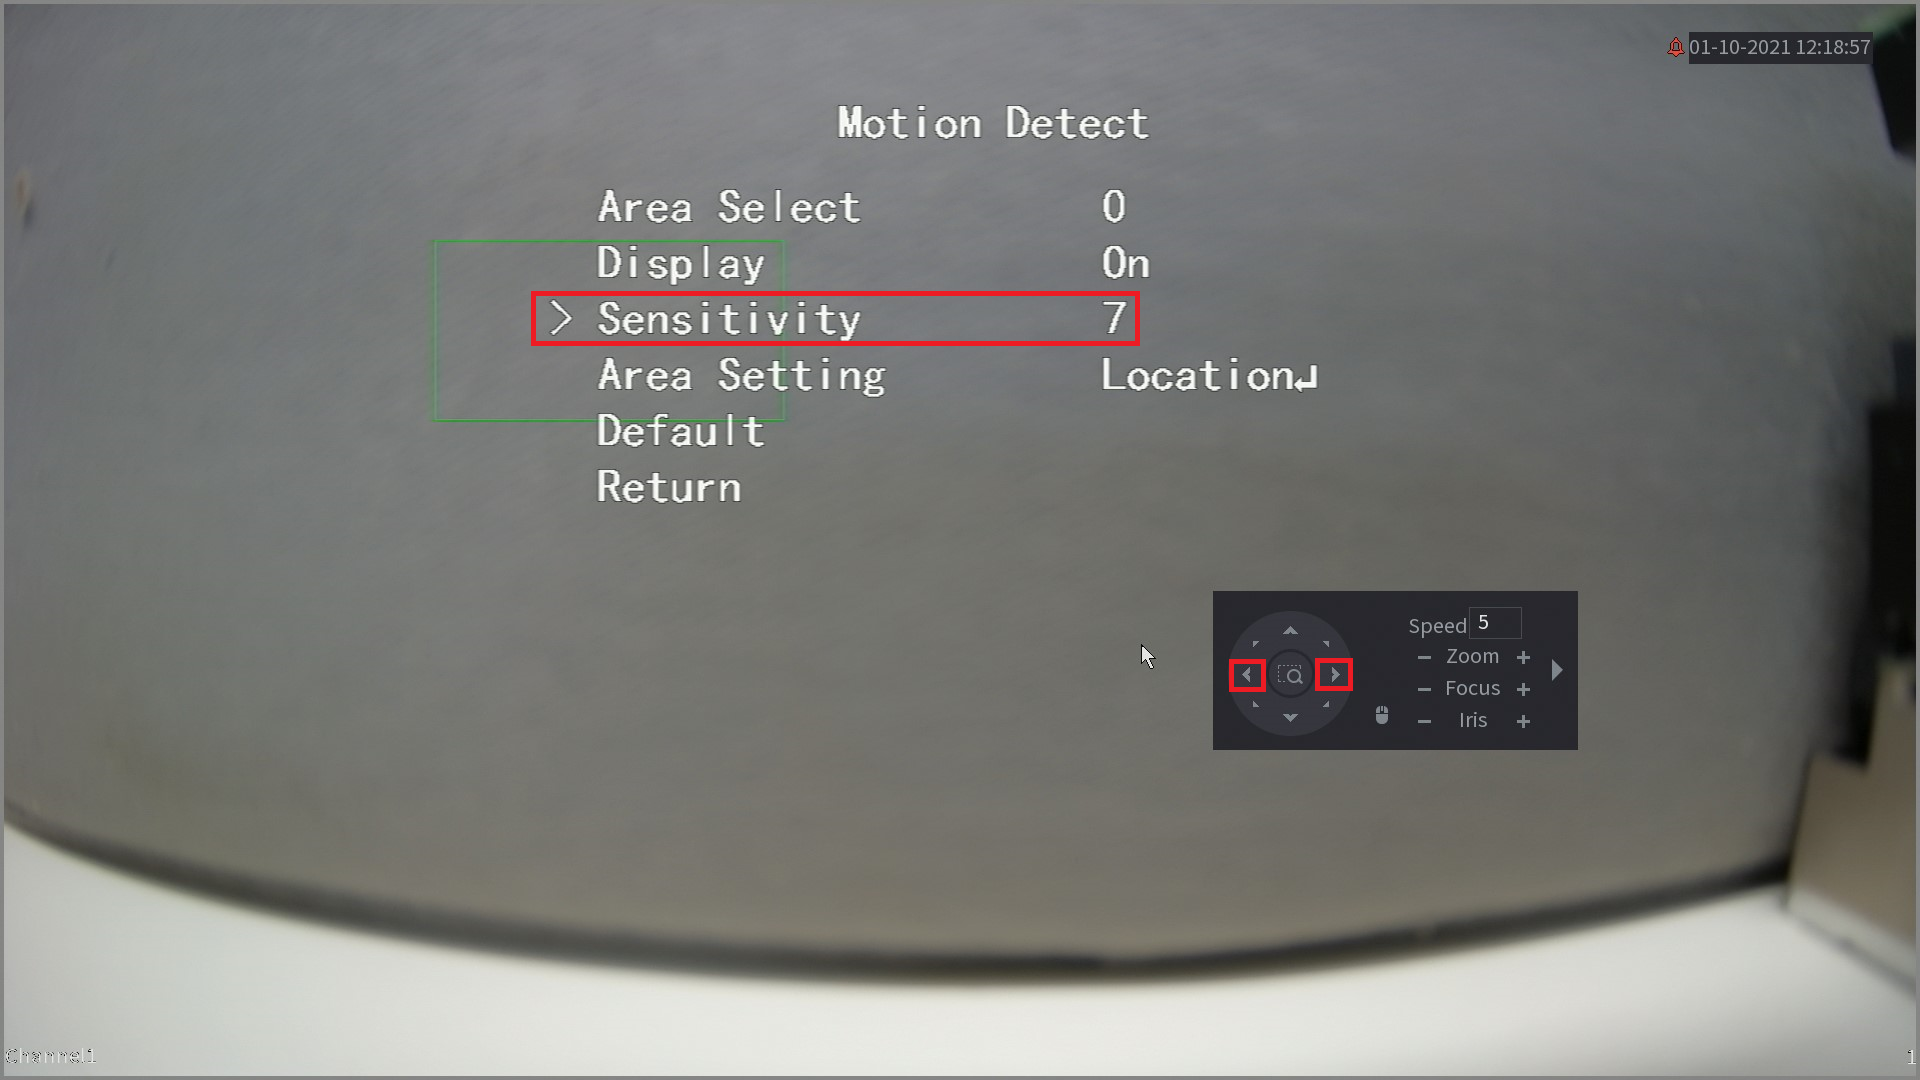
Adjusting Sensitivity
- Navigate to Motion Detect, then click on the + icon.

- Navigate to Sensitivity, then use the Left and Right arrow buttons to change the Sensitivity value.
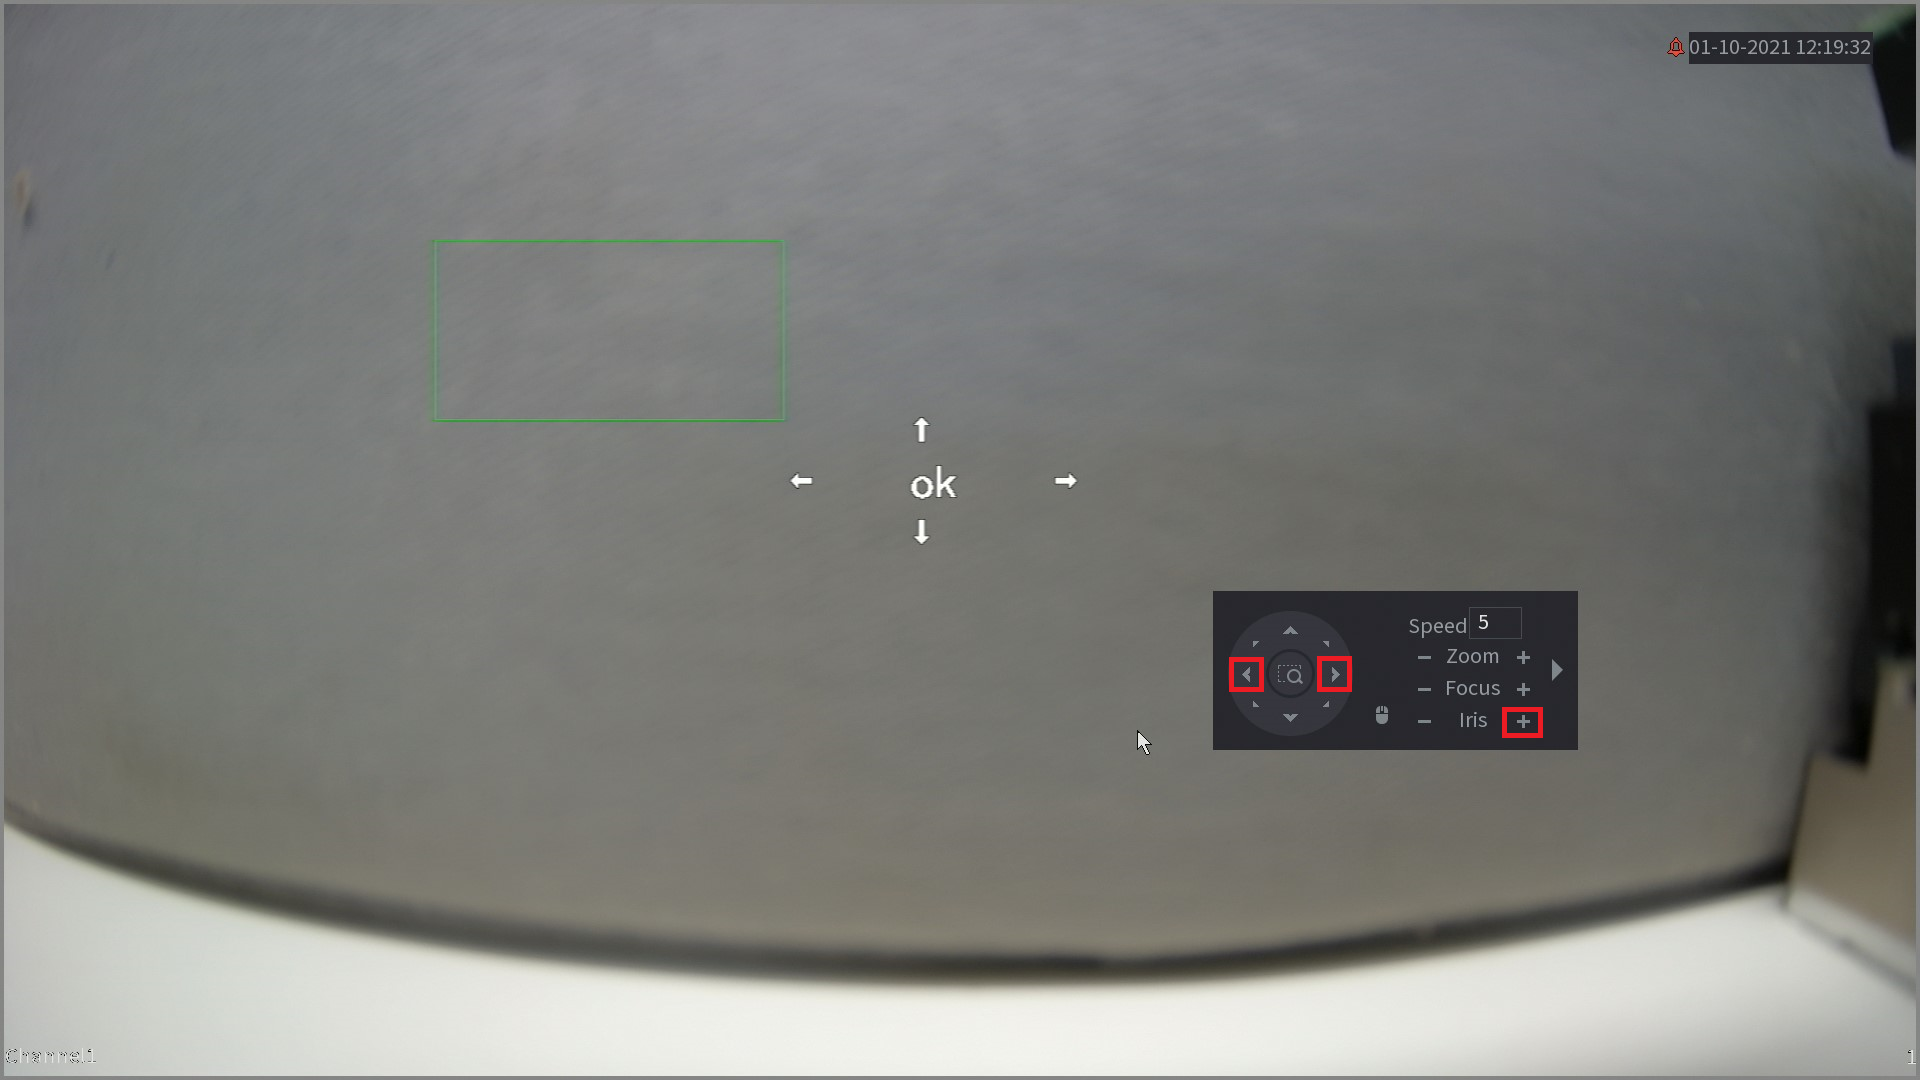
Adjusting Area Setting (Location)
- Navigate to Motion Detect, then click on the + icon.
- Navigate to Area Setting, then press the + icon to enter Location adjustment.

- Use the Left and Right arrow buttons to move the detection box to the desired location. Once completed, click the + button to save.
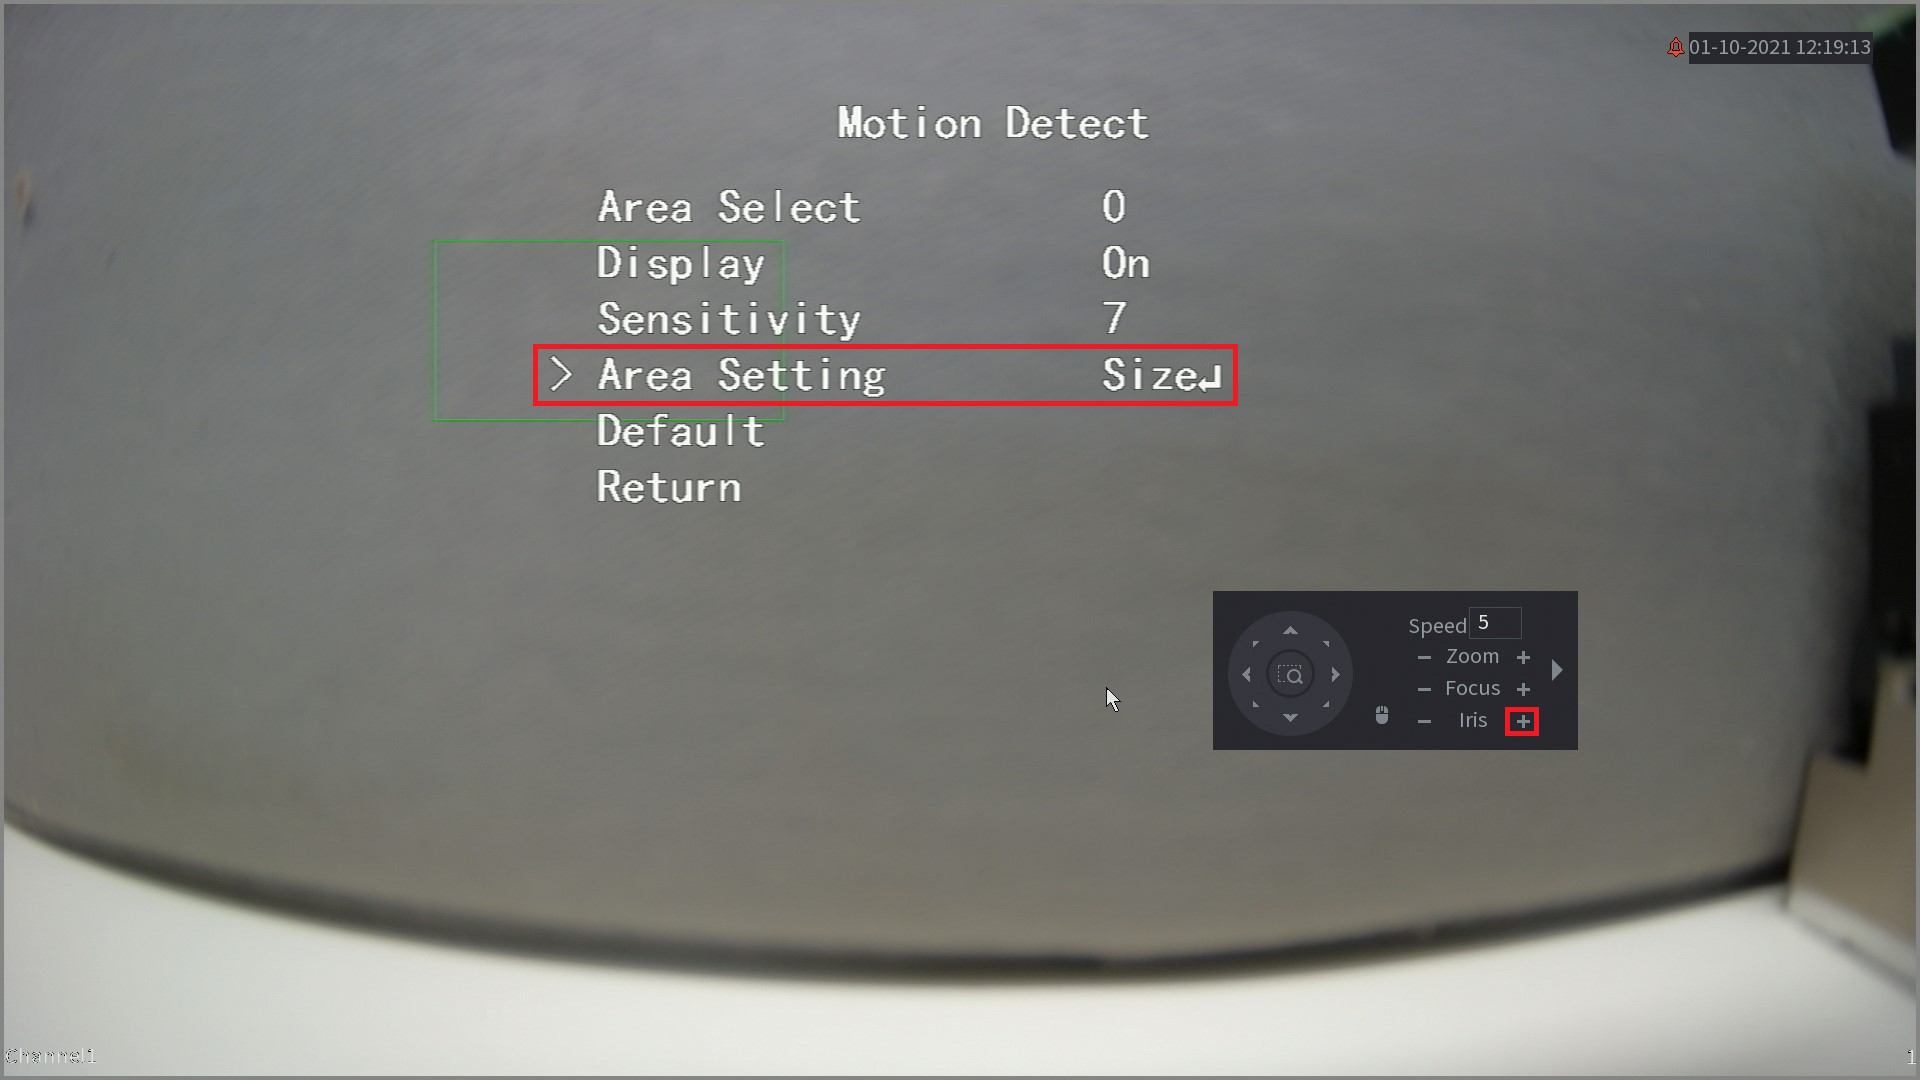
Adjusting Area Setting (Size)
- Navigate to Motion Detect, then click on the + icon.
- Navigate to Area Setting, then use the Left arrow button to toggle to Size. Click on the + key to enter settings.
- Use the Up and Down arrow buttons to adjust the vertical size of the detection box. Use the Left and Right arrow buttons to adjust the horizontal size of the detection box. Click the + button to save.
Adding Extra Detection Boxes
- Navigate to Motion Detect, then click on the + icon.
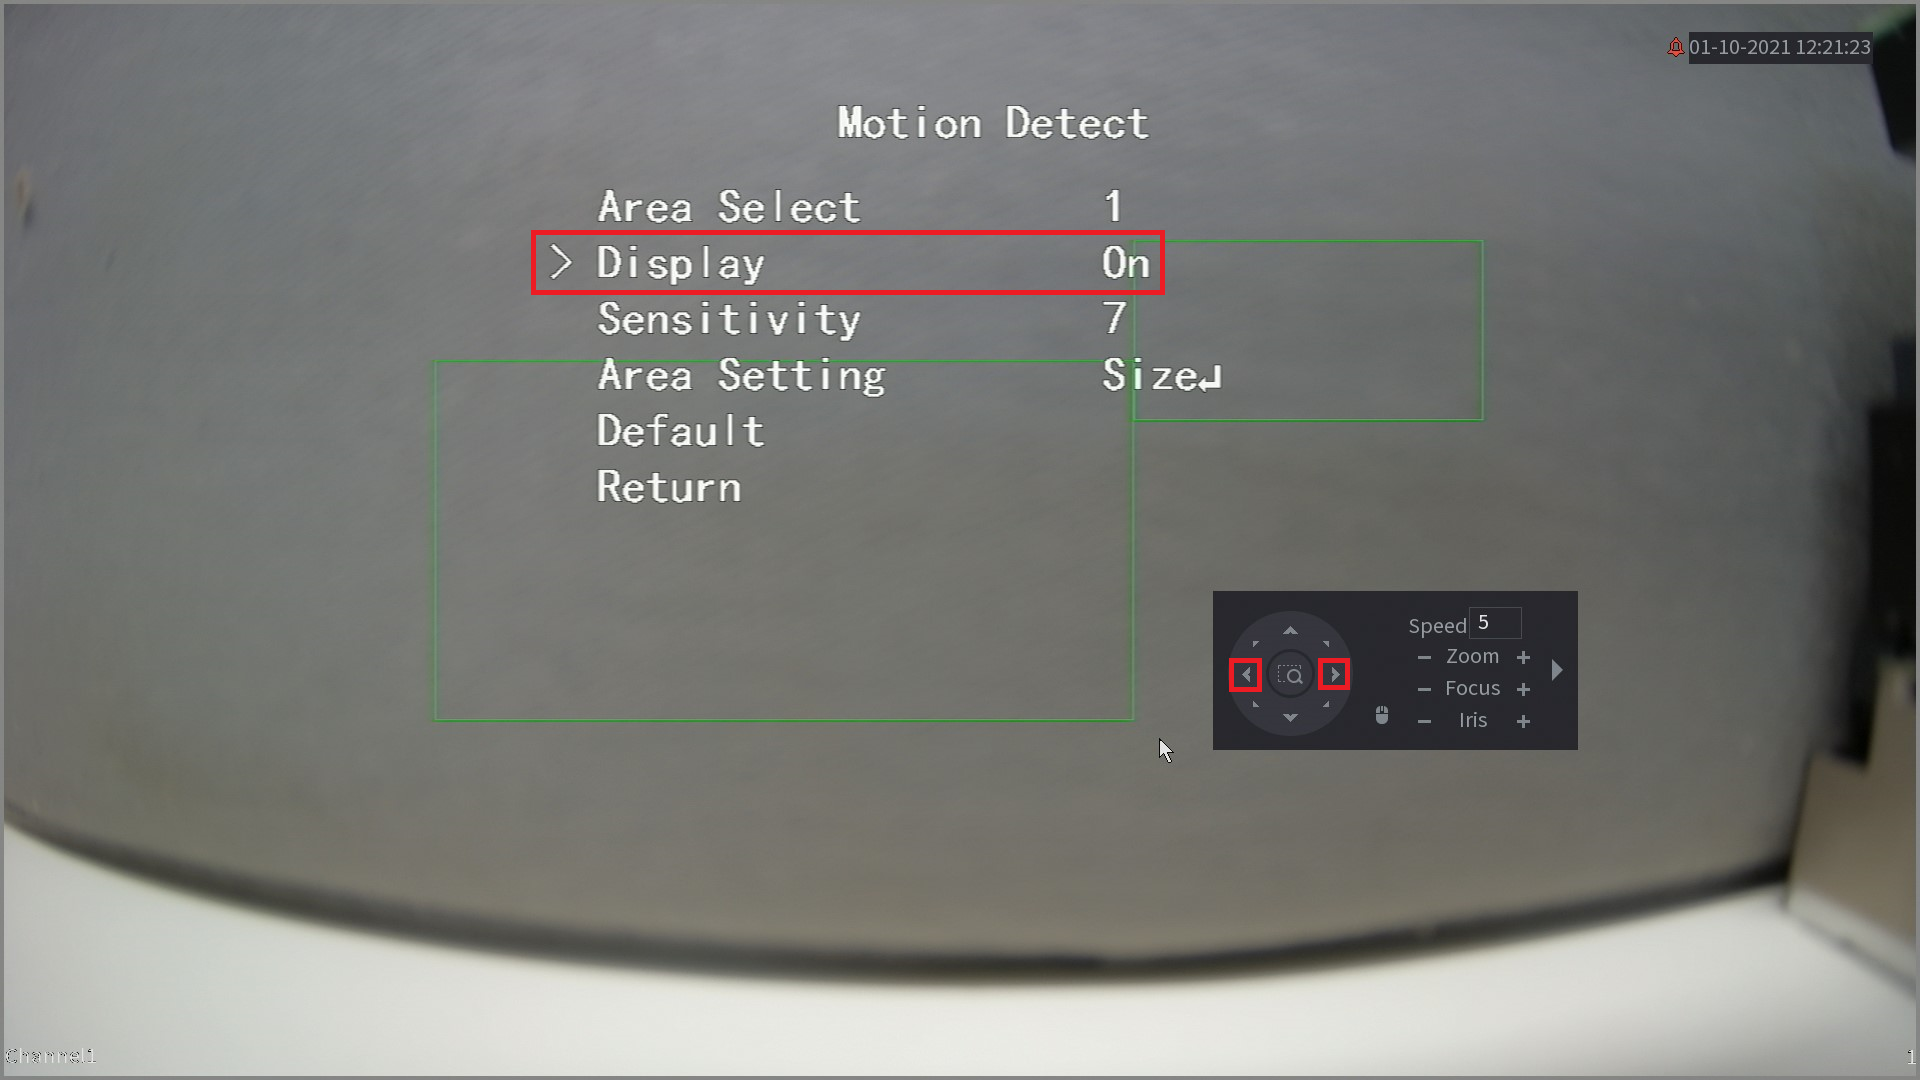
- Under Area Select, use the Left and Right arrow buttons to switch to a new Detection Box. (0,1,2 etc.)

- Navigate to Display, then use the Left and Right arrow buttons to select On.
- Navigate to Return, the click the + icon to save.