Have you replaced your modem, and lost connection to your Intercom, NVR, or any other network device?
This is normally caused when your new router has a different IP address range and now can no longer connect to your devices.
Usually the easiest solution is to change the IP range of your router instead of IP of each device.
Below is some Examples of different Routers and how to change the network IP Range, all routers are different but the principles are the same.
Logging into Router
1. Find out your current IP address range of your existing products, On an NVR it is Main Menu > Network > TCP/IP > NIC1.
2. Log into your modem using its IP address, this can be found either on the bottom of the device, by googling the Router model's default IP or by looking at a currently connected Devices IP. (e.g IPCONFIG through the command Prompt on a PC).
And with the Devices username and password, Default Values of these will also be on the bottom of the device.
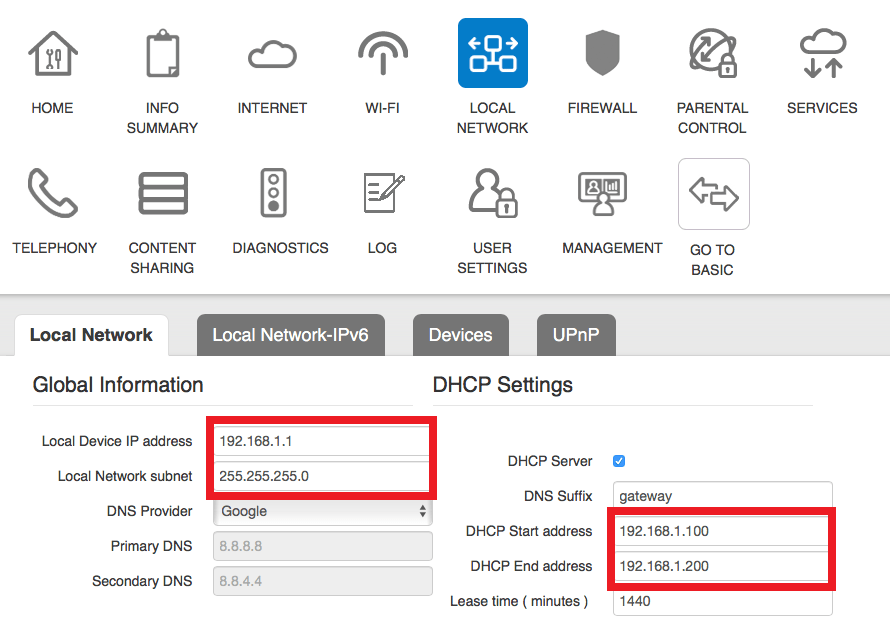
Telstra
1. Under Local Network, Your local Device IP address is Listed, this is the Network Range that it is set too, Adjust as necessary.
2. Your modem will normally restart after the settings are applied.
3. Restart the devices connected to the modem, wait 10 minutes then test your device for network connectivity.
Huawei
- Select Settings to enter main settings
- Select Ethernet
- Select Ethernet settings
- Set to static IP address
- Change Ip Range to desired IP, Set Gateway as the Same IP


Teltonika RUT
- Select Network > Lan
- Edit
- Change IP to Desired Range
- Set Gateway to same IP
