The below listed models of USB Wi-Fi adapter can be plugged into compatible recorders to wirelessly connect to the internet via Wi-Fi networks in range of the recorder. This option is useful when there is no way to run a cable from the modem to the recorder. Note that any model not listed below, will not work.
| USB Wi-Fi Adapter Model |
| NC650 |
| TL-WN725N |
Limitations
Please be aware while this application can be suited to smaller systems with a limited number of cameras, it is always advised to use a hardwire Ethernet connections when using a larger number of cameras, due to bandwidth limitations of Wi-Fi.
List of Compatible Recorders:
Recorder Model |
Firmware Version |
| NVR4COM-I | 2024-07-16 |
| NVR8COM-I | 2024-07-16 |
| NVR16COM-I | 2024-07-16 |
| NVR8PRO-I | 2024-07-16 |
| NVR16PRO16P-I3 | 2024-08-30 |
| NVR32PRO16P-I3 | 2024-08-30 |
| NVR32PRO-I3 | 2024-08-30 |
| NVR64PRO-I3 | 2024-08-30 |
| NVR-L81 | 2025-04-02 |
| NVR-L41 | 2025-04-02 |
Connecting Compatible Recorders to Wi-Fi
- Plug the adapter into one of the free USB ports in the front/back of the recorder.
- On the record right click to bring up list of different options and then select Main Menu.

- Navigate to Network Settings by selecting network in the Main Menu.

- Navigate to the WiFi page by selecting Wi-Fi from the column on the left. Then, proceed to click on Refresh to search for connectable WiFi networks in range.

-
Find the required WiFi network from the list of available networks and then double click on it to open a pop up with connection settings.

- Enter the Connection Password. This is the password of your WiFi. Then make sure DHCP is enabled . After you have done this then click on connect, and then OK.

- Click on Apply on the bottom right to save the settings.
Non-Compatible Records can be wirelessly connected to internet with a TP-TL-MR3020. Instructions on how to do this is given below:
How to connect a DVR/NVR to the internet using a TP-TL-MR3020
How to connect a DVR/NVR to the internet using a TP-TL-MR3020
A TP-TL-MR3020 can be used to connect hardwired devices, such as a CCTV Recorder, to a wireless network to provide an internet connection to them for remote viewing.
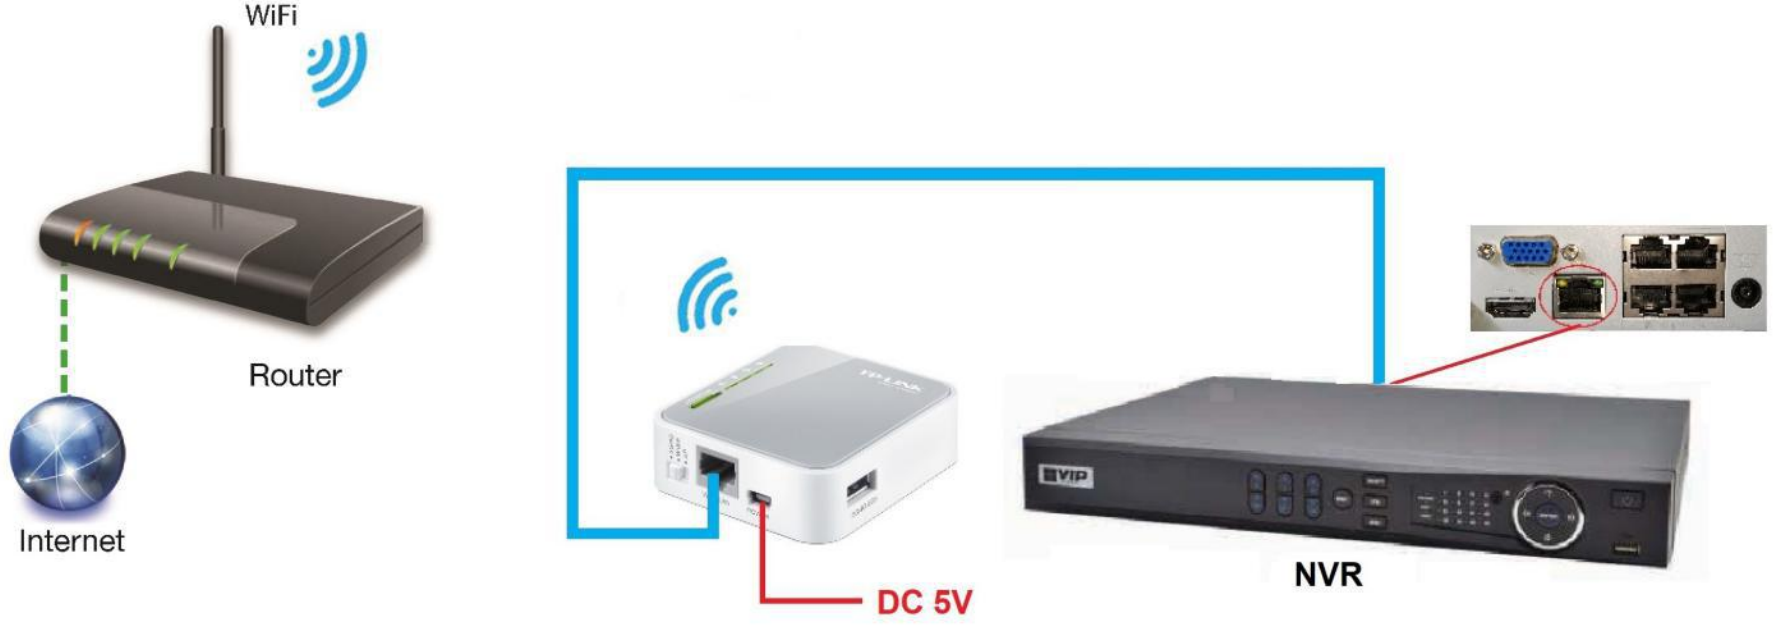
Step 1 - How to access the TP-TL-MR3020 Web Interface
The web-based management page is a built-in internal web server that does not require internet access. It does however require you device to be connected to the TP-Link router. This connection can be wired or wireless.
1. Set up the TCP/IP Protocol in Obtain an IP address automatically mode on your computer.
2. Visit http://tplinkwifi.net, and create a password for future logins.
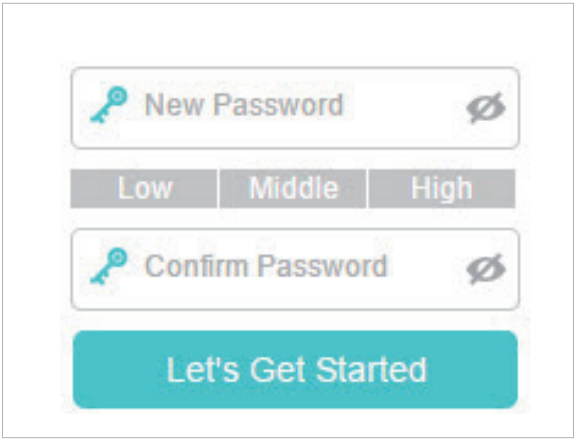
For more information on accessing the unit please refer to this page.
Step 2 - Using the TP-TL-MR3020 to connect to a 3G/4G Dongle
Create a private wireless network and share the 3G/4G network with local devices.
1. Switch the operation mode to 3G/4G and connect the 3G/4G Dongle to the TP-TL-MR3020
2. Log in the router. For instruction, please refer to the first step.
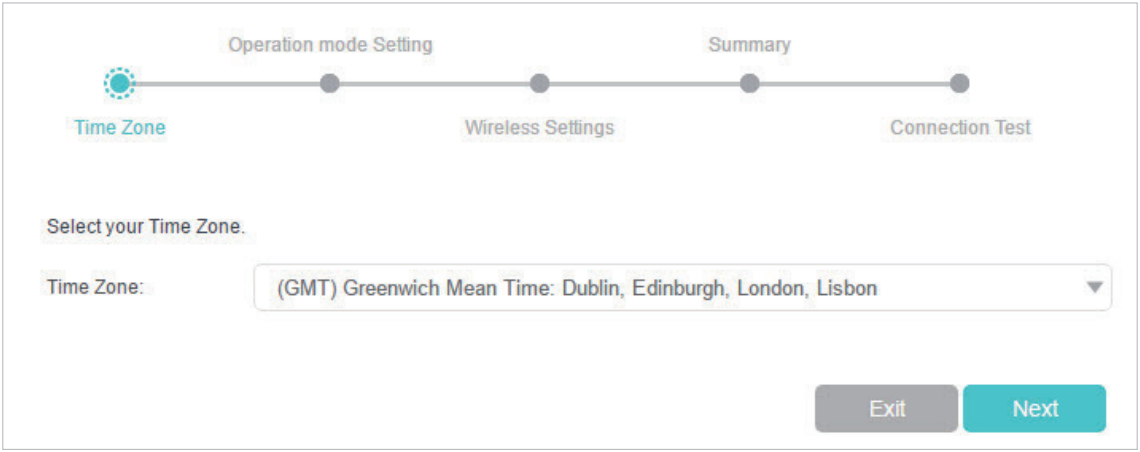
3. Select your Time Zone and click Next. .
4. Select 3G/4G Router Mode and click Next.
Note: The router can be configured with a primary 3G/4G connection and WAN connection as a backup solution to ensure “always-on“ internet connectivity.
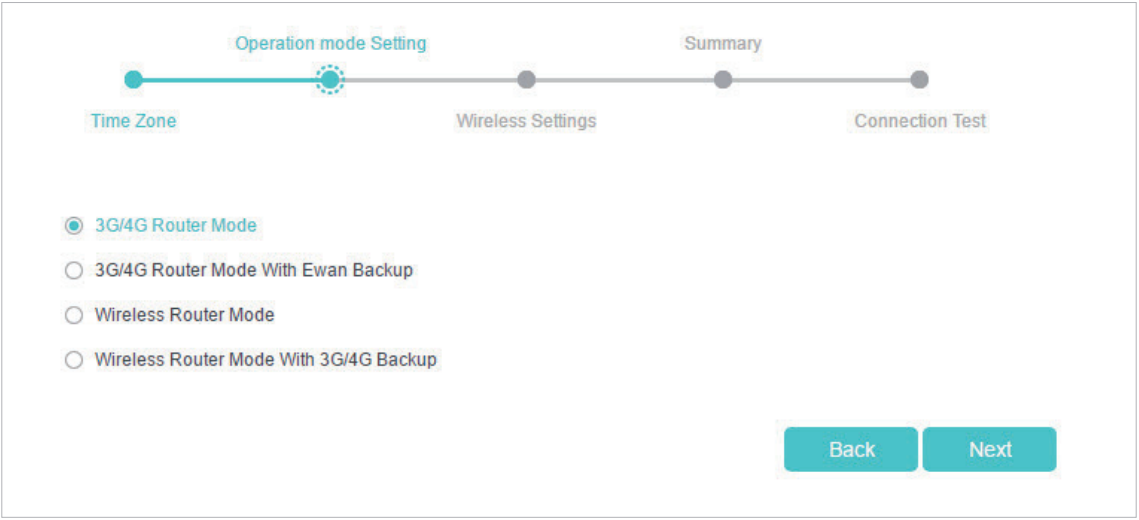
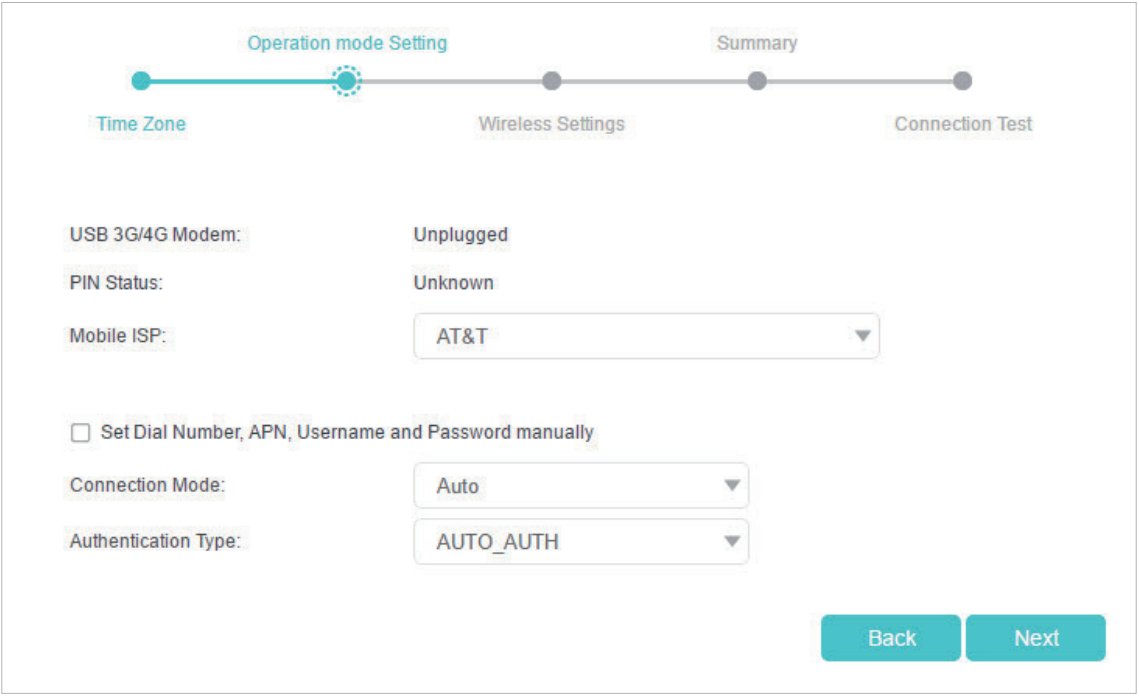
5. Select your Mobile ISP or manually set them using the parameters provide by your mobile ISP, if your ISP is not listed, click Next.
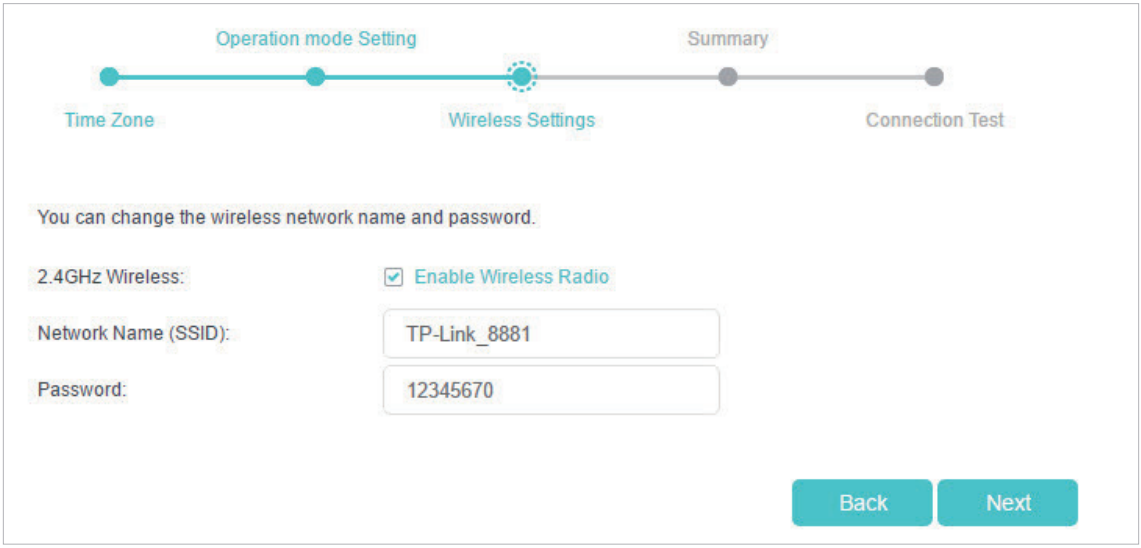
6. Either customize your Network Name (SSID) and Password or keep the default ones, and then click Next.
7. Check the wireless settings, note them down for future use and click Save.
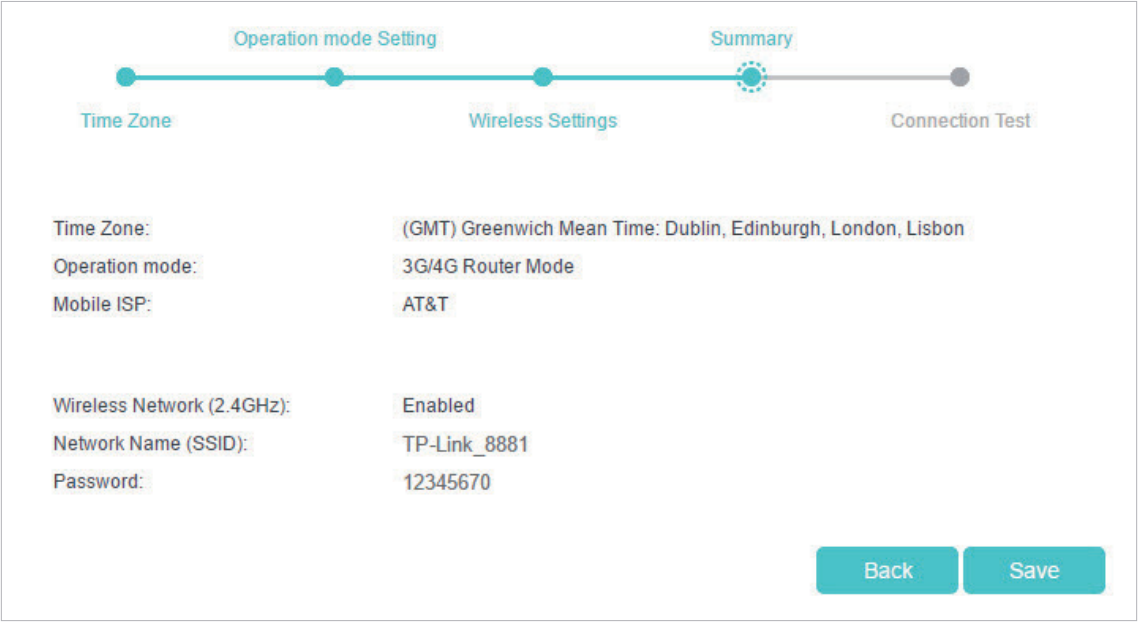
8. Click Finish to complete the configuration.
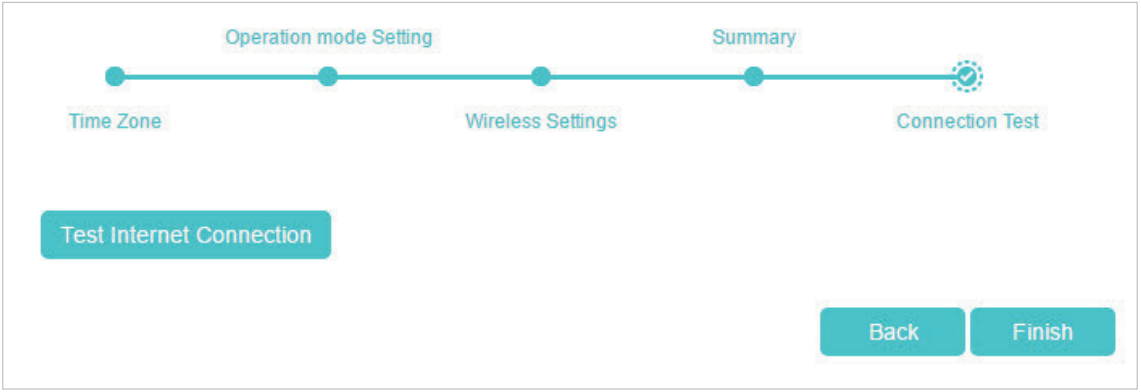
Step 2 - Using the TP-TL-MR3020 to Connect Wirelessly to a Network
1. Switch the operation mode to AP.
2. Log in the router. For instructions, please refer to the first step.
3. Select your Time Zone and click Next.
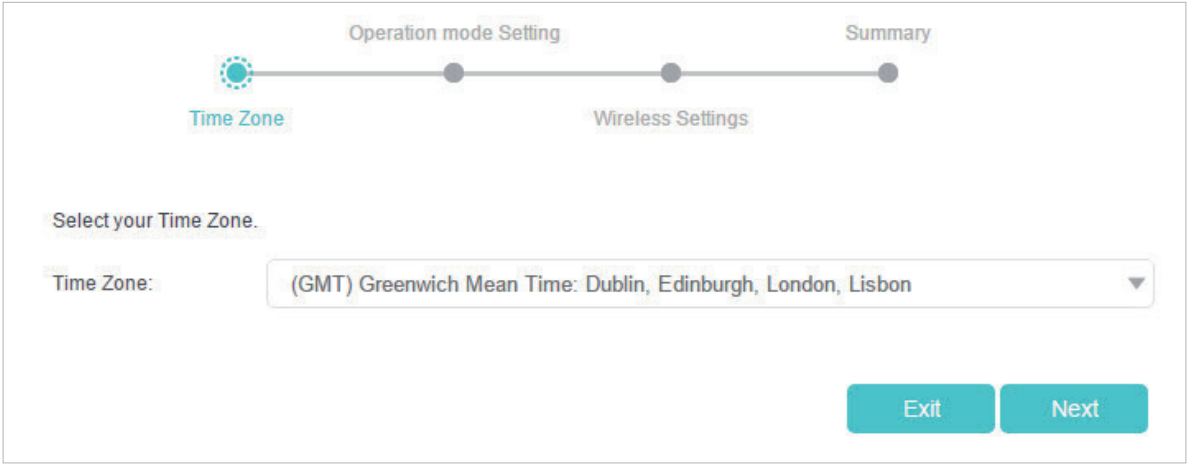
4. Select Repeater/Bridge Mode and click Next.
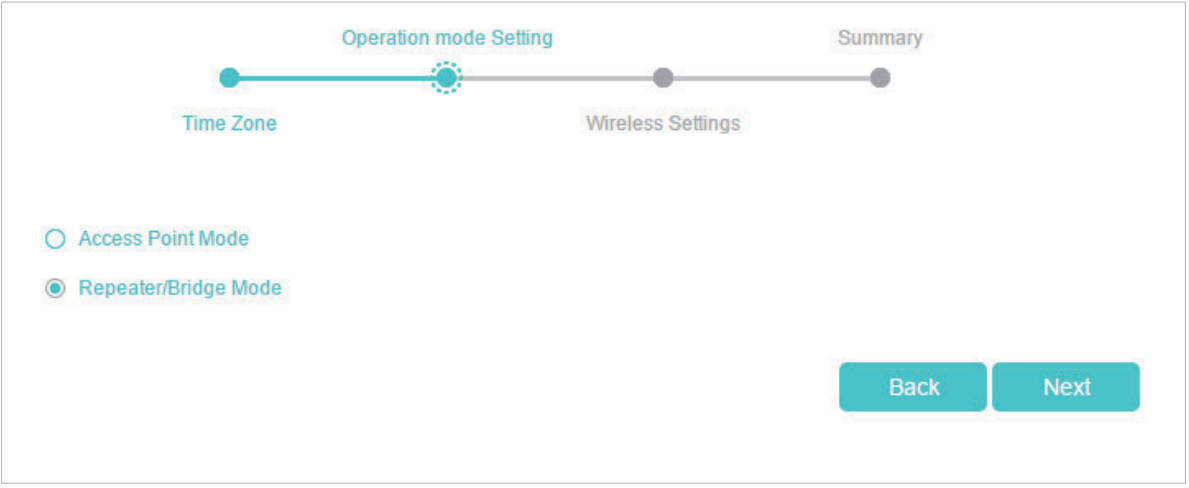
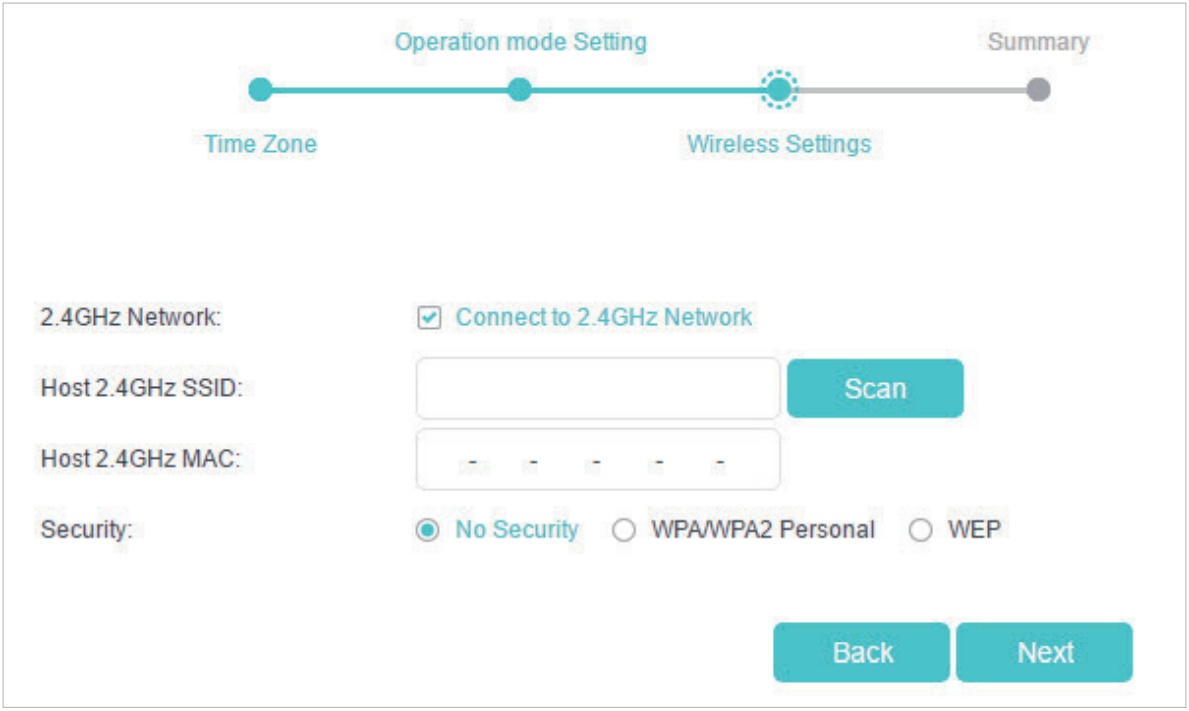
3. Click Scan to find the network you want to extend. Enter the Password for the selected wireless network if it is encrypted. Then click Next.
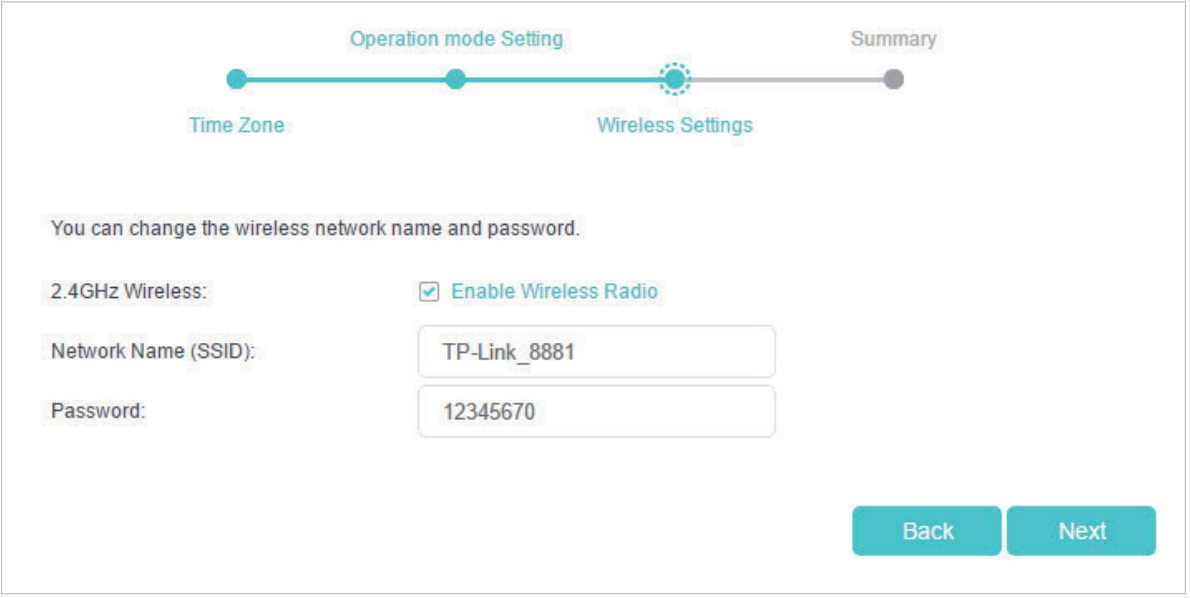
4. Either customize your Network Name (SSID) and Password or keep the default ones, and then click Next.
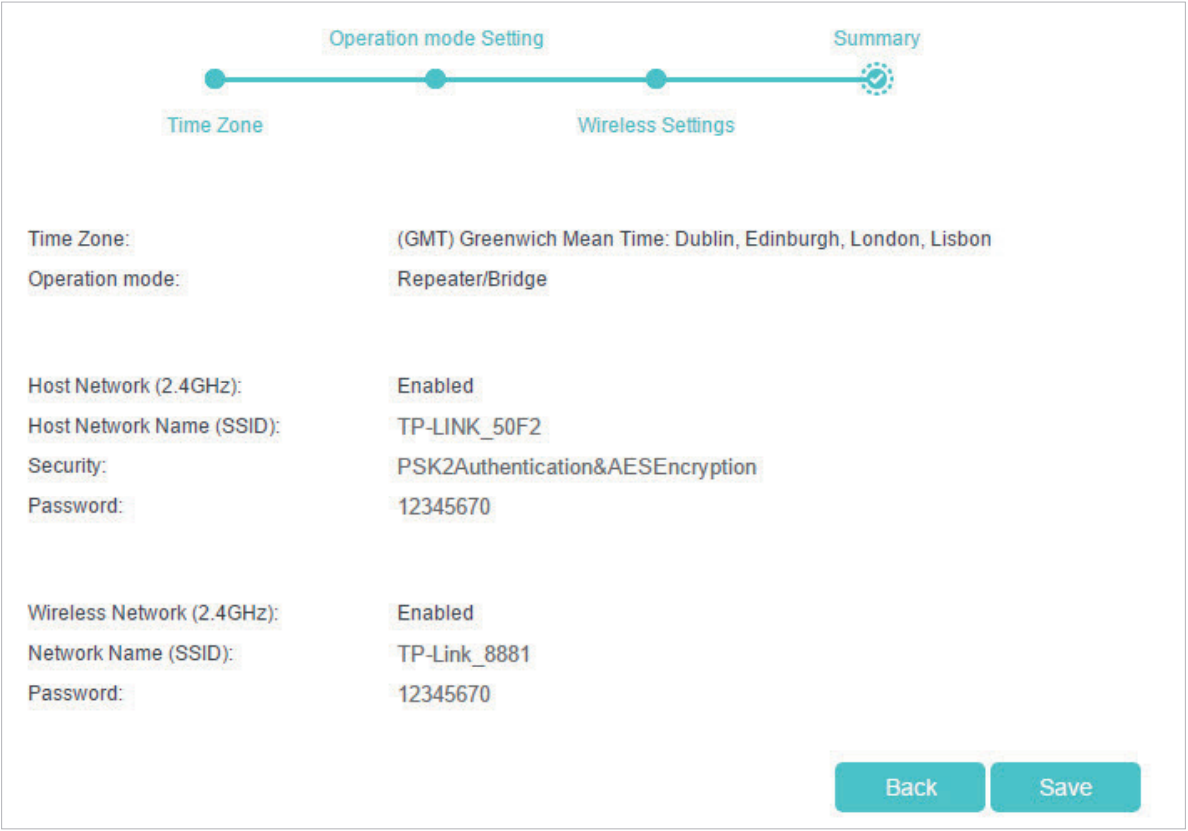
5. Click Save to complete the configuration.
Step 3 - Connecting the TP-TL-MR3020 to a Recorder
Before beginning, connect the network port of the TP-TL-MR3020 to the LAN port on the back of the recorder.
1. Right Click, and select Main Menu.2. Select Network.
3. Select TCP/IP.
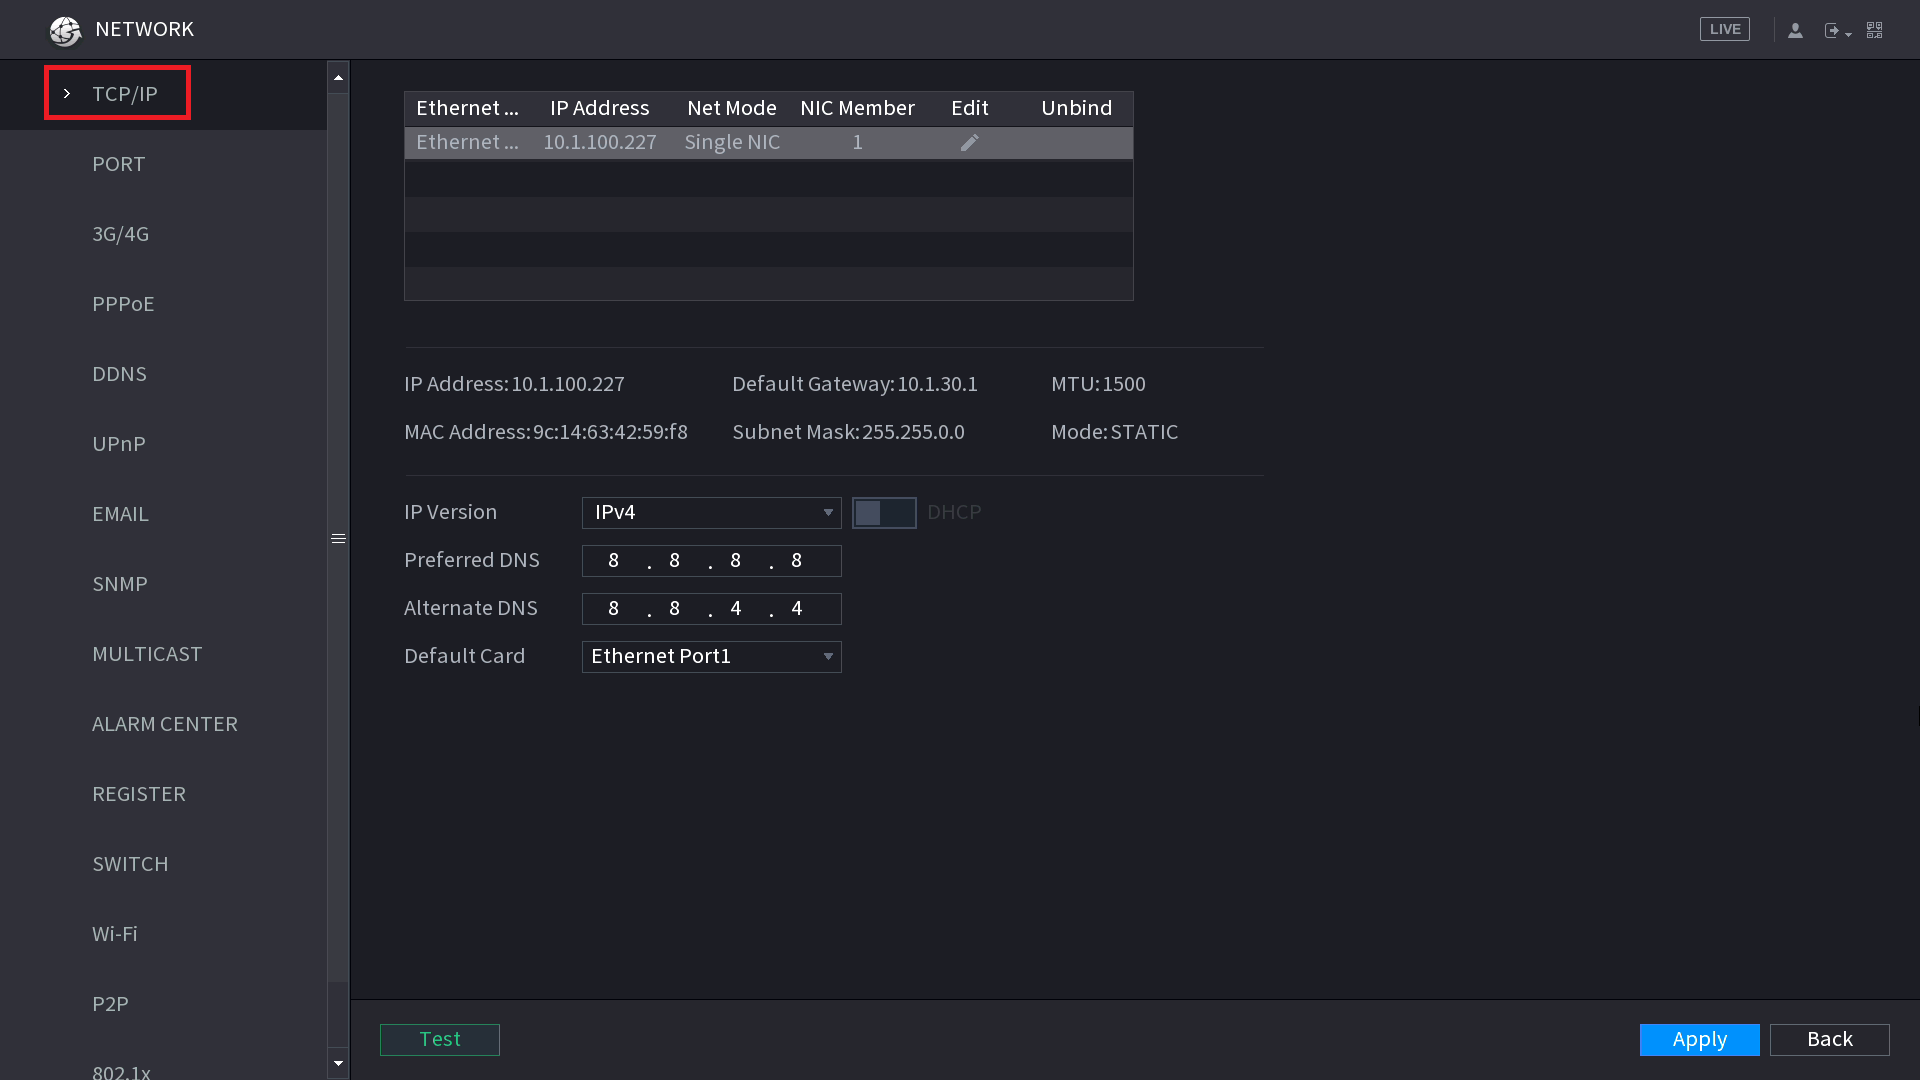
4. Click the Edit Pencil to bring up the page to modify the IP Settings.
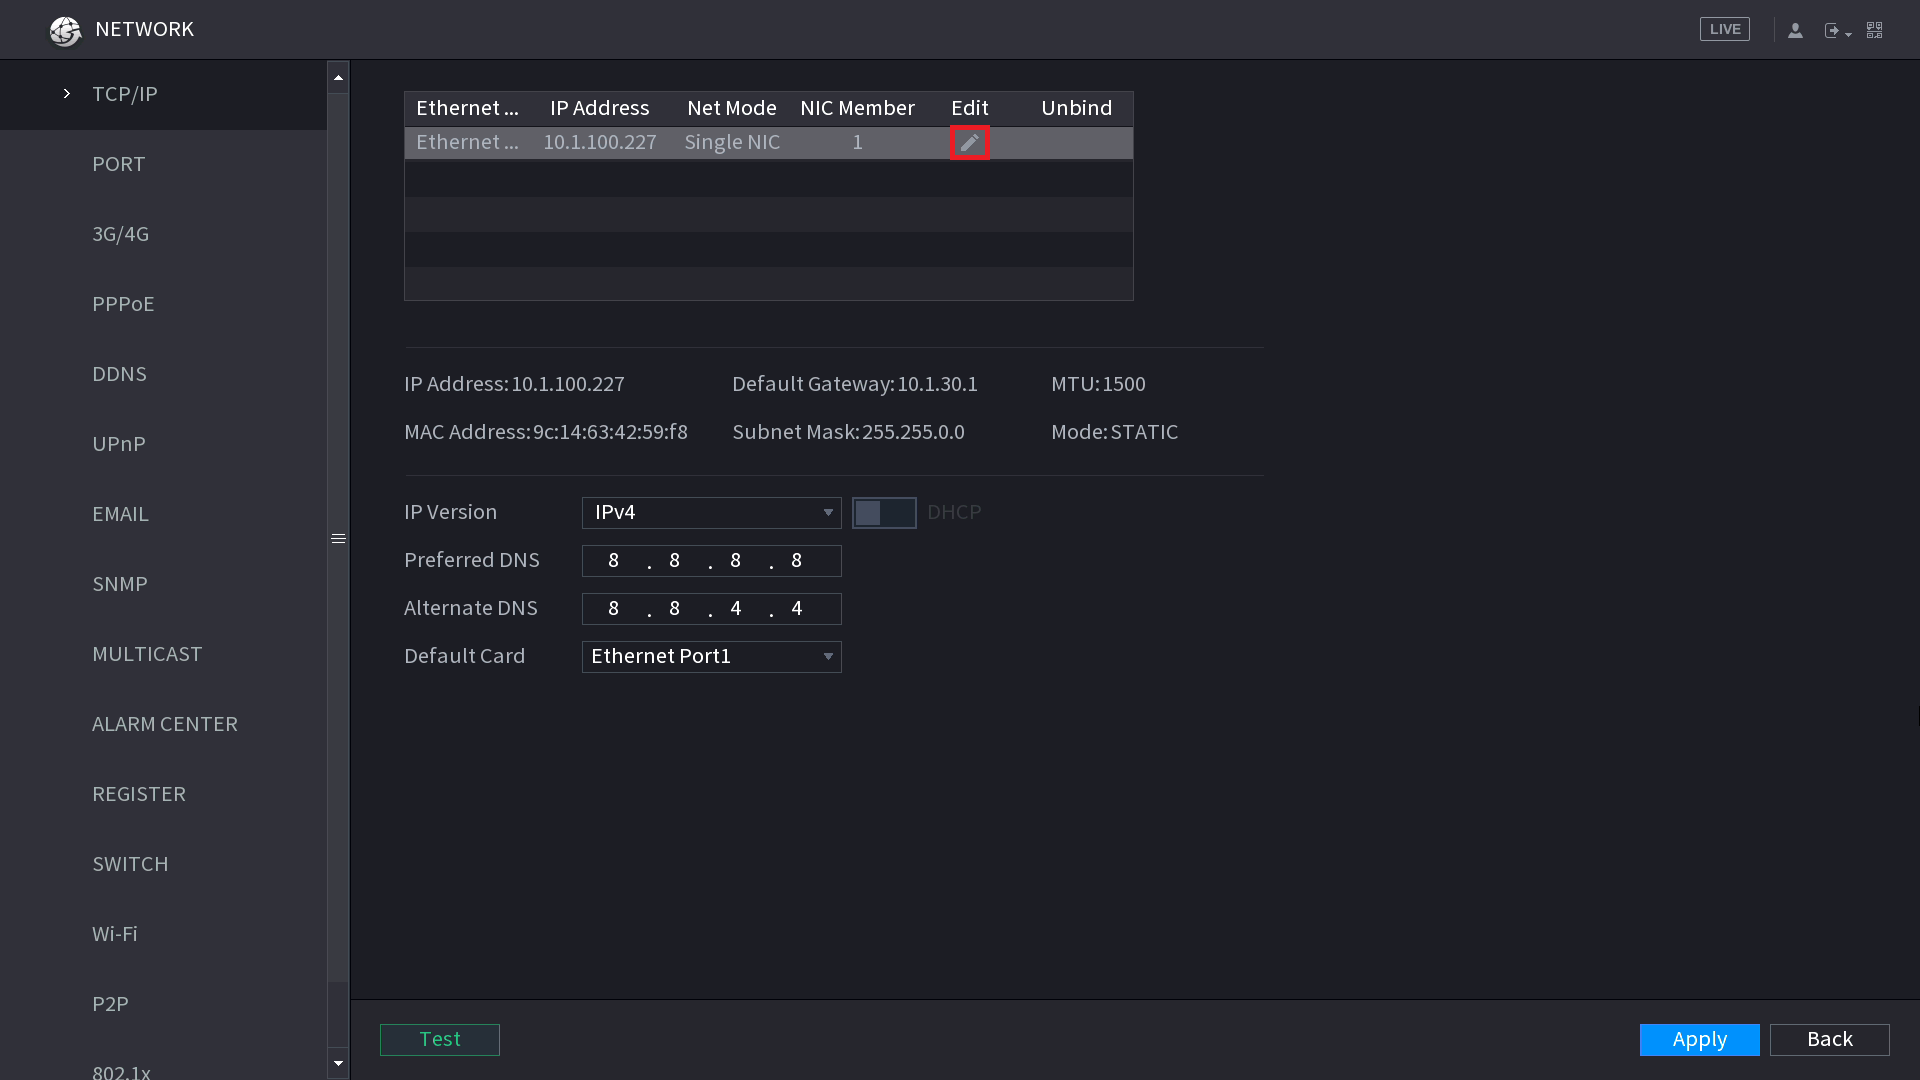
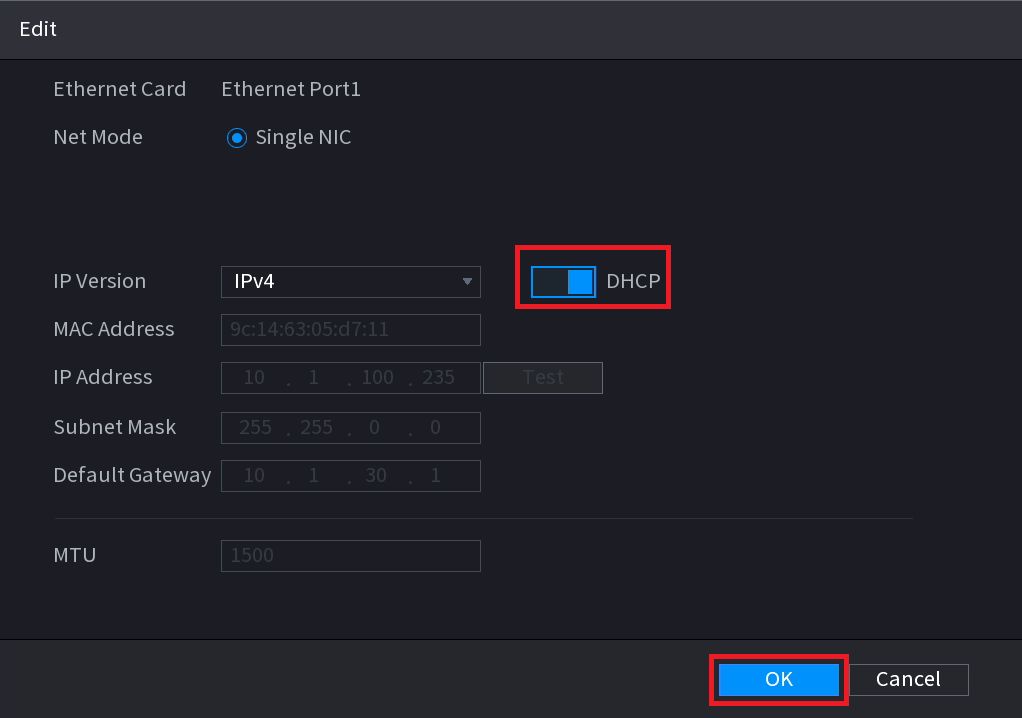
5. Turn DHCP on. The IP Address should change to 0.0.0.0. Select OK to save your changes.
6. Select Apply to save your changes.
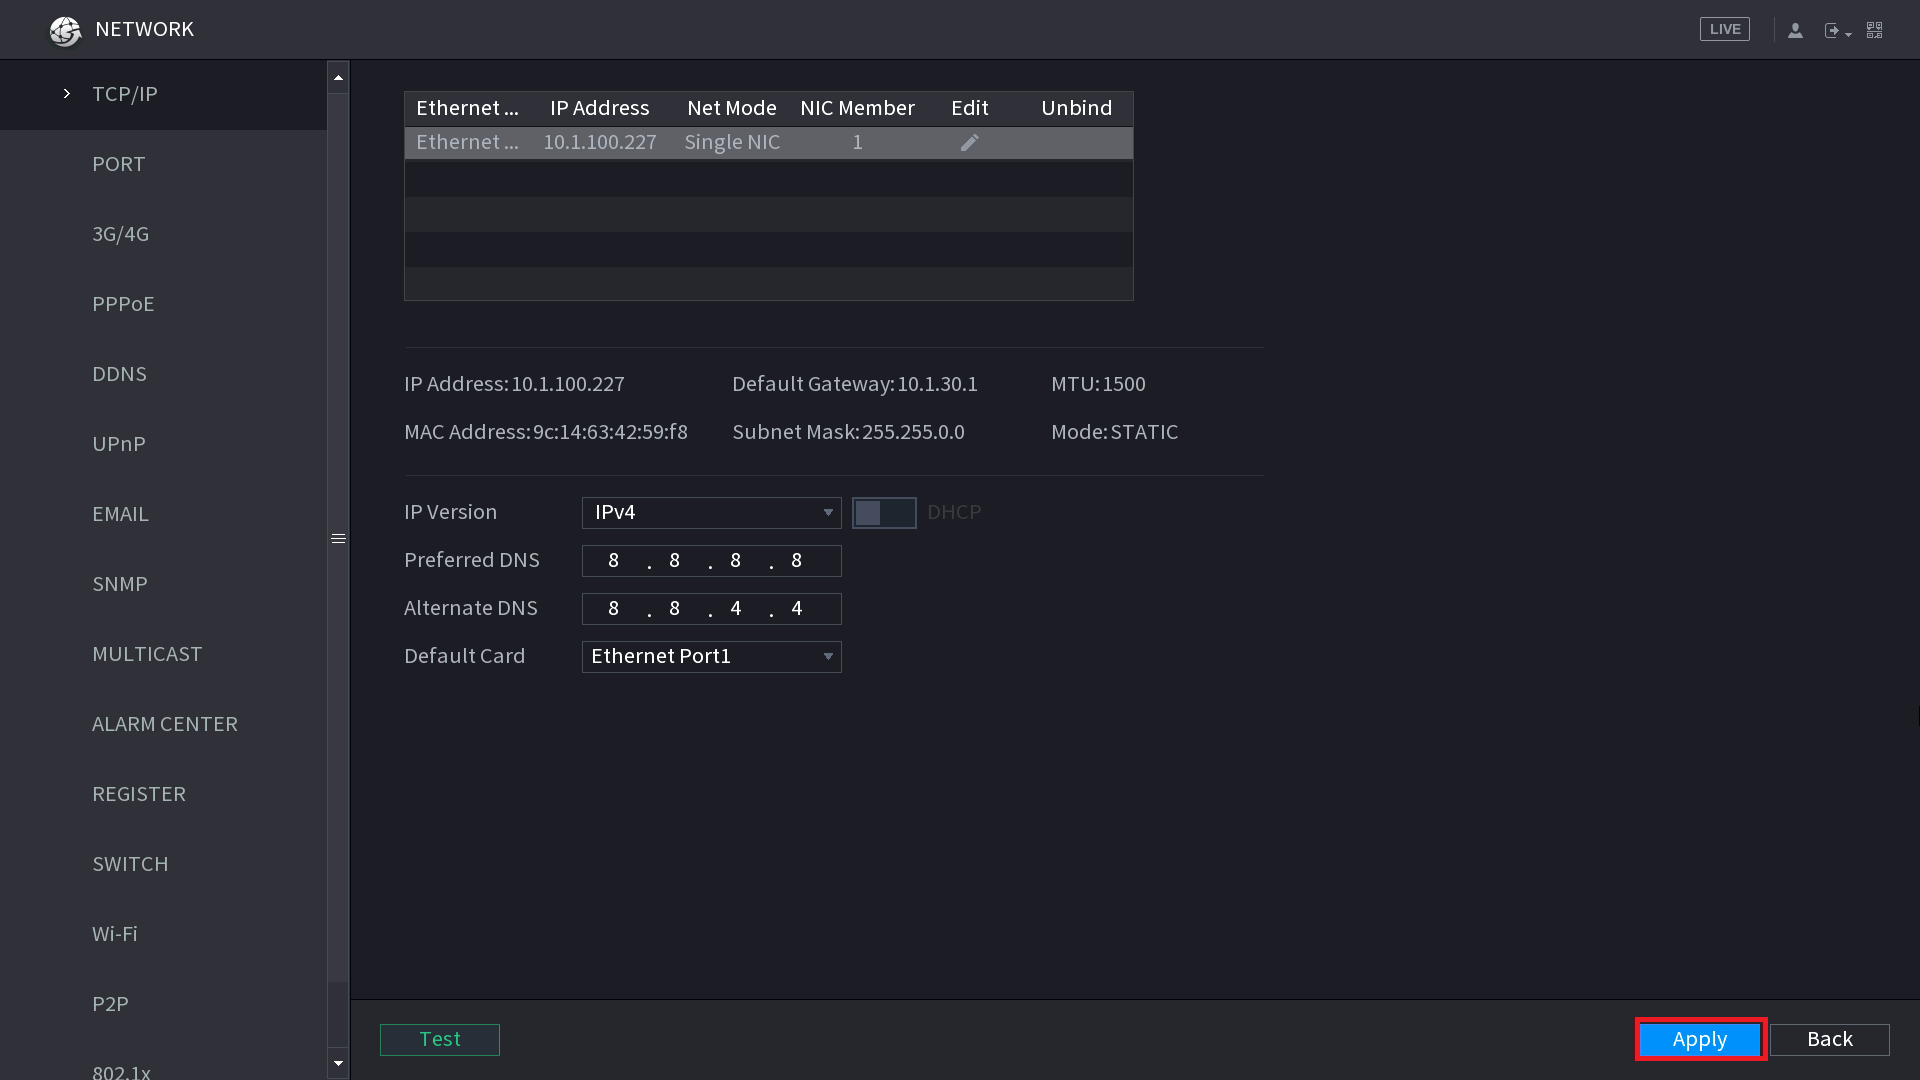
The recorder will now obtain an IP address from the TP-TL-MR3020, this can take up to 5 minutes.
For remote access setup instructions, see this article.
TP-Link Support
More information and support for this TP-Link product can be found below.