Deterrence Camera Types
This guide applies to several models of Deterrence cameras each with different features and interface. Please see the below list for the Interface type for each model.
Web Interface 3.0:
- Generation 1: VSIPP-2DG-ID, VSIPP-4DG-ID, VSIPP-5DIRG-ID and VSIPP-8DG-ID
- Generation 2: VSIPP-5DG-ID2 and VSIPP-8DG-ID2
Web Interface 5.0:
- Generation 3: VSIPP-6DG-ID3 and VSIPP-8DG-ID3
- VSIPSLR-A41
Audio & Visual Deterrence Features
The VIP Vision Pro AI Active Deterrence Camera is designed to ward off intruders with an Audio (Siren) & Visual (Red & Blue Strobe) warning. This can be triggered with events such as:
- Motion Detection, IVS and SMD.
- External alarm inputs.
- Manually Triggered remotely via the DMSS Application.
Siren & Strobe Configuration via Web Interface 5.0
IVS Setup
- From the home page, navigate to AI > Smart Plan > IVS.
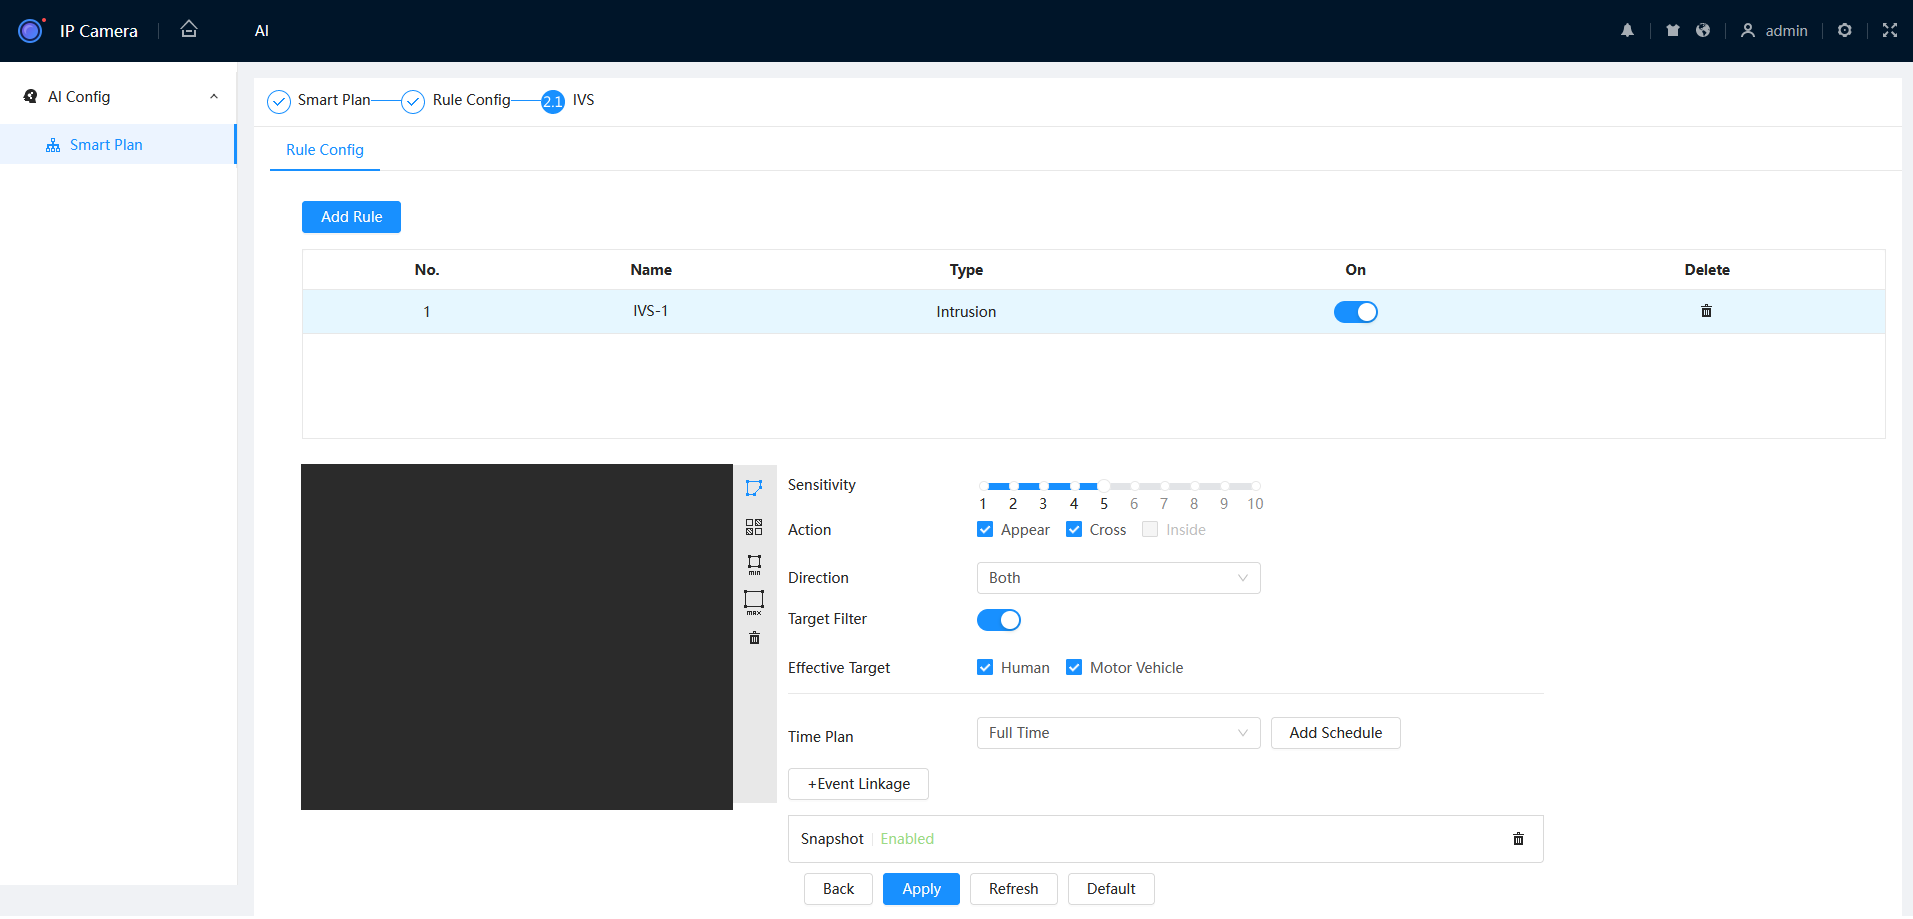
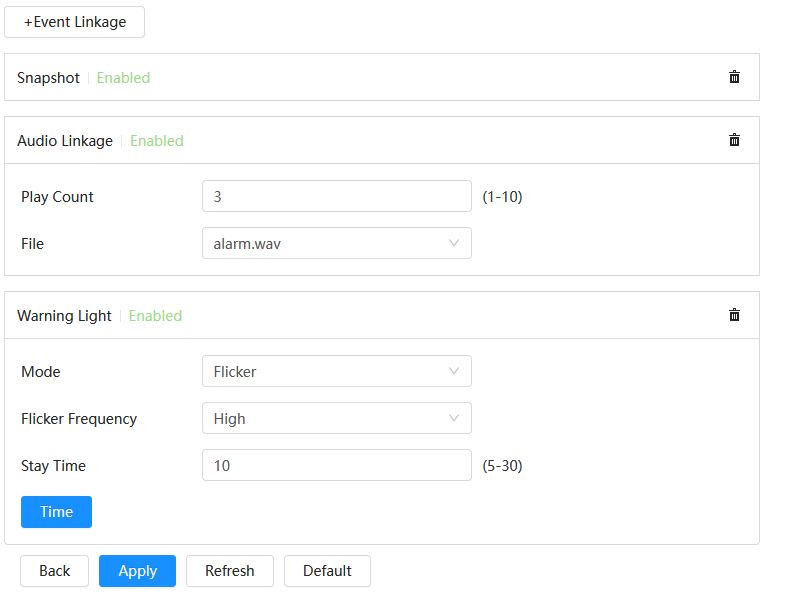
- Click Event Linkage, then select Warning Light and/or Audio Linkage.
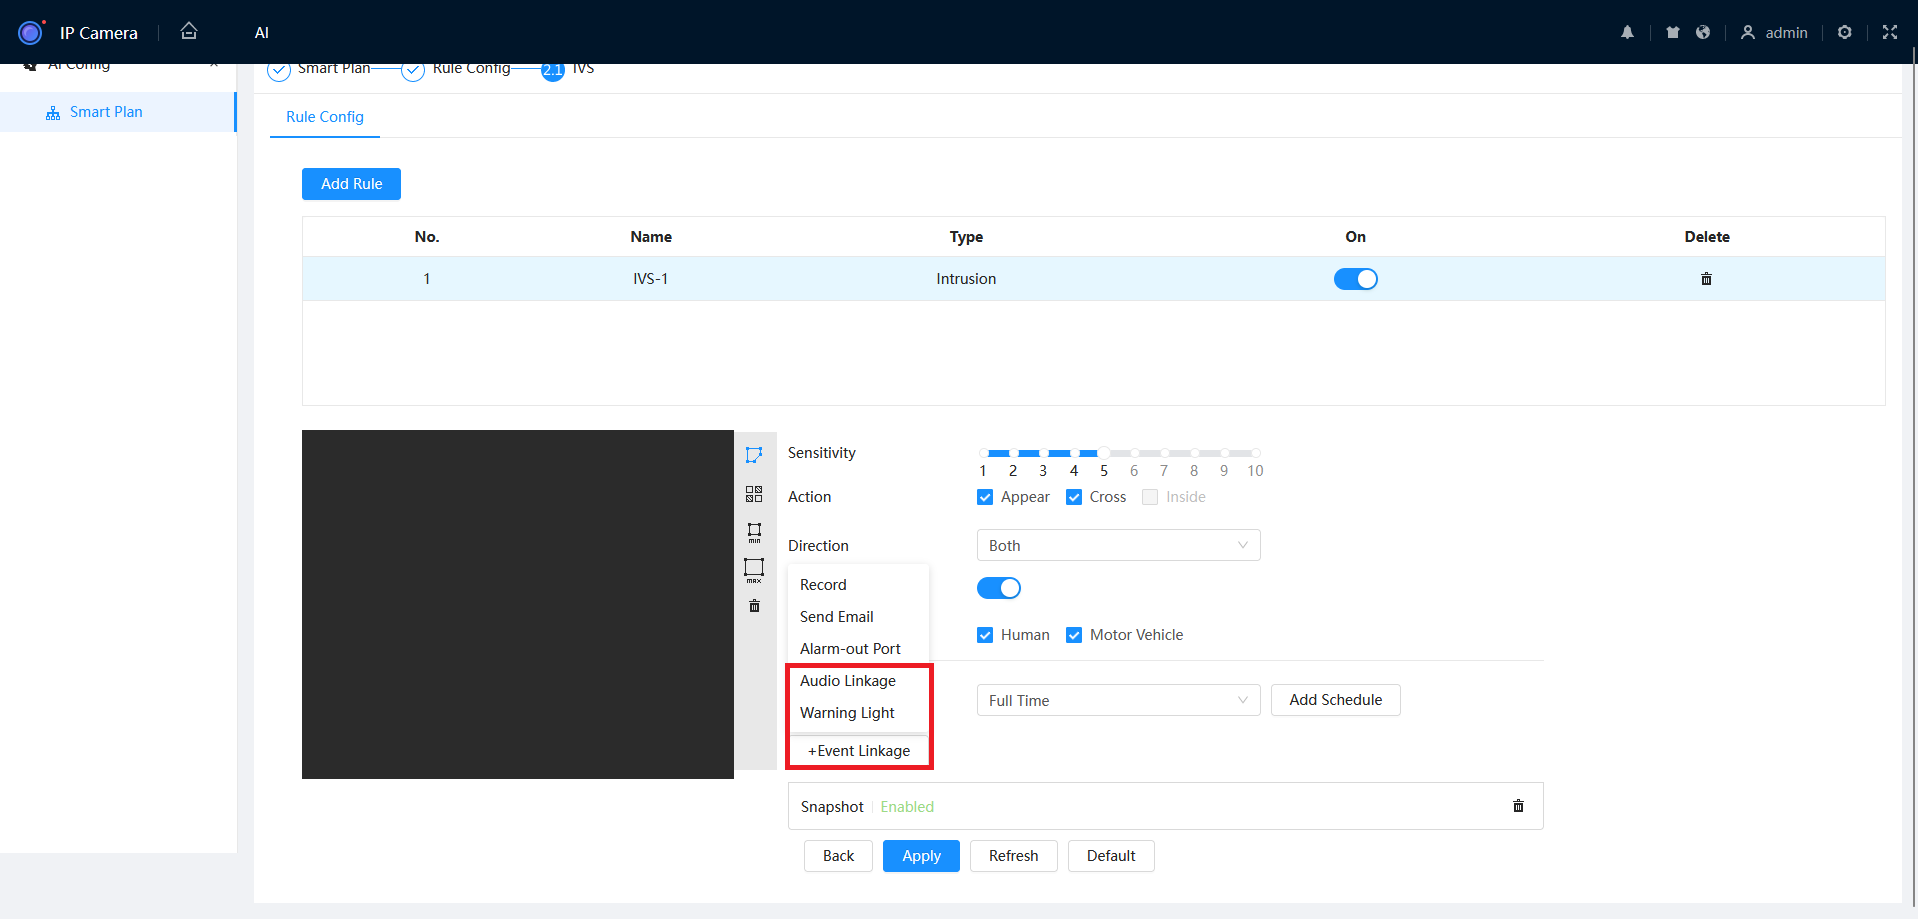
- Select your preferred settings.
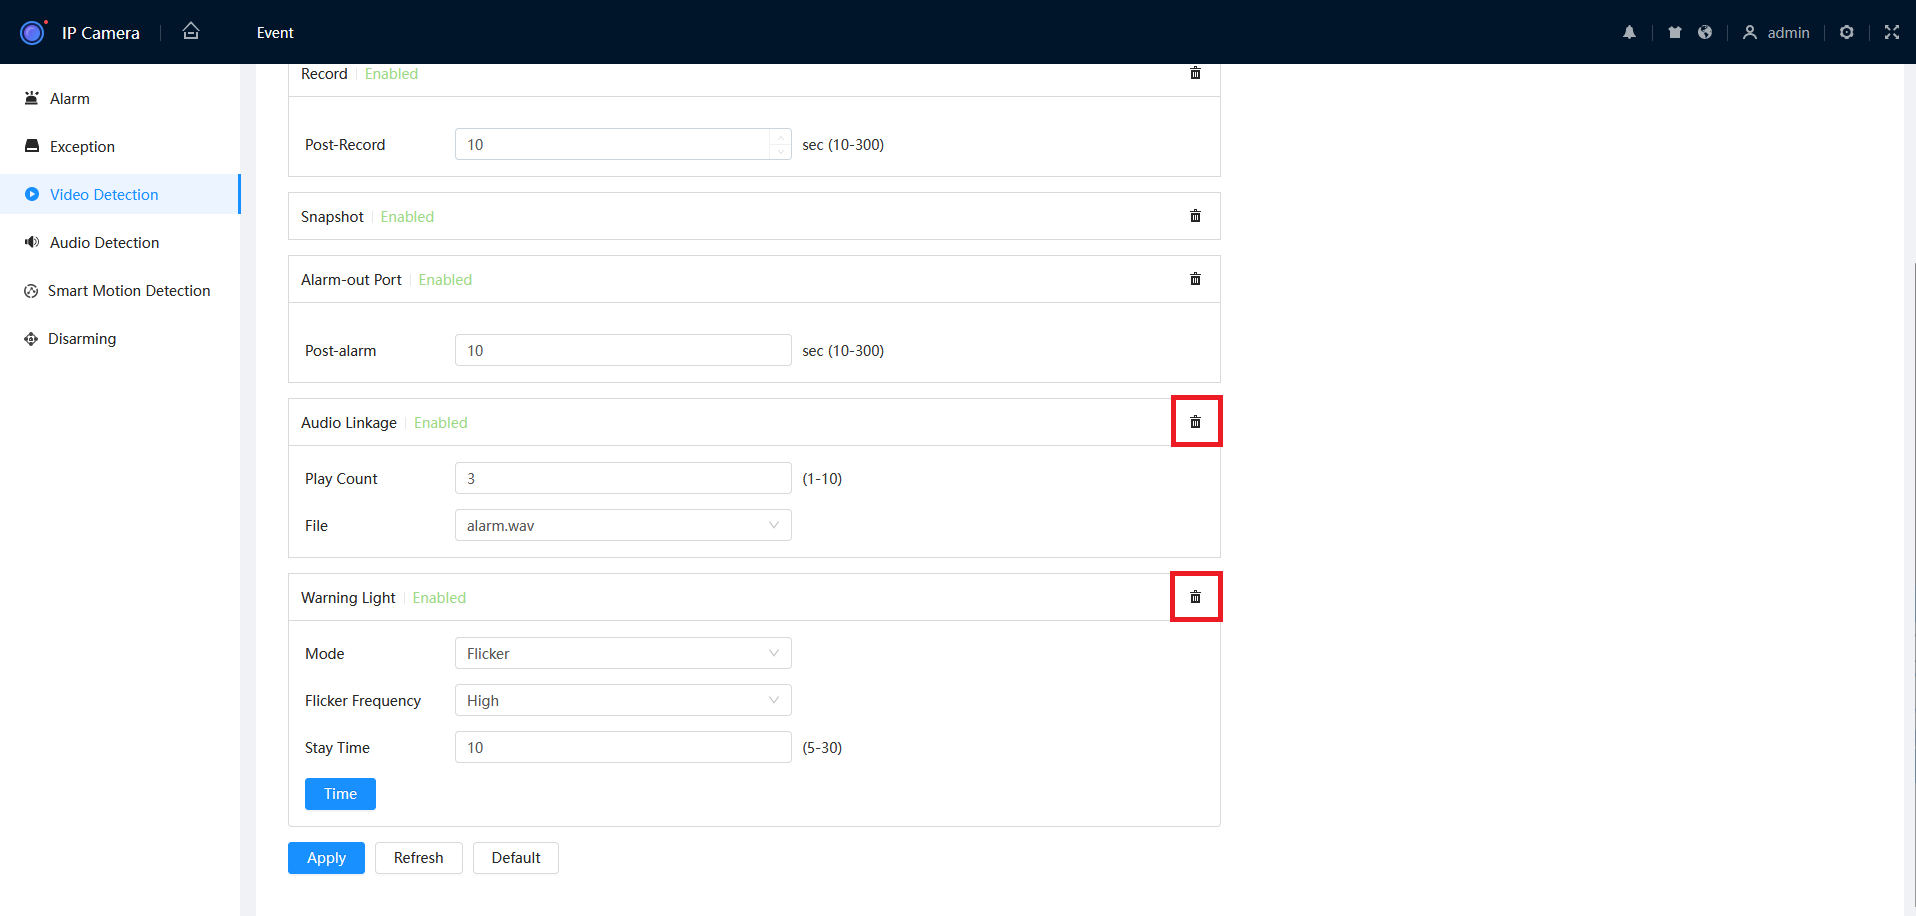
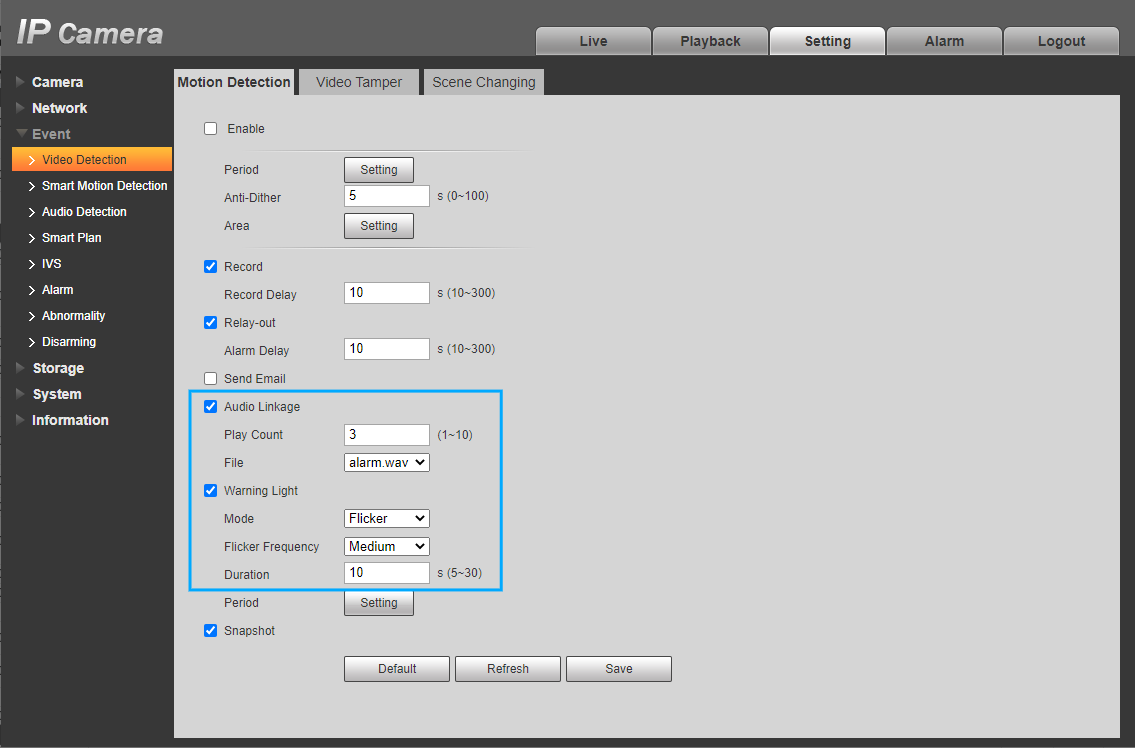
Motion Detection Setup
- From the home page, navigate to Event > Video Detection > Motion Detection.
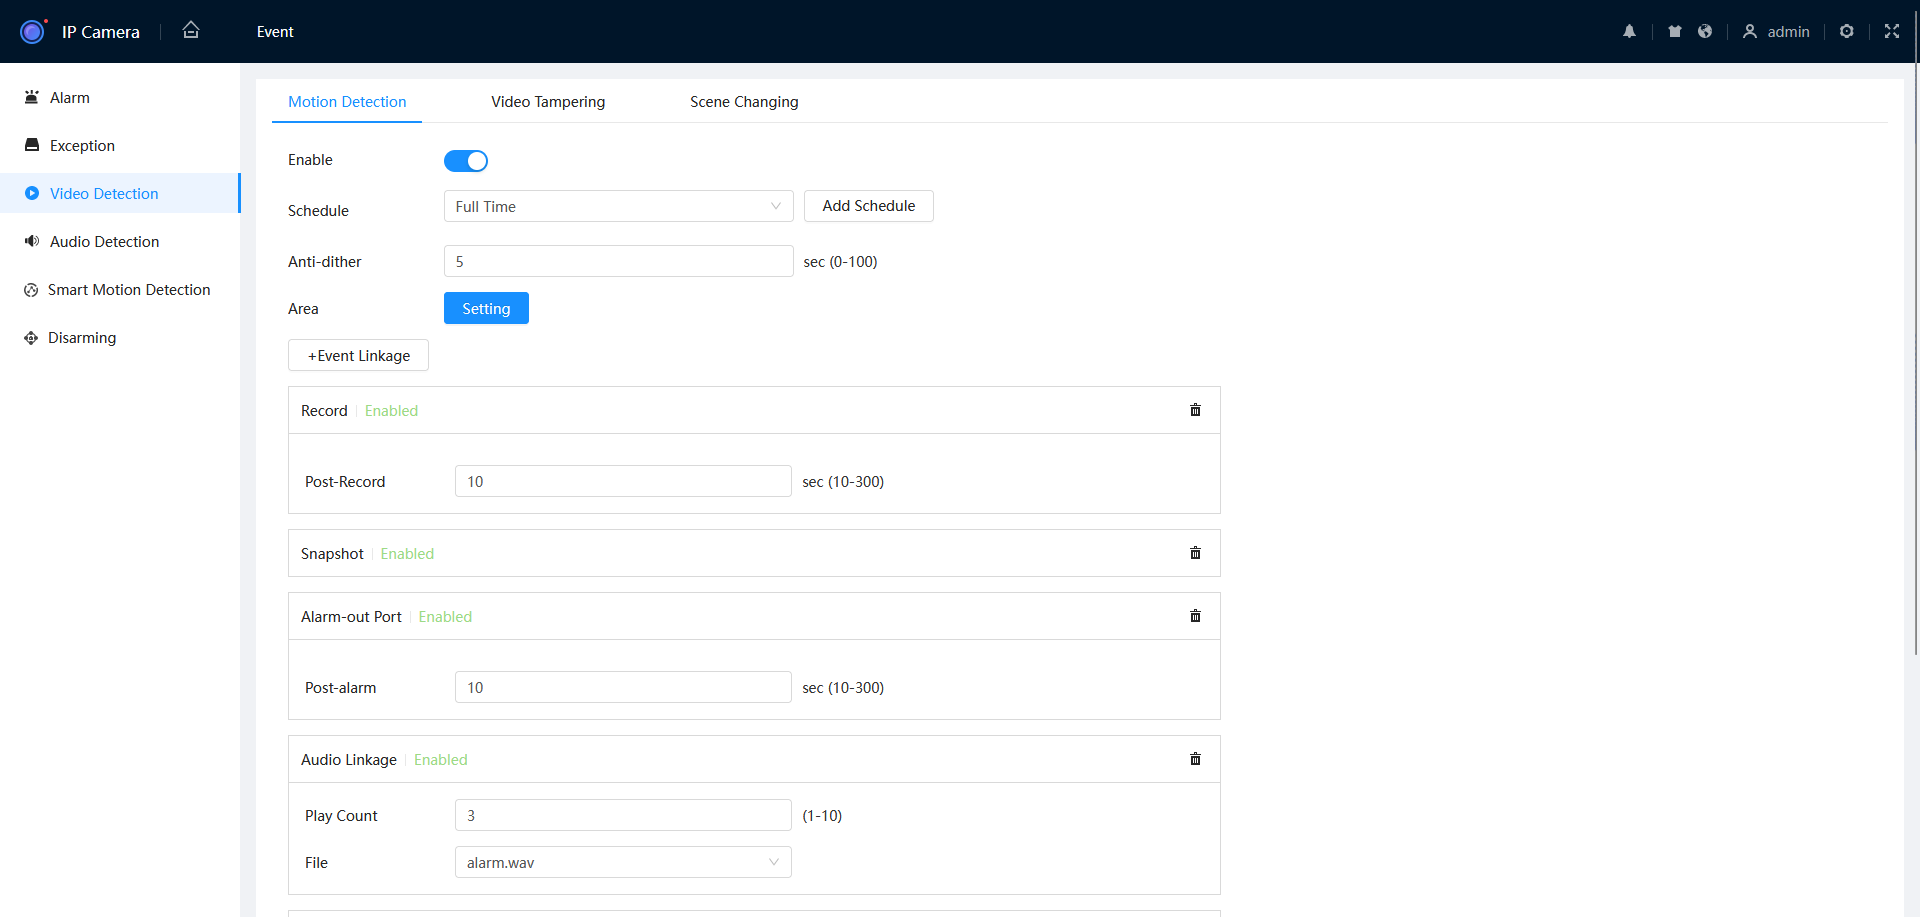
- Scroll down until you see Audio Linkage and Warning Light.
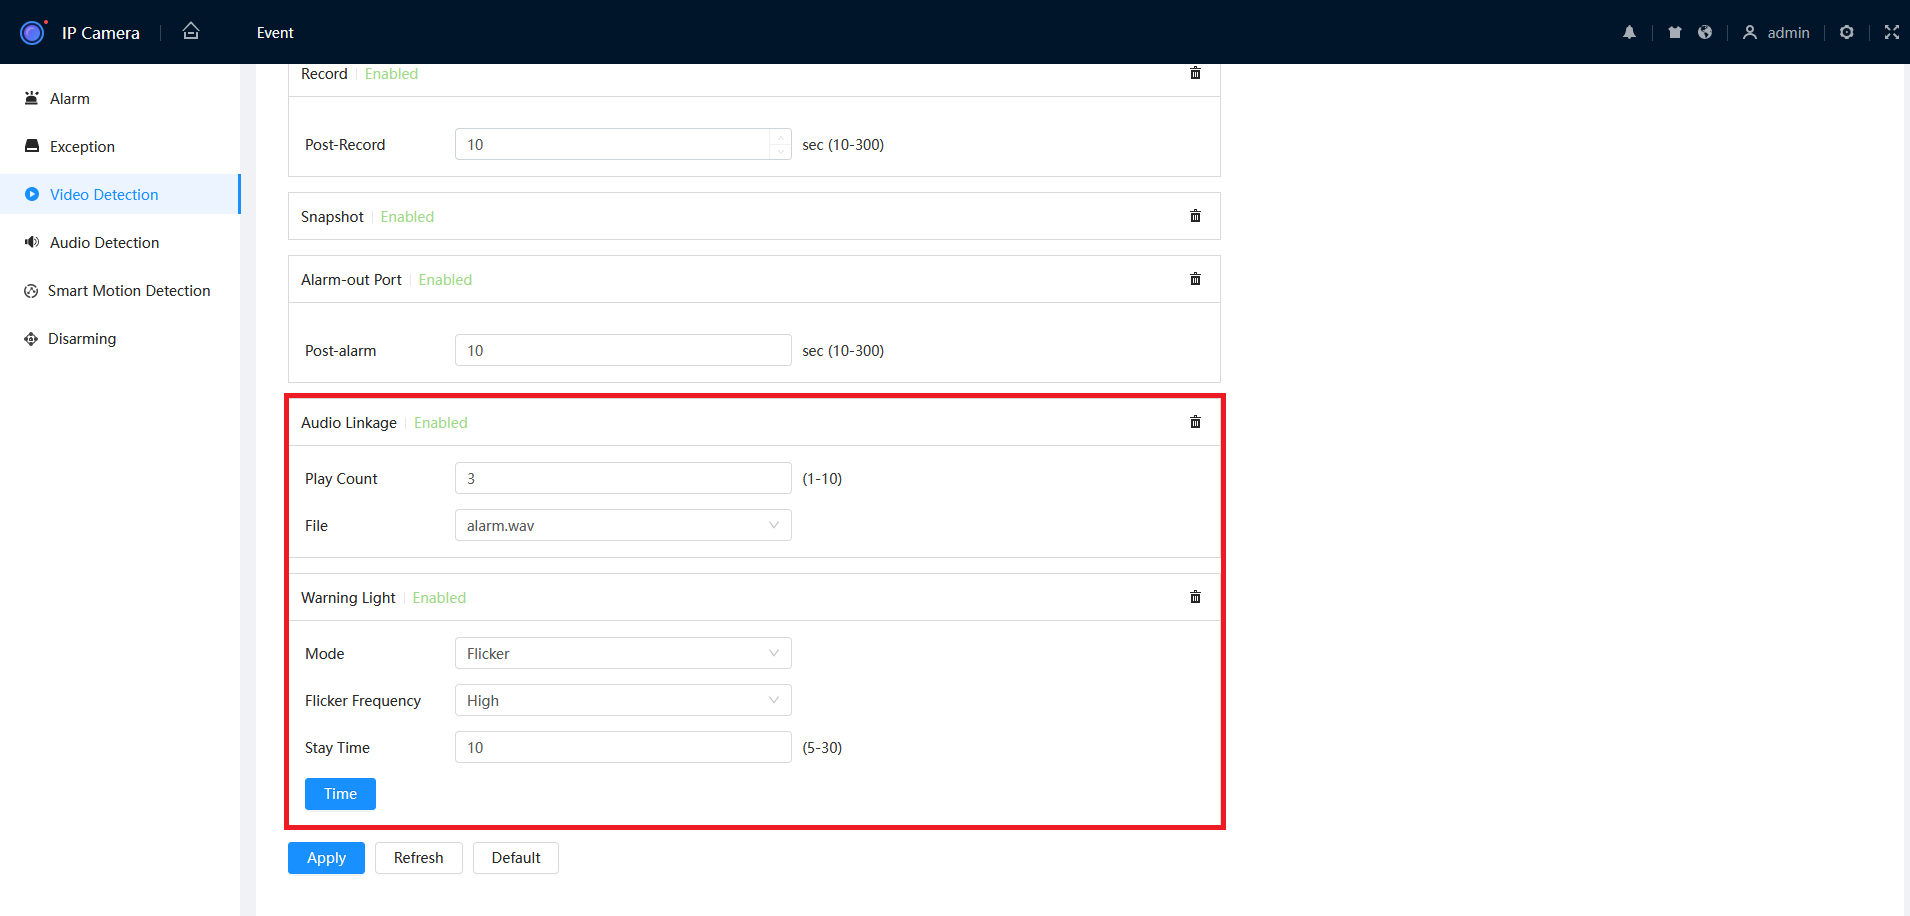
- Select your preferred settings, or delete if not required.
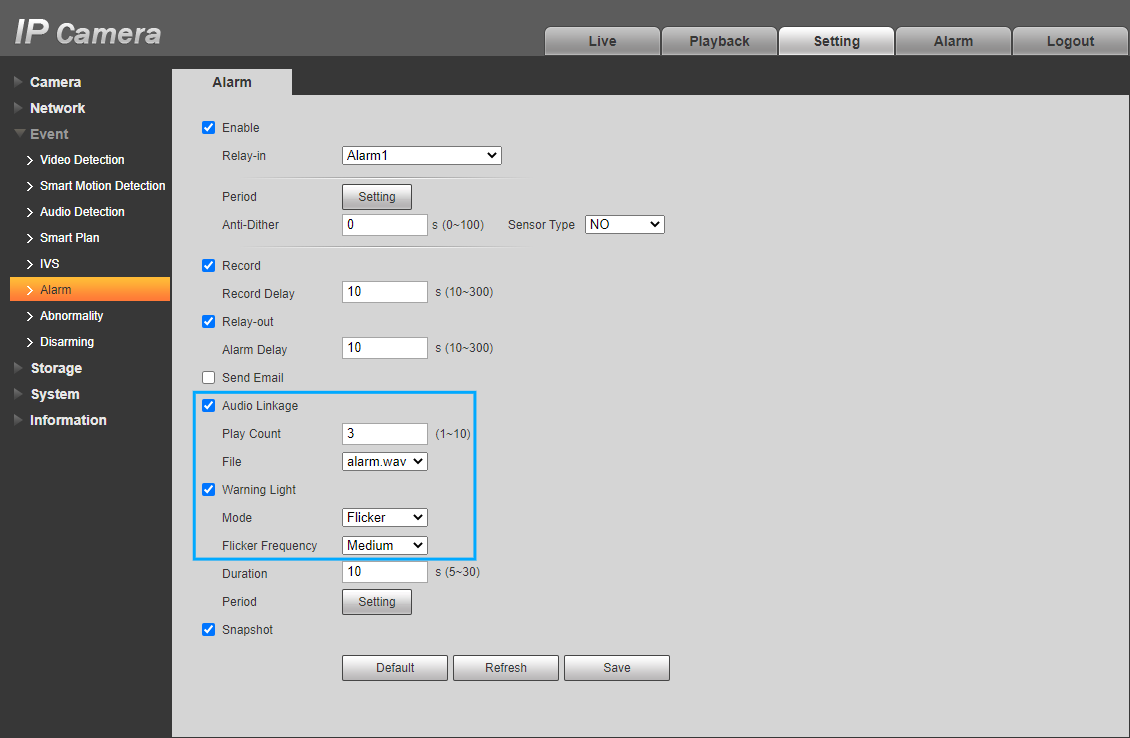
Trigger with External Device
- From the home page, navigate to Event > Alarm.
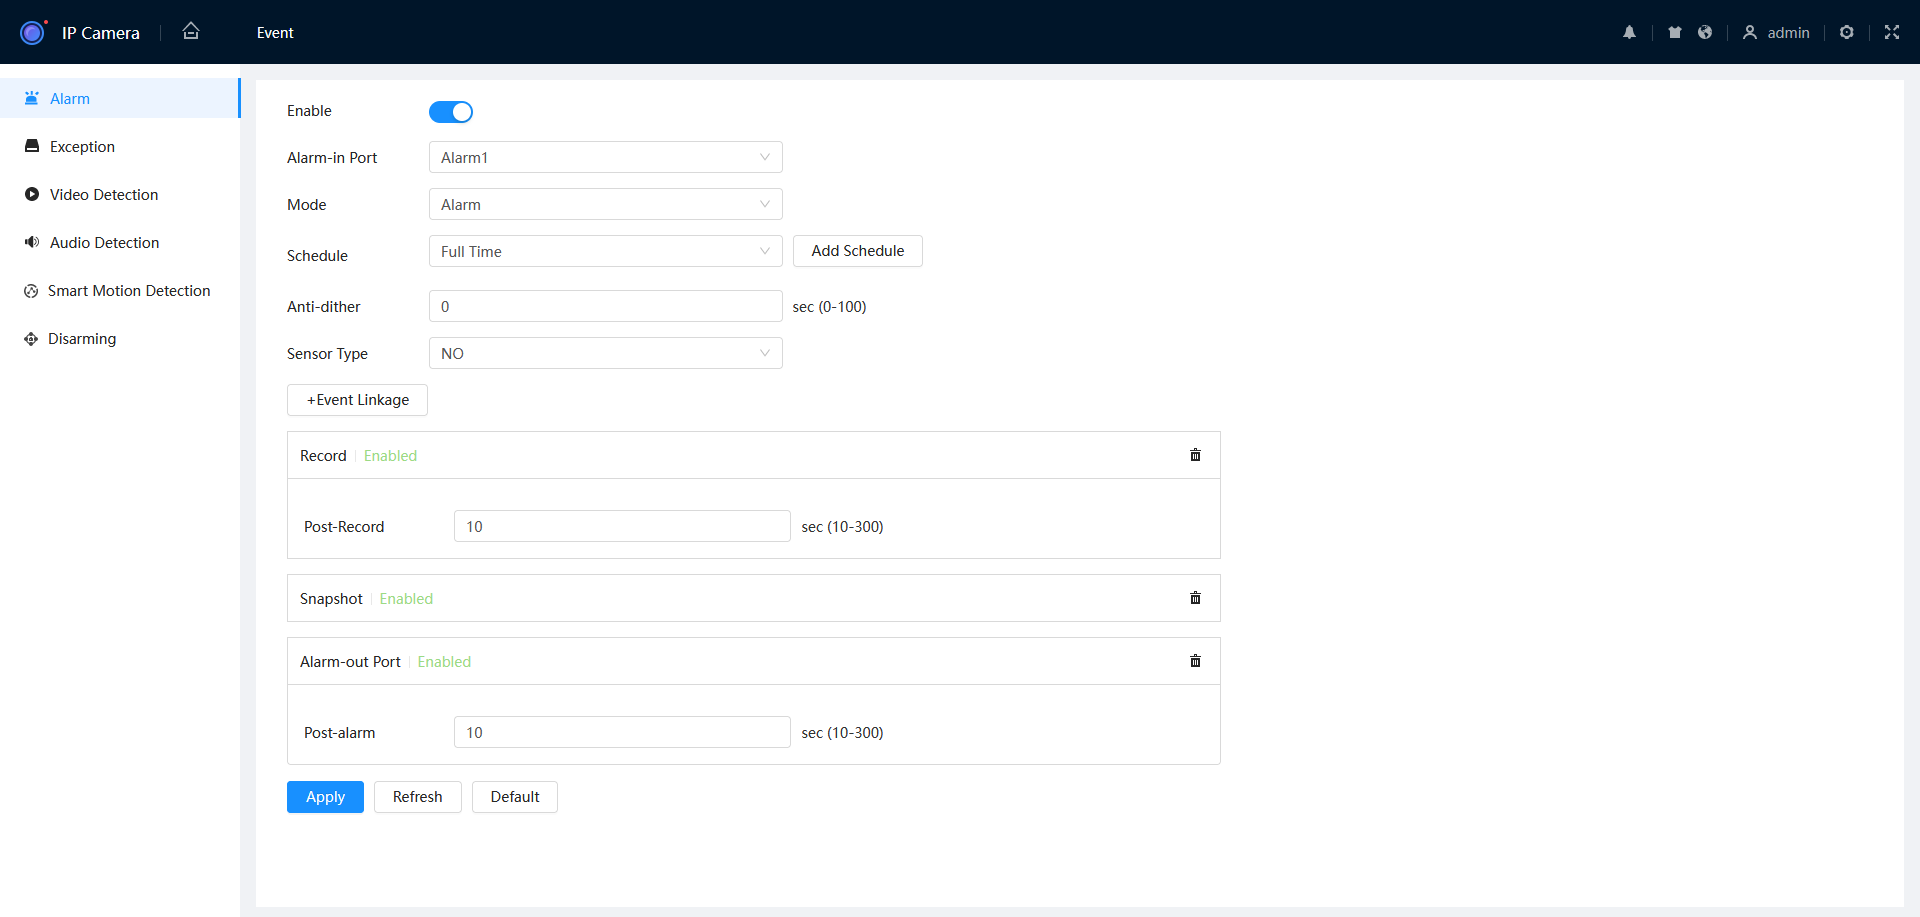
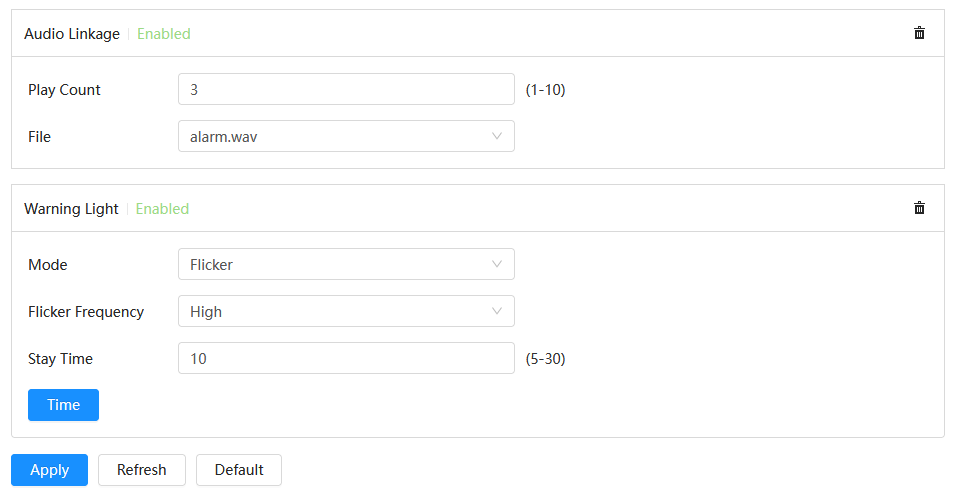
- Click Event Linkage, then select Warning Light and/or Audio Linkage.

- Select your preferred settings.
Siren & Strobe Configuration via Web Interface 3.0
IVS Setup
Navigate to Setting > Event > IVS. You can then select your preferred settings. 
Motion Detection Setup
Navigate to Setting > Event > Video Detection. You can then select your preferred settings.
Trigger with External Device
Info
This setting can only be adjusted in the Web Interface of the camera.
Navigate to Setting > Event > Alarm. You can then select your preferred settings.
Siren & Strobe Configuration via NVR
Info
This feature is available on compatible NVR models only. Please ensure that the NVR and the DMSS app are up to date.
IVS Setup
- Navigate to Main Menu, then AI.
- Select Parameters, IVS then Trigger.
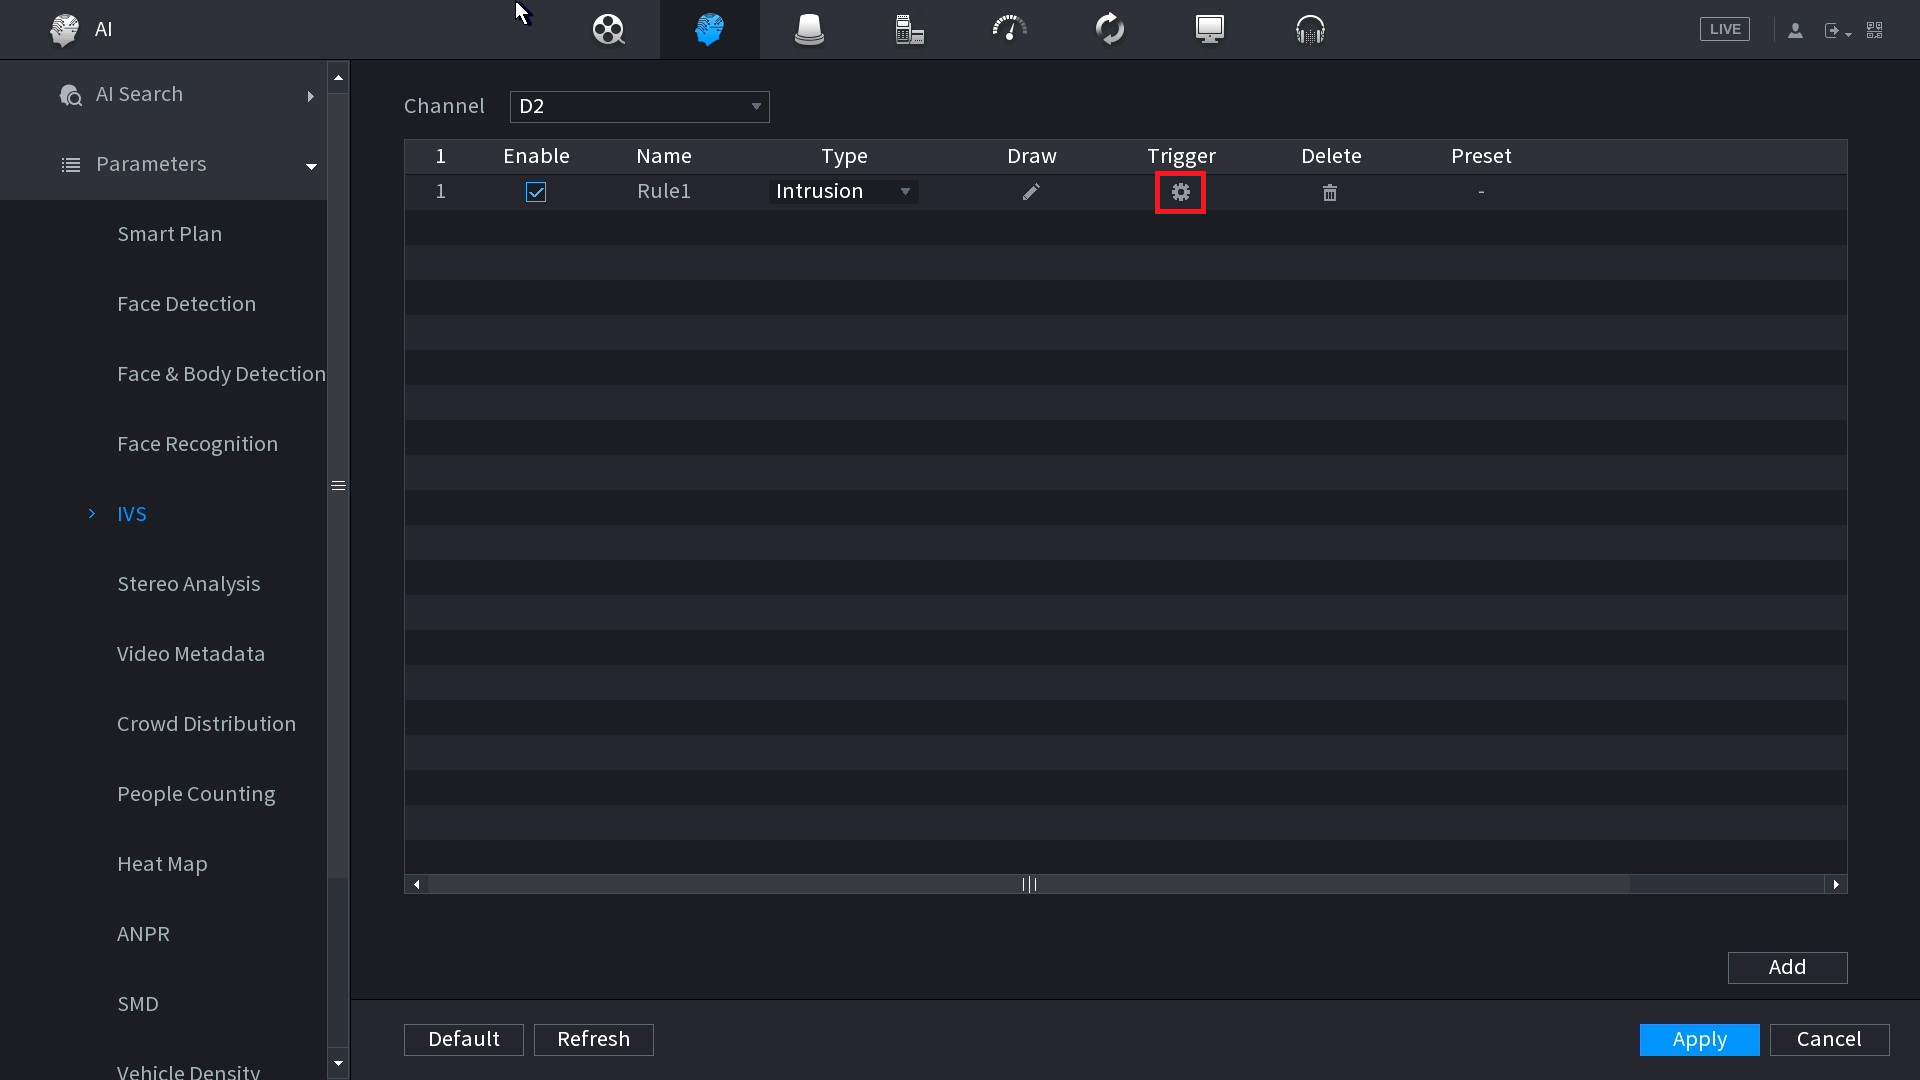
- From this page you can toggle the Audio Linkage and Warning Light on and off.

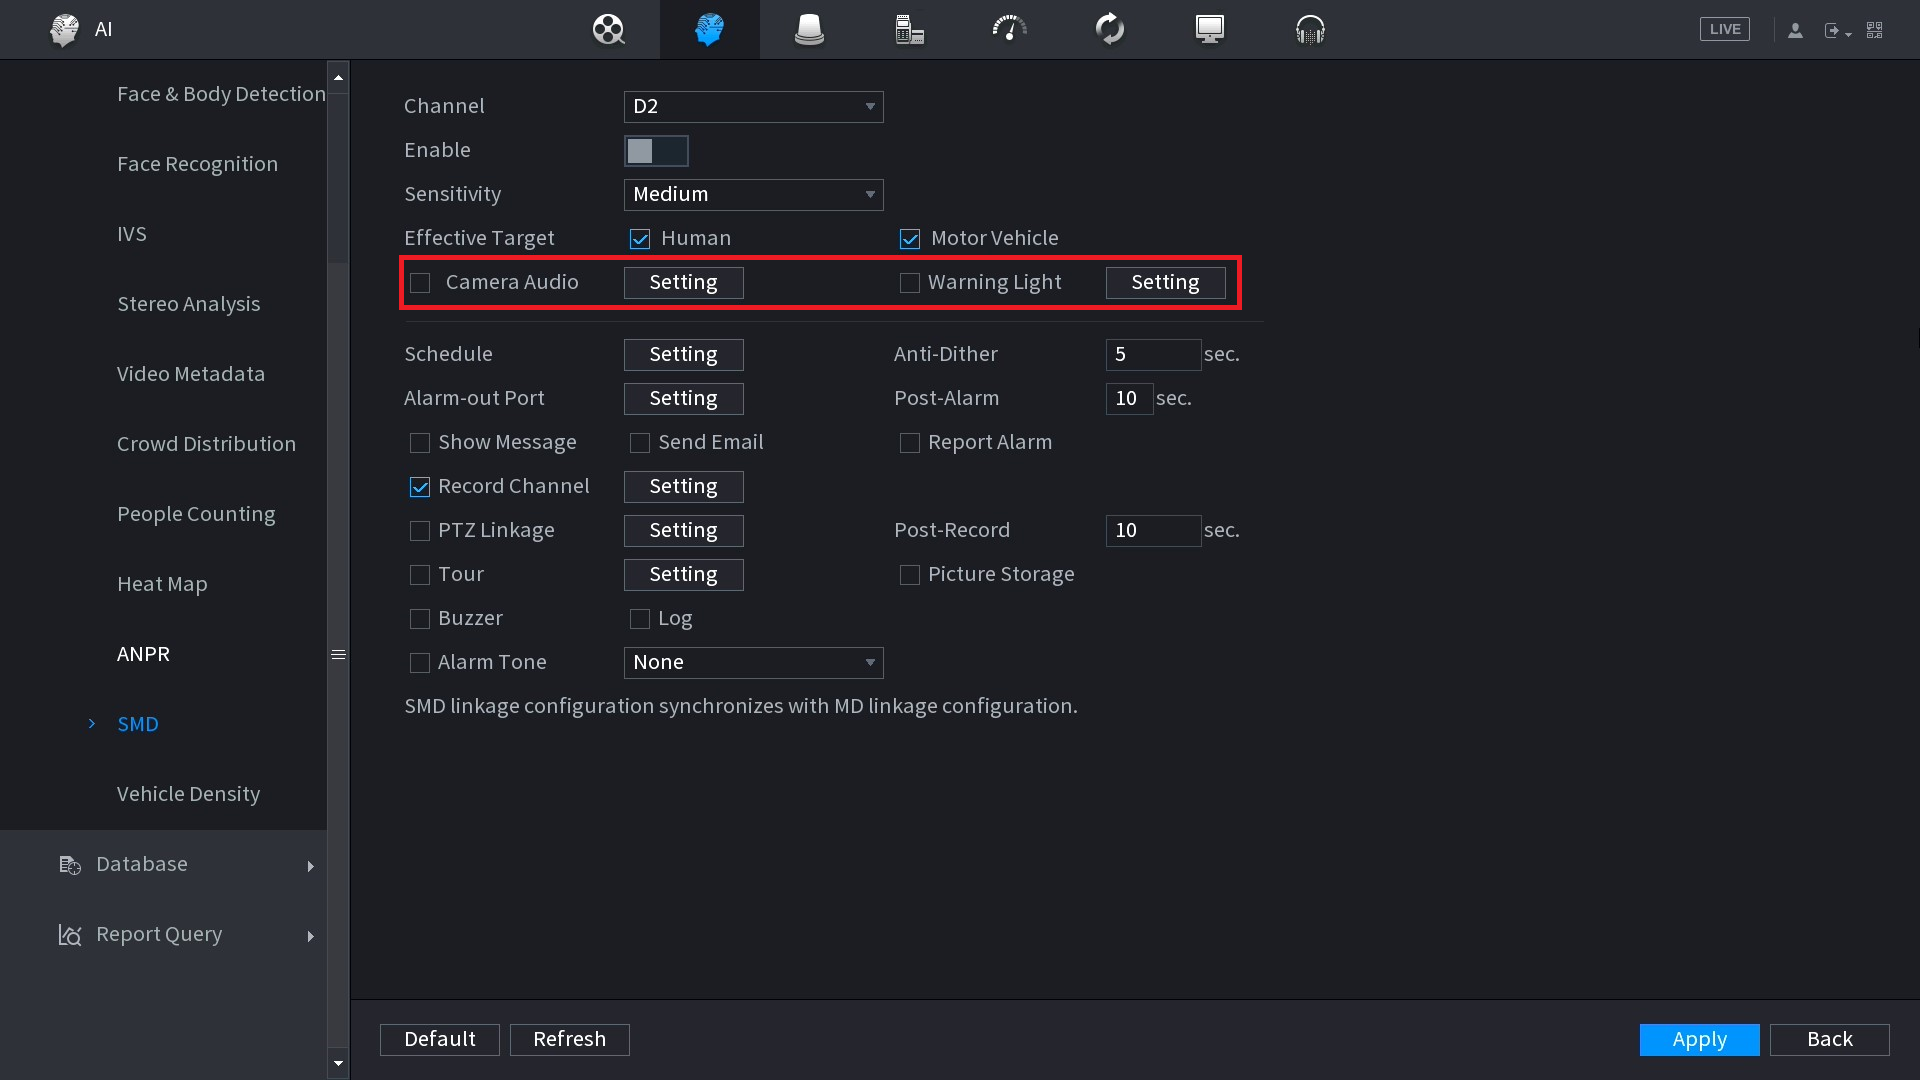
SMD Setup
- Navigate to Main Menu, then AI.
- Select Parameters, then SMD.
- From this page you can toggle the Audio Linkage and Warning Light on and off.
The Active Deterrence camera can be disarmed to temporarily disable the siren and strobe so they cannot be activated. This can be done on a schedule (e.g Business Opening Hours), or toggled on/off via the NVR and DMSS (e.g A Manager accessing a business during closed hours) or via an Alarm Input via the NVR or Camera.
How to toggle Disarming on/off via NVR and DMSS app.
You can disarm the strobe & siren of the camera remotely via DMSS or locally via the NVR it is connected to.
Info
This feature is available on compatible NVR models only. Please ensure that the NVR and the DMSS app are up to date.
Disarm via DMSS App
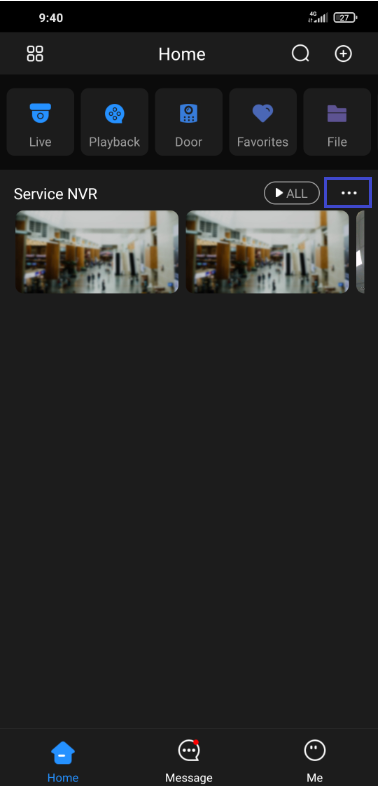 |
Open the DMSS App and tap the . . . Icon next to your device card on the home page, then select Device Details. |
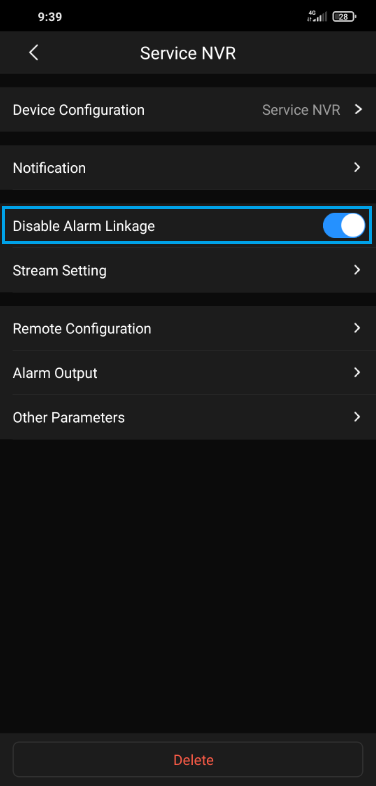 |
Wait for the device settings to load, this may take up to 10 seconds. Then turn on the Disable Alarm Linkage Function. |
Disarm via NVR
If the top right of the Live View page next to the time there is a  icon. Click this to arm/disarm the deterrence features. Red means it is armed. Grey is disarmed.
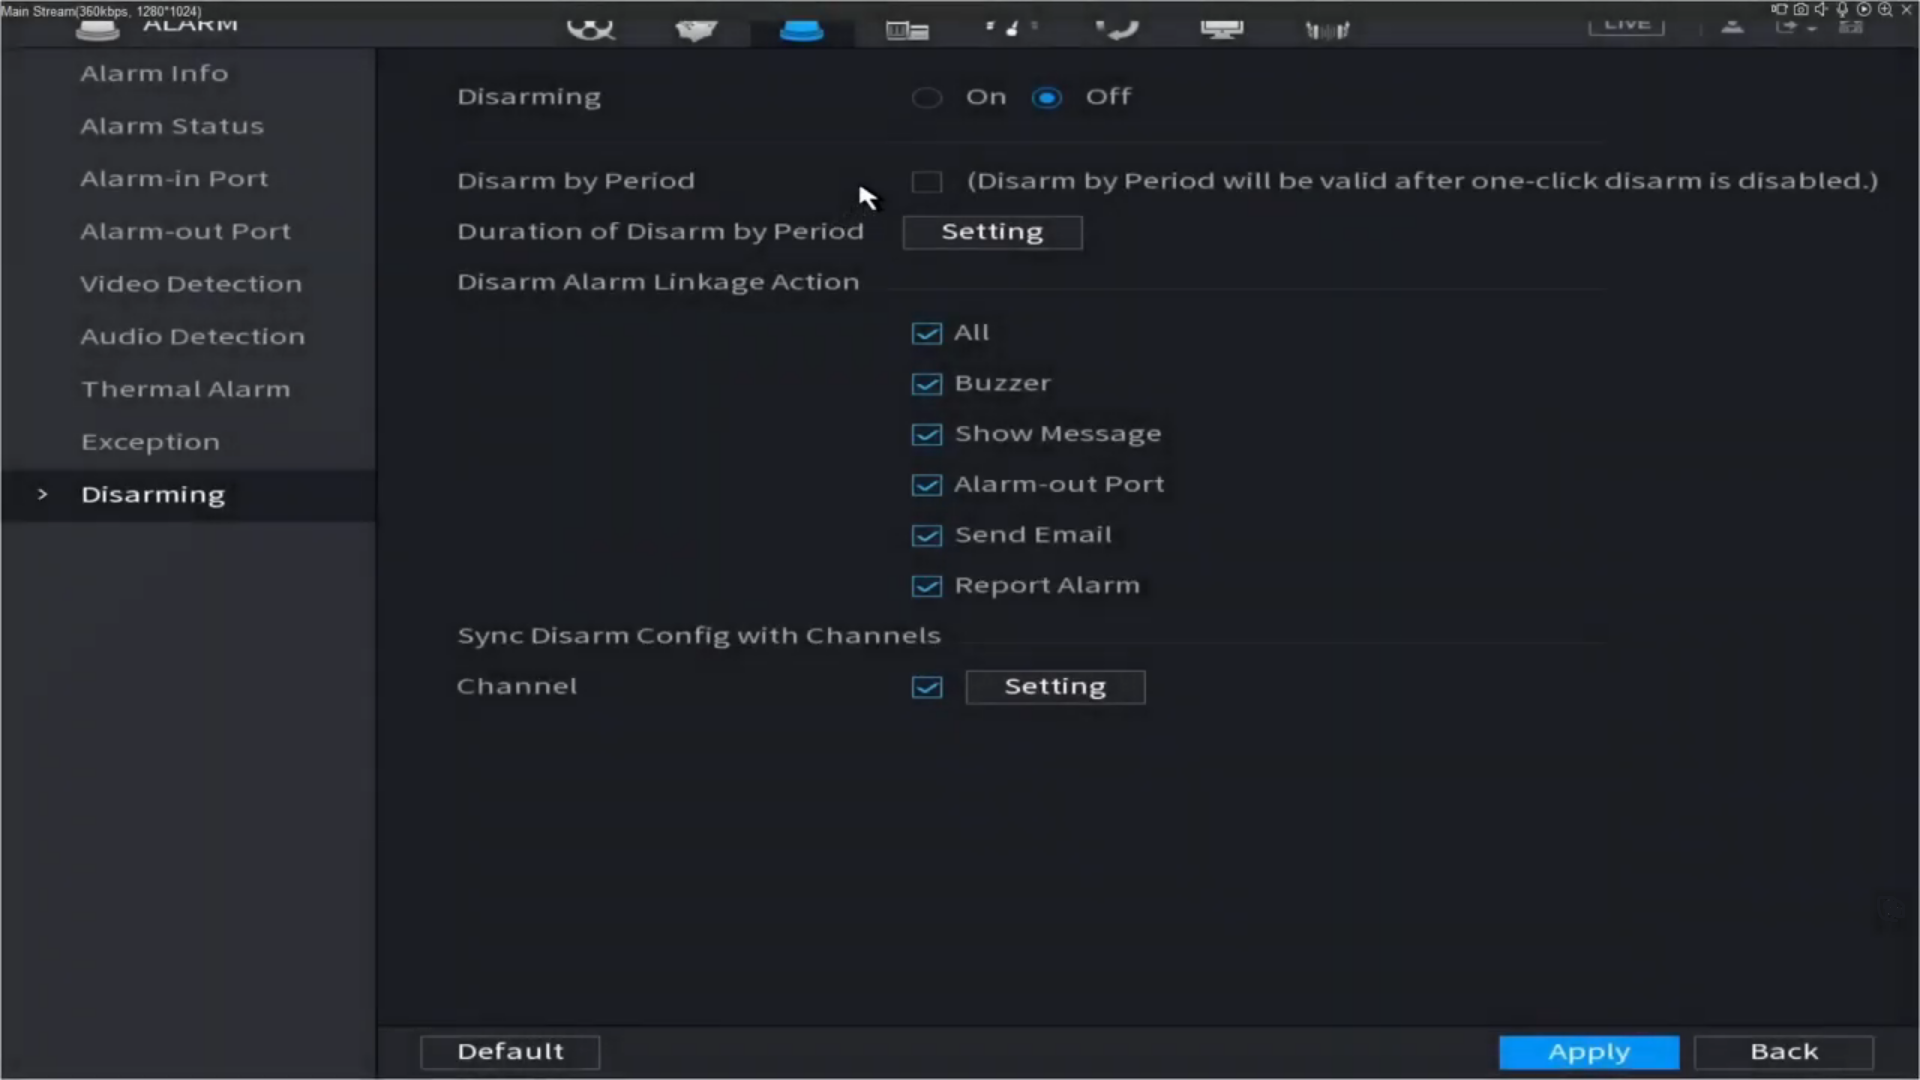
Alternatively, navigate to Main Menu > Alarm > Disarming.
Set Disarming to On to disable deterrence features.
Set Disarming to Off to turn them back on.
How to toggle Disarming on/off via alarm input on NVR
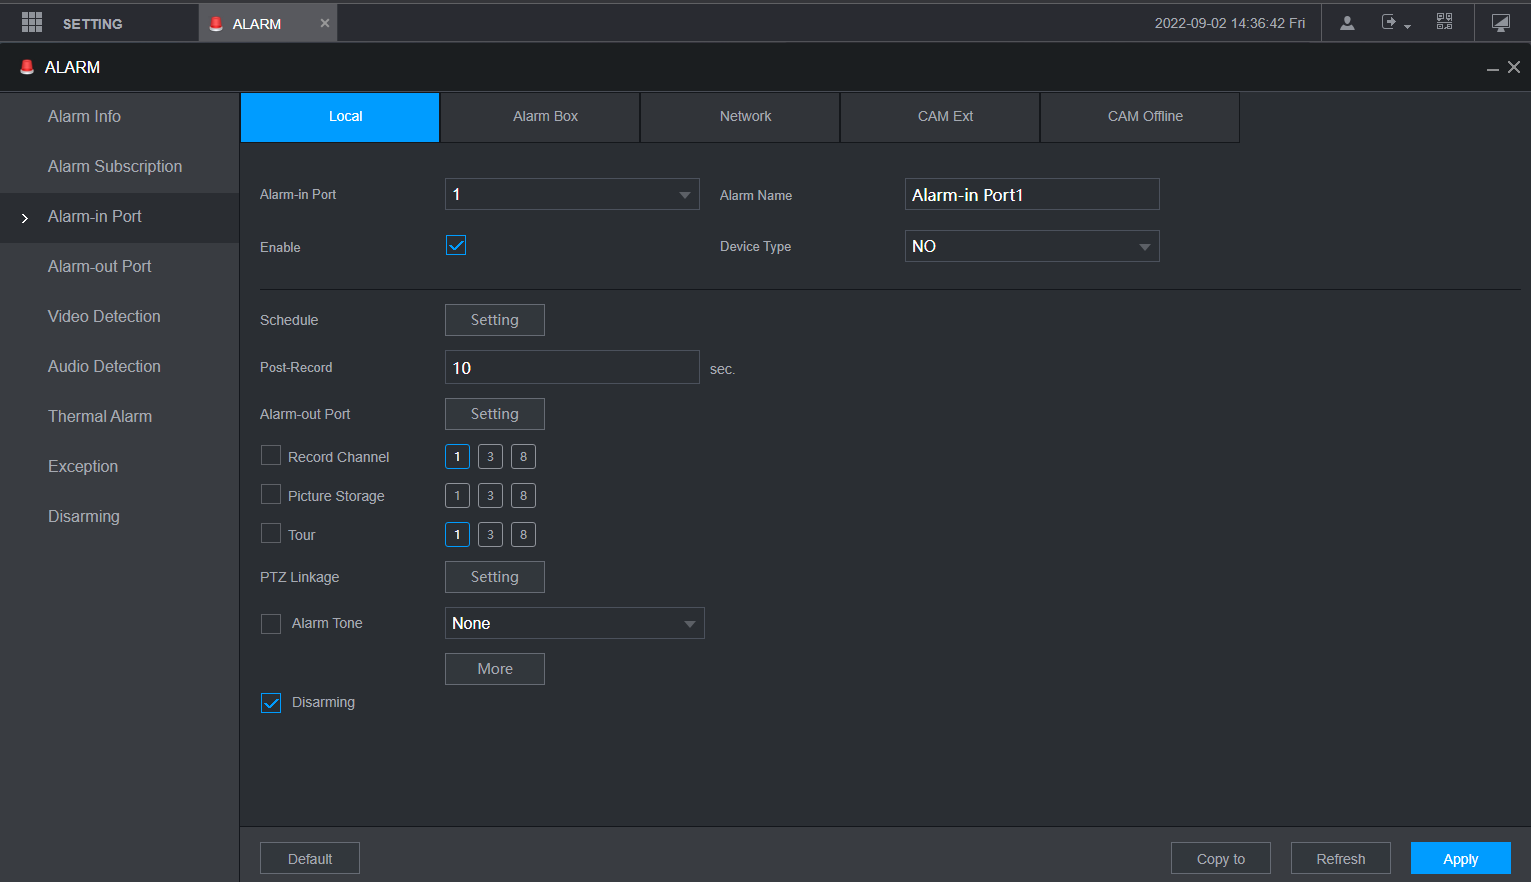
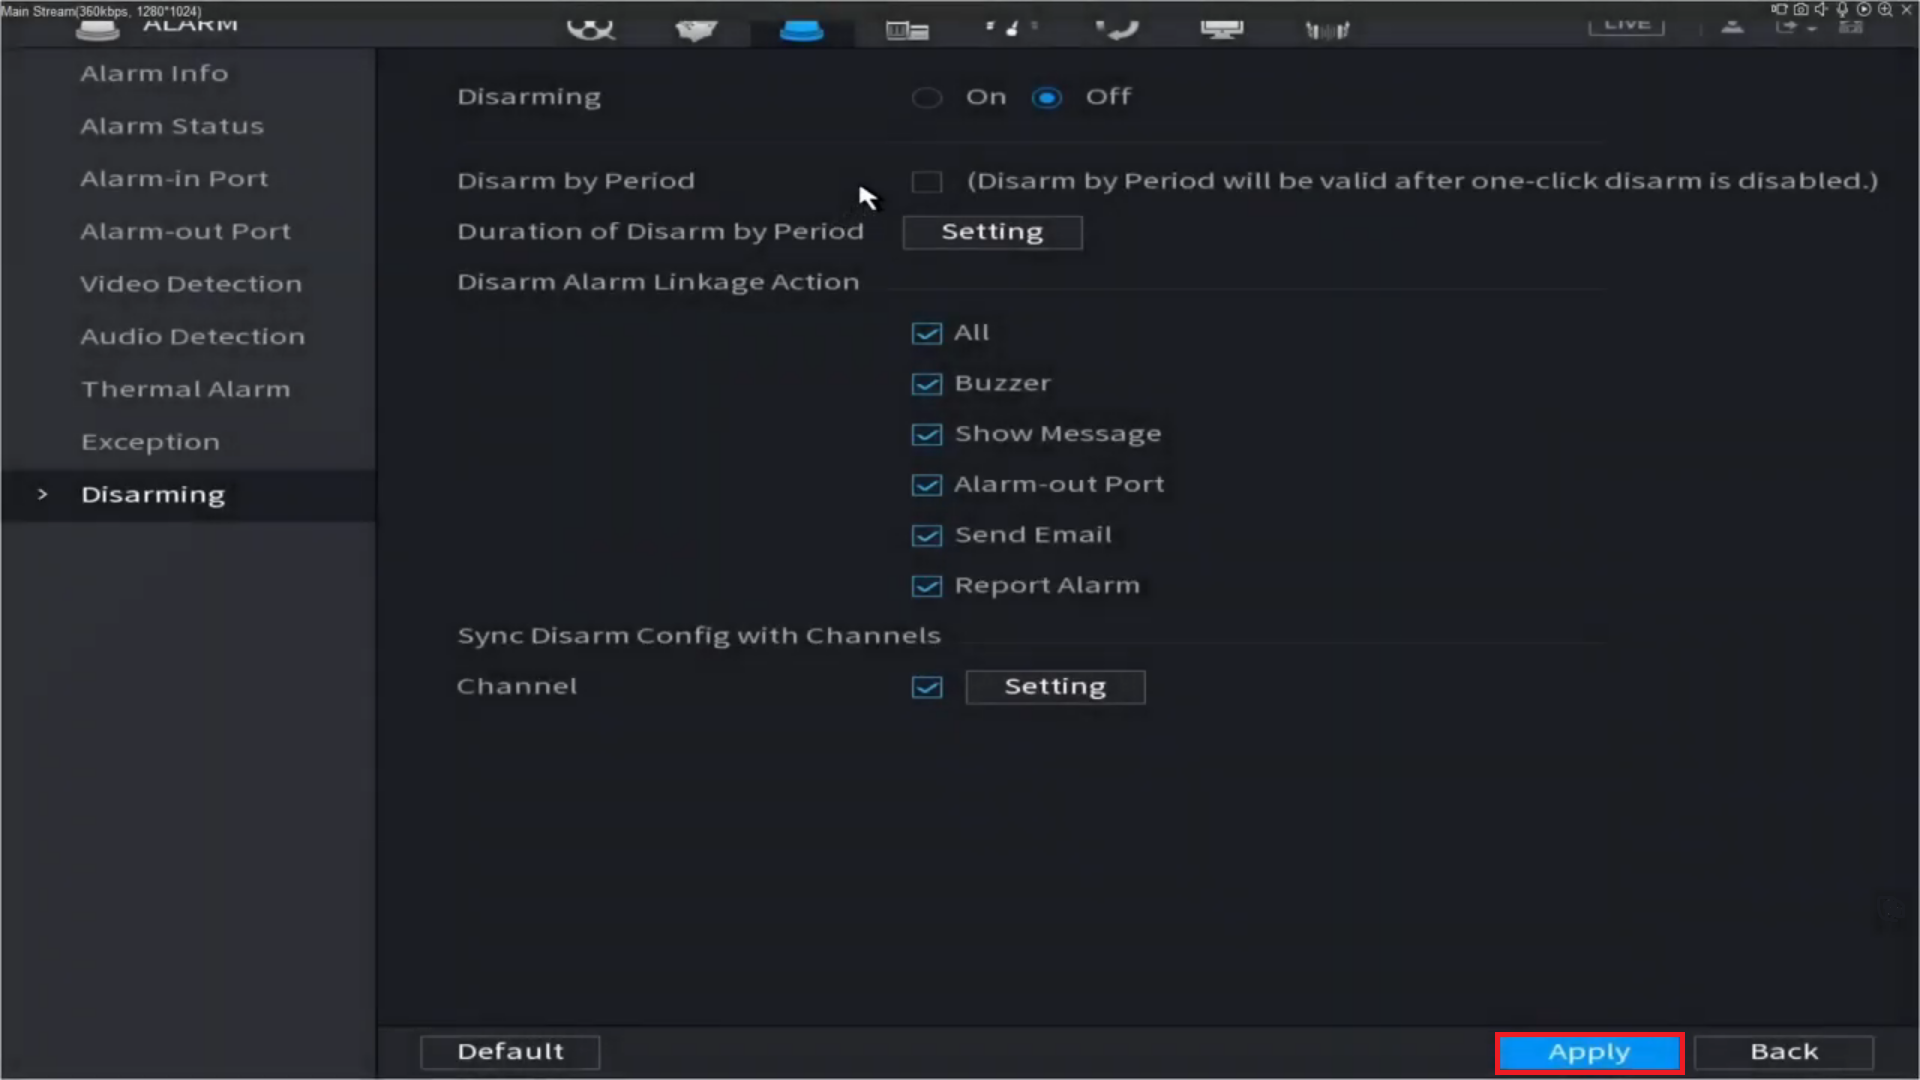
- On the NVR navigate to Main Menu > Alarm > Alarm-in Port > Local
- Select the Alarm-in Port that the device is connected to.
- Tick Enable.
- Tick the Disarming box.
- Click Apply.
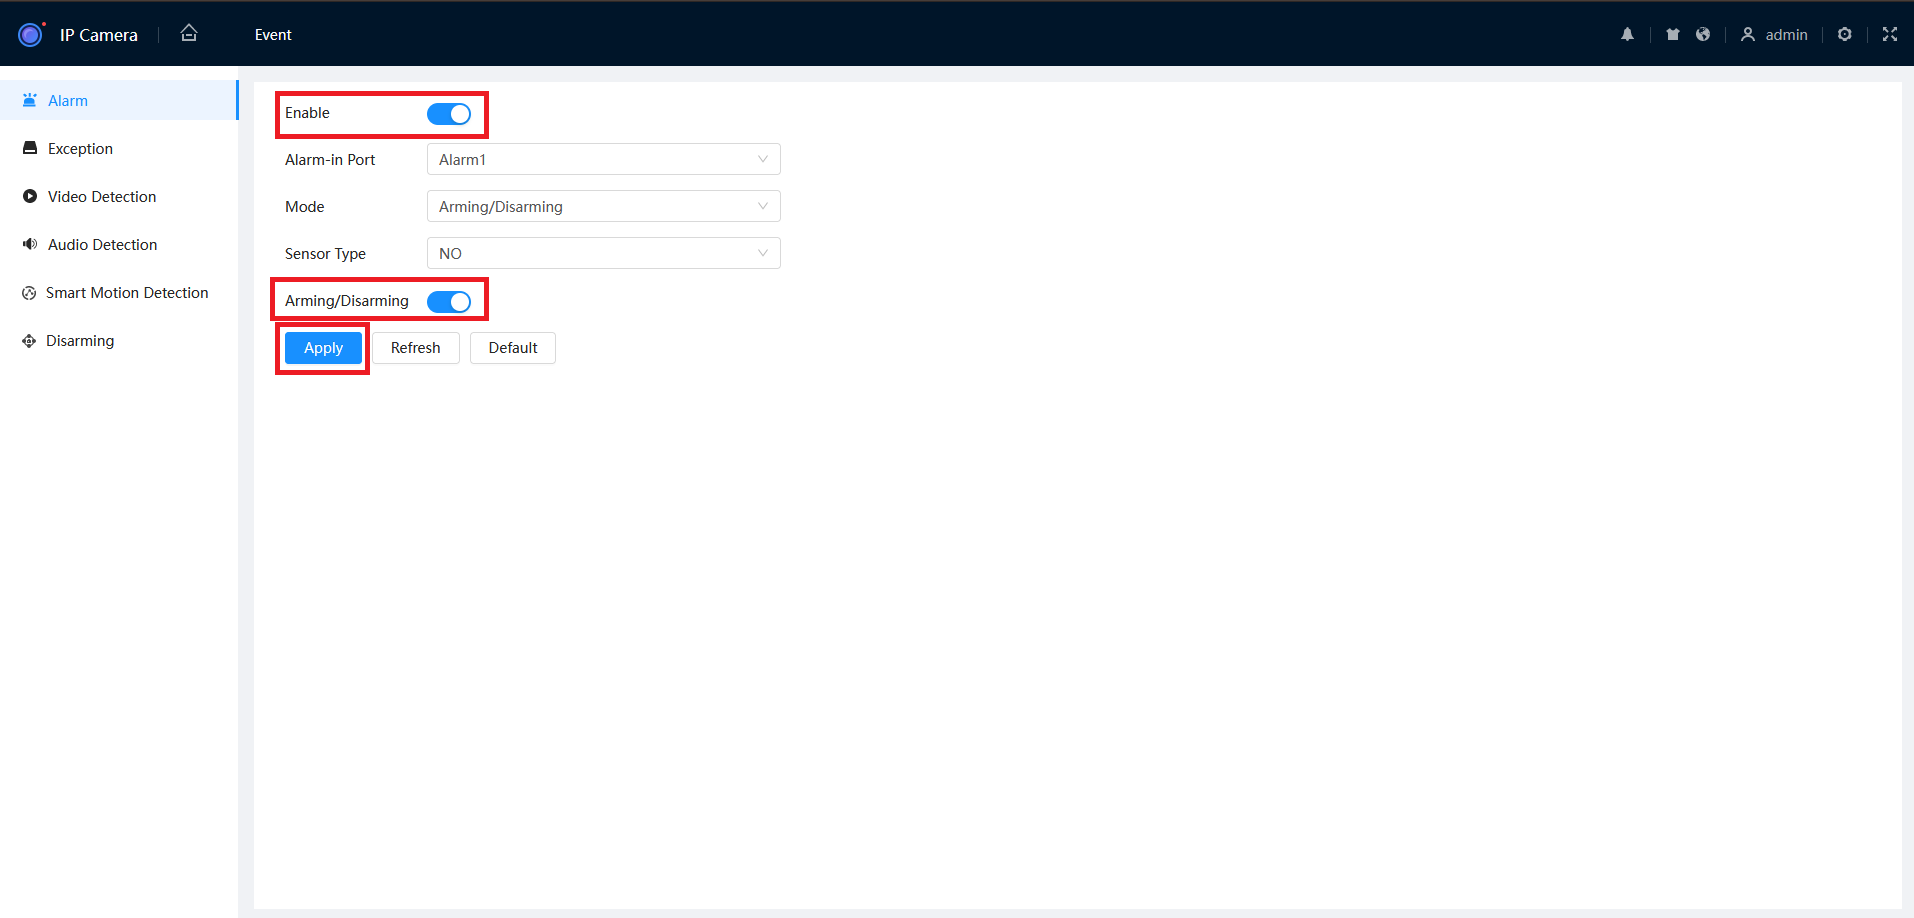
How to toggle Disarming on/off via alarm input on Camera (Web interface 5.0)
- From the home page, navigate to Event > Alarm.

- Change the mode to Arming/Disarming.
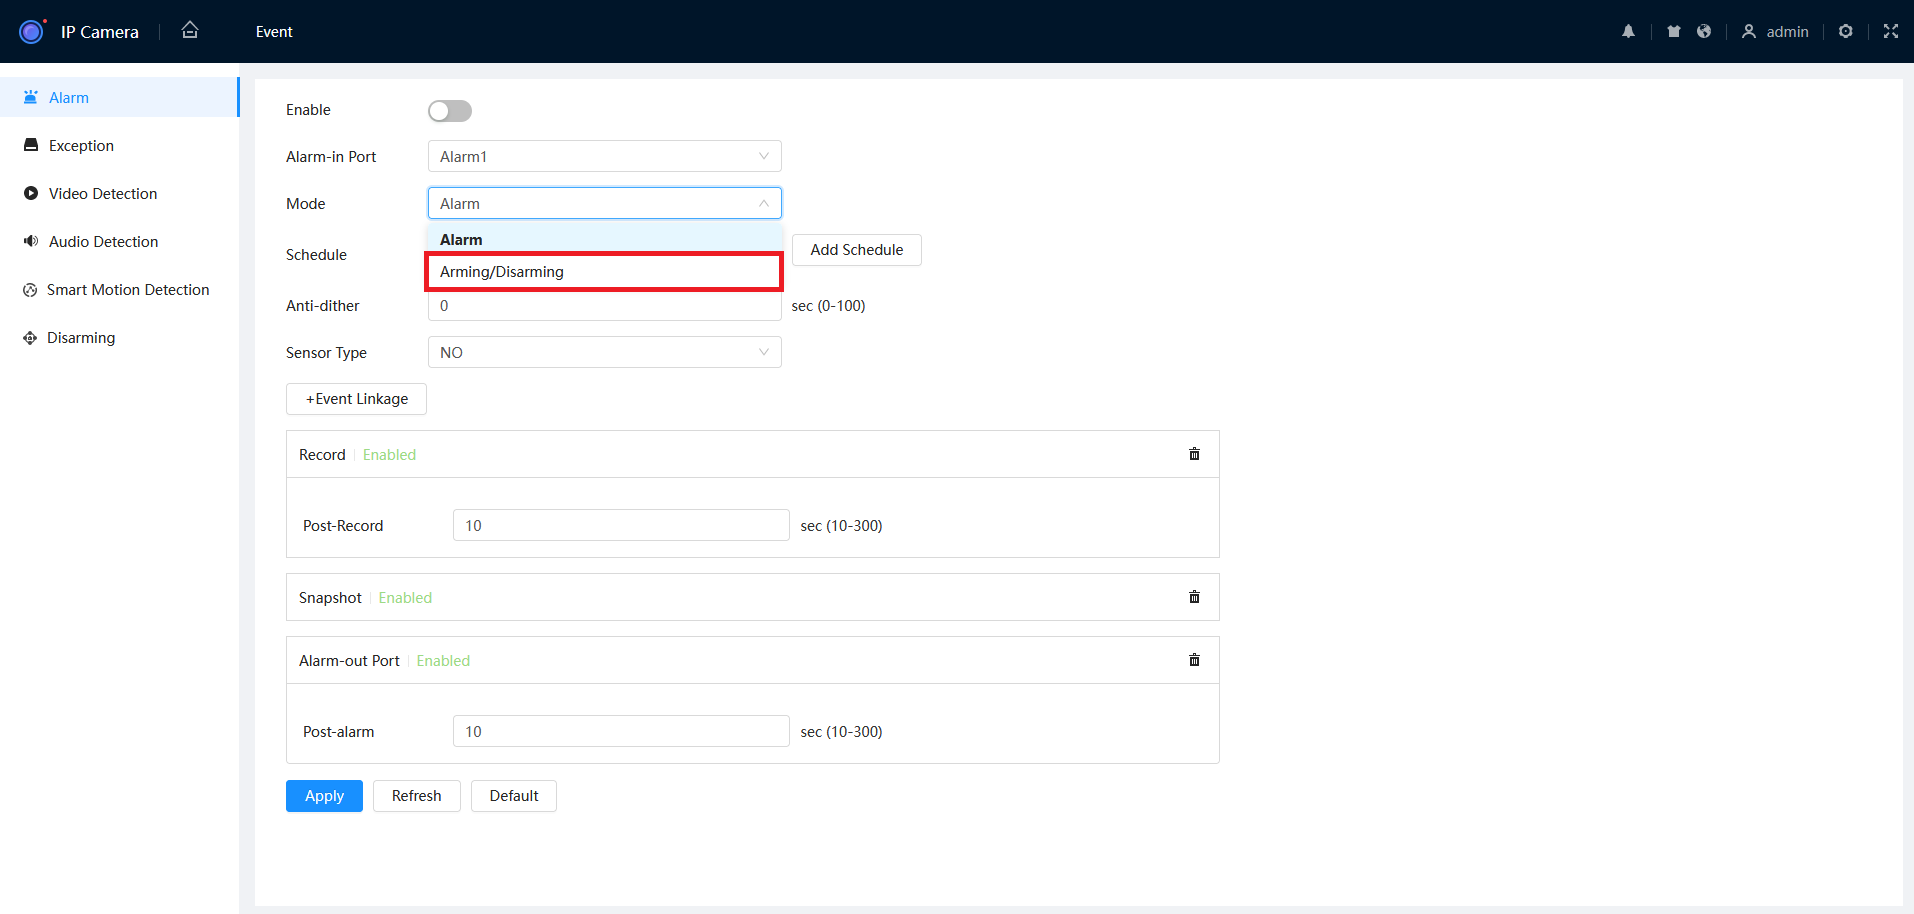
- Set the Enable Status and Arming/Disarming Status to On, then press Apply.
How to toggle Disarming on/off via alarm input on Camera (Web interface 3.0)
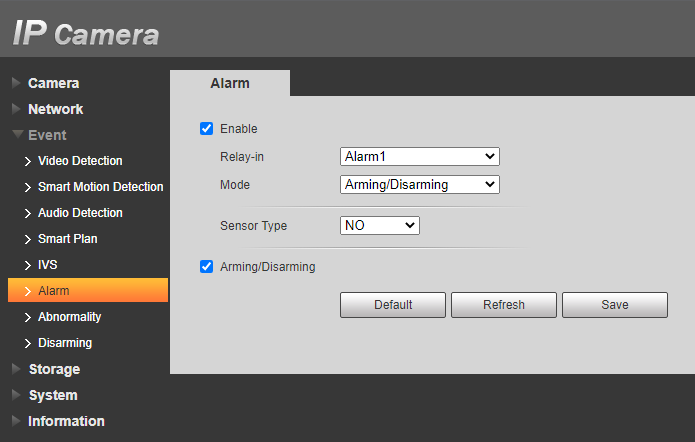
- In the web interface of the camera, navigate to Setup > Event > Alarm.
- Tick the Enable option.
- Set Relay-in to Alarm1.
- Set Mode to Arming/Disarming.
- Set Sensor Type to the type of Switch being used.
- Tick Arming/Disarming.
- Click Save.
How to Disarm the Alarm on a Schedule via NVR
Info
This feature is available on compatible NVR models only. Please ensure that the NVR and the DMSS app are up to date.
- Navigate to Main Menu > Alarm > Disarming.
- Select Setting.
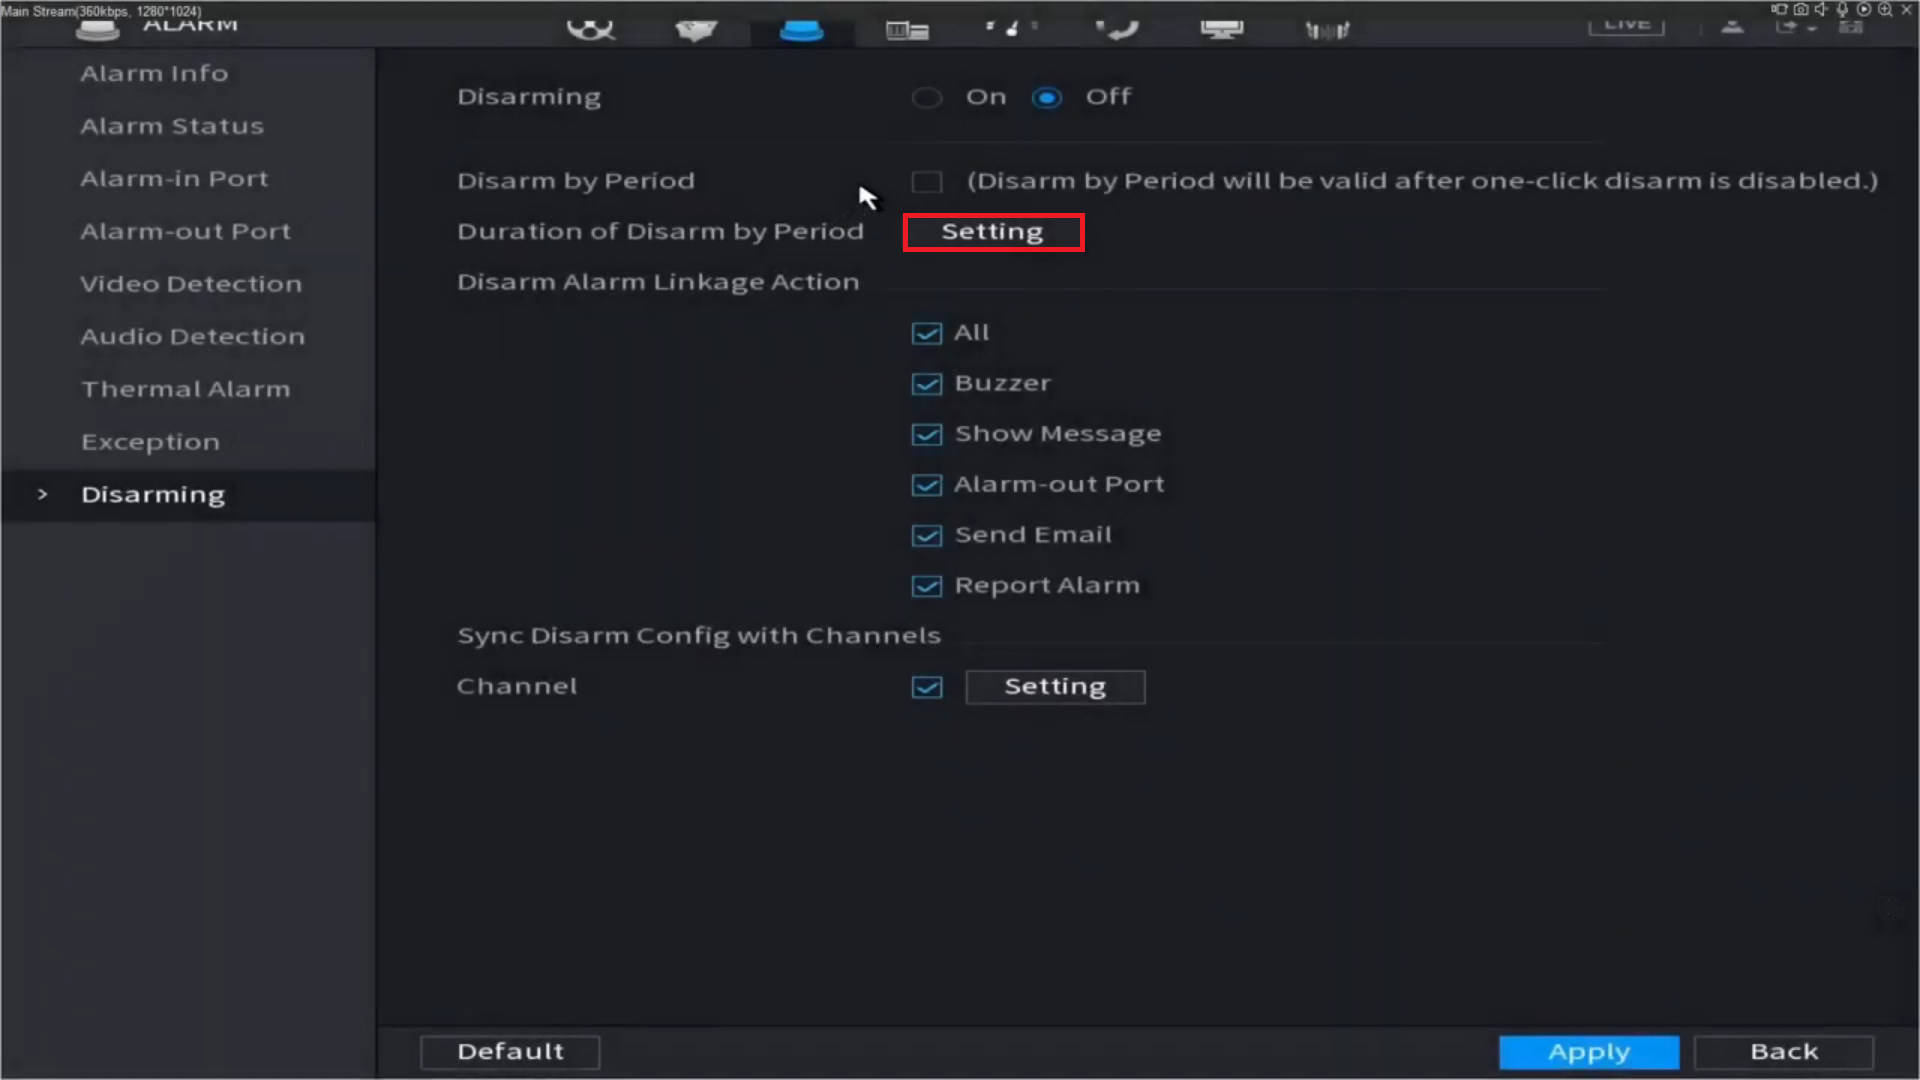
- Fill out Period settings, then click OK.
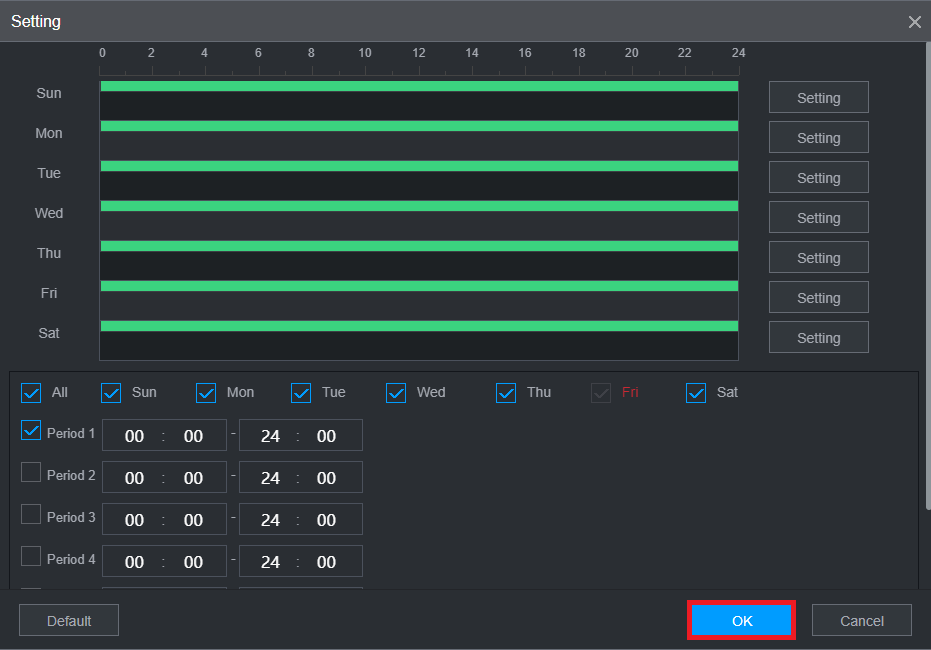
- Click Apply.
How to Disarm the Alarm on a Schedule via Web Interface 5.0
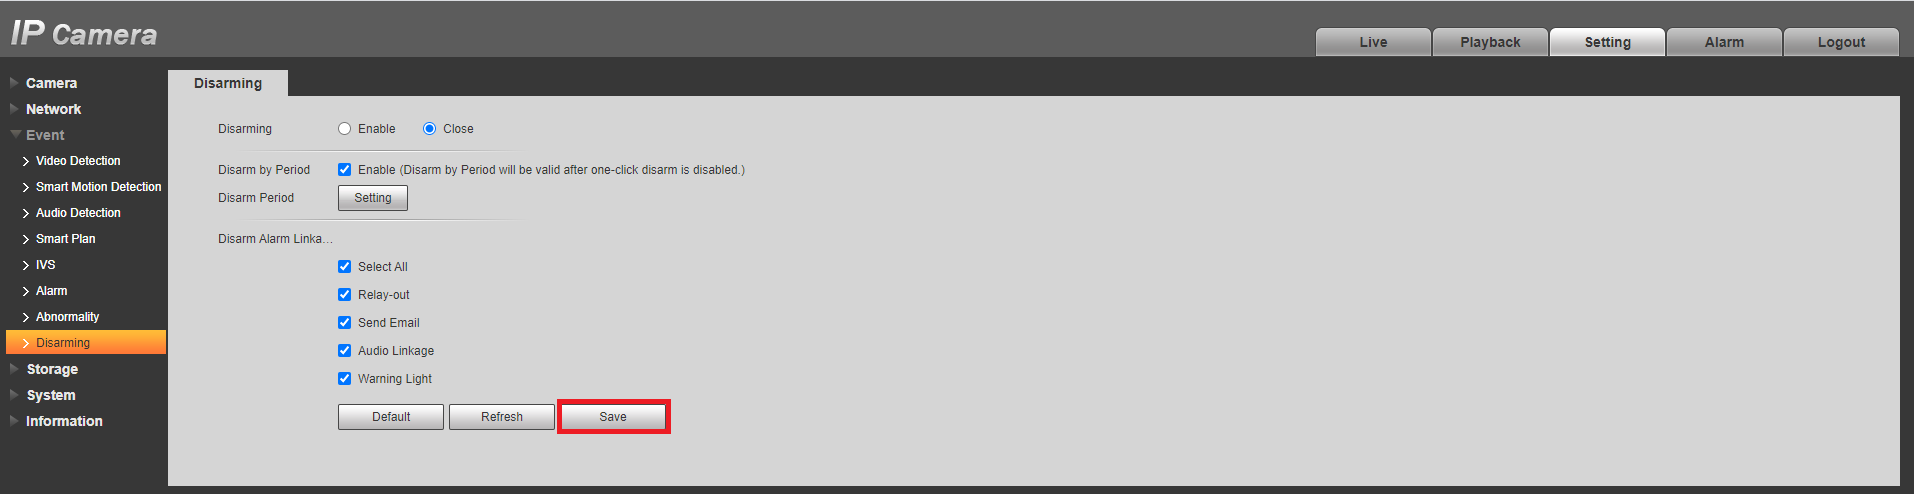
- From the home page, navigate to Event > Disarming.
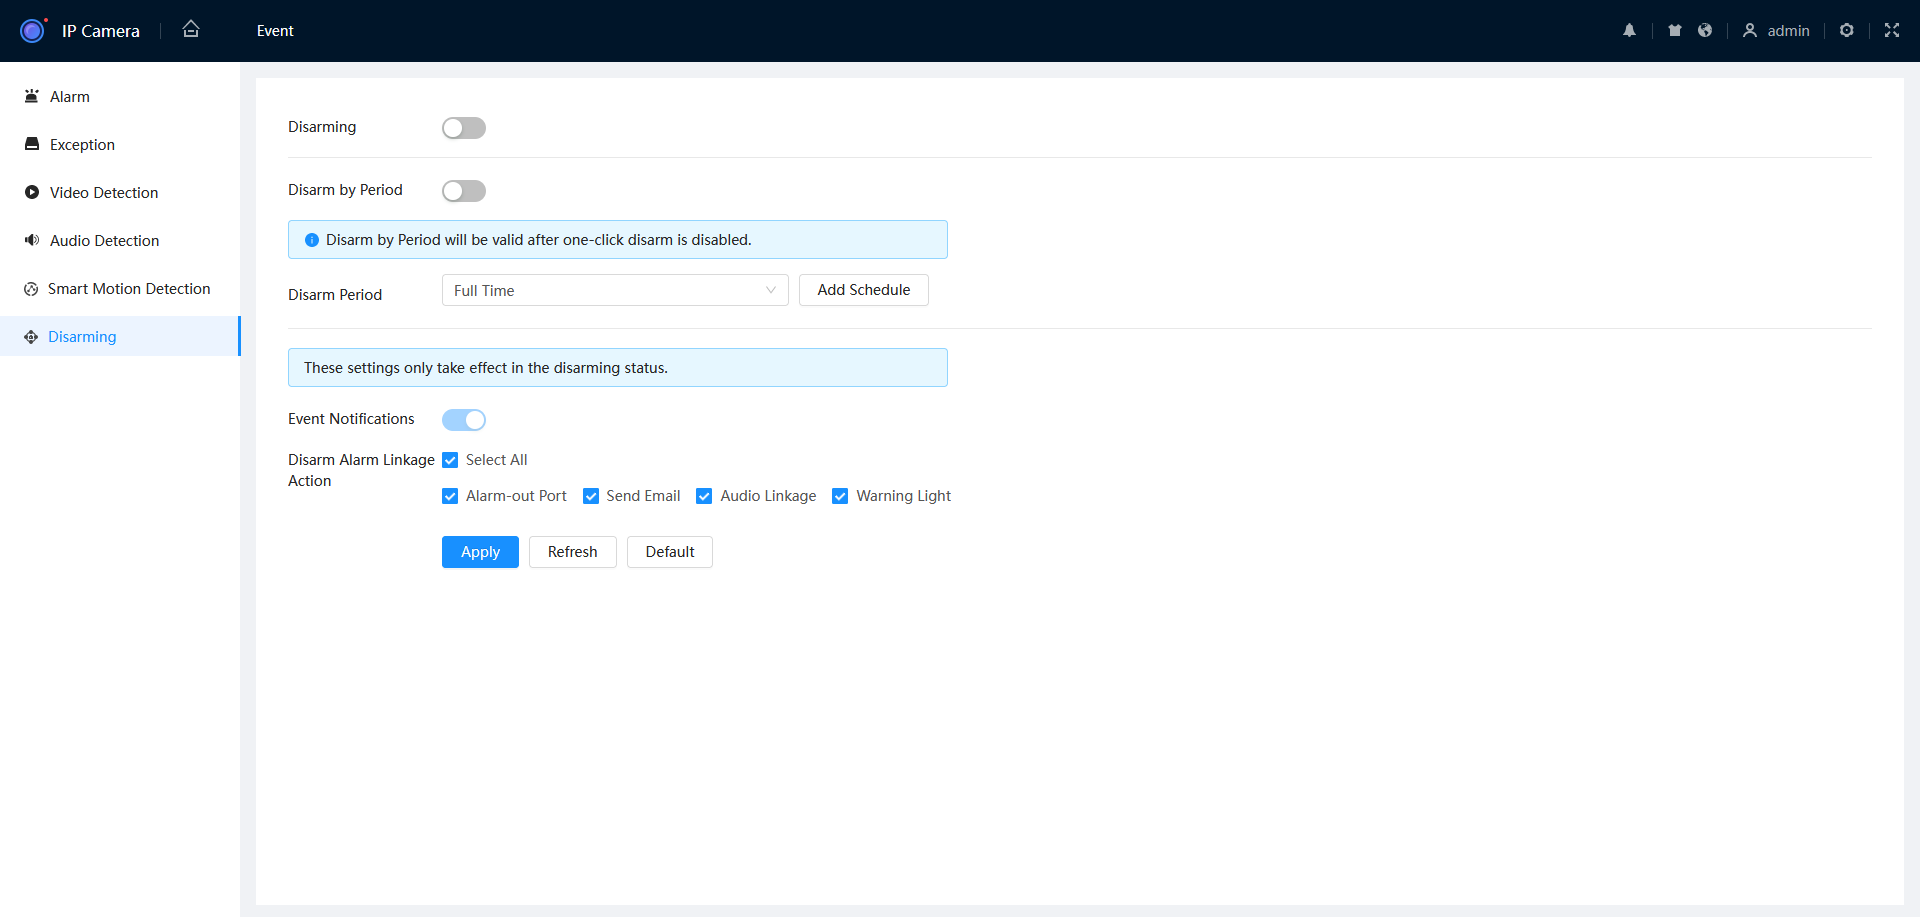
- Enable Disarm by Period.
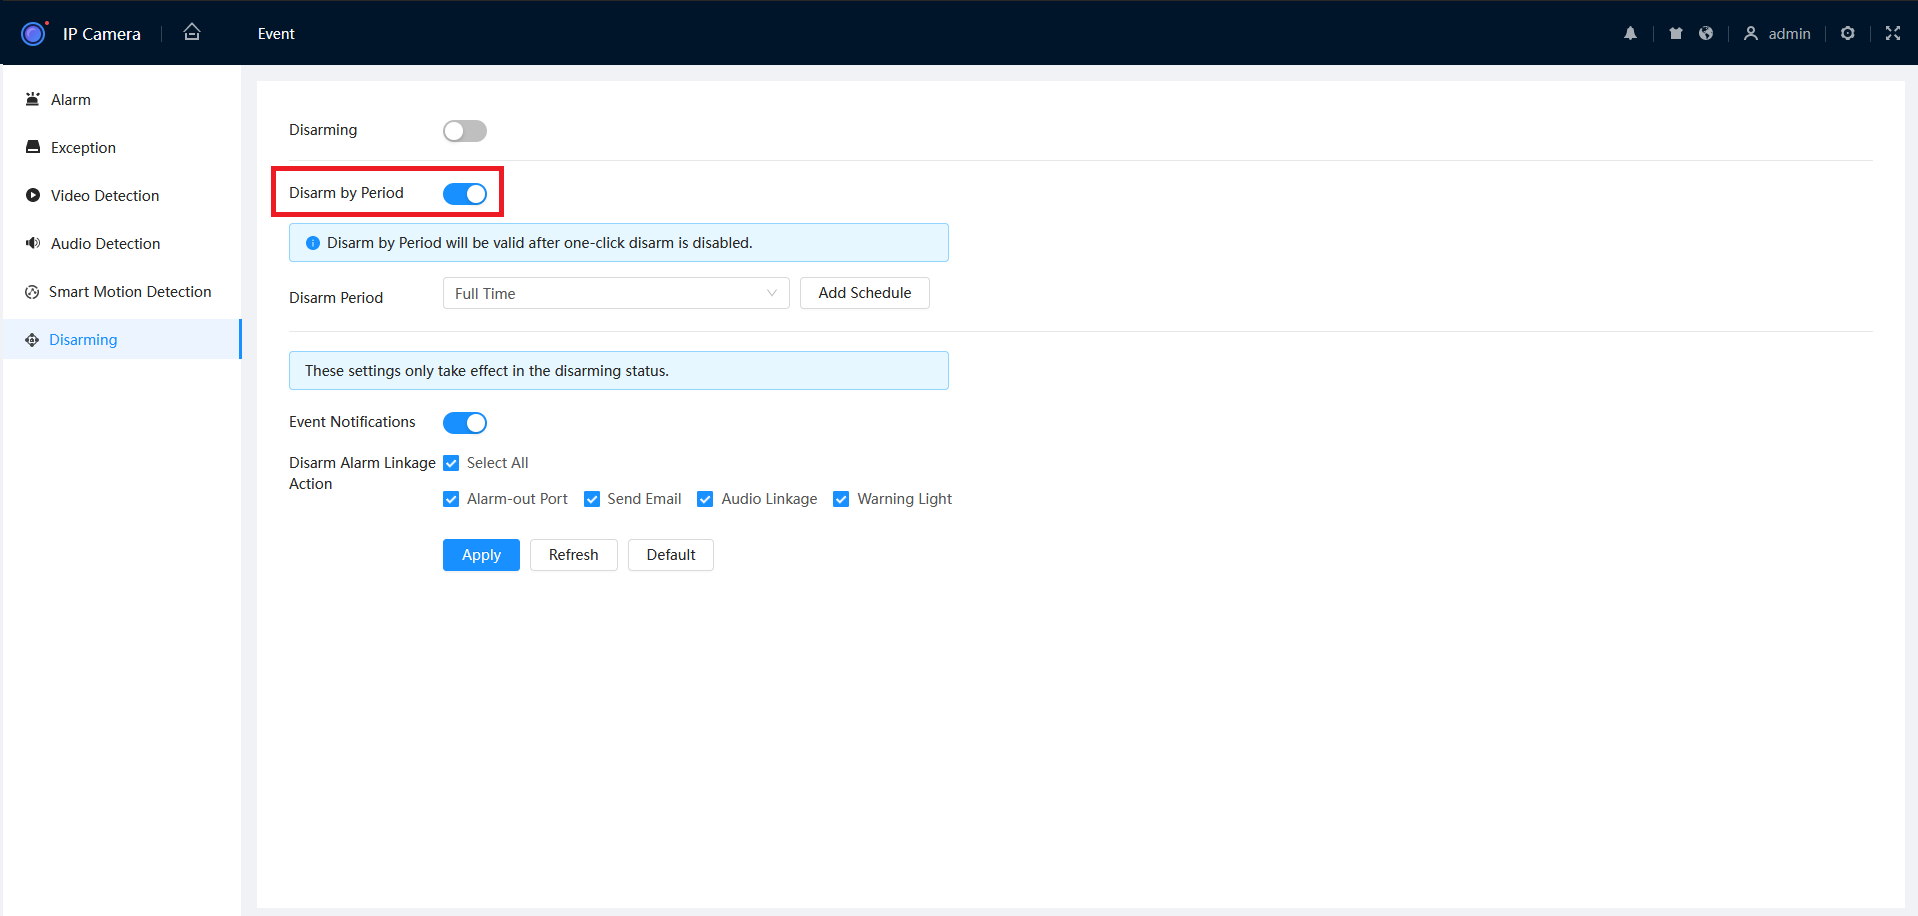
- Select Add Schedule.
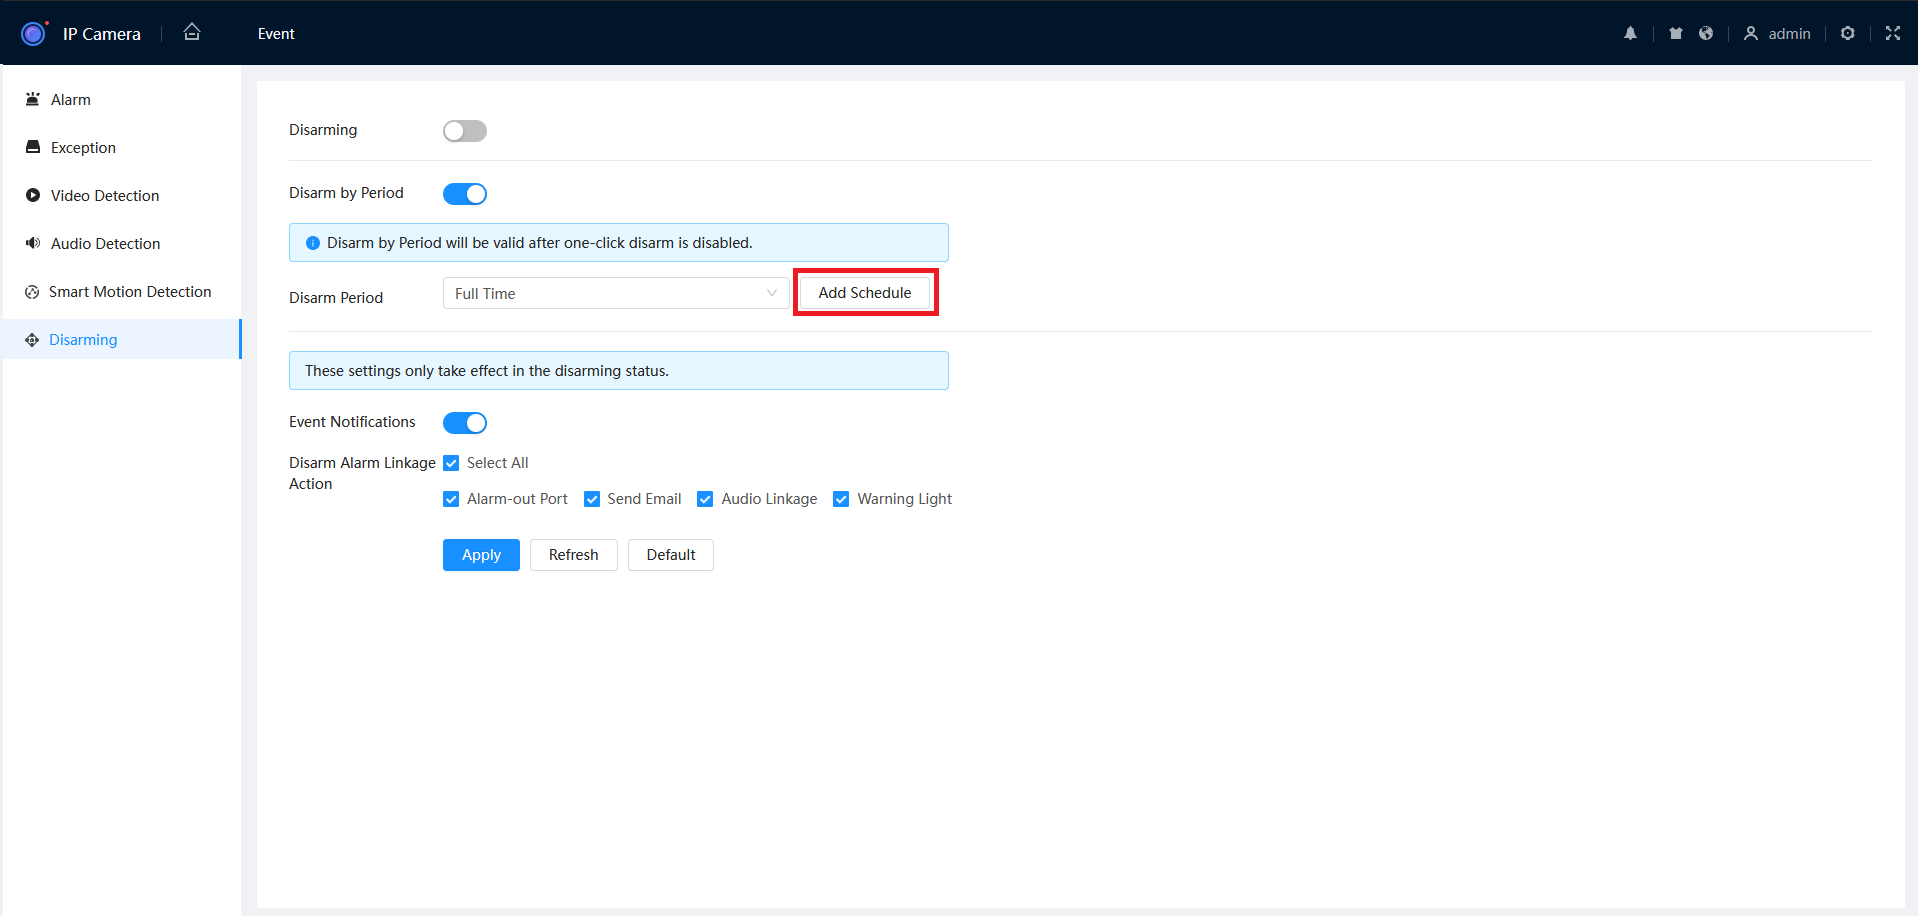
- Fill out the desired settings, then press Apply.

- Press Apply.
How to Disarm the Alarm on a Schedule via Web Interface 3.0
- Navigate to Setting > Event > Disarming.
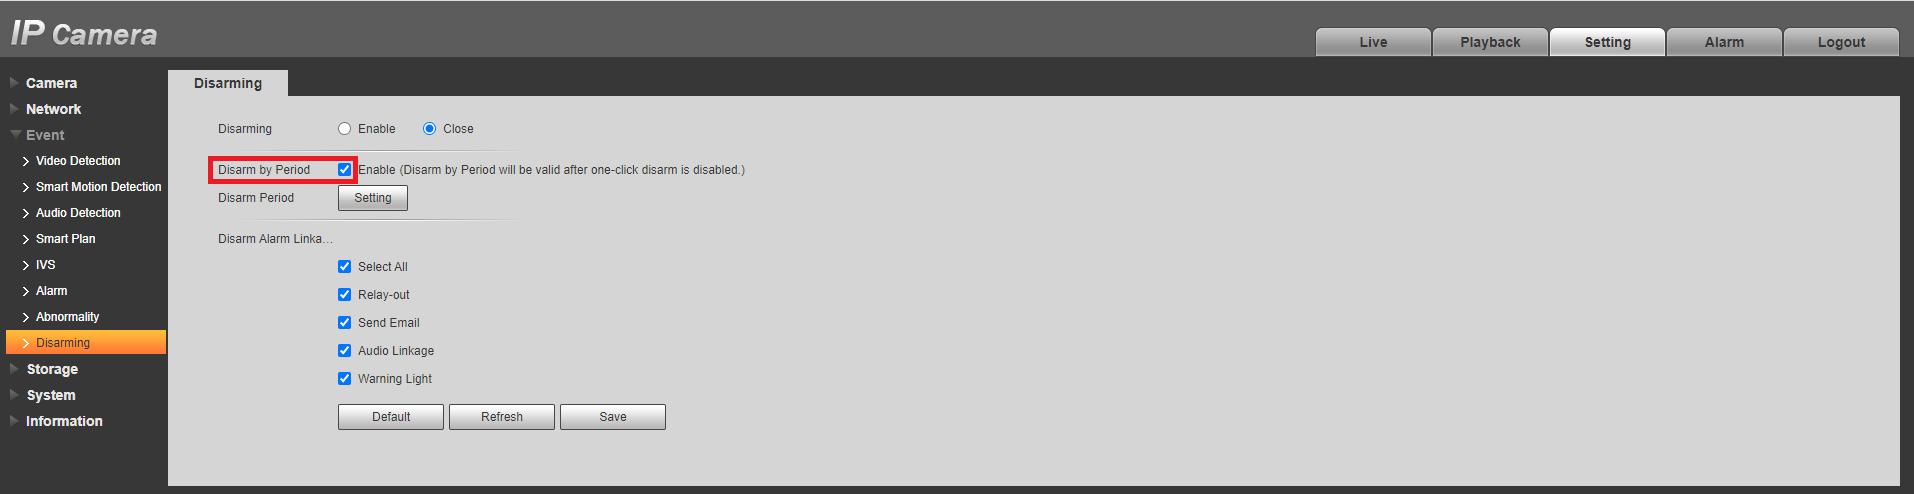
- Enable Disarm by Period.
-
Select Setting.
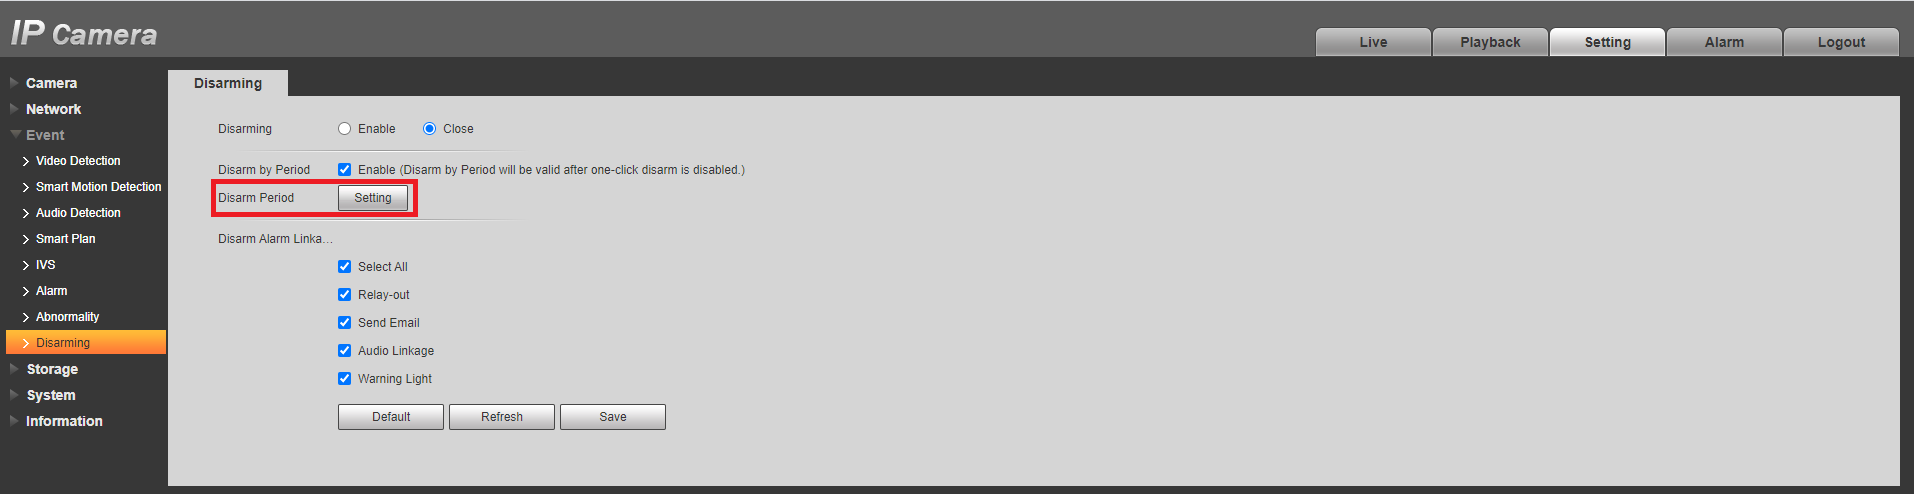
- Fill out Period Settings, then click Save.
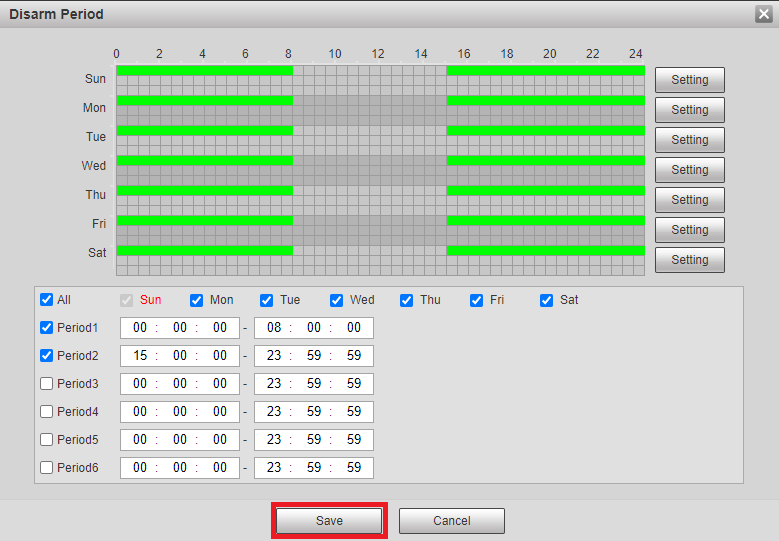
-
Click Save.
Illuminator Options
The second and third generation of Active Deterrence cameras (ID2 and ID3) have three options for night-time illumination.
- IR Mode - Infrared light with a black & white camera image.
- Warm Light Mode - White LED spotlight to illuminate the area enough to use 24/7 colour. The brightness of the white LED will adjust based on the amount of ambient light in the area.
- Smart Illumination Combination of the two above options. The camera remains in black & white infrared mode until a target is detected through SMD or IVS. Once detected, the camera switches to 24/7 color mode, and the white LED spotlight turns on if there isn’t enough ambient light. If no IVS rules are set the illuminator will follow the SMD region settings, ensuring the light only activates in the relevant detection areas for optimal video quality.
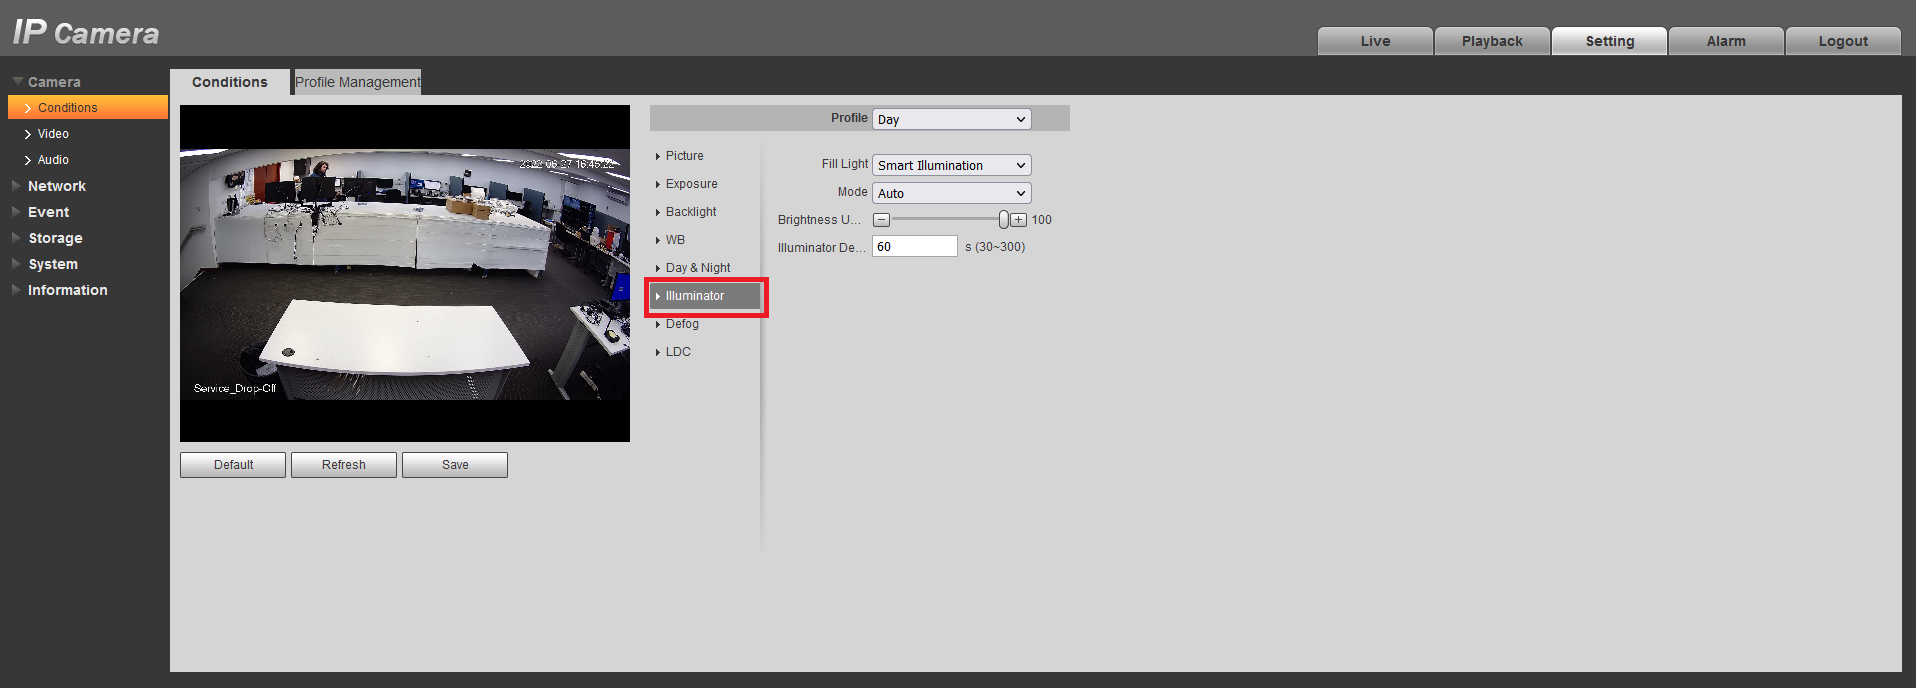
How to change Illuminator Options via Web Interface 3.0
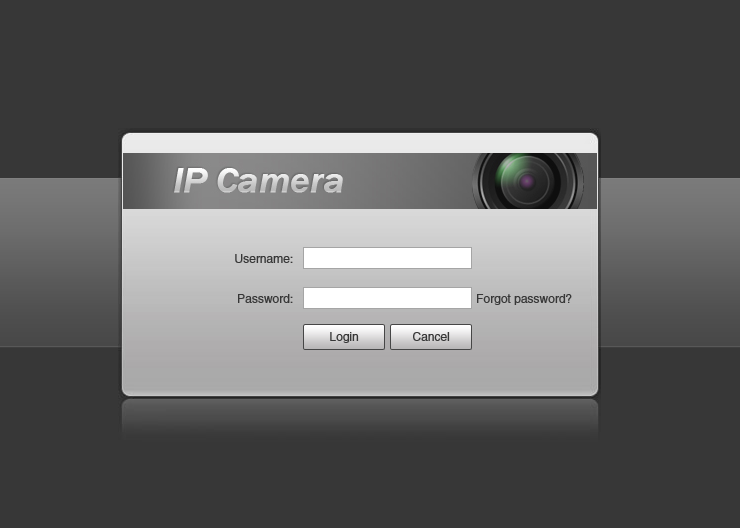
- Connect to the camera's web interface.
-
Login to the camera.
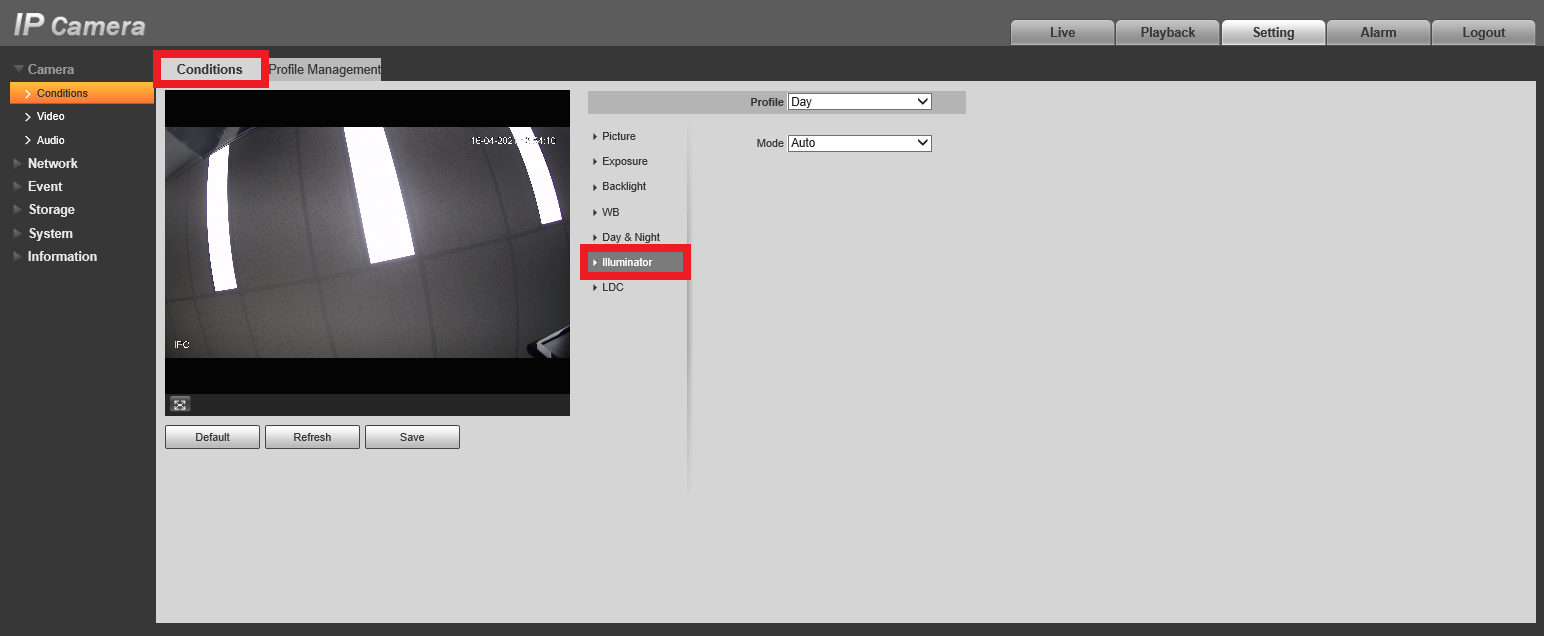
- Select Settings, Conditions, then Illuminator.
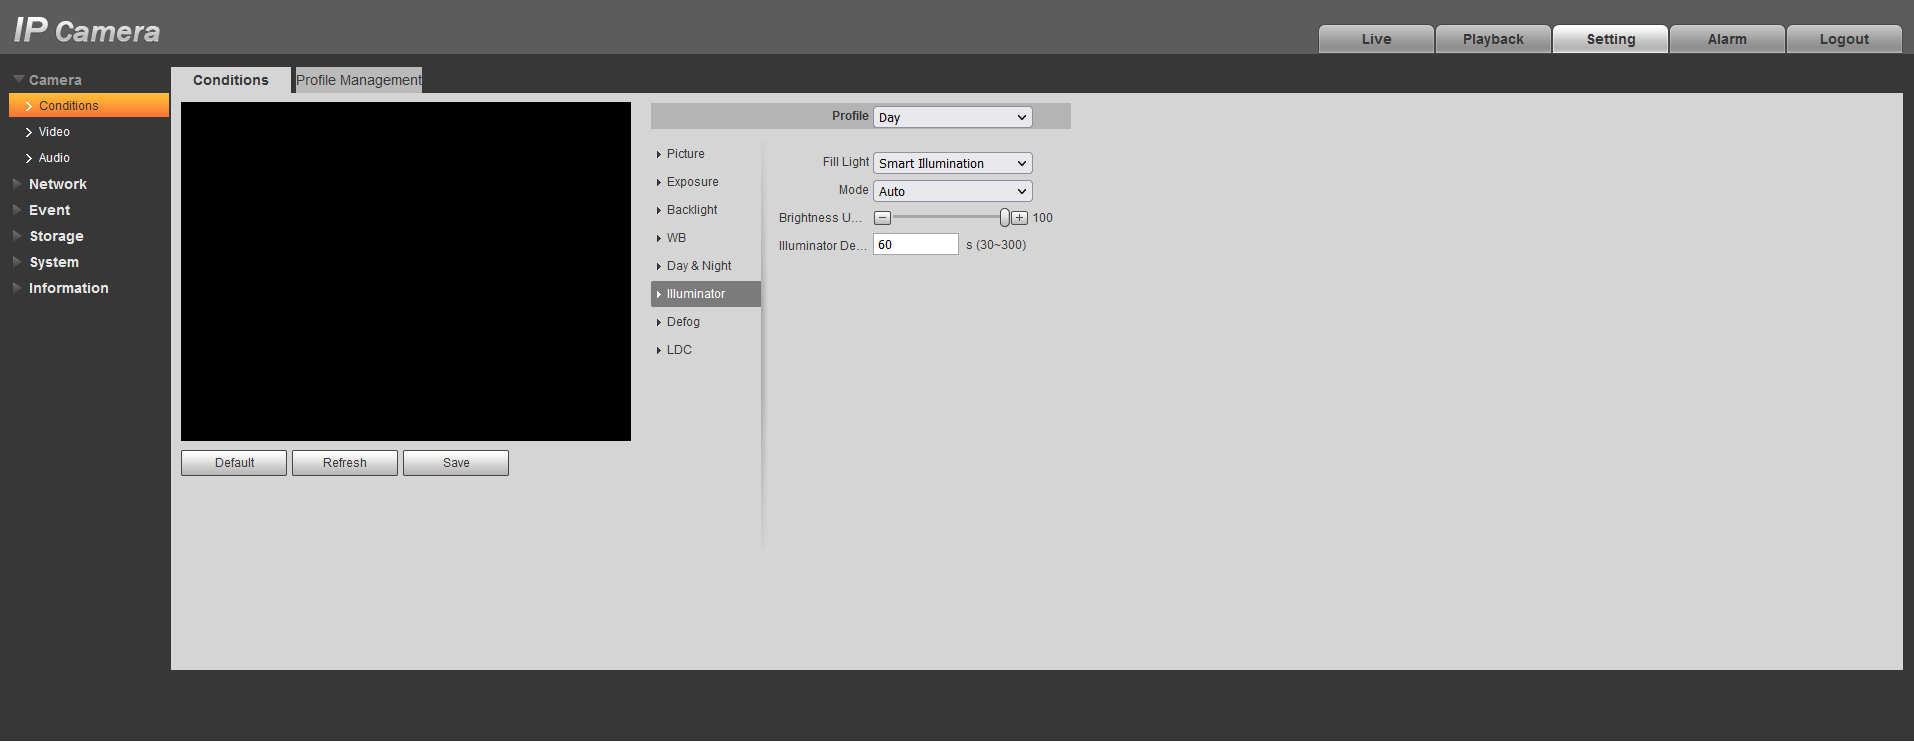
- Under the Night profile, set the Fill Light to Smart Illumination then press Save.

- Select Profile Management, then Full Time.

- Press Save.
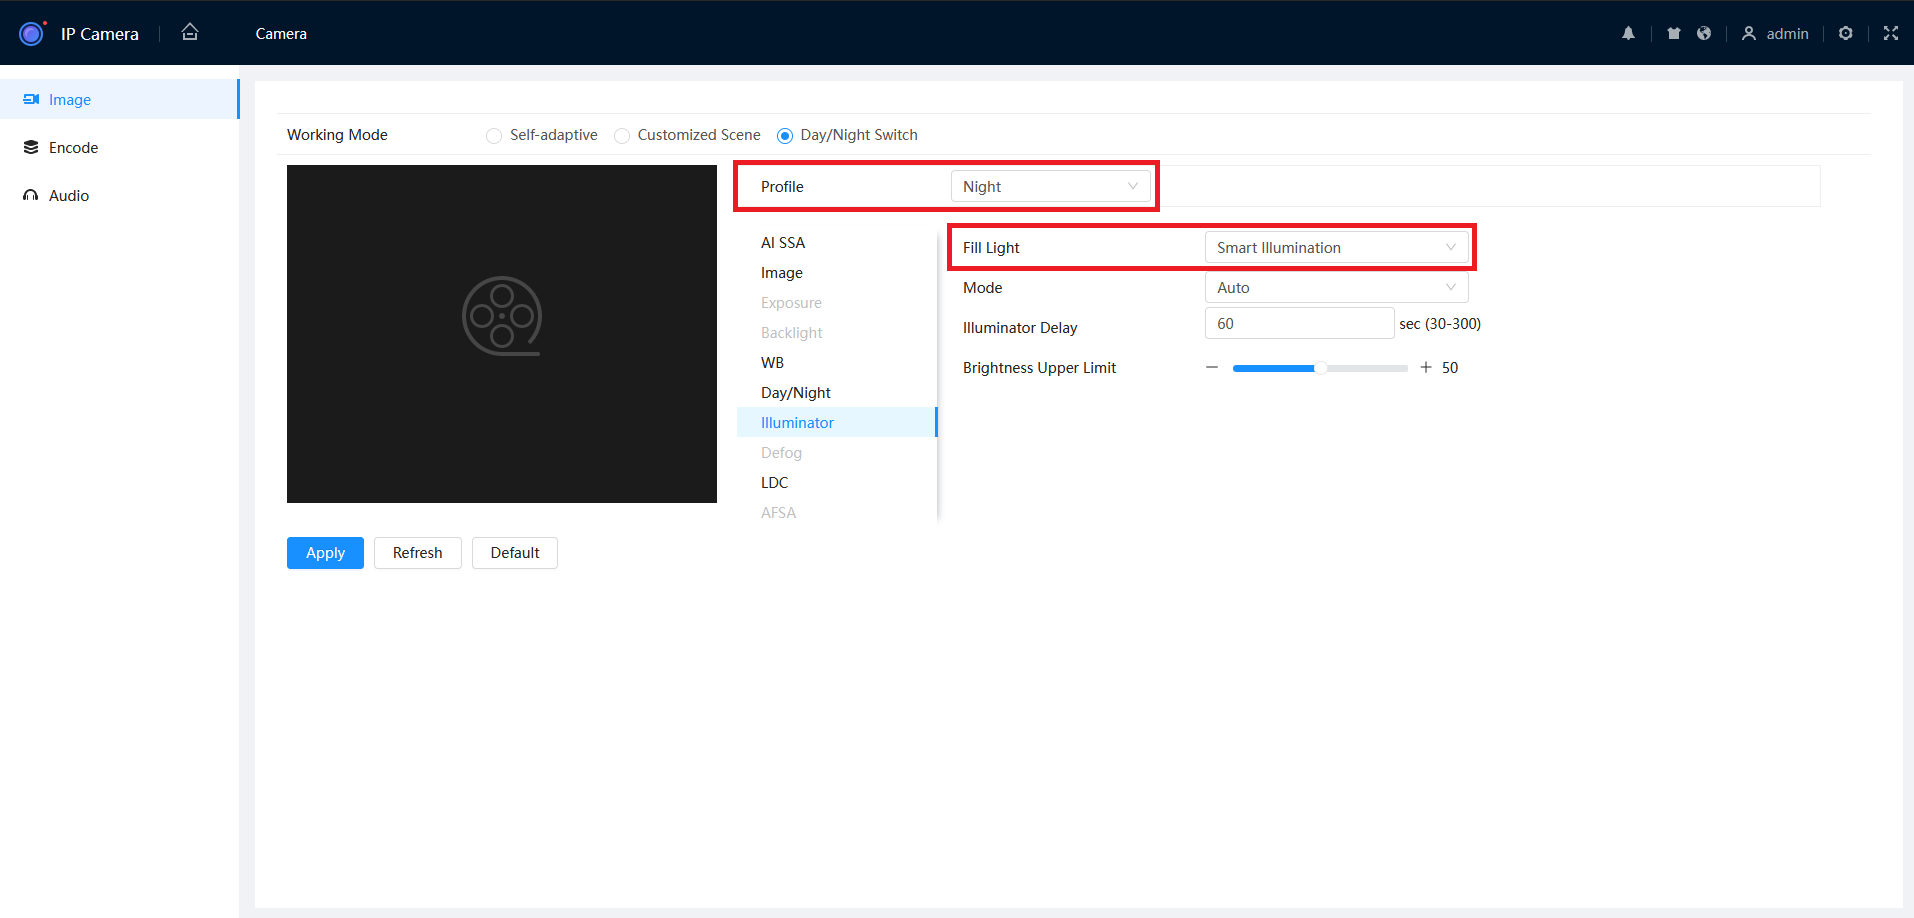
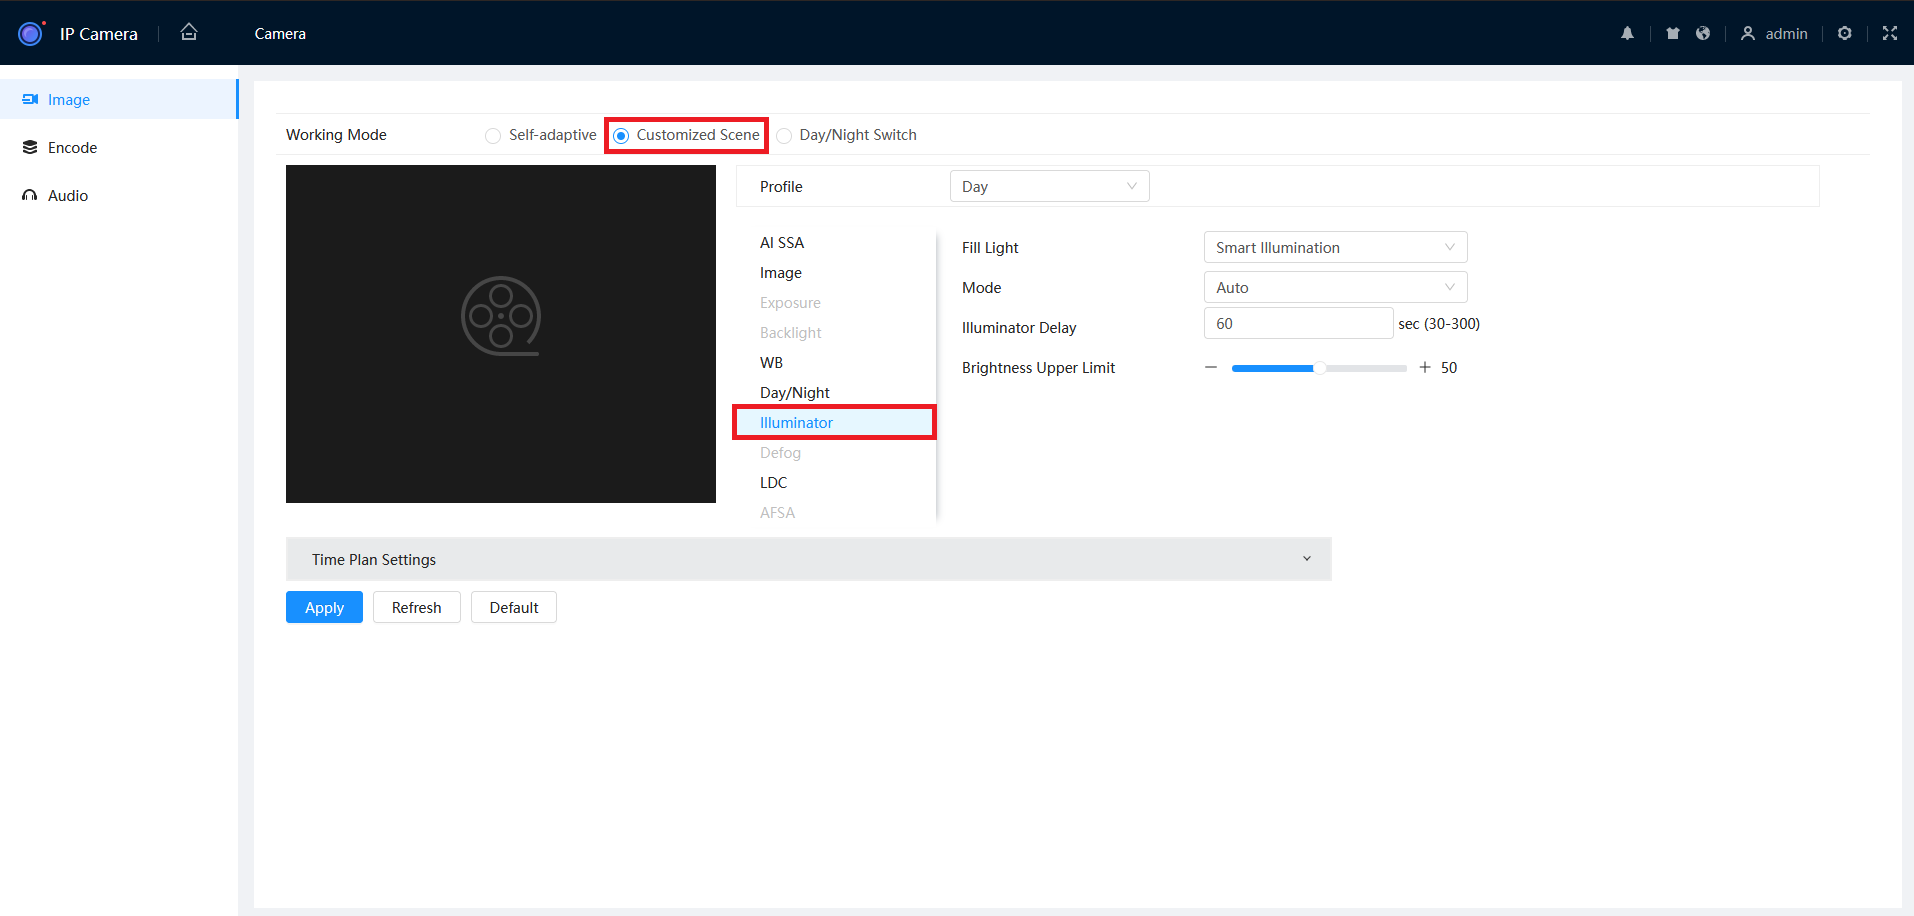
How to change Illuminator Options via Web Interface 5.0
- From the home page, navigate to Camera > Image.
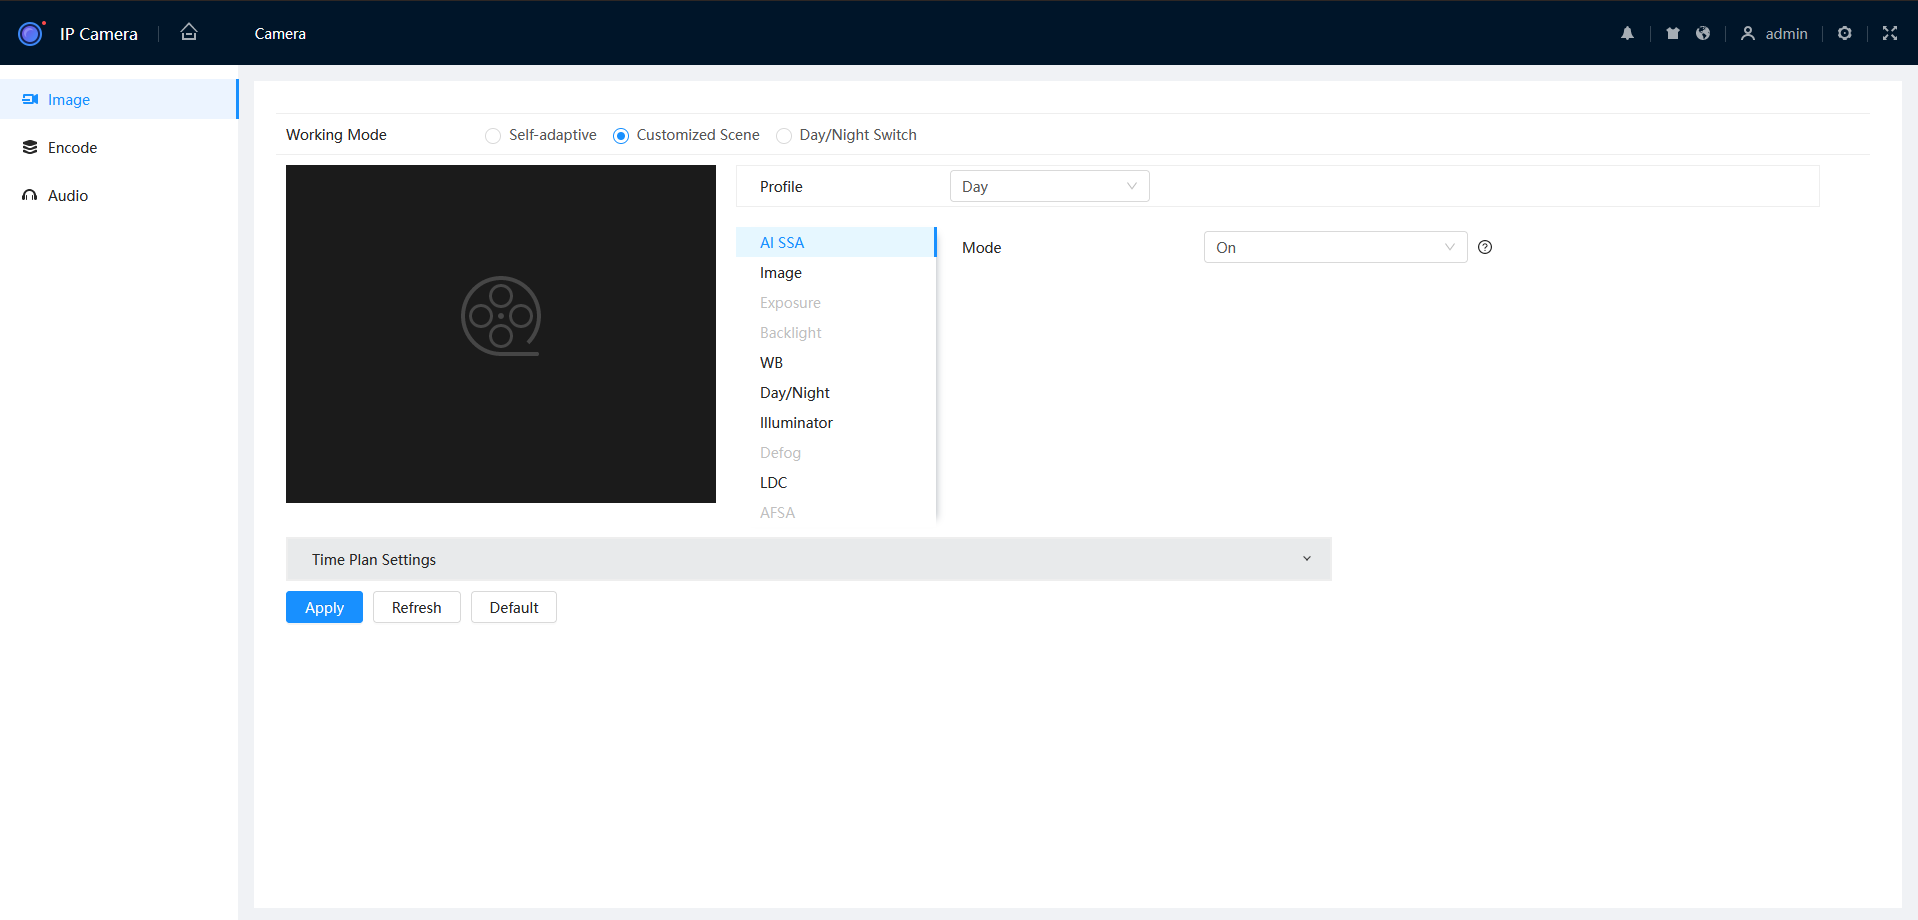
- Set the Working Mode to Day/Night Switch, then choose Illuminator.
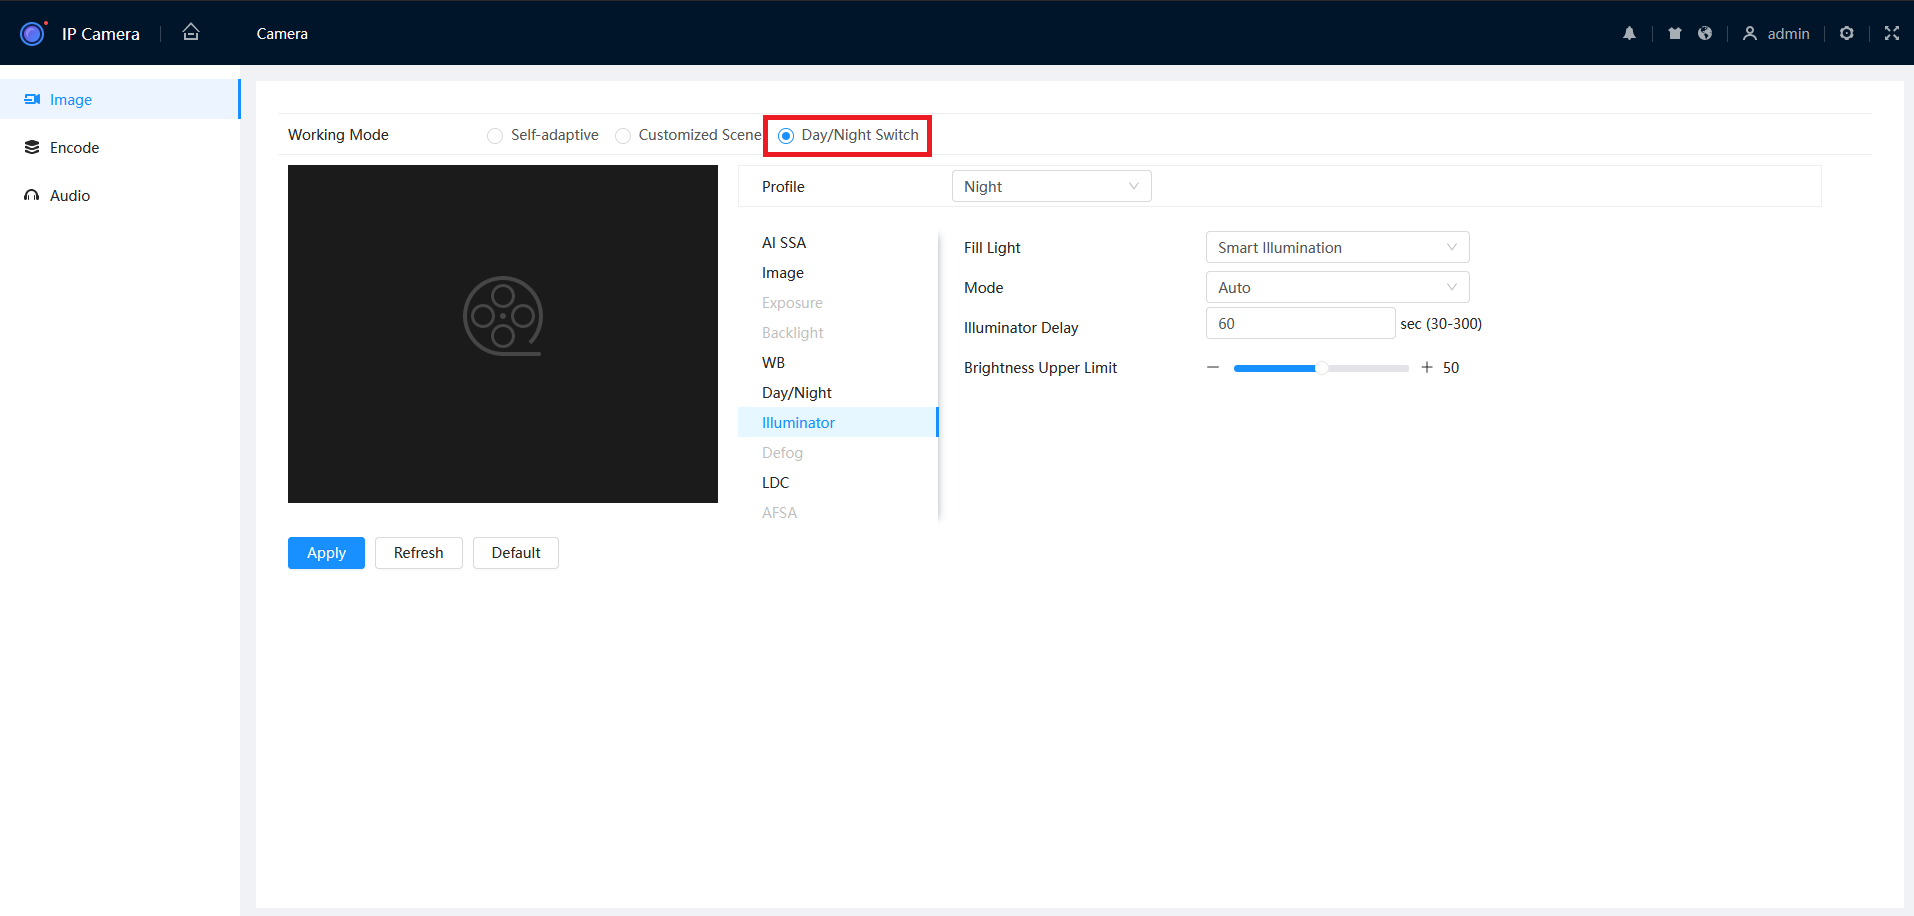
- Set the Profile to Night, then set the Fill Light to the desired setting.
How to change Illuminator Option Via NVR Interface
- Go to Main Menu > Camera

2. Select Image

- Select Illuminator then select smart Illumination under fill light. And Hit Apply.

- Note the Brightness Upper Limit is how the bright the White LED will get when it is activated, you can adjust max brightness using the slider. The Illuminator Delay Is the Length of time that the Lights stays before turning off again.

How to Schedule the Warm Light via Web Interface 3.0
- Connect to the camera's web interface.
-
Login to the camera.

-
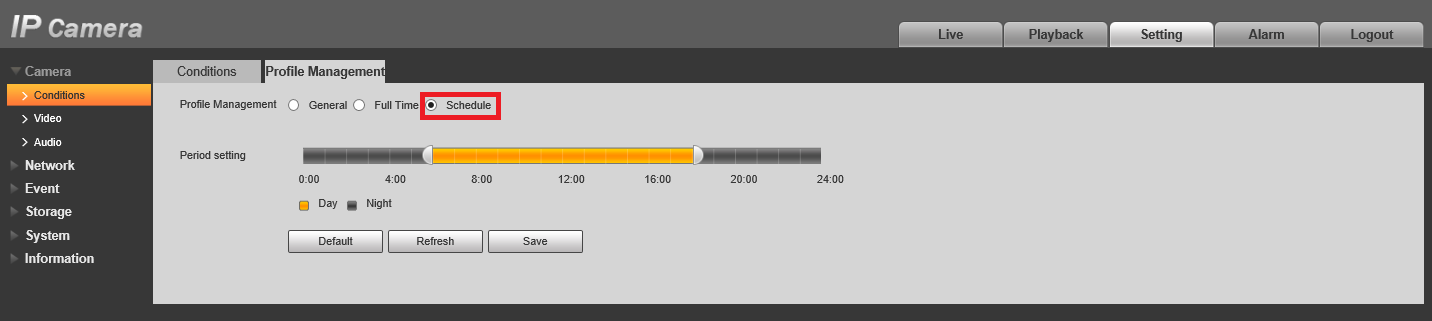
Select Settings, Conditions, then Profile Management.

-
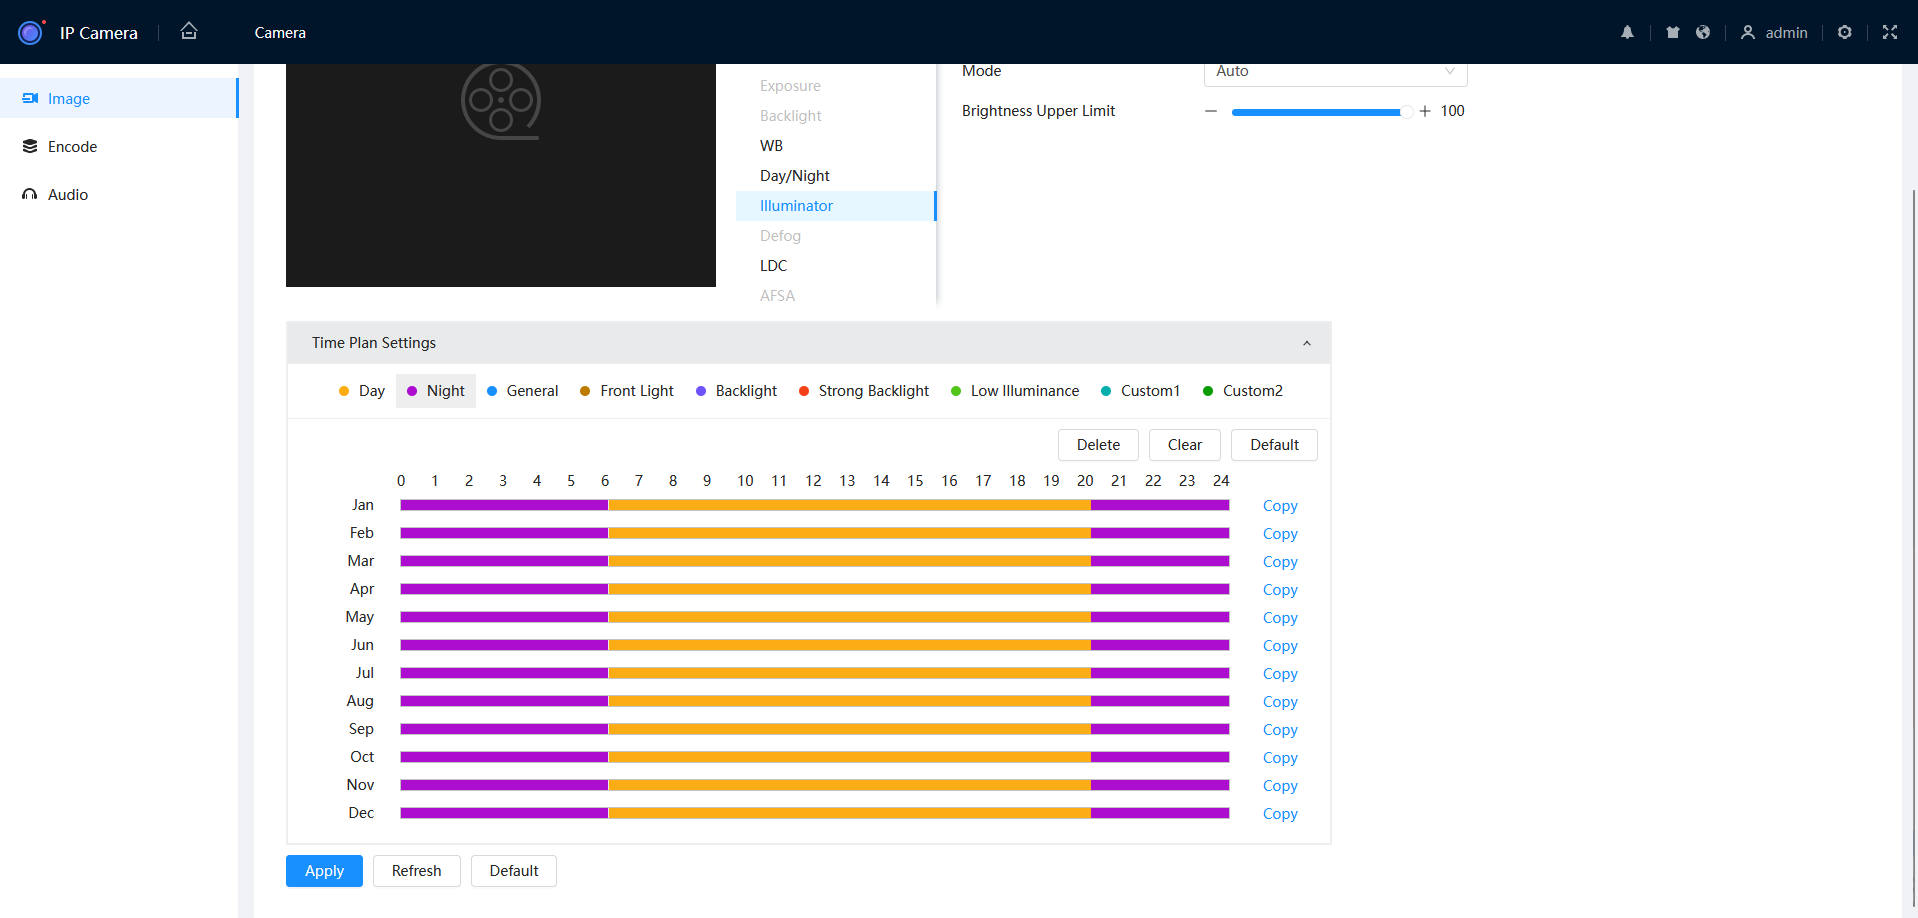
Select Schedule, and adjust the time frame to suit your requirements the select Save. The black portion is the night period, and the orange portion is the day period. Press Save.

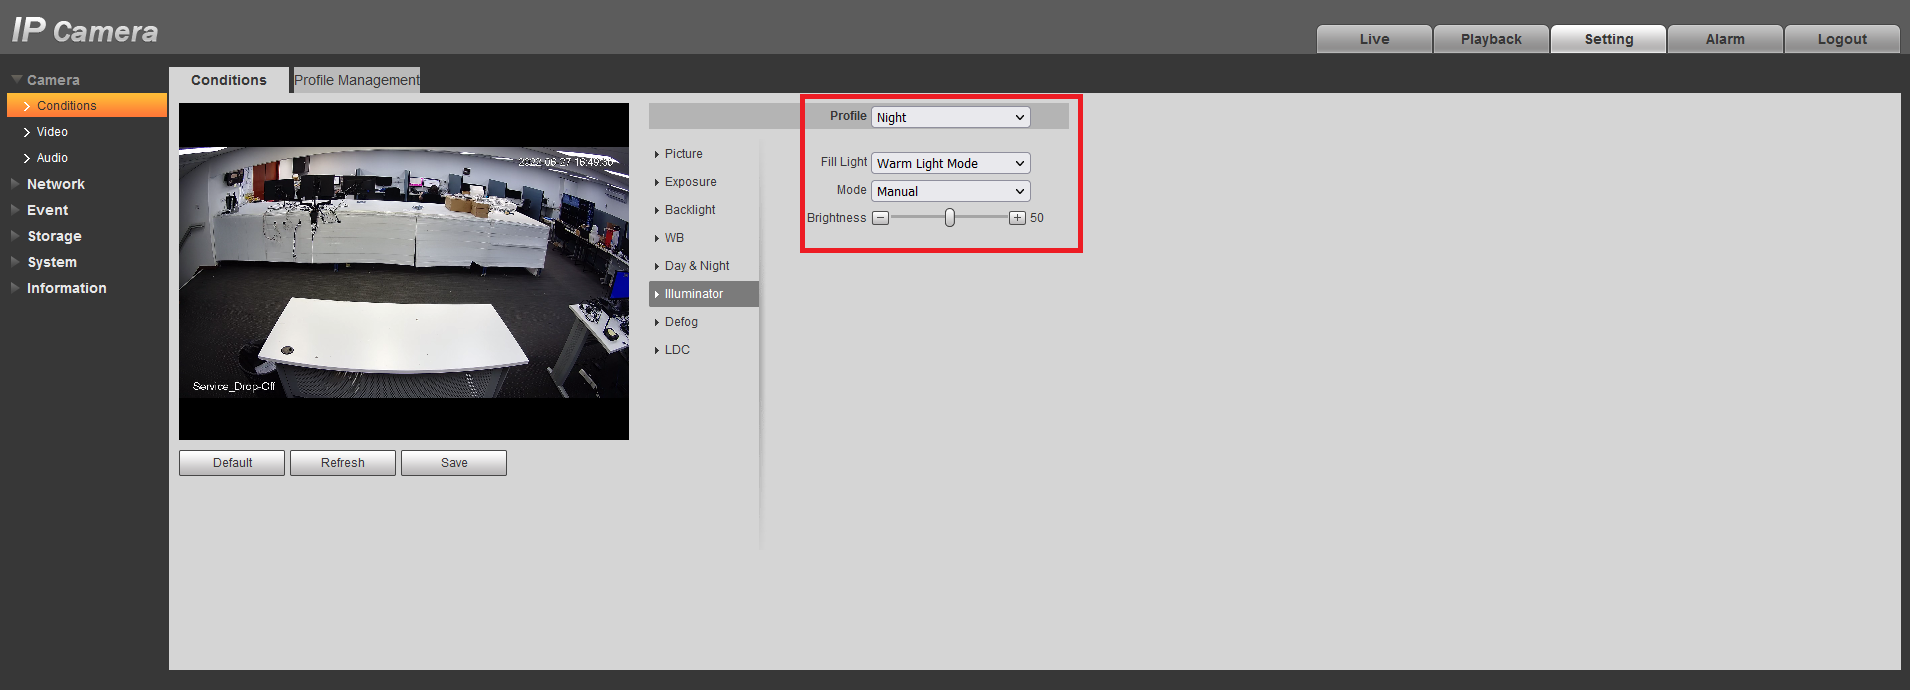
- Select Conditions, then Illuminator.
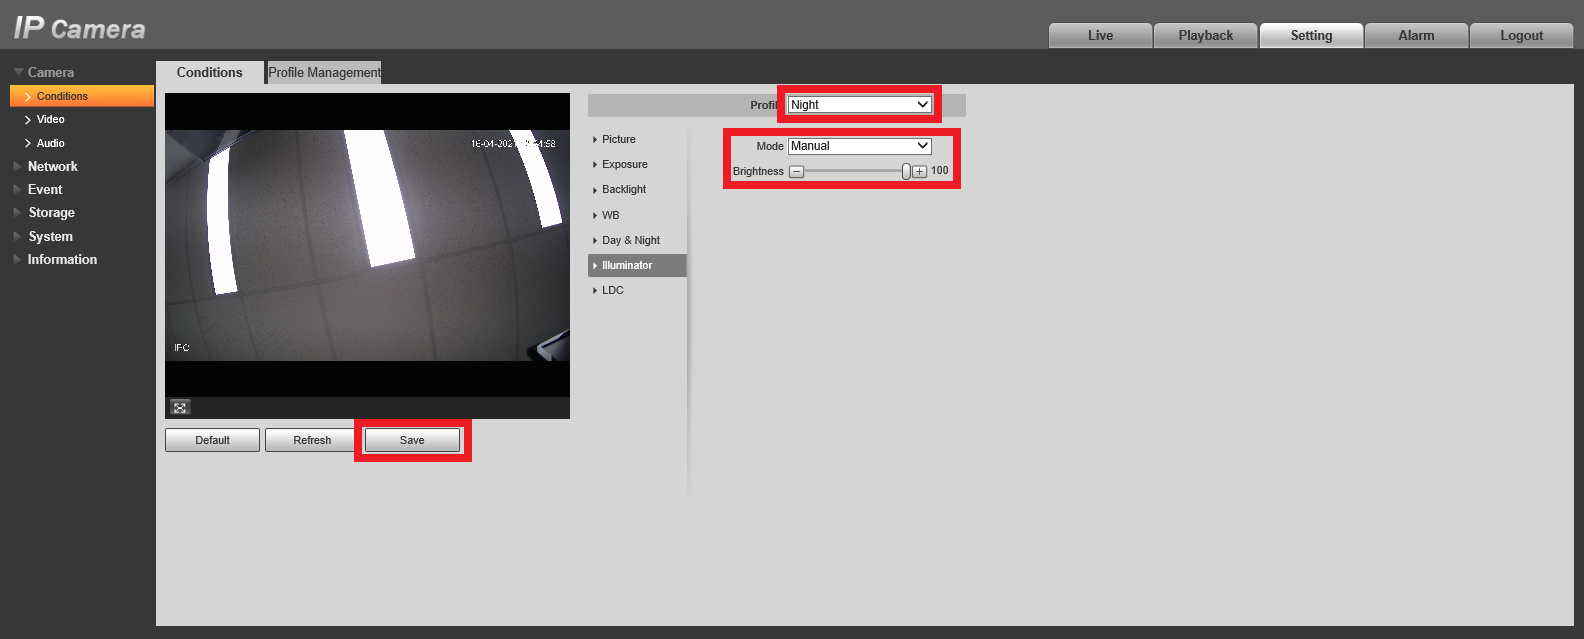
- Under the Night Profile, set the Fill Light to Warm Light Mode and the Mode to Manual. Adjust the Brightness to suit your requirements, then select Save.
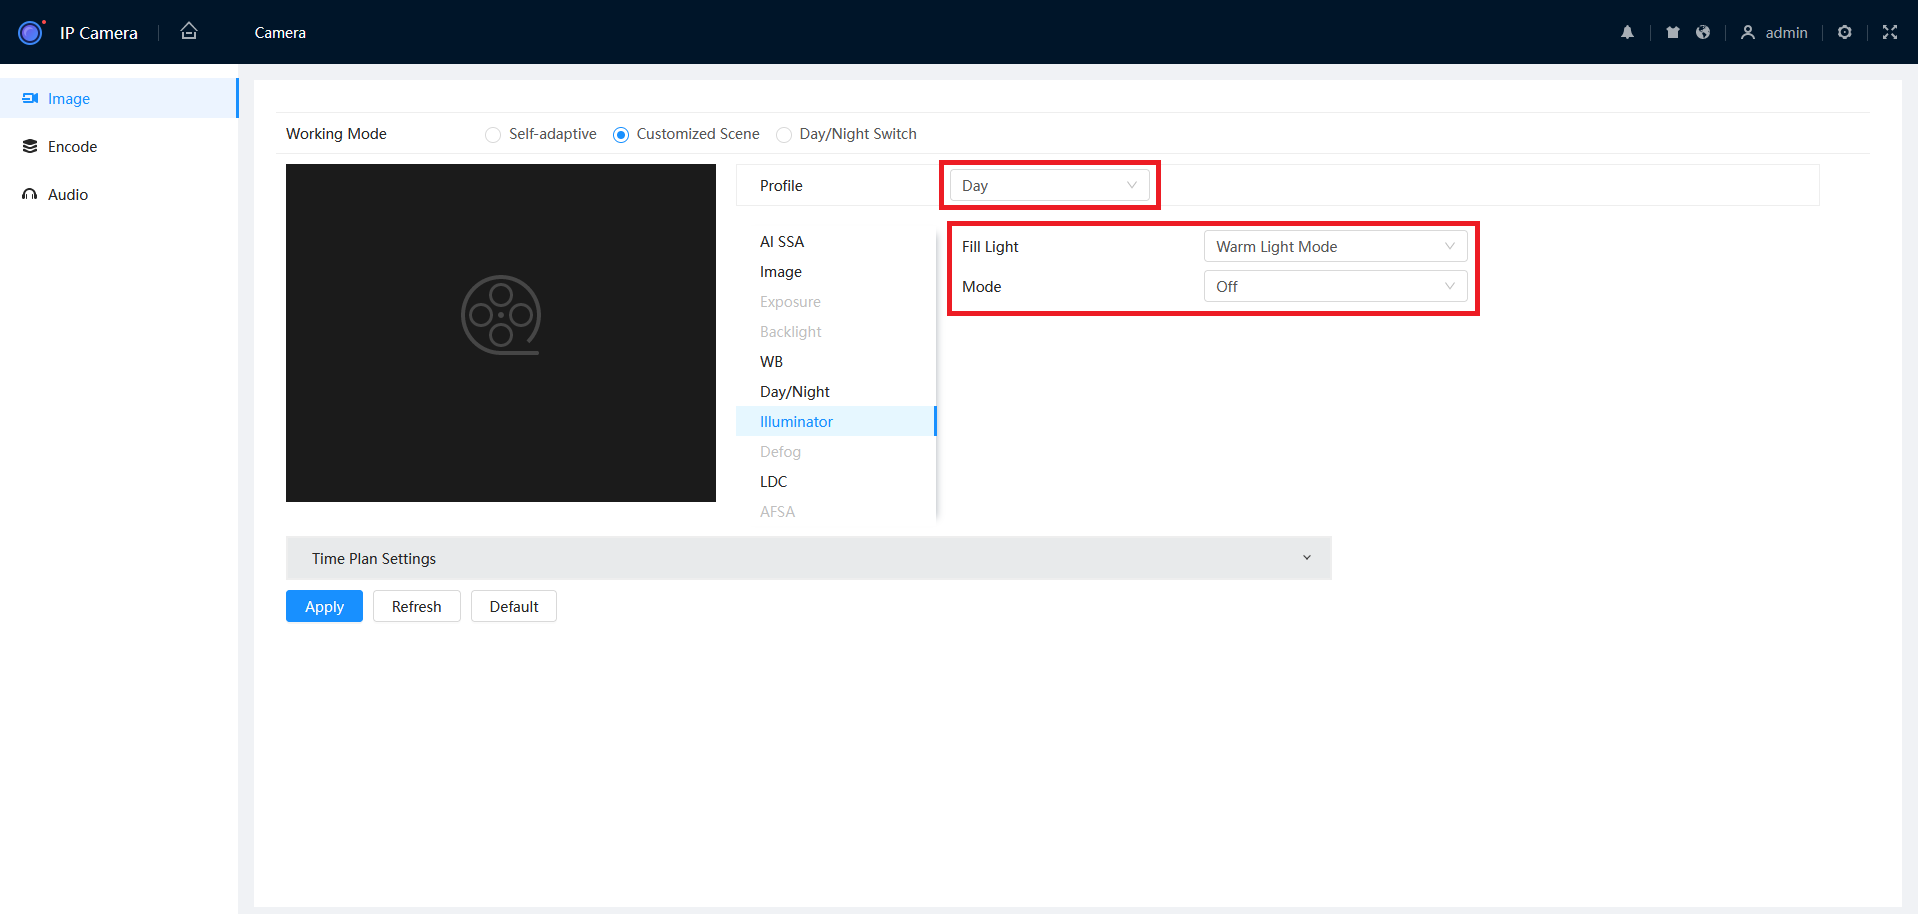
How to Schedule the Warm Light via Web Interface 5.0
- From the home page, navigate to Camera > Image.

- Set the Working Mode to Customized Scene, then select Illuminator.
- Under the Day Profile, set the Fill Light to Warm Light Mode and set the Mode to Off.
- Under the Night Profile, set the Fill Light to Warm Light Mode and set the Mode to Manual.
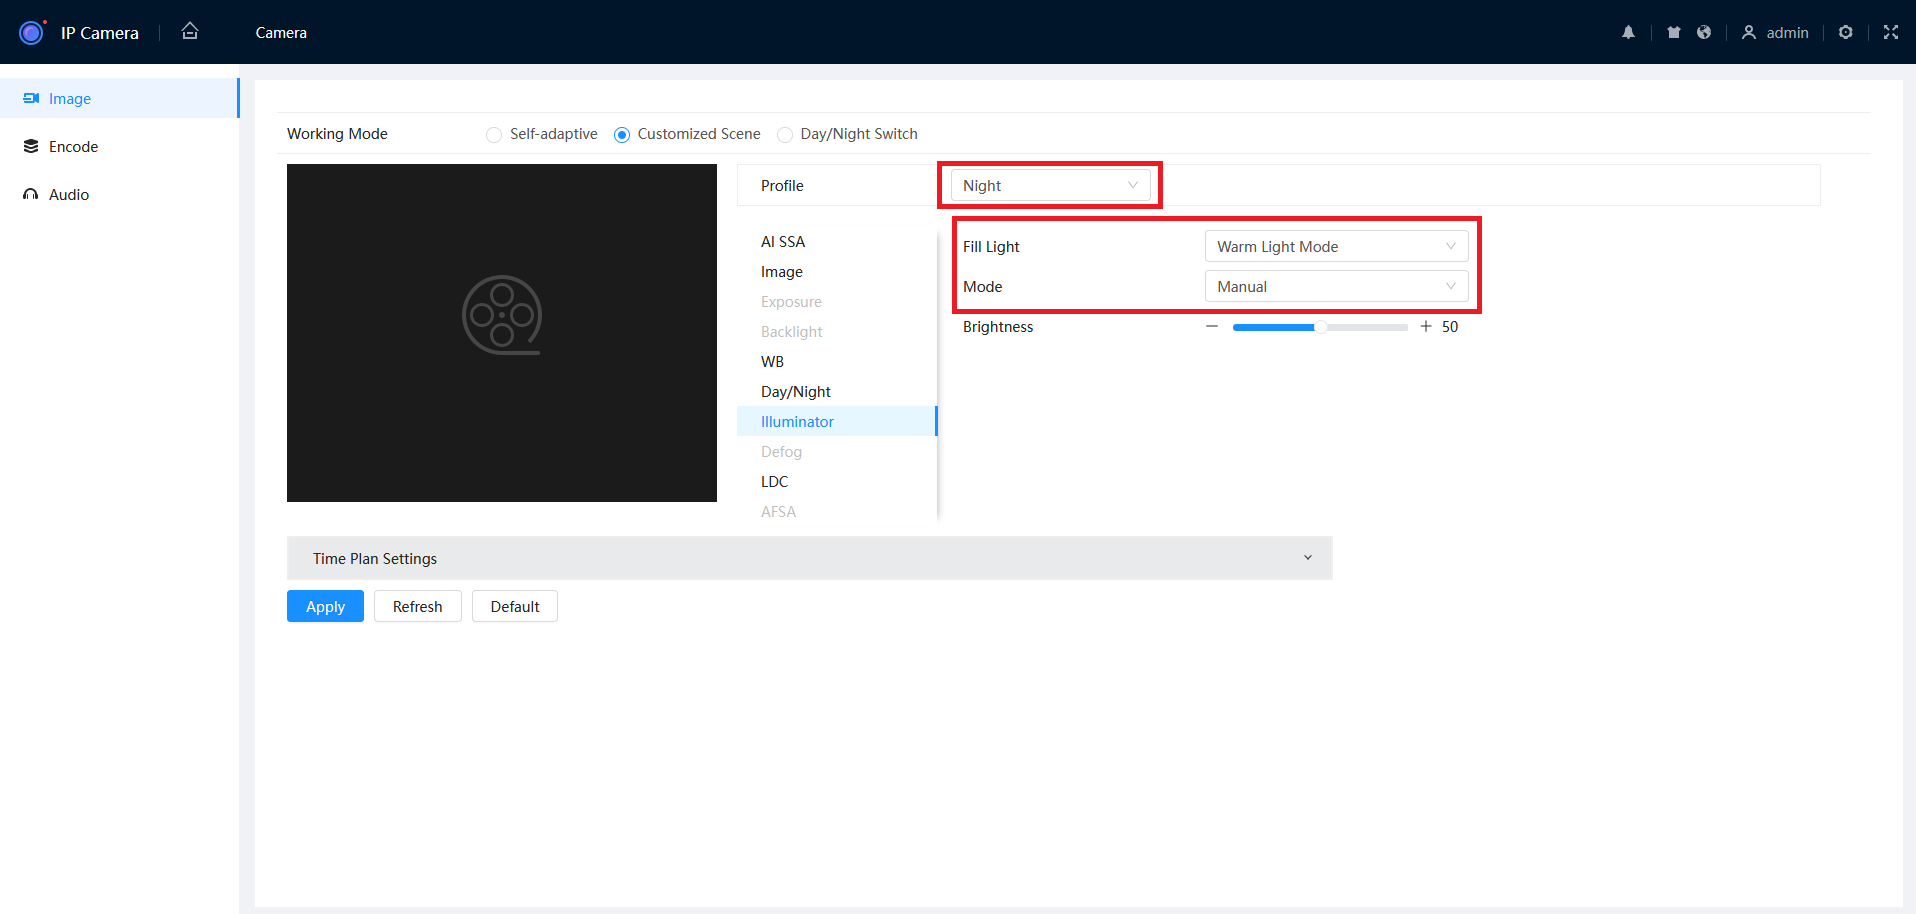
- Select Time Plan Settings, then adjust the graph to the desired times.
The first generation of Active Deterrence cameras (ID) only have the Warm Light Mode option. The White LED Spotlight can be disabled or scheduled for a specific time period.
How to Schedule the Warm Light via Web Interface 3.0 (ID Cameras)
In some installations, it may be required to adjust when the white LED light turns on, and its intensity. In this example we are setting the light to be off during the day, and 100% brightness at night.
- Connect to the camera's web interface.
-
Login to the camera.

-
Select Settings, Conditions, then Profile Management.

-
Select Schedule, and adjust the time frame to suit your requirements the select Save. The black portion is the night period, and the orange portion is the day period. Press Save.
-
Select Conditions, then Illuminator.

-
Set the Day Profile to Off, and select Save. This turns the light off during the day.
-
Set the Night Profile to Manual, and adjust the Brightness to suit your requirements. Select Save.
Additional Configuration
How to configure and use Two-Way talk
To use Two-Way talk, the Microphone will need to be enabled for the camera.
Enable the Microphone via Web Interface 3.0
- Navigate to Setting > Camera > Audio in the Camera's Web Interface.

- Set AudioIn Type to Mic, and Tick Enable for both Main Stream & Sub Stream.
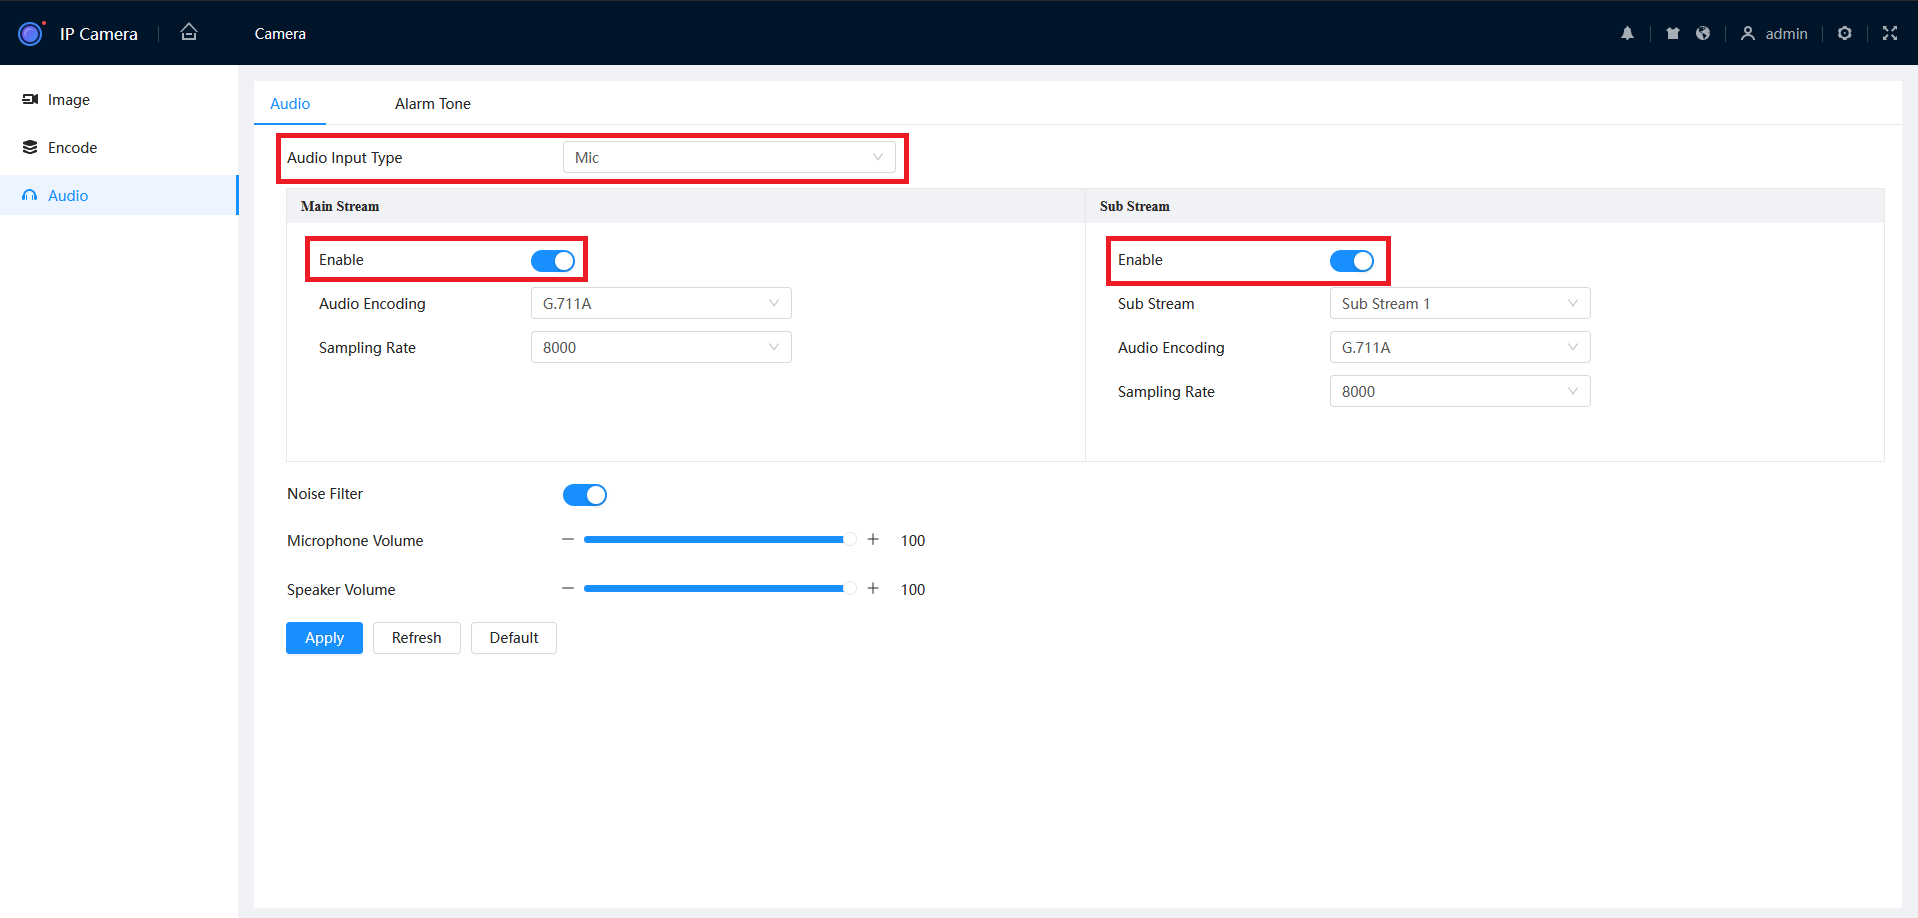
Enable the Microphone via Web Interface 5.0
- From the home page, navigate to Camera > Audio.
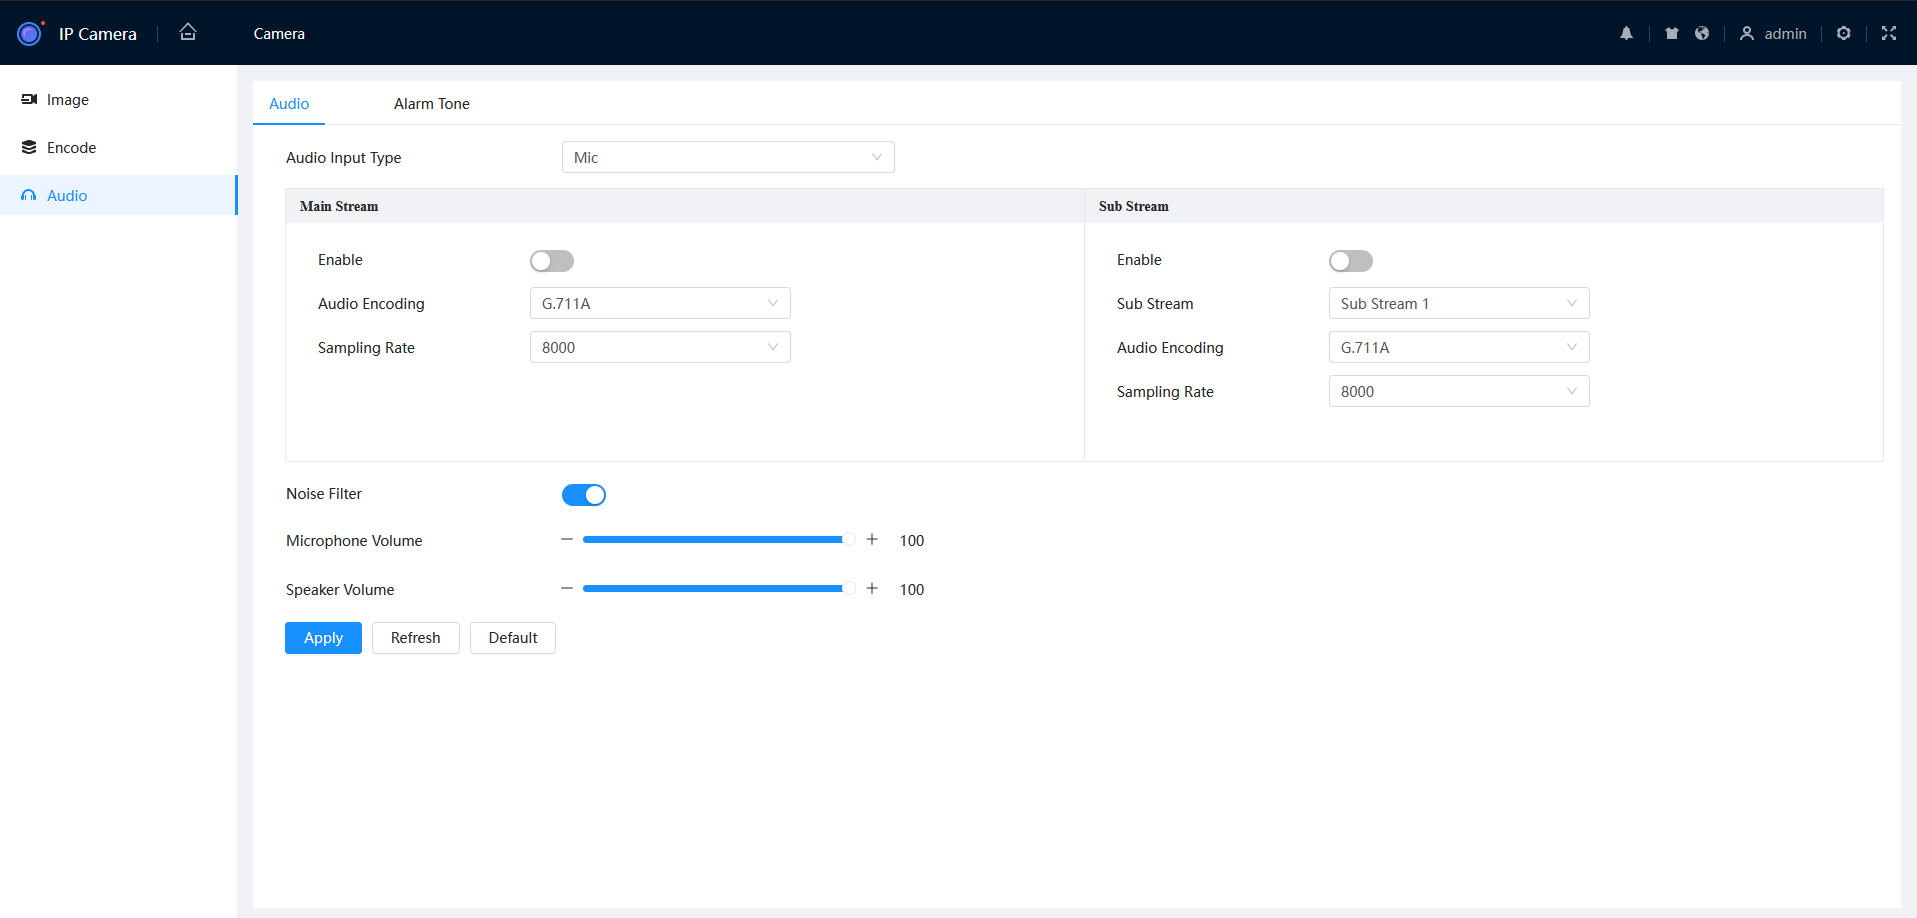
- Set the Audio Input Type to Mic, then enable the main stream and sub-stream.
How to use Two-Way Talk via DMSS
 |
|
 to allow you to listen to the camera. The icon will display two curved lines when enabled, and an X when disabled.
  to enable the microphone. The icon will turn blue when listening for audio. If prompted to choose between channel and device, choose channel.
 Trigger the light/audio functions via DMSS
Before beginning, ensure you have the camera or NVR added to the DMSS application.
 |
Expand the settings by clicking the arrow. |
 |
Select the lightbulb option. |
 |
In this menu, you will have the option to enable/disable the light, or audio output from the camera. |
Import Custom Audio Files
You can import audio files to replace the default alarm sounds of the camera.
When uploading a file, the format must be .Mp3 (Mp3 Format) and the file will need to be less than 10 seconds.
Web Interface 3.0
- Navigate to Setting > Camera > Audio > Alarm Audio
- Select Add Audio File, then you can choose to record an audio file from your microphone, or upload a file you have already downloaded.


Web Interface 5.0
- From the Home page, navigate to Camera > Audio > Alarm Tone.
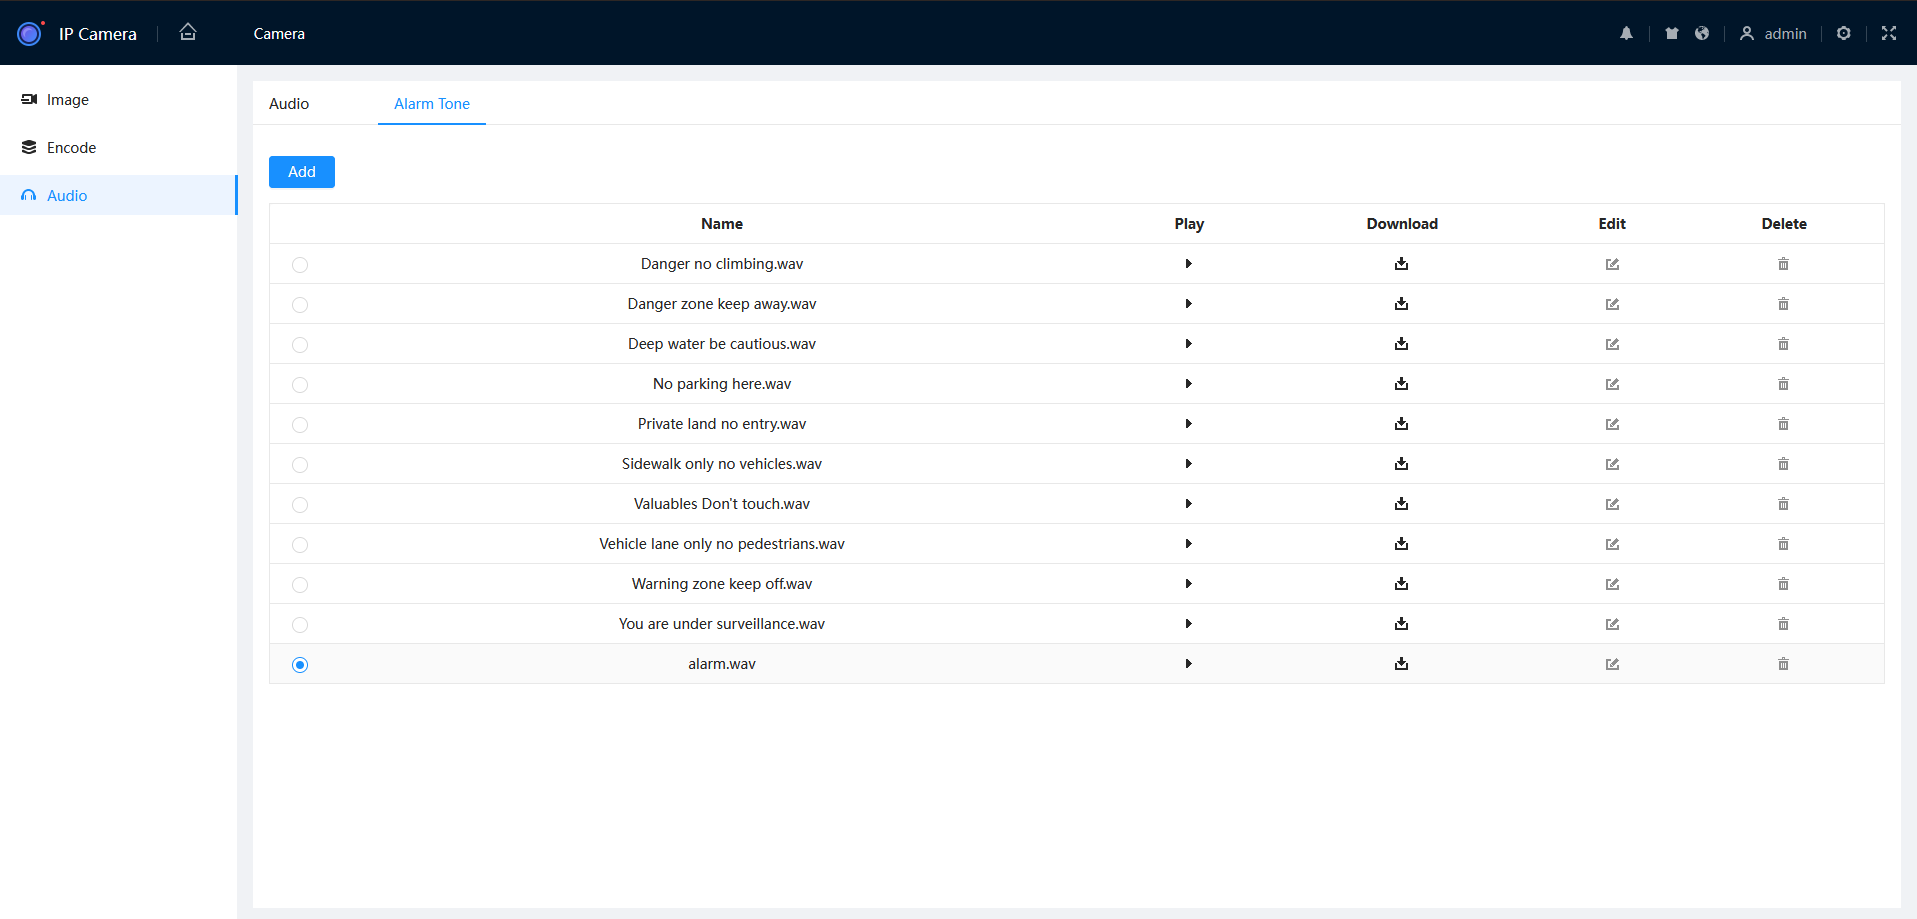
- Click Add.
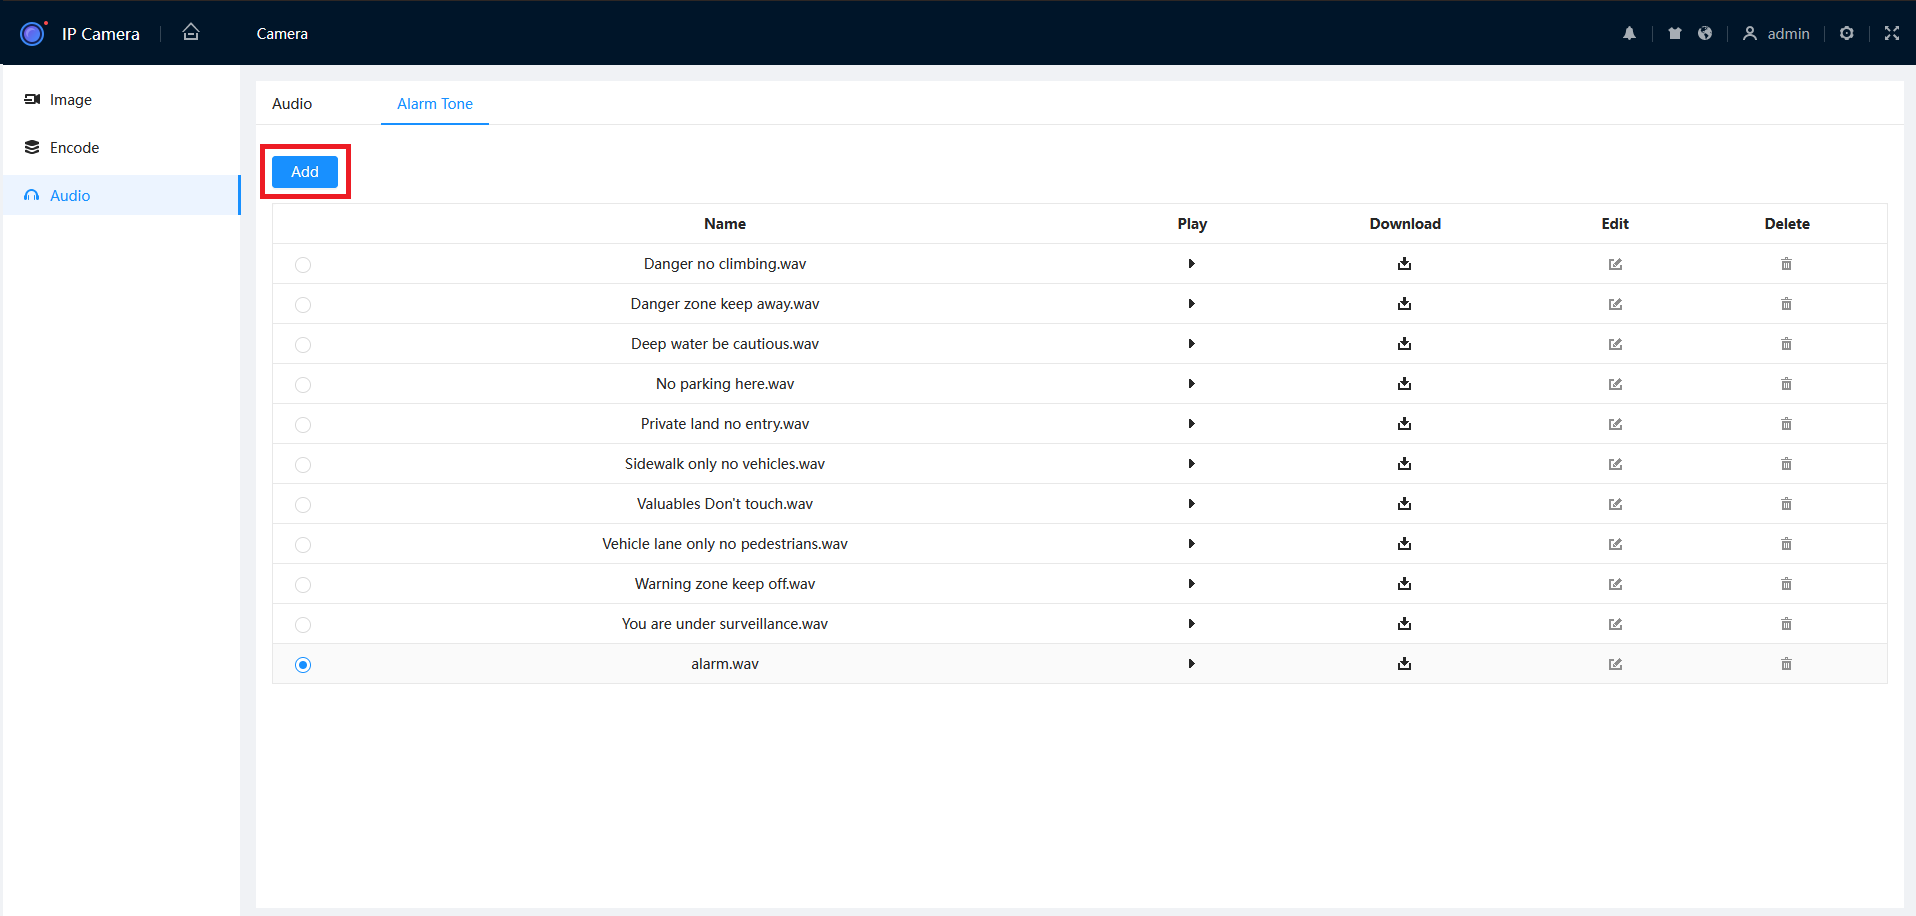
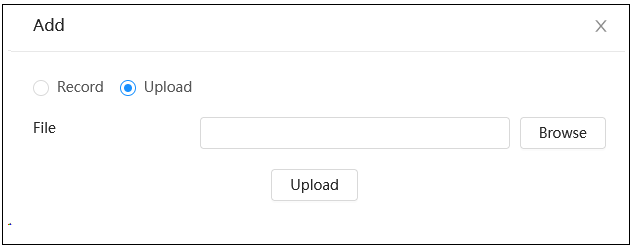
- Choose Record or Upload, then select your file from the list.

The custom audio file will need to be setup
The accepted formats are:
.wav2, .pcm. aac and .mp3 files,
and supports standard sampling rates (e.g. 8000, 16000, 22050, 44100, 64000).
Note: The Internal speaker audio diminishes volume after ~7KHz
3. Preparing a file
Some Audio files wont be accepted and need to be formatted
There are a number of file Conversion programs available.
e.g:
https://www.audacityteam.org/download/
Once the file is ready select Upload option , click Browse to select the audio file to be uploaded, and then click Upload button.

or you can record your own audio on the computer

Force Alarm
By clicking the  Bell icon you can Force the alarm to ring out
