There are 3 ways to access the web interface of an NVR.
- Logging in directly using the IP address.
- Logging in via SmartPSS
- Logging in via SmartPSS Lite
Logging in to NVR Directly
Connect your device to the same network as your NVR Either through a Switch or directly to the LAN port of the NVR.

Depending on how your network and NVR are Configured you may have to change the IP of the device so it is the same IP range of the NVR.
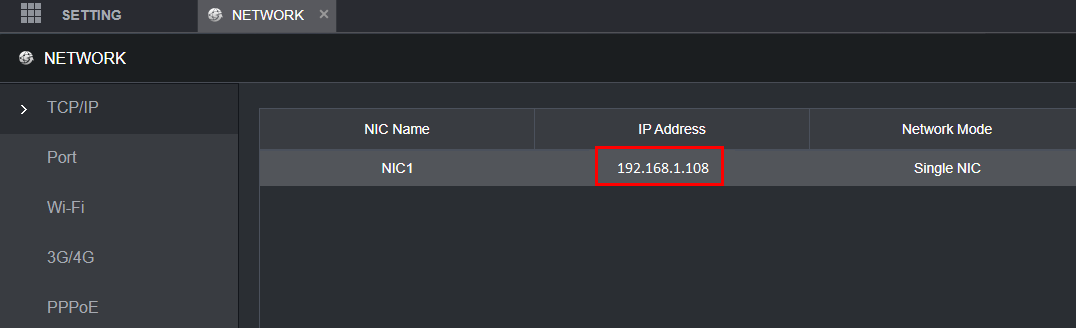
To Find IP of Recorder, got to Main Menu > Network > TCP/IP and note down the IP of your NVR.
Changing the IP address on a Windows Computer
Windows 10
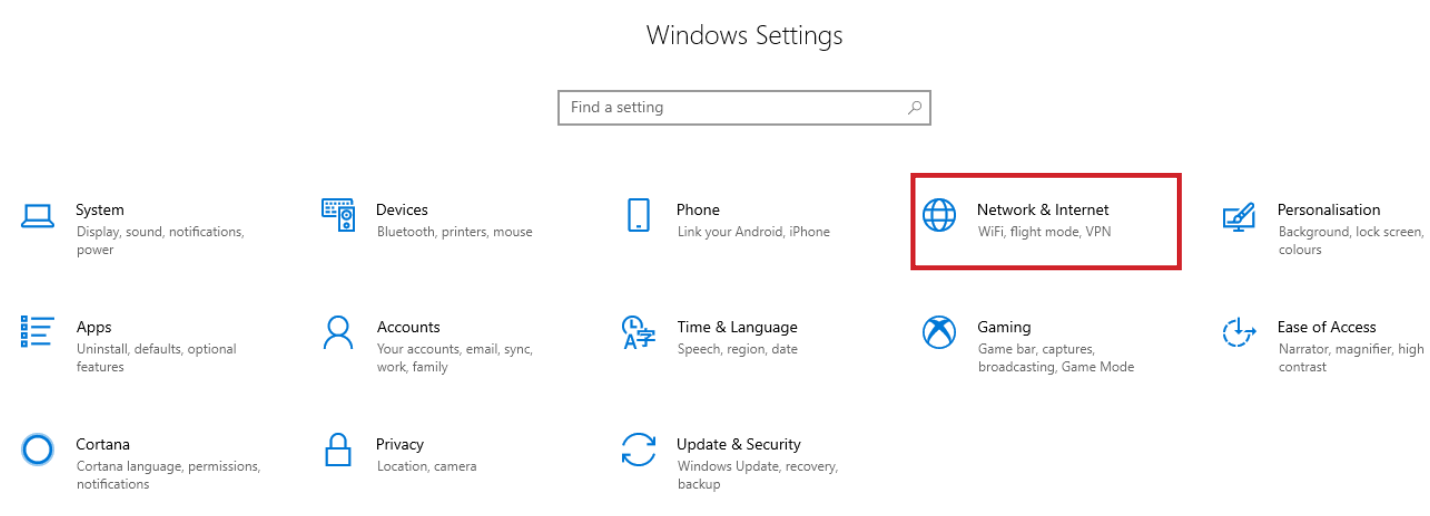
- Open Settings.
- Select Network & Internet.
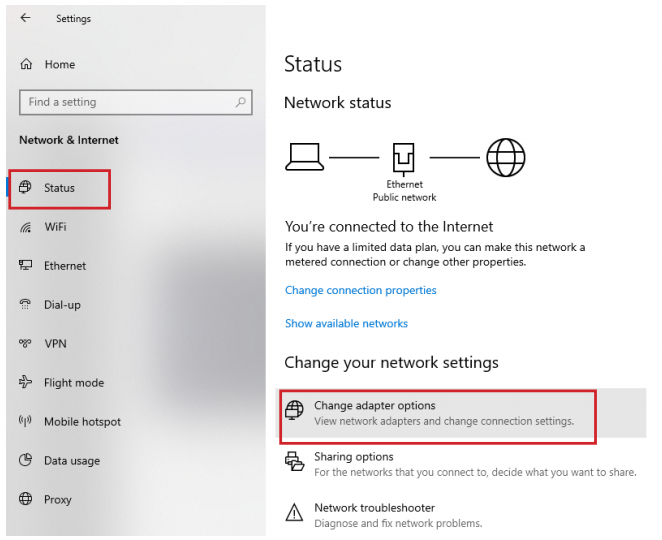
- Select Status, then Change Adapter Options.
-
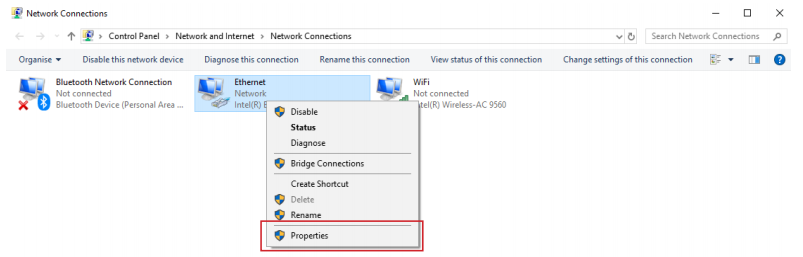
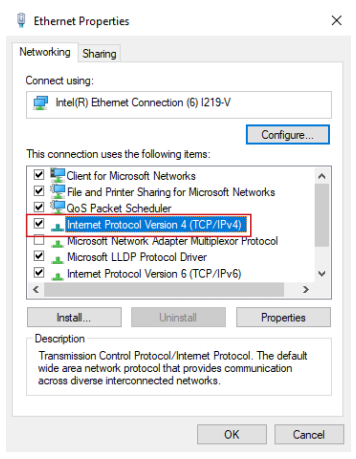
Right-click the network adapter you want to change the IP address for, and select Properties.
-
Double-click the Internet Protocol Version 4 (TCP/IPv4) item.
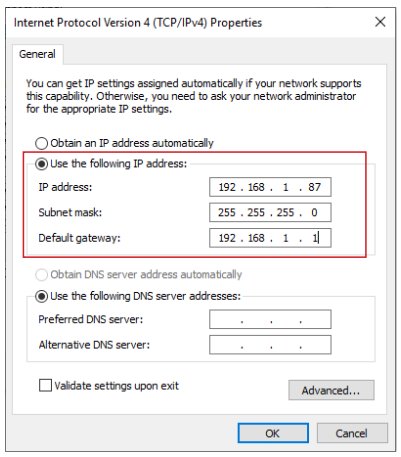
- Click Use the following IP address and enter an IP address in the same range as the device you are trying to access. (E.g when trying to access 192.168.1.108 use a IP address in the 192.168.1.x range.) Note: This cannot be the same as the device you are trying to connect to or any other device on the same network. Save your changes on both windows.
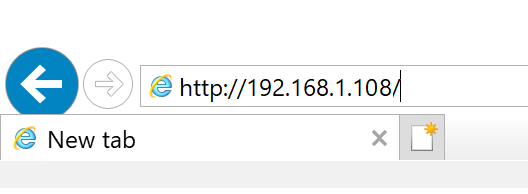
- Type the IP address of the device you are trying to access into the address bar of your web browser.
- Once finished configuring the device, change the adapter settings back to normal by following steps 1-5 and clicking Obtain an IP address automatically.
Windows 11
1. In the Windows search bar at the bottom of the page, type Control Panel and press enter.
2. Select Network and Internet.

3. Select Network and Sharing Centre.

4. Select the link for Connections in the network that you want to change the IP address for.

5. Select Properties.

6. Double-click the Internet Protocol Version 4 (TCP/IPv4) item.

7. Click Use the following IP address and enter an IP address in the same range as the device you are trying to access. (E.g when trying to access 192.168.1.108 use a IP address in the 192.168.1.x range.) Note: This cannot be the same as the device you are trying to connect to or any other device on the same network. Save your changes on both windows.

8. Type the IP address of the device you are trying to access into the address bar of your web browser.
9. Once finished configuring the device, change the adapter settings back to normal by following steps 1-6 and clicking Obtain an IP address automatically.
See the video below for a visual guide of the steps above:
Shortcut
1. In the Windows search bar at the bottom of the page, type Ncpa.cpl and press enter.
2. Right-click the network adapter you want to change the IP address for, and select Properties.
3. Select the Internet Protocol Version 4 (TCP/IPv4) item.

4. Click Use the following IP address and enter an IP address in the same range as the device you are trying to access. (E.g when trying to access 192.168.1.108 use a IP address in the 192.168.1.x range.) Note: This cannot be the same as the device you are trying to connect to or any other device on the same network. Save your changes on both windows.
5. Type the IP address of the device you are trying to access into the address bar of your web browser.
6. Once finished configuring the device, change the adapter settings back to normal by following steps 1-3 and clicking Obtain an IP address automatically.
See the video below for a visual guide of the steps above:
Once Device is in Same Range of the NVR. On the computer, open Internet Explorer and enter the IP address of the recorder.
If Device is in same range and the IP Address is correct, you will be Prompted with a login page.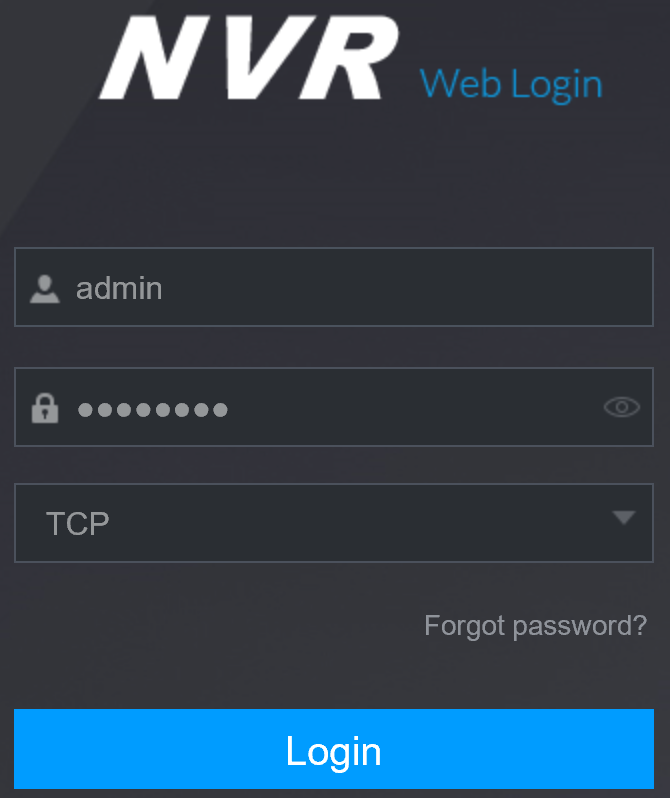
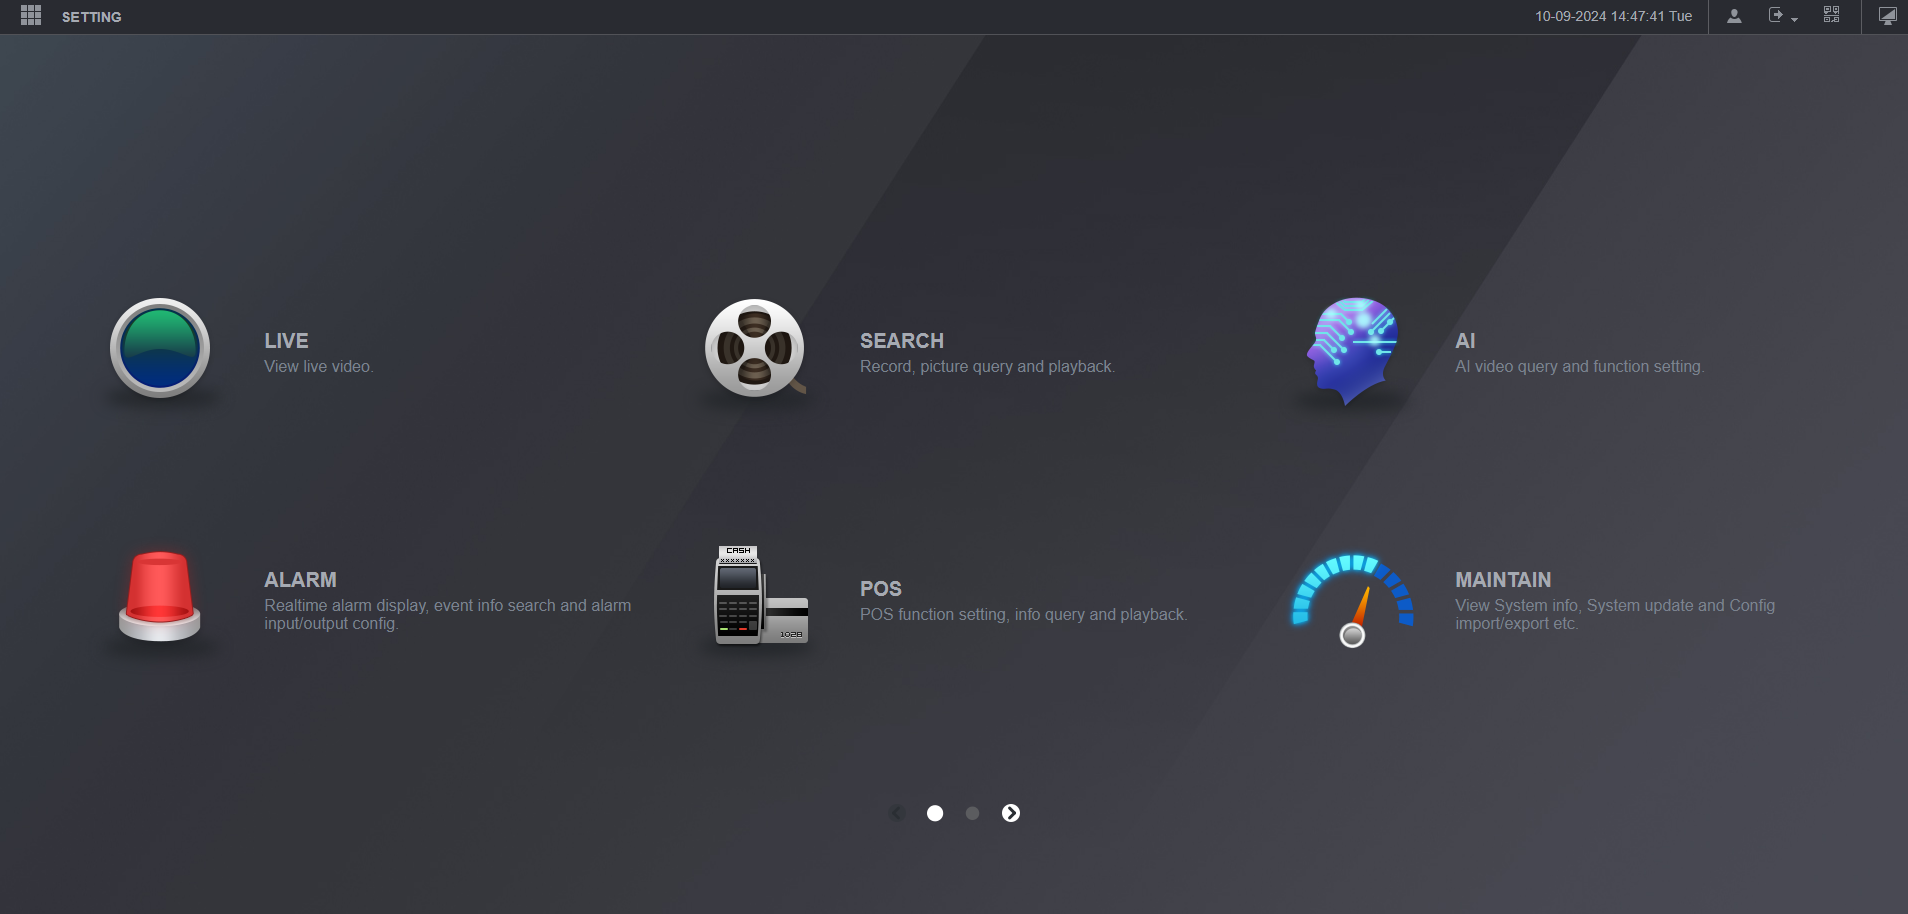
After Login The NVR web Interface will be Shown as below.
Accessing the Web Interface via SmartPSS
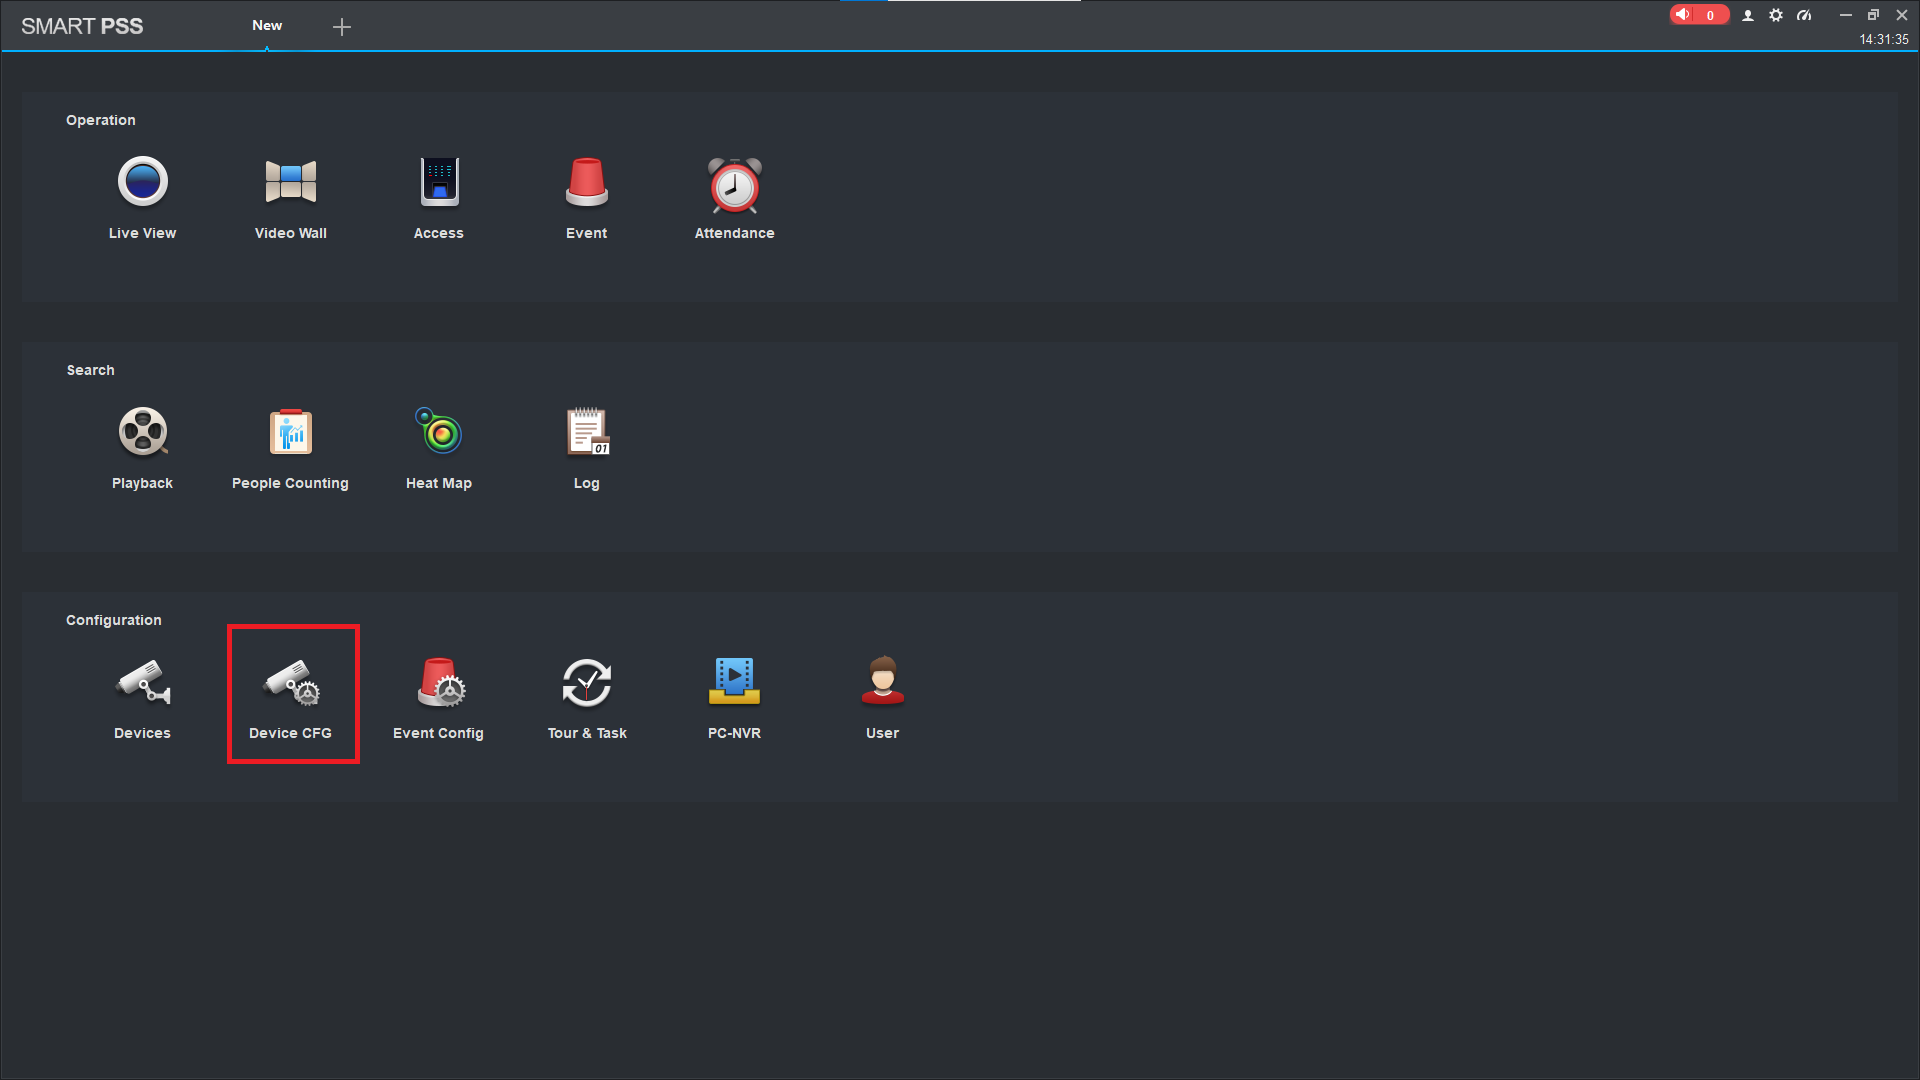
Open Smart PSS and select Device CFG.
Select your device.

Select Link to WEB.

A Browser will open with the login page. Once Logged in the NVR web interface will appear as below
Accessing the Web Interface via SmartPSS Lite
- Open SmartPSS Lite and select Devices.

2. For the device you want to access the web interface of, select the Globe Icon.
This will direct you to the login page of your device, allowing you to enter the username and password.

If everything is done correctly but the web interface doesn't load, see below.
Web Interface Troubleshooting
Web Interface Troubleshooting
If directly accessing the device using the IP address, ensure that the IP address of your PC is in the same range as the device you are trying to access
If you get an error that says "Unable to open the search page", "This page can't be displayed" or something similar, your PC might not be in the correct IP range. If you are trying to log into a camera with the IP Address of 192.168.1.108, your PC's IP address should be in the 192.168.1.x range.
How to change your Computer's IP Address
Windows 10
- Open Settings.
- Select Network & Internet.
- Select Status, then Change Adapter Options.
-
Right-click the network adapter you want to change the IP address for, and select Properties.
-
Double-click the Internet Protocol Version 4 (TCP/IPv4) item.
- Click Use the following IP address and enter an IP address in the same range as the device you are trying to access. (E.g when trying to access 192.168.1.108 use a IP address in the 192.168.1.x range.) Note: This cannot be the same as the device you are trying to connect to or any other device on the same network. Save your changes on both windows.
- Type the IP address of the device you are trying to access into the address bar of your web browser.
- Once finished configuring the device, change the adapter settings back to normal by following steps 1-5 and clicking Obtain an IP address automatically.
Windows 11
1. In the Windows search bar at the bottom of the page, type Control Panel and press enter.
2. Select Network and Internet.
3. Select Network and Sharing Centre.
4. Select the link for Connections in the network that you want to change the IP address for.
5. Select Properties.
6. Double-click the Internet Protocol Version 4 (TCP/IPv4) item.
7. Click Use the following IP address and enter an IP address in the same range as the device you are trying to access. (E.g when trying to access 192.168.1.108 use a IP address in the 192.168.1.x range.) Note: This cannot be the same as the device you are trying to connect to or any other device on the same network. Save your changes on both windows.
8. Type the IP address of the device you are trying to access into the address bar of your web browser.
9. Once finished configuring the device, change the adapter settings back to normal by following steps 1-6 and clicking Obtain an IP address automatically.
See the video below for a visual guide of the steps above:
Shortcut
1. In the Windows search bar at the bottom of the page, type Ncpa.cpl and press enter.
2. Right-click the network adapter you want to change the IP address for, and select Properties.
3. Select the Internet Protocol Version 4 (TCP/IPv4) item.
4. Click Use the following IP address and enter an IP address in the same range as the device you are trying to access. (E.g when trying to access 192.168.1.108 use a IP address in the 192.168.1.x range.) Note: This cannot be the same as the device you are trying to connect to or any other device on the same network. Save your changes on both windows.
5. Type the IP address of the device you are trying to access into the address bar of your web browser.
6. Once finished configuring the device, change the adapter settings back to normal by following steps 1-3 and clicking Obtain an IP address automatically.
See the video below for a visual guide of the steps above:
Reload the page in Internet Explorer or Microsoft Edge in Internet Explorer mode.
The plugins for our products are designed for Internet explorer, so you may run into issues using another web browser.
The icon for Internet Explorer looks like this  , whereas the icon for Microsoft Edge looks like this
  .
.
Reloading Microsoft Edge in Internet Explorer Mode
- select the 3 dots(
 ) in the top right corner.
 - Select Reload in Internet Explorer Mode.

If the Reload in Internet Explorer Mode option isn't there, follow the steps below:
- Open Microsoft Edge and select the 3 dots(
 ) in the top right corner.
 - Select Settings.
- Select Default Browser.
- Change “Allow sites to be reloaded in Internet Explorer mode (IE mode)” to Allow.

Clear your Browsing History
If using Internet Explorer and the web interface has "sys." or "com." in front of text or it doesn't load some elements correctly, you will need to delete your browsing history to fix it.
Press CTRL + SHIFT + DELETE.
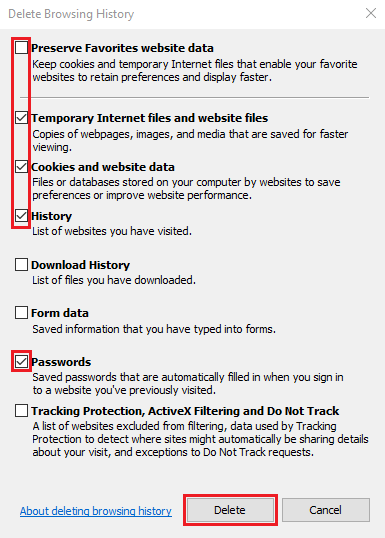
Untick Preserve Favourites website data and Tick Temporary Internet files and website files, Cookies and website data, History and Passwords, then click Delete.

Internet explorer will prompt you when it has finished deleting your browser history. Refresh the page
Delete Internet Explorer's Plugins
Our cameras and NVRs use a plugin made for Internet Explorer and, depending on the firmware of the device, may present a different version of the plugin which can cause conflicts.
To resolve this, close Internet Explorer then find the directory below and delete the webrec folder containing the plugins.
C:\Program Files\webrec\ or C:\Program Files (x86)\webrec\