Config Tool is a program that can be used to find IP address of devices on the network, initialise cameras, modify IP addresses and more. It is available from our website or can be downloaded directly from here.
Opening Config Tool
When you first download ConfigTool it will be a .ZIP file. Its contents will need to be extracted into a folder.
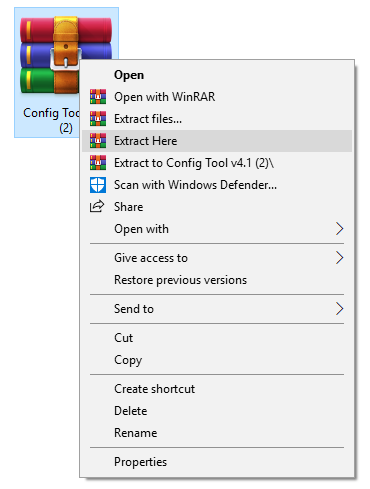
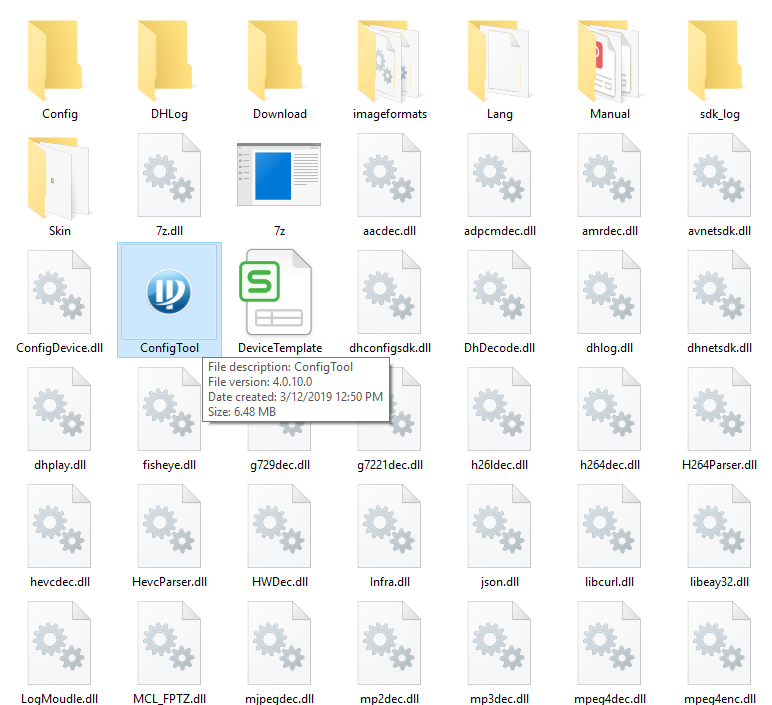
Windows 10 is capable of extracting files from a .ZIP file or you can use an unzipping tool like WinRAR as seen in the image above. Once this has been done you will then have a folder called Config Tool, click into there and locate the ConfigTool application and double click it.
Connecting cameras to a Laptop/PC
To be able to see your cameras on Config Tool you will need to connect the cameras to the PC. Please note that the camera will need to be powered either with a PoE or 12VDC connection as the PC will not be able to communicate with the camera unless it is powered on.
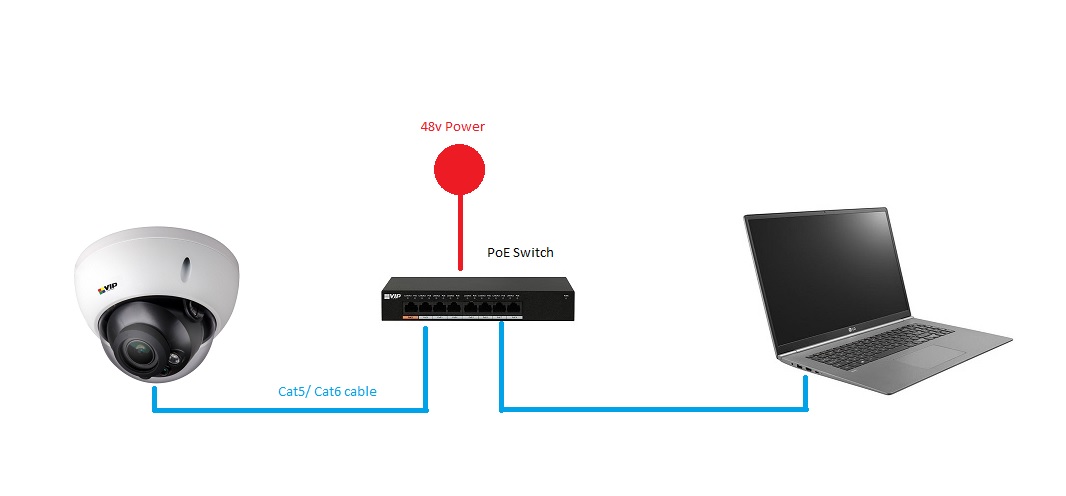 Camera powered via a PoE Switch
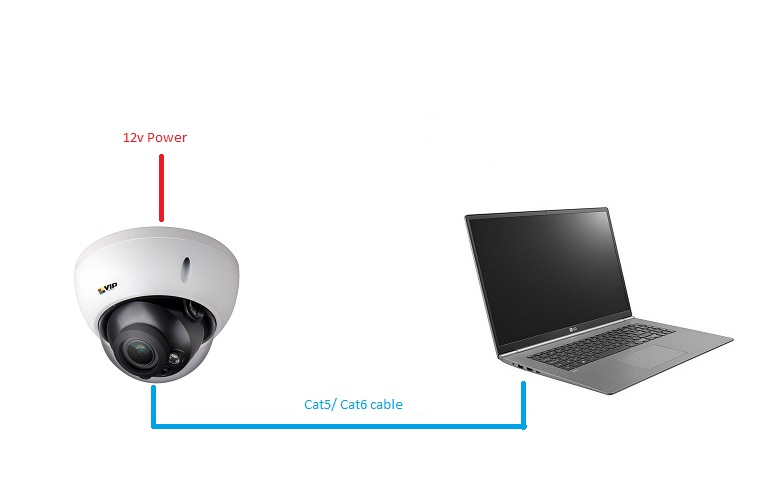 Camera powered by a 12VDC Power supply
*Once you have connected up the camera to the PC it may take a few minutes to power on.
Finding Cameras with Config Tool
After you open Config Tool, you may be asked to allow the program though windows firewall. Click "allow" or you may have issues finding your cameras.
Click here if the pop up does not appear.
If the pop up doesn't you will need to locate the Windows Firewall settings. Click on the start menu and search for "windows firewall" like in the image below:
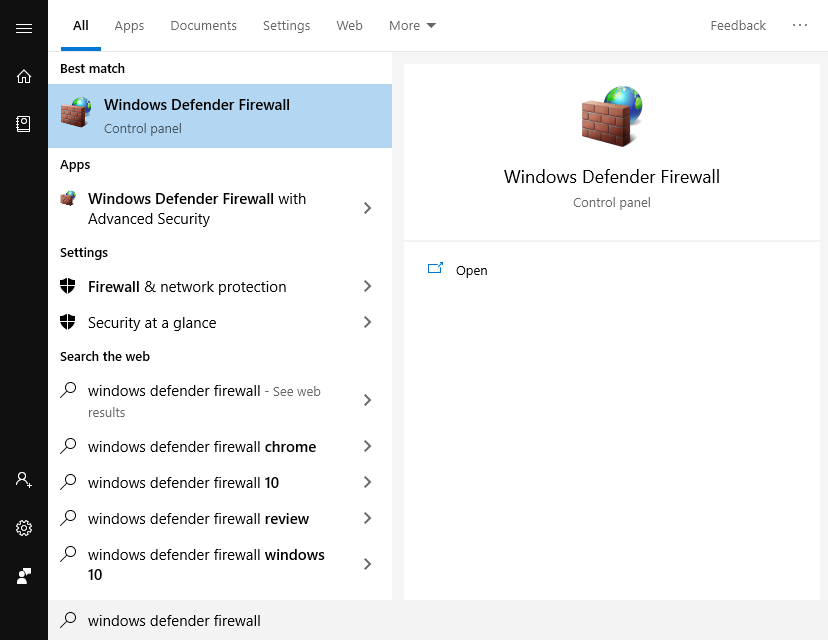
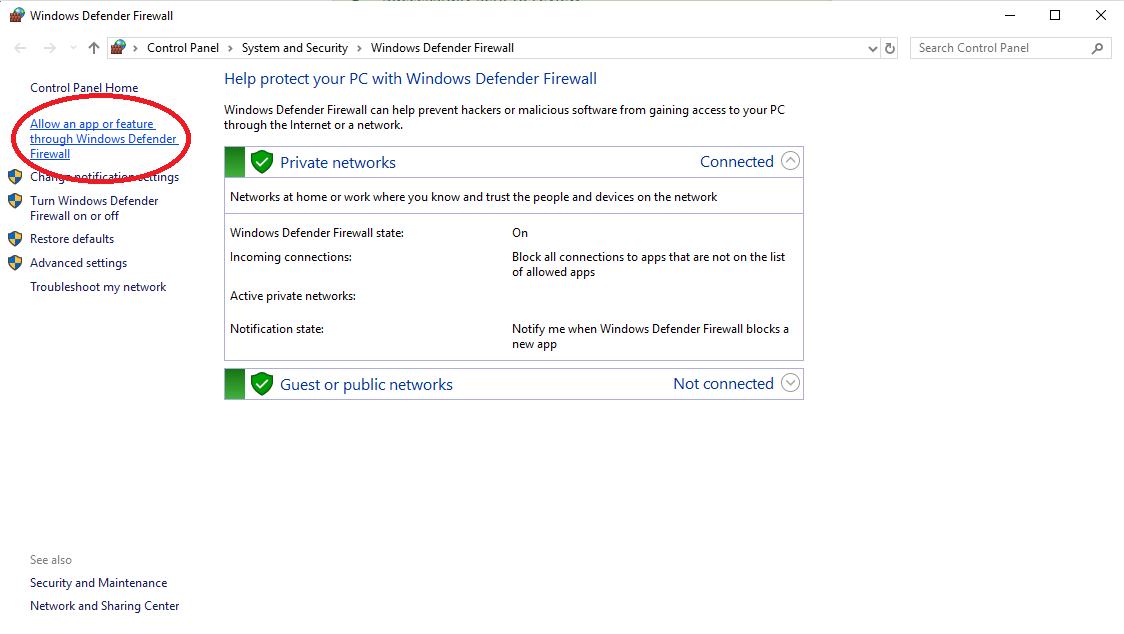
After you have opened this window you will need to select "Allow an app or feature through Windows Defender Firewall" on the left.
With this you will then open a new window which will have a few apps that are already allowed through your Firewall, if you see ConfigTool on this list then you are good to go! If not then you will have to manually allow another application. The button for this should be under the list, if this button is grayed out, then you will need to select the above option for "Change settings" this may ask you to allow admin privileges first. Allow it and then you will be OK to add ConfigTool to the exception list.
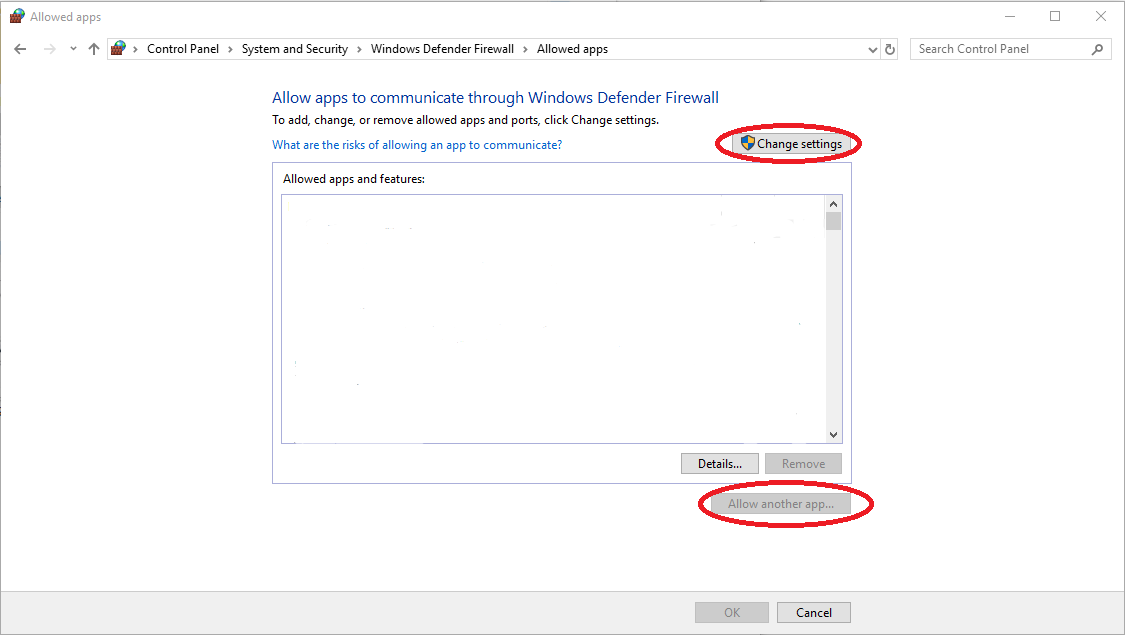
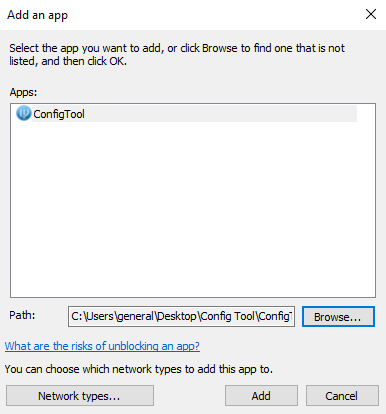
Once you have clicked on "Allow another app" you will be asked to browse to the .exe file inside the extracted ConfigTool folder. Select it and then click OK. It will then be added to the below screen. The click the "Add" button, this will add it to the exception list.
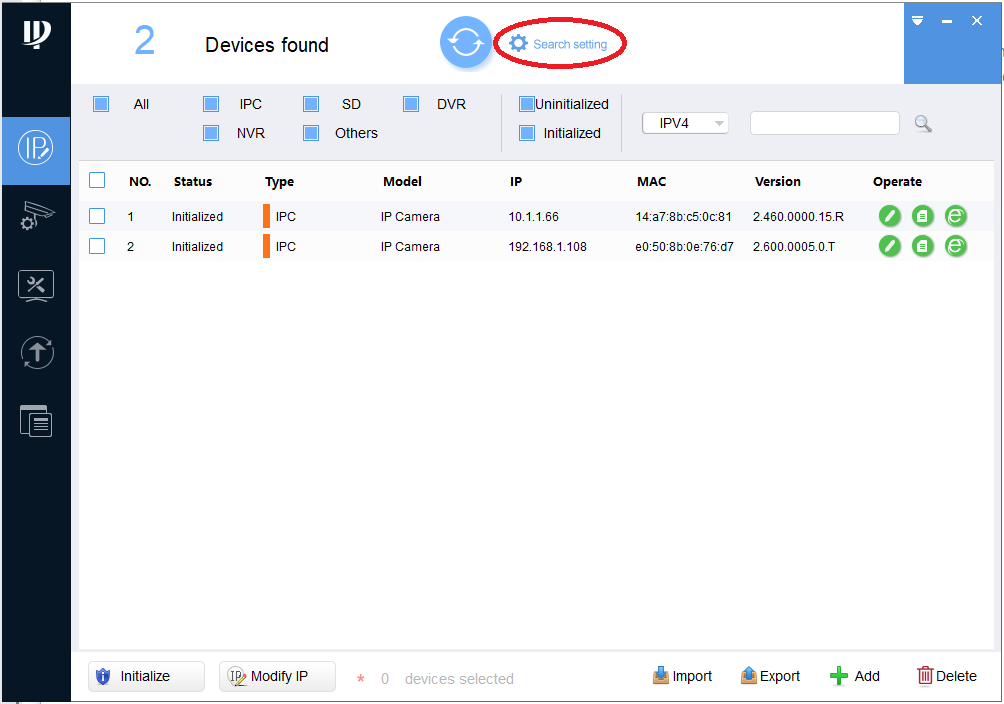
Now that you have the application open the first thing you may notice is the blue circle button at the top, this is the "Refresh" or "Search" button. When you need to detect more cameras or after you make changes to the details of the cameras you should click this button to get the updated information.
Click the refresh button to perform a search for your cameras. If the refresh button does not allow you to click it, you will need to update your search options. You can do so by clicking "Search Settings".
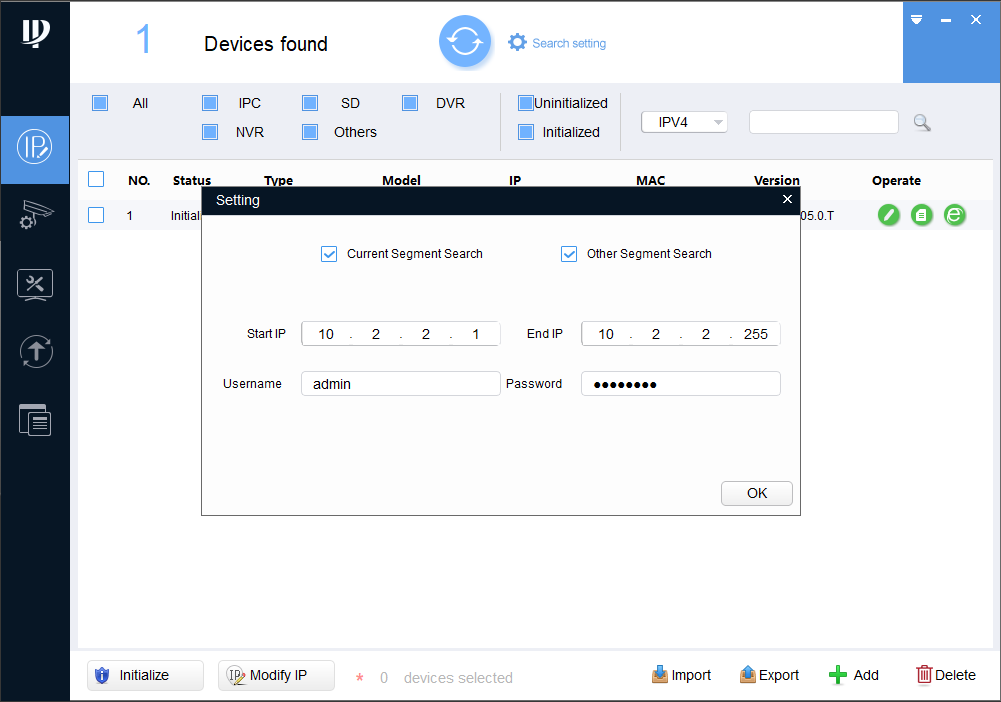
There are a few elements here which can have an impact on what cameras you may find;
The first is "Current Segment Search" this setting allows ConfigTool to search the IP range that your PC is on to locate any cameras on that network. For more information on IP addressing and changing the IP of your PC click here.
"Other Segment Search" will allow ConfigTool to search the IP range between "Start IP" and "End IP". In the example above you will see that I am trying to find all cameras in the 10.2.2.(x) range. You can also narrow down your search results by minimising the range. For example 10.2.2.45 - 10.2.2.61 would only show you a maximum of 16 cameras whose IP address fell into that range. If you enter 0.0.0.0 - 0.0.0.0 it will search all IPs.
"Username and Password" You will need to enter the username and password of a camera that you wish to change the settings for. by default this is admin/admin, but if the camera has been initialised it will be the password set during the initialisation process. If the camera was connected to a recorder at first, the password may be the password of the admin account of the recorder.
Functions and Features of Config Tool
"Initialize" and "Modify IP"
These buttons will allow you to Initialise and Modify the IP address of your camera. If you see any cameras that say "Uninitialized" then you can tick those cameras, click the Initialize button and fill out the required information. To modify the IP Address you can click the edit pencil on the right hand side of the camera, or you can tick the cameras you wish to modify, click "Modify IP" and fill out the desired IP Address.
For more information on Initialising, addressing and adding cameras to your Recorder, check out the second option on this guide.
Firmware upgrade
You can also use ConfigTool to update the firmware of your cameras.
Navigate to the section shown below, browse to the location where you have saved the firmware file and then hit upgrade.
You can find firmware on our website www.rhinoco.com.au. Search for your model of camera and look for the firmware file under links and downloads.
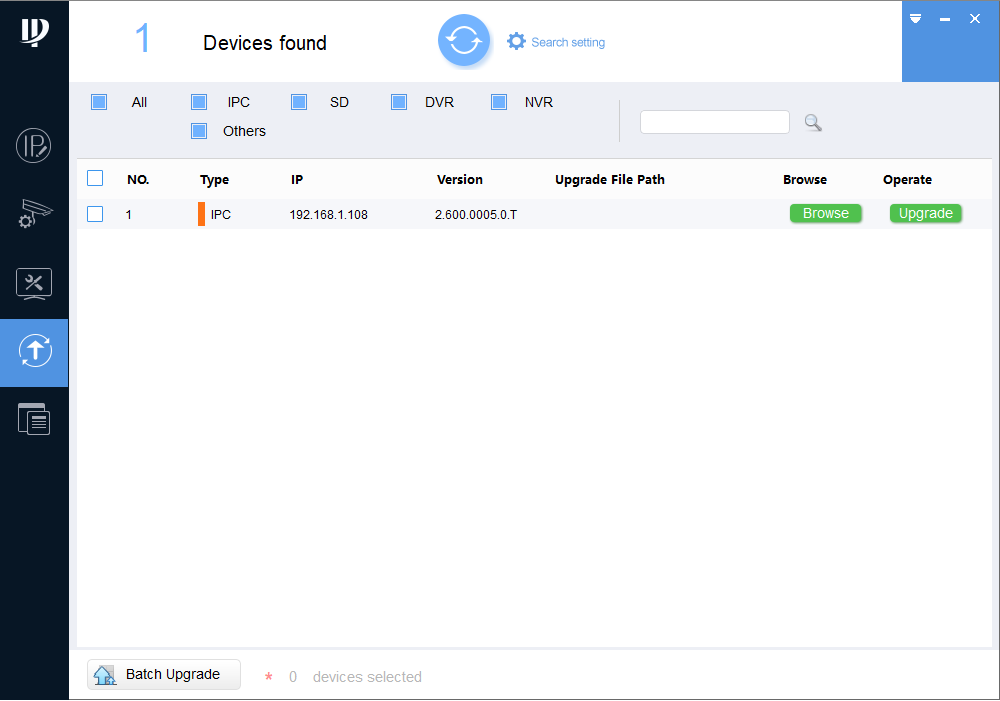
First step is to click "Browse"
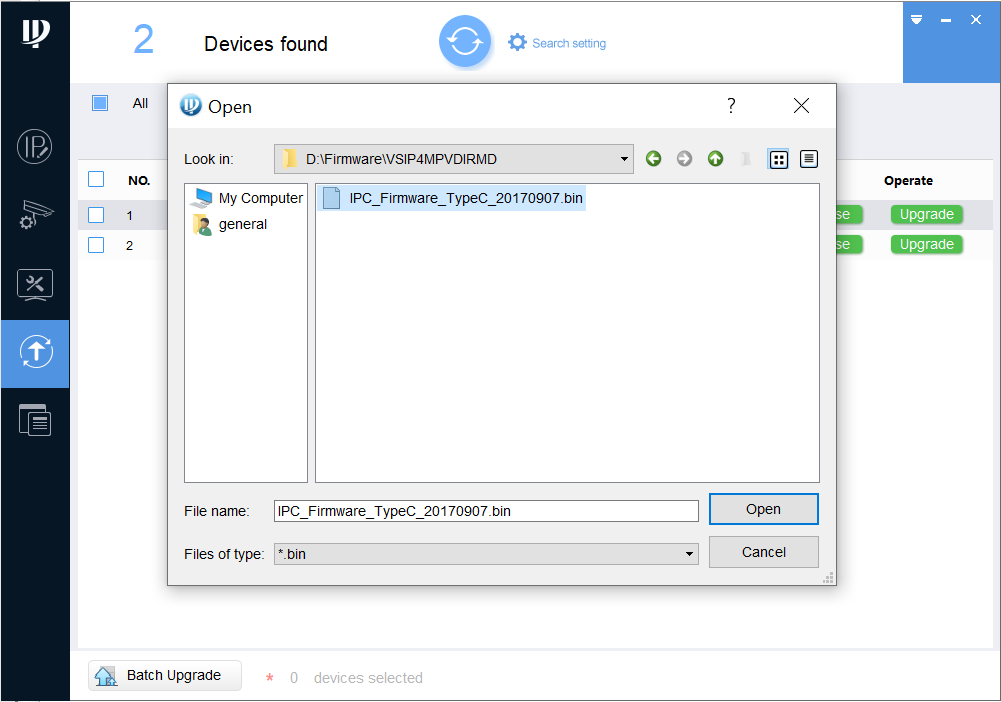
Locate the firmware file that you have downloaded and click "Open".
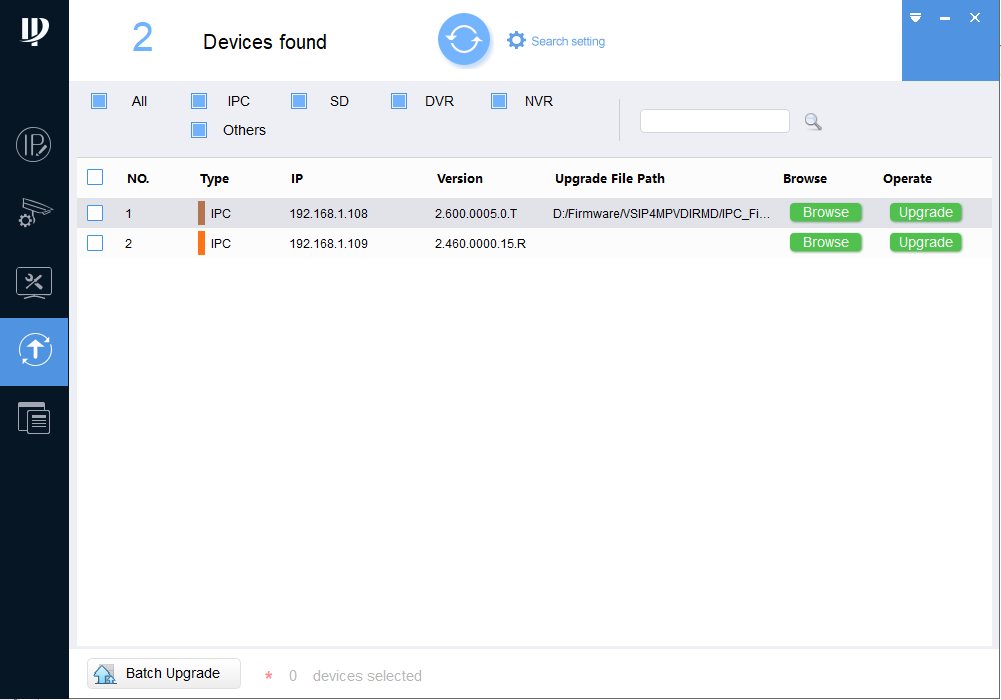
Click the upgrade button.
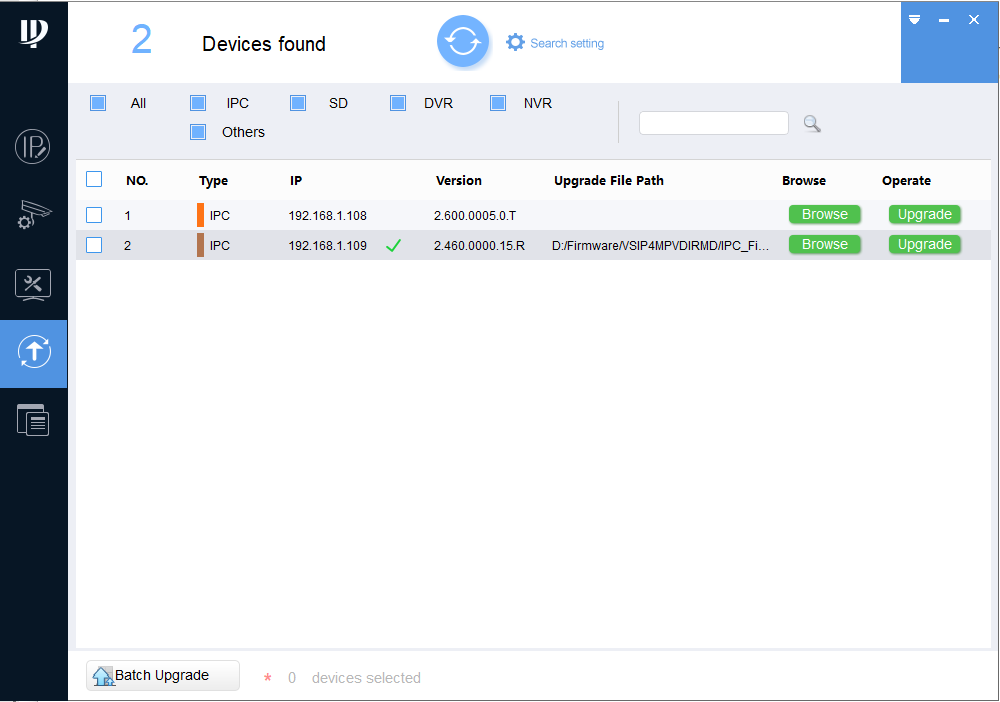
Once you see the green tick you know that the upgrade was successful.
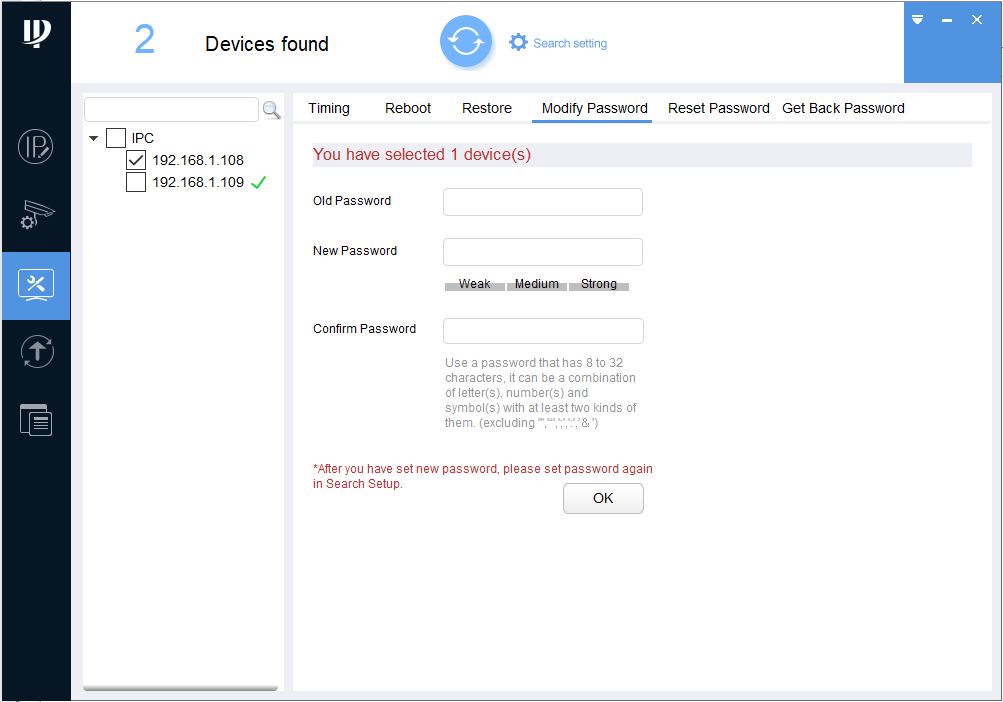
Modify password
Another function of this tool is the ability to modify the password of your cameras.
To do this, navigate to the section shown below and tick the box next to the IP address of the camera you'd like to modify. Then enter your old password, new password and confirmation before clicking "OK". You should see a green tick next to the IP address if this has been successful.