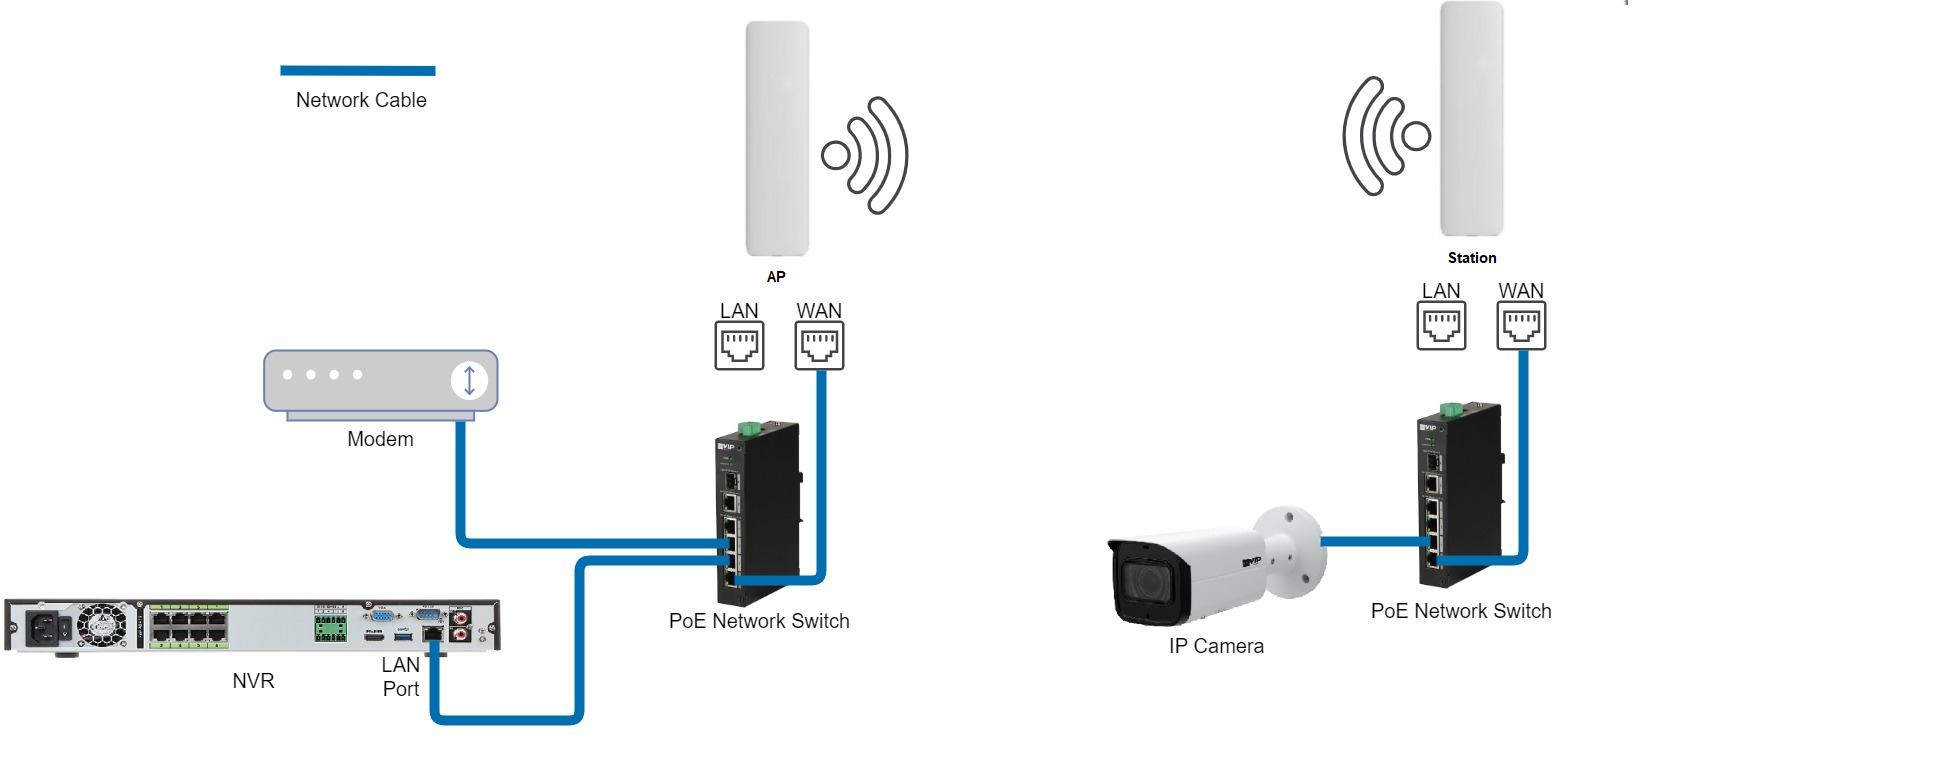
The recommended Configuration for multiple LGAP300 is as a bridge. Where one LGAP300 is an Access Point and the other LGAP300's are secondary site stations. Please not that the configuration process is the same when multiple Stations are added.
LGAP300 - How to configure a bridge
1. Connect power to the included POE injector.
2. Connect the WAN port of the LGAP300 to the POE port of the POE injector with an Ethernet cable.
3. Connect the LAN port of the LGAP300 to your PC/Laptop with an Ethernet cable.
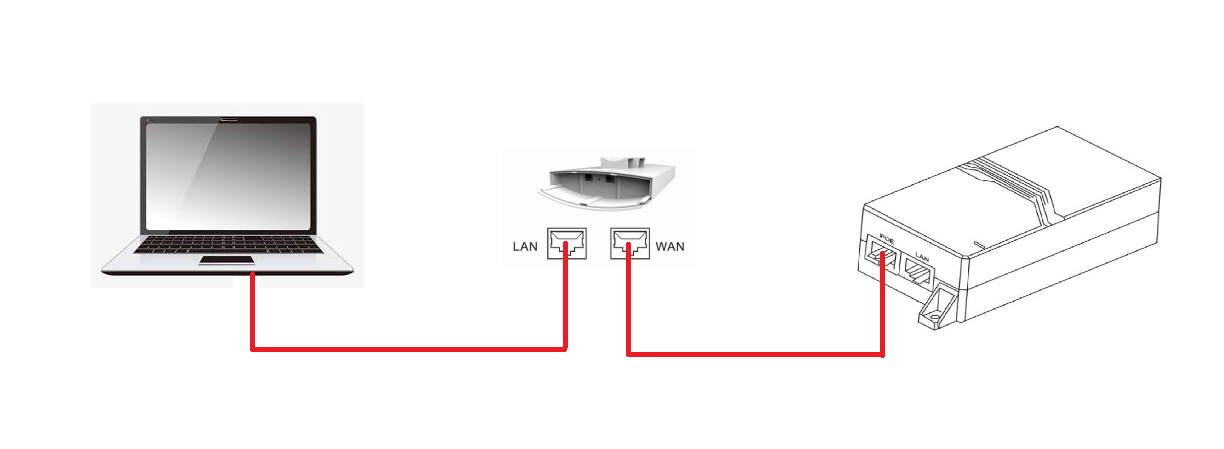 4. Change the IP address of your PC/Laptop to 192.168.10.199.
5. Open your web browser and enter the default IP address for the device, 192.168.10.1 (Internet Explorer is recommended).
6. Select the globe at the top, right hand side of the screen to change the language to English.
7. Enter a password of your choosing as there is no password set, and record details in a safe place for later use.
8. Click the wizard icon on the left panel, then select bridge.
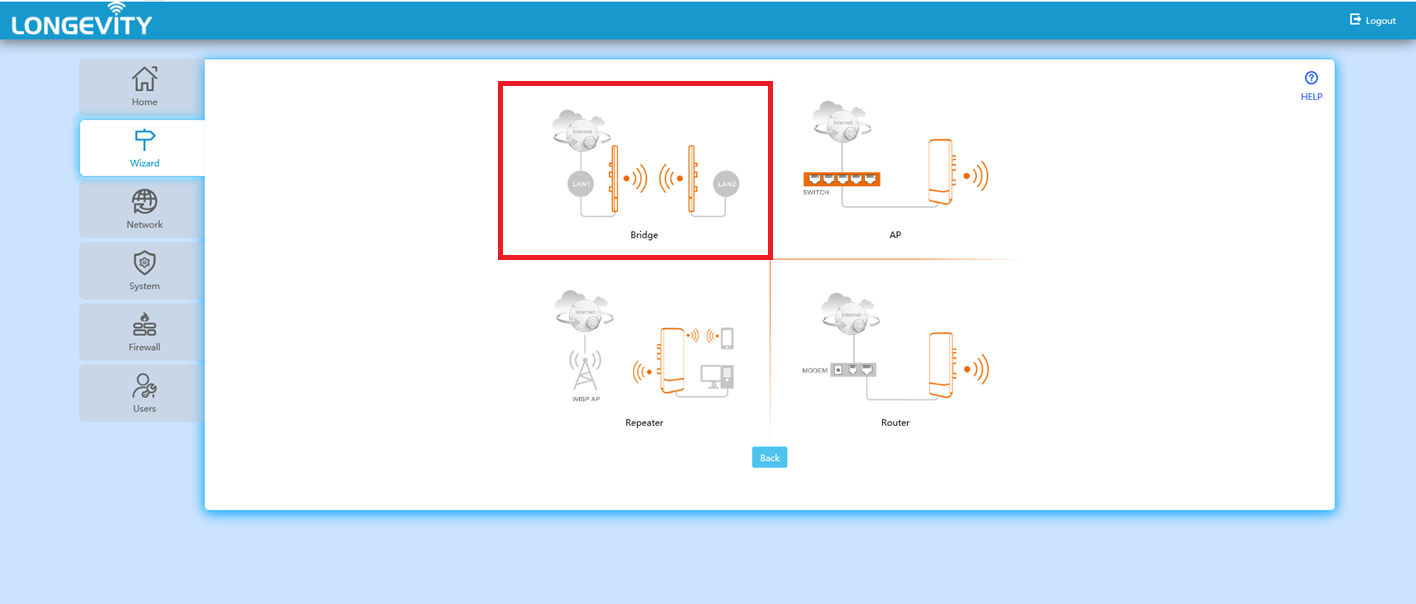 9. First set up the access point then the station.
Access Point Setup
1. Select Access Point
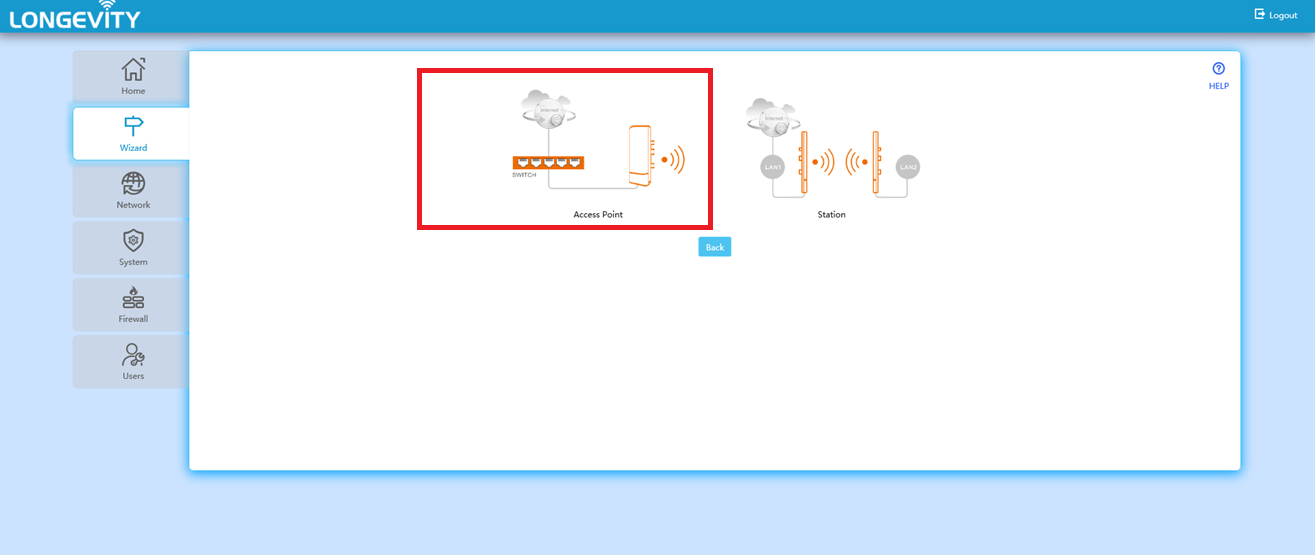 2. Change the IP address of the device to be in the same range as your computer (Do not keep it as 192.168.10.1). In our example, it will be 192.168.10.123. then press next.
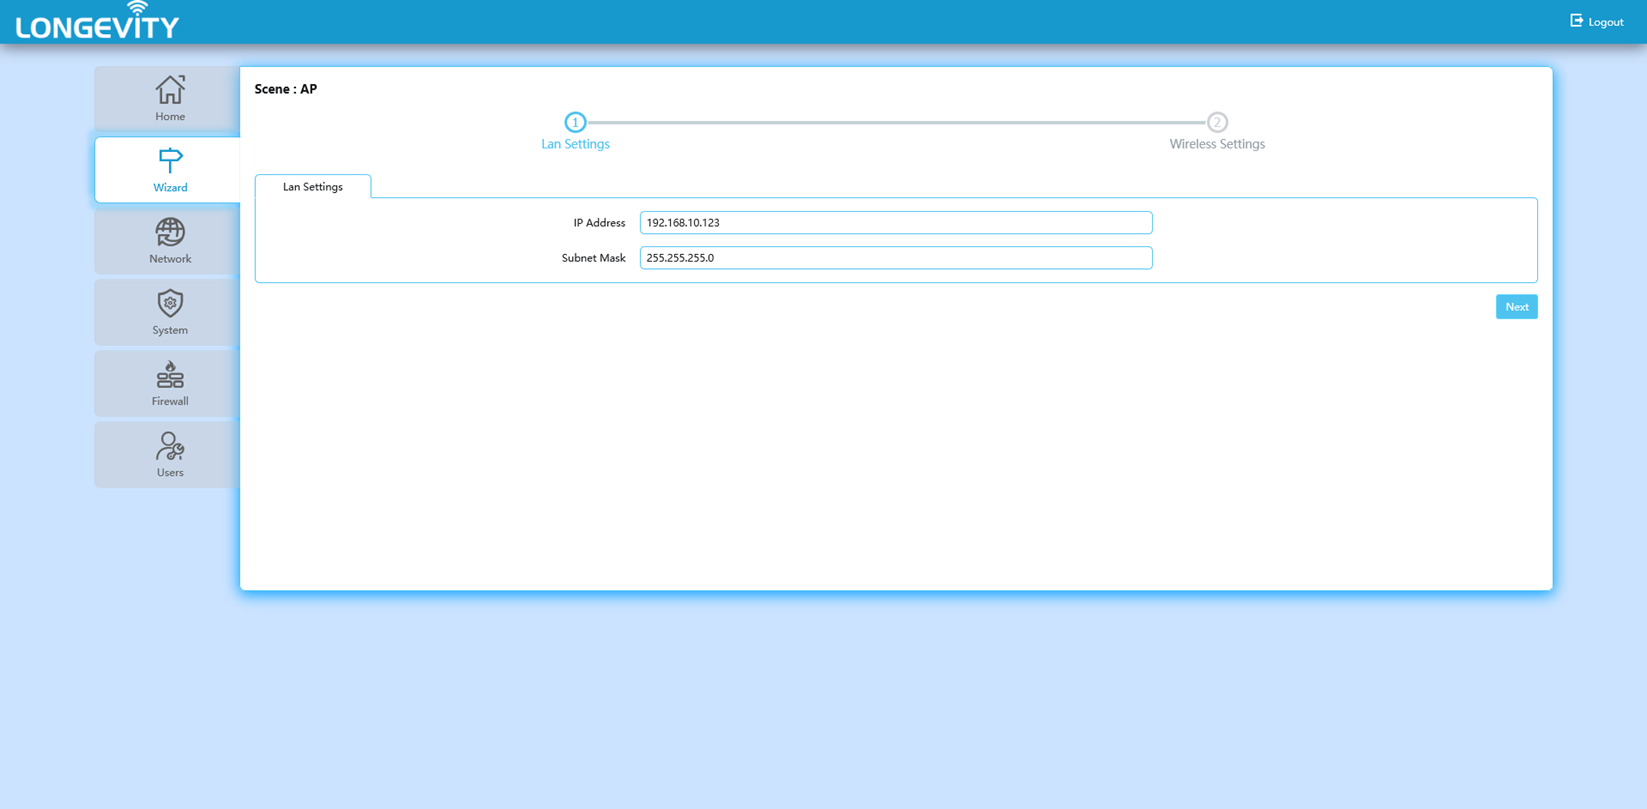
3. Enter your desired Network name in local SSID and password. Record these details for later use.
4. Change the country to Australia and leave the other settings as default setting.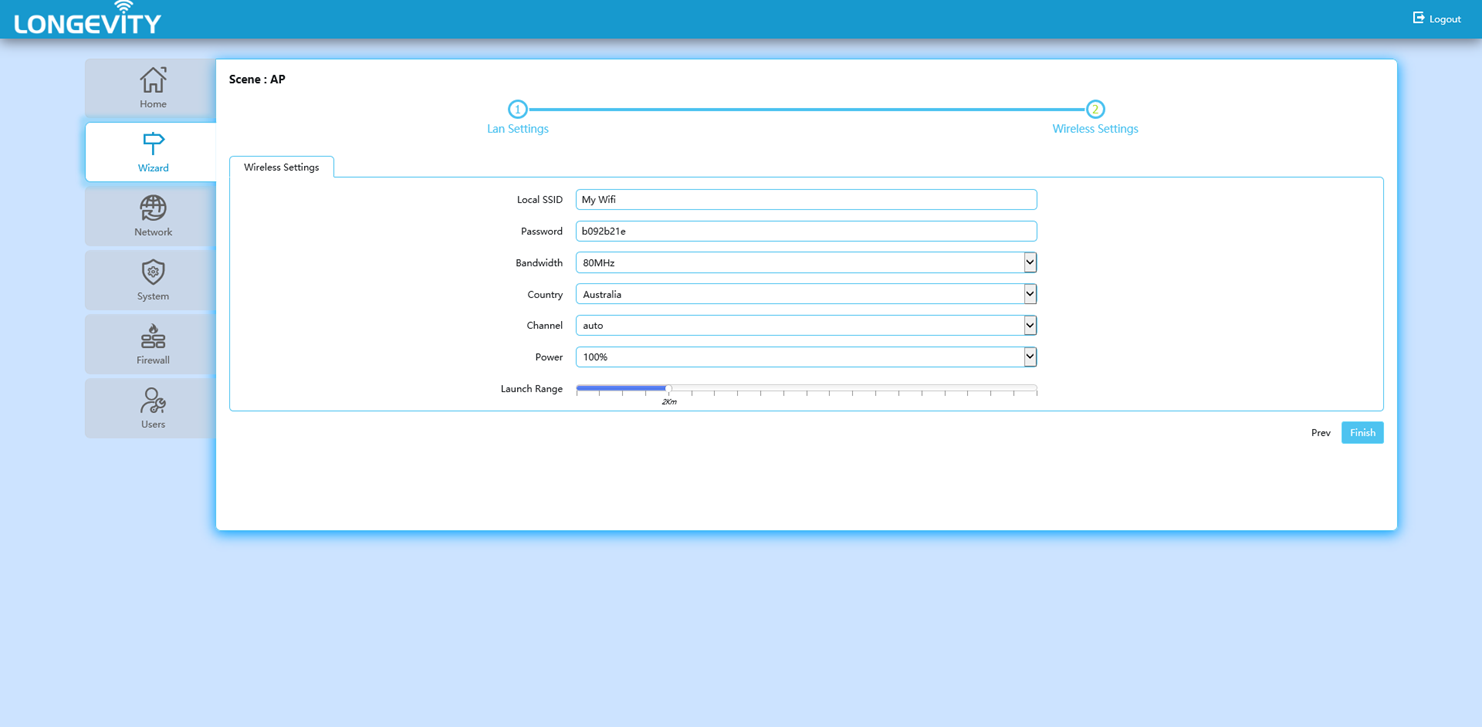
6. Click finish to complete set up.
Station setup
1. Select Station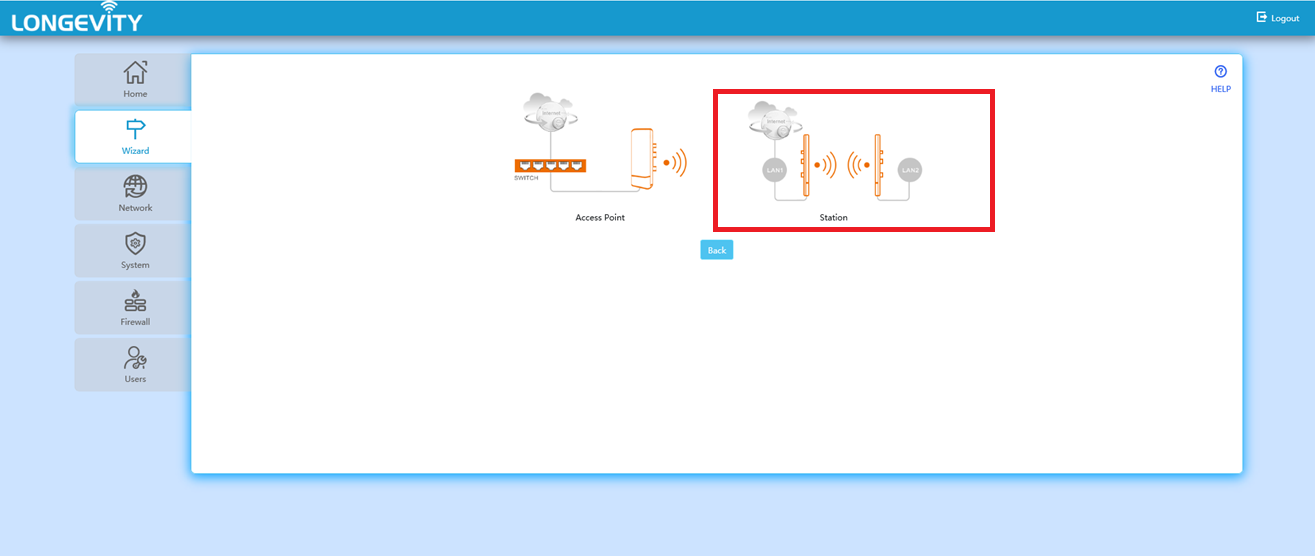
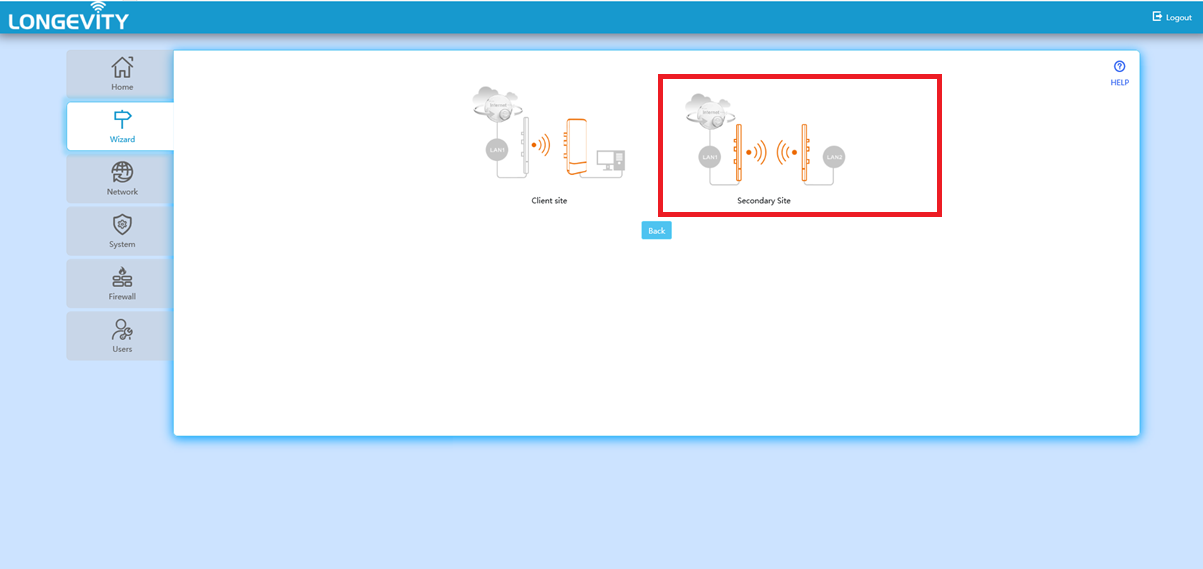 3. Change the IP address to be in the same range as your computer. Select next.
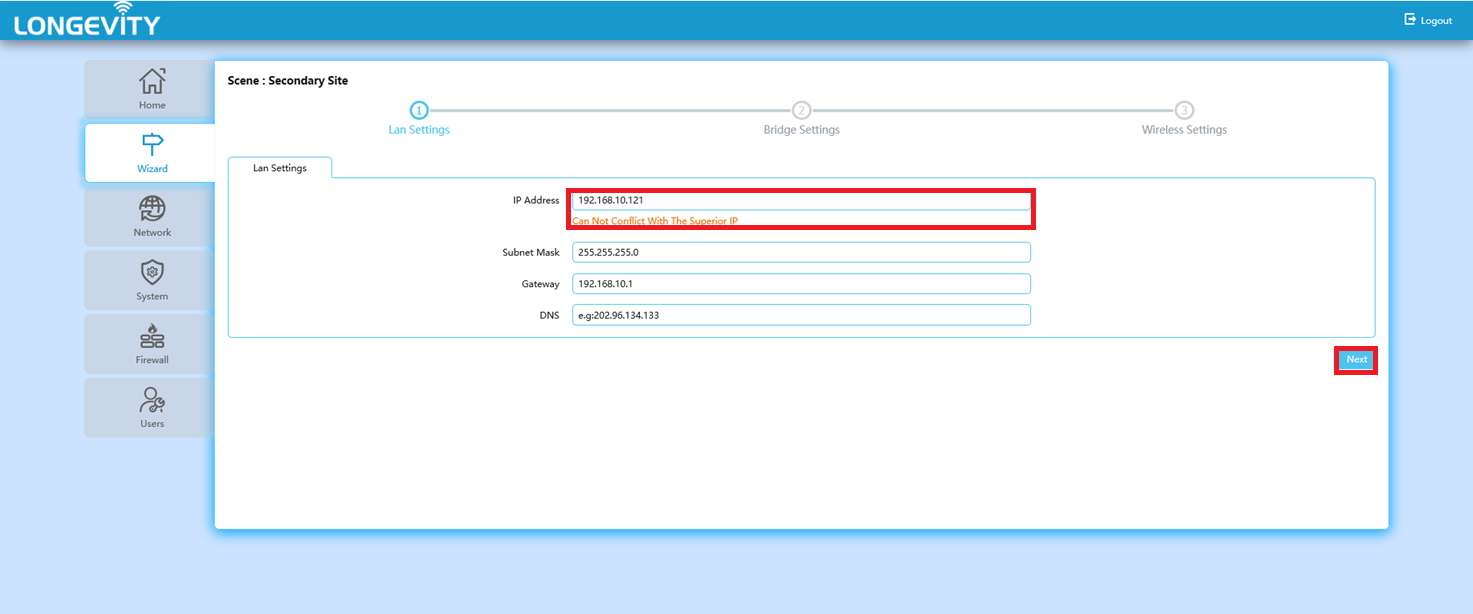
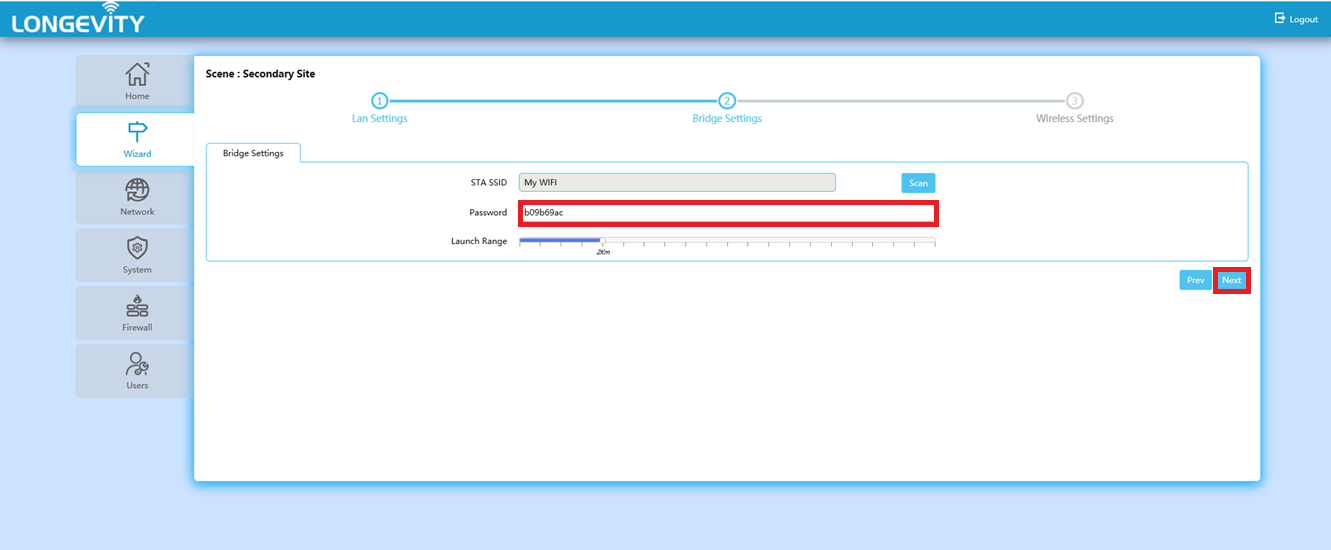
4. Click scan and select your Access Point using the operate symbol.

5. Enter the password you created for the Access Point. Then select next.
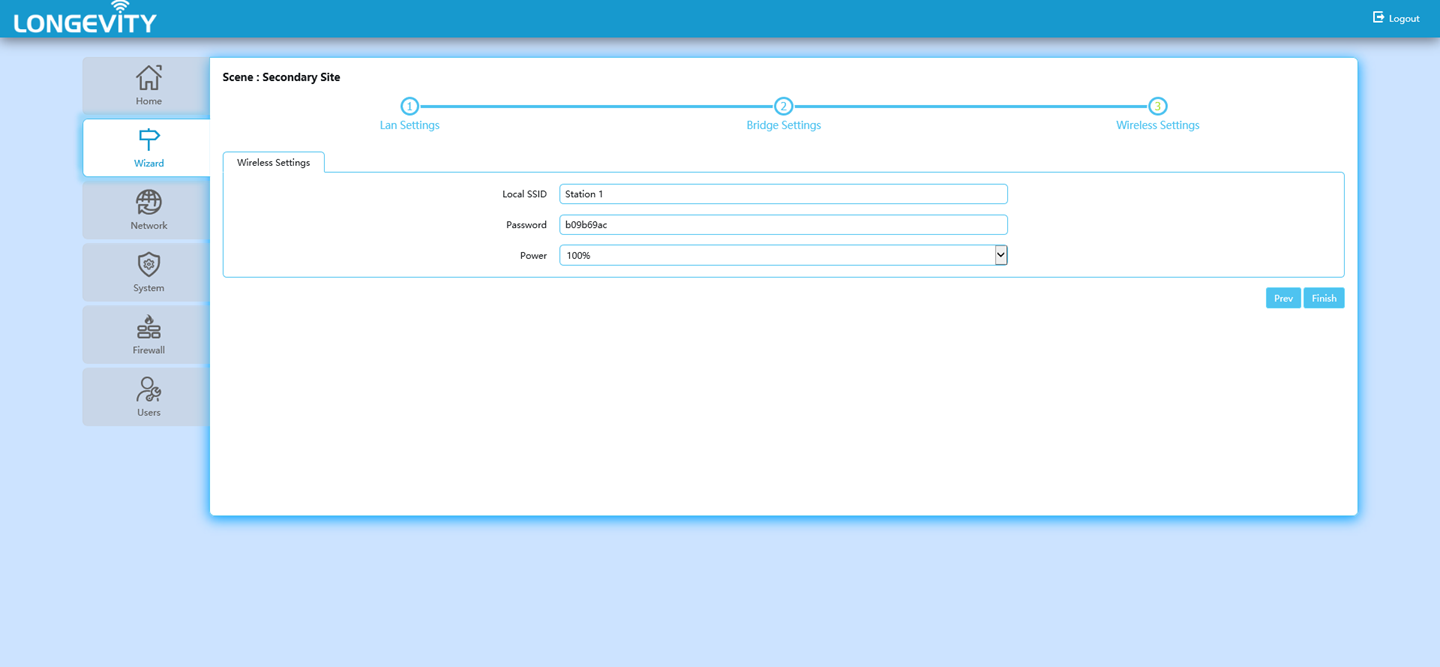
6. Enter desired Local SSID and password. Select finished.
Wiring example
