This guide will walk you thorough how configure the WT5-ULB.
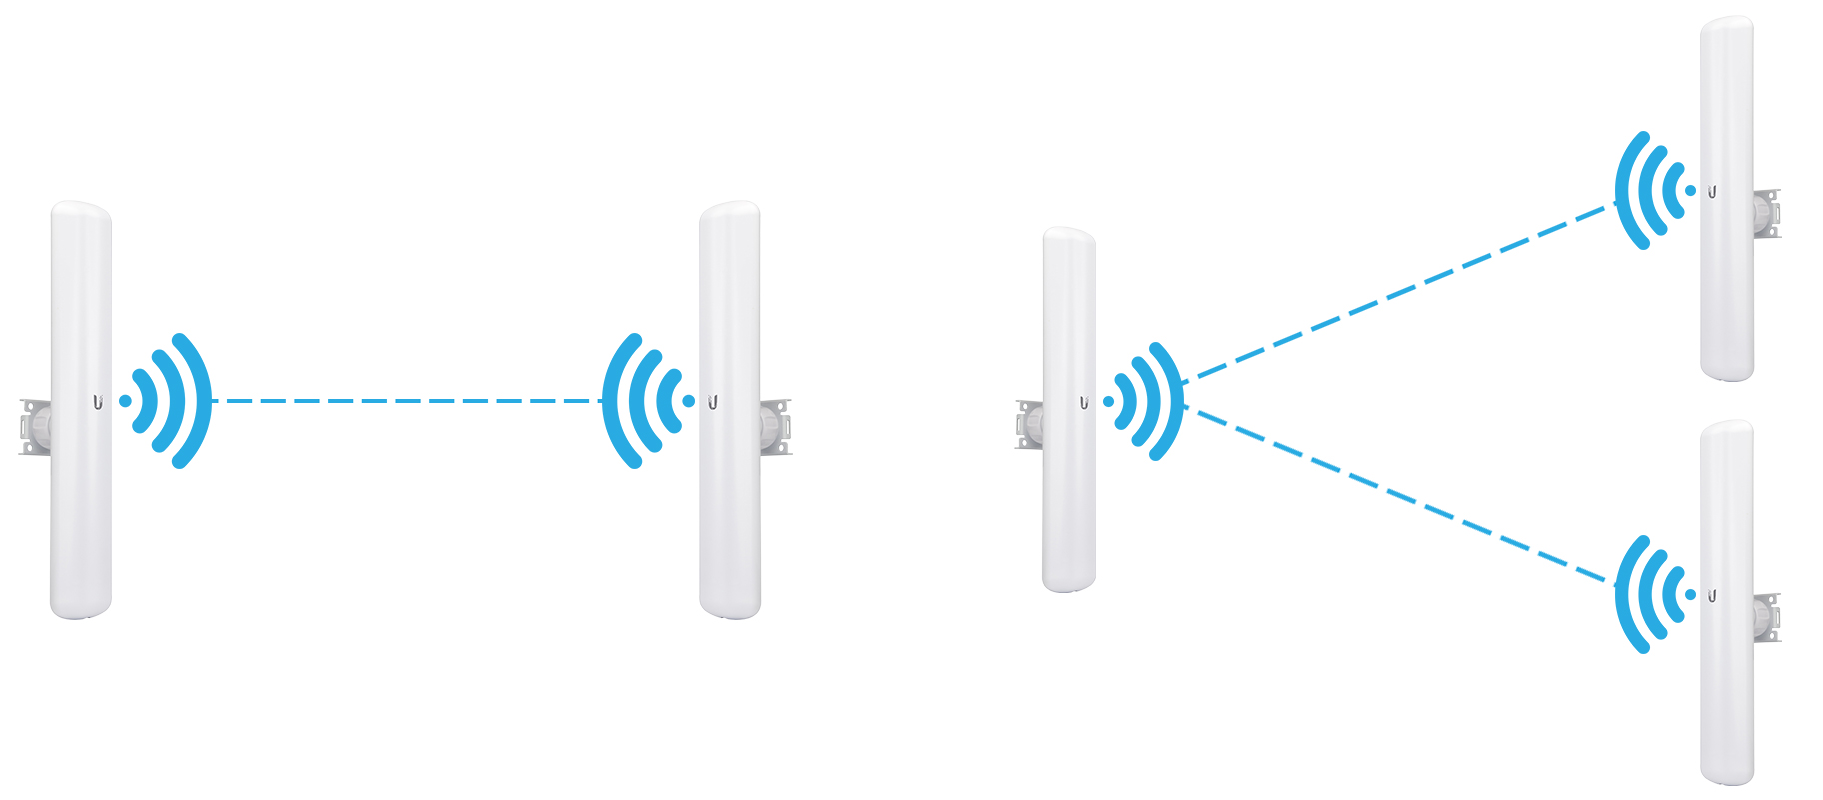
There are two configuration examples below. The first details a 1-to-1 setup with one access point and one station, this is the most common. The second setup is a 1-to-2 setup for when you have two locations (stations) to go back to a single point (access point). The same steps can be followed to add additional stations.
Setting up 1 Access Point and 1 Station
Before beginning, it is recommended to setup the devices first, before mounting them. A computer with a ethernet port will be required.
Access Point Setup
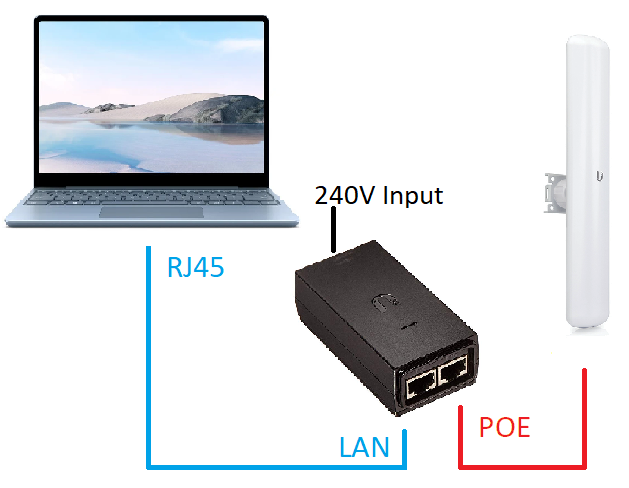
- Connect power to the included Ubiquiti PoE Injector, and connect the Ubiquiti antenna to the PoE port. Connect the LAN port to the ethernet port on the computer. Allow 2 minutes for the device to power up.

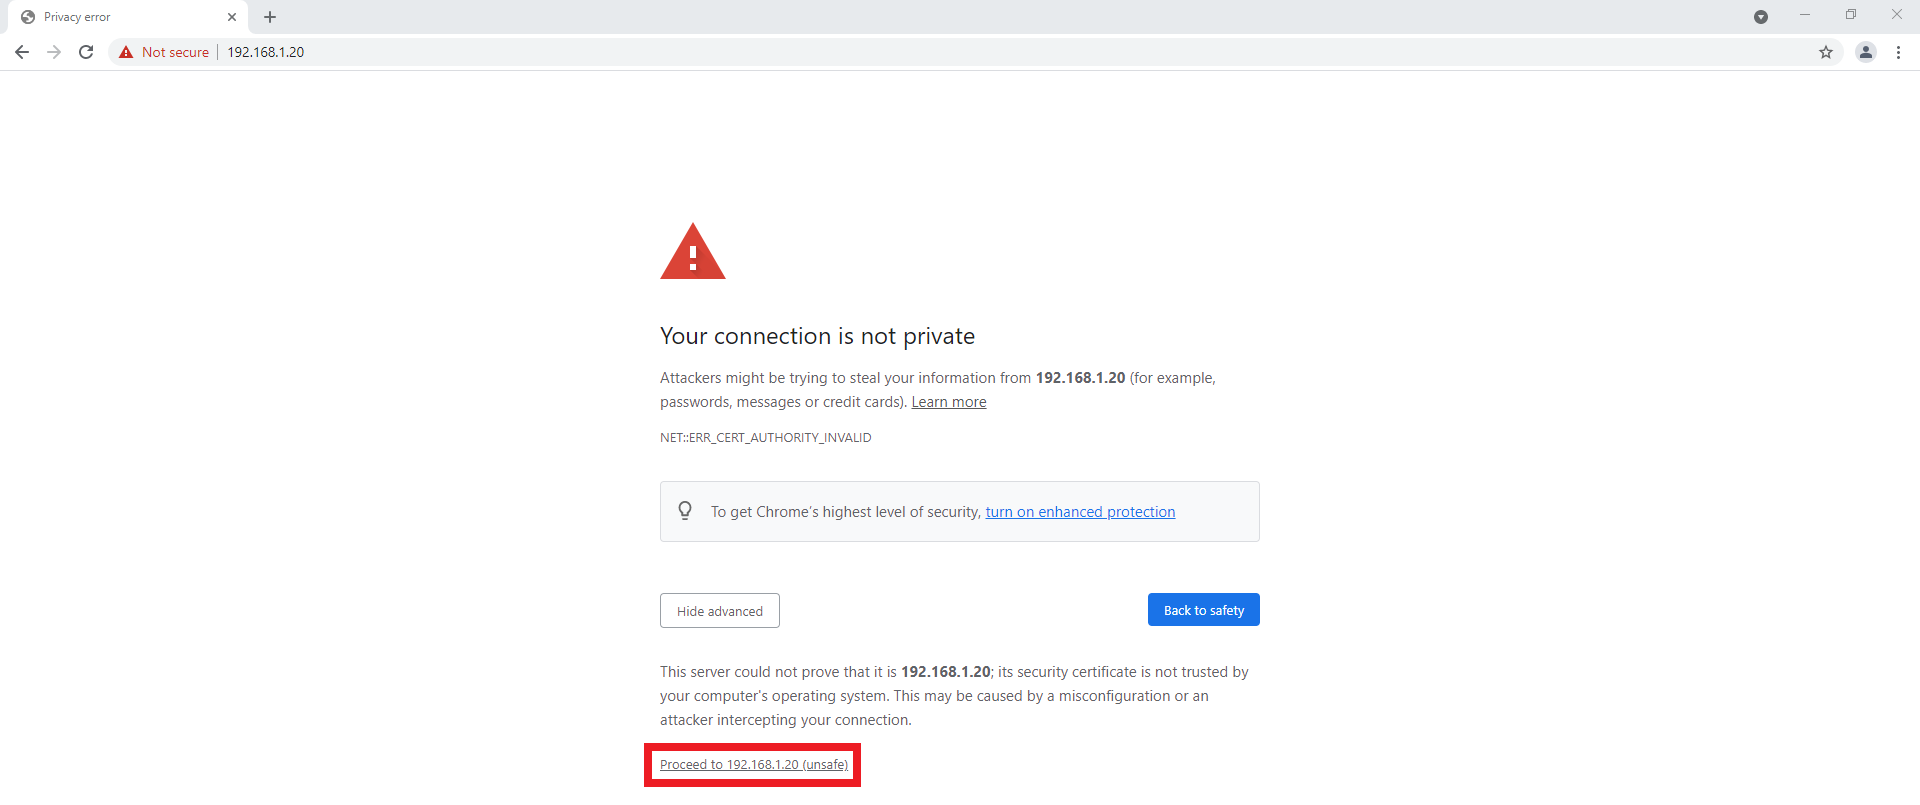
- Open Google Chrome, and enter the default IP address for the device, 192.168.1.20 (If you are unable to connect to the device, ensure your computer is in the same IP address range.)
NOTE: As of February 2025 Ubiquiti ULB devices have DHCP enabled by default - If you have a router attached to your network the Ubiquiti may not be on the 192.168.1.20 address. If this happens, login to your router to find what IP address it has give to the Ubiquiti device. - You may be prompted that the connection is not private, select the proceed option.
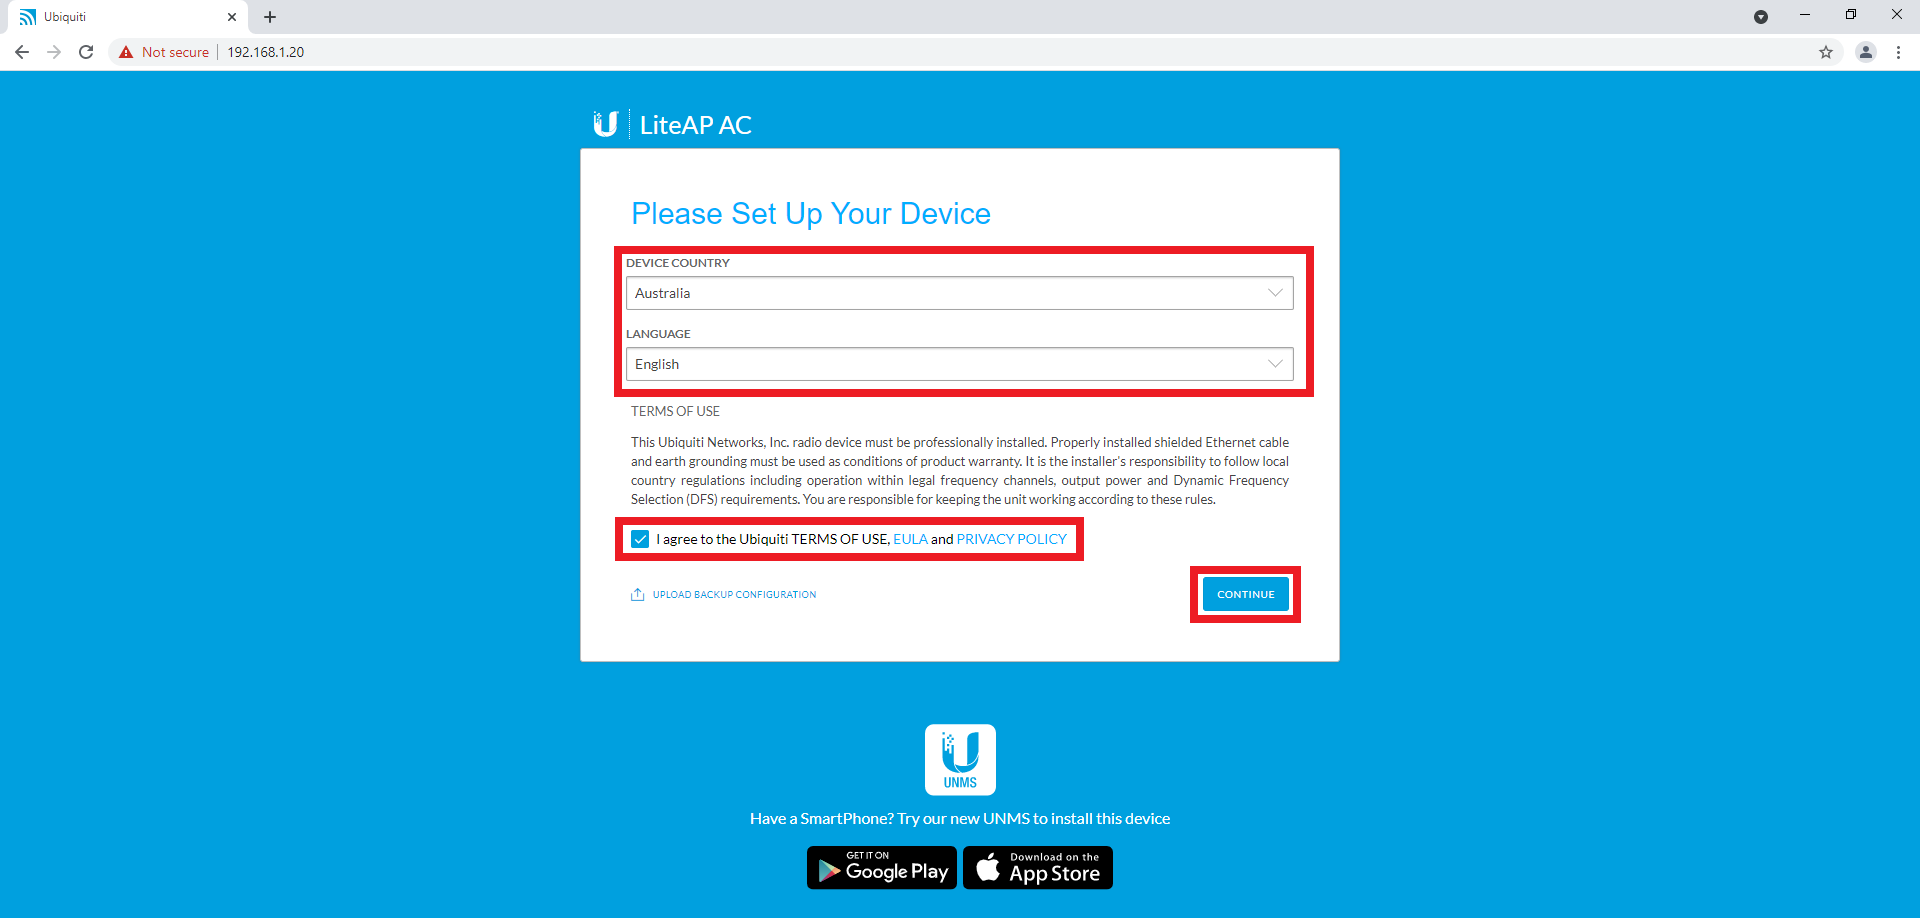
- Select your Country, and Language. Tick the agreement box, and select Continue.
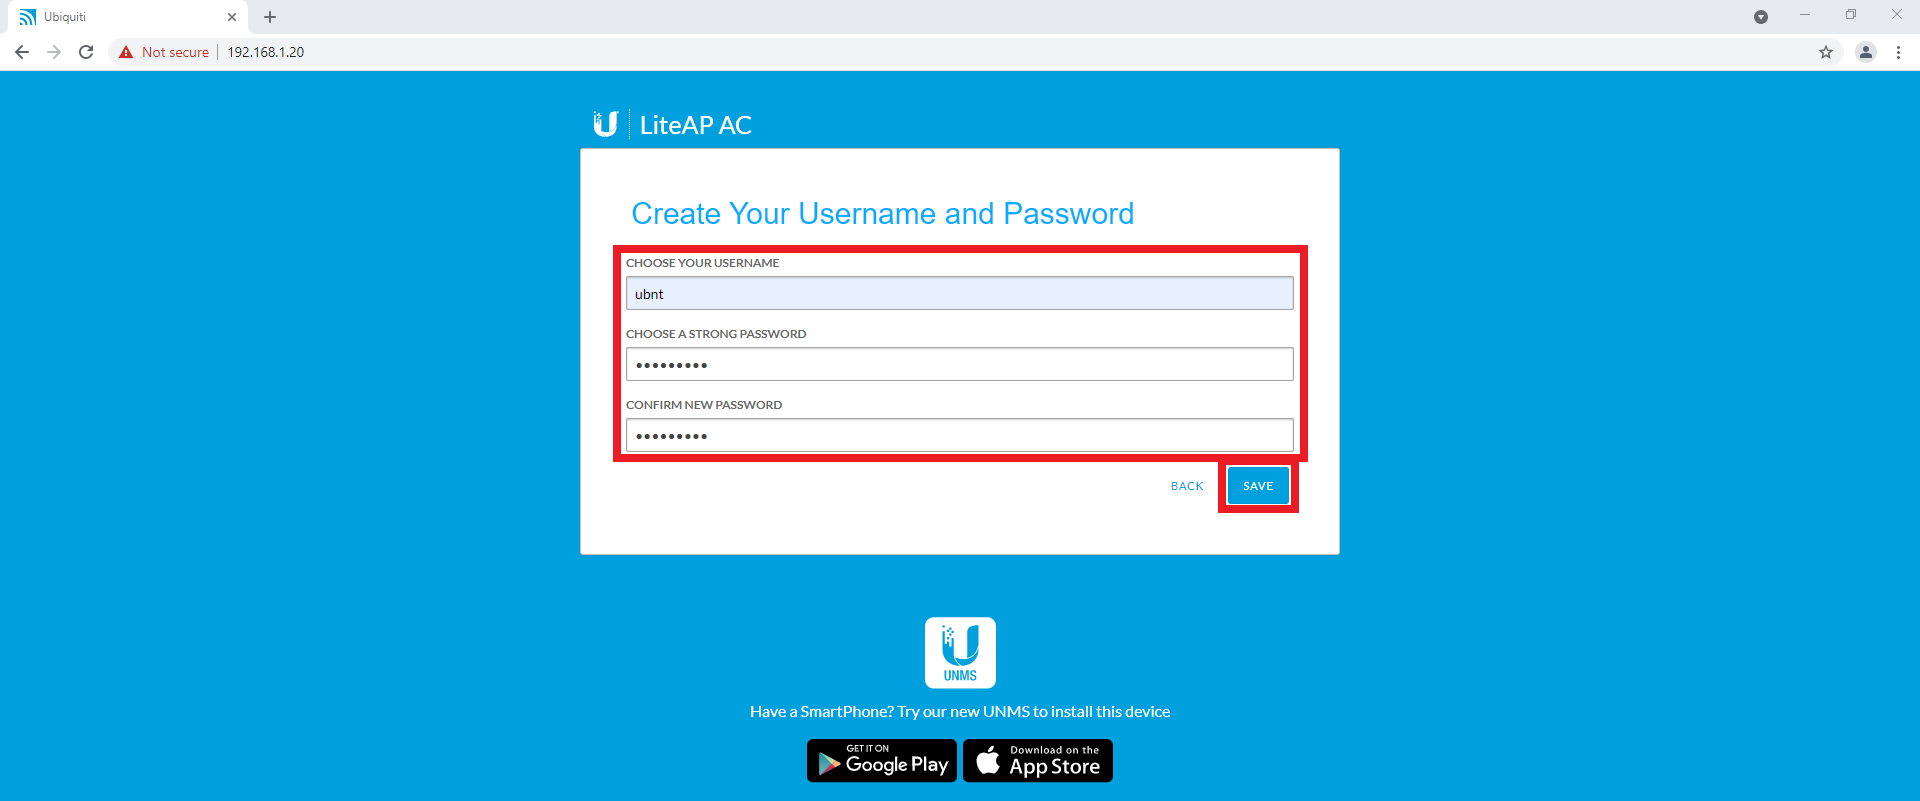
- Enter a Username and Password. Record these details in a safe place for later use. Select Save.
- Select Network.

- Change the IP address of the device to suit your network. In our example it will be static, with the address of 192.168.1.100. Select Save Changes.
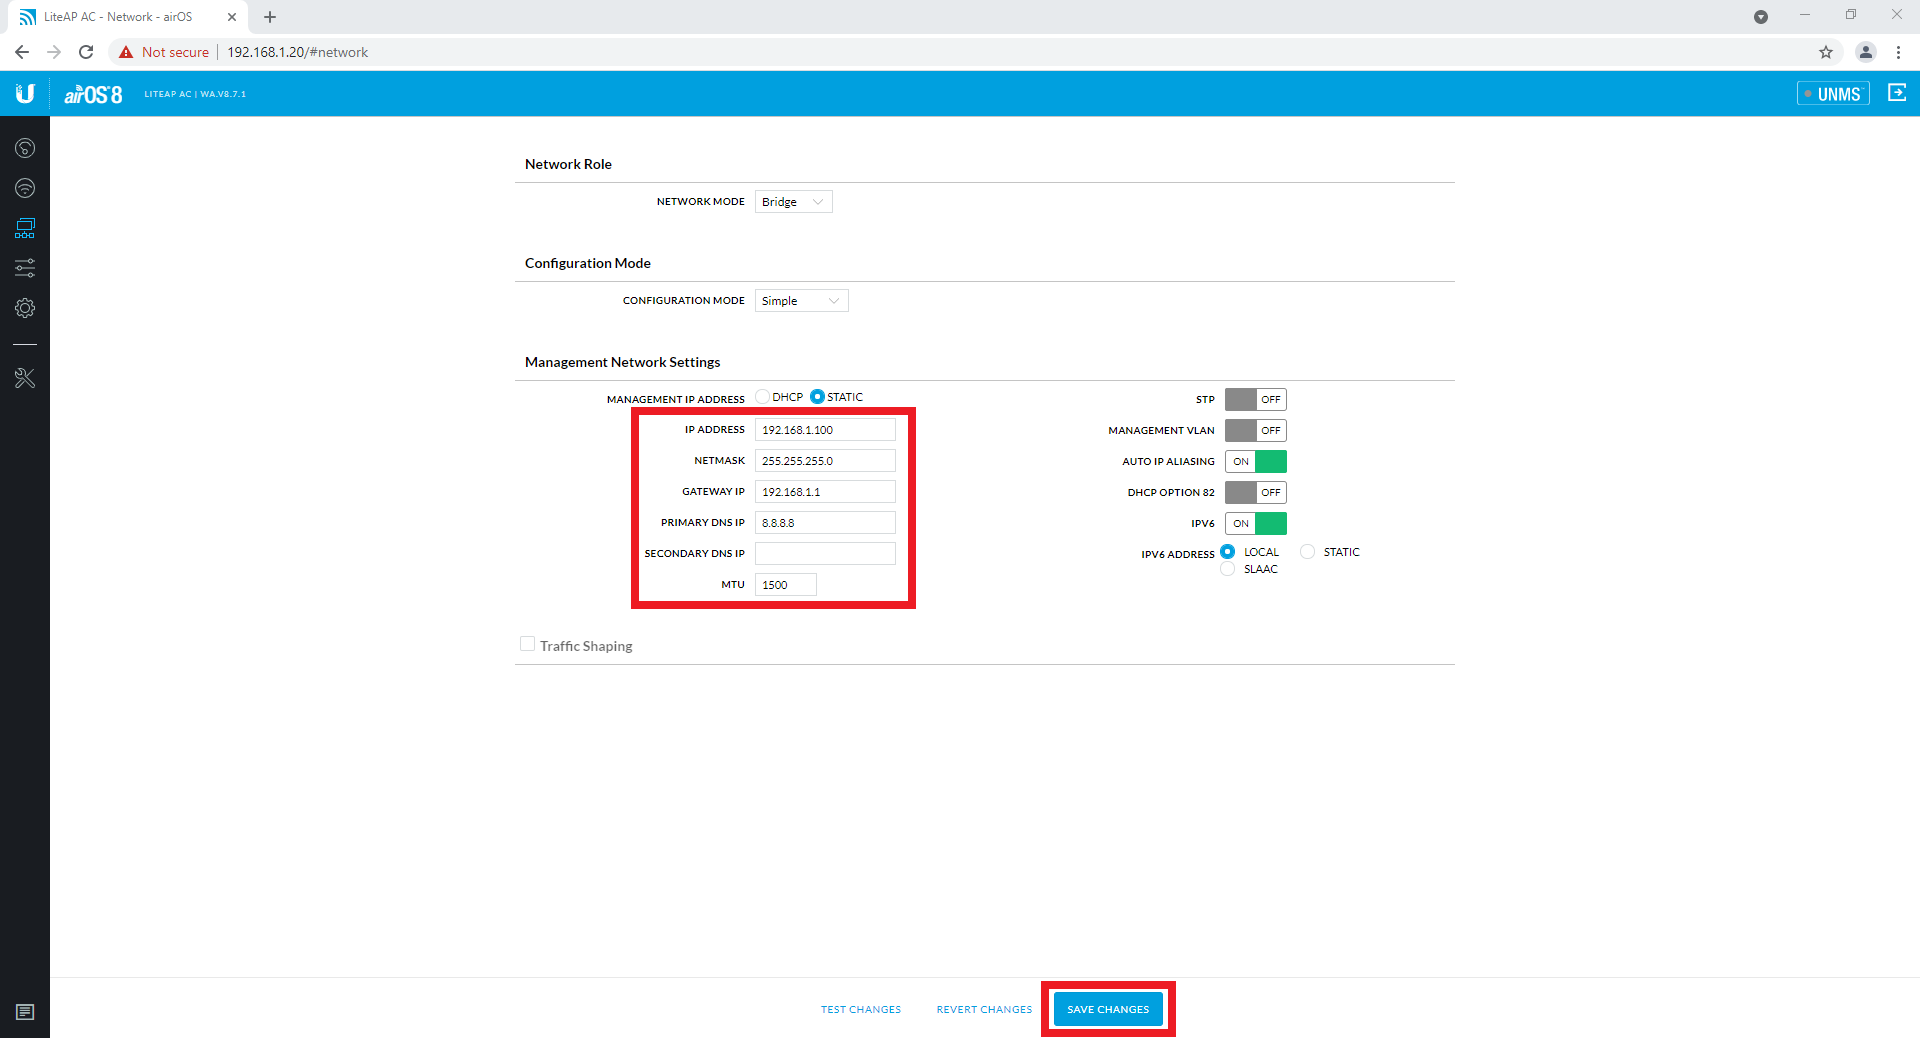
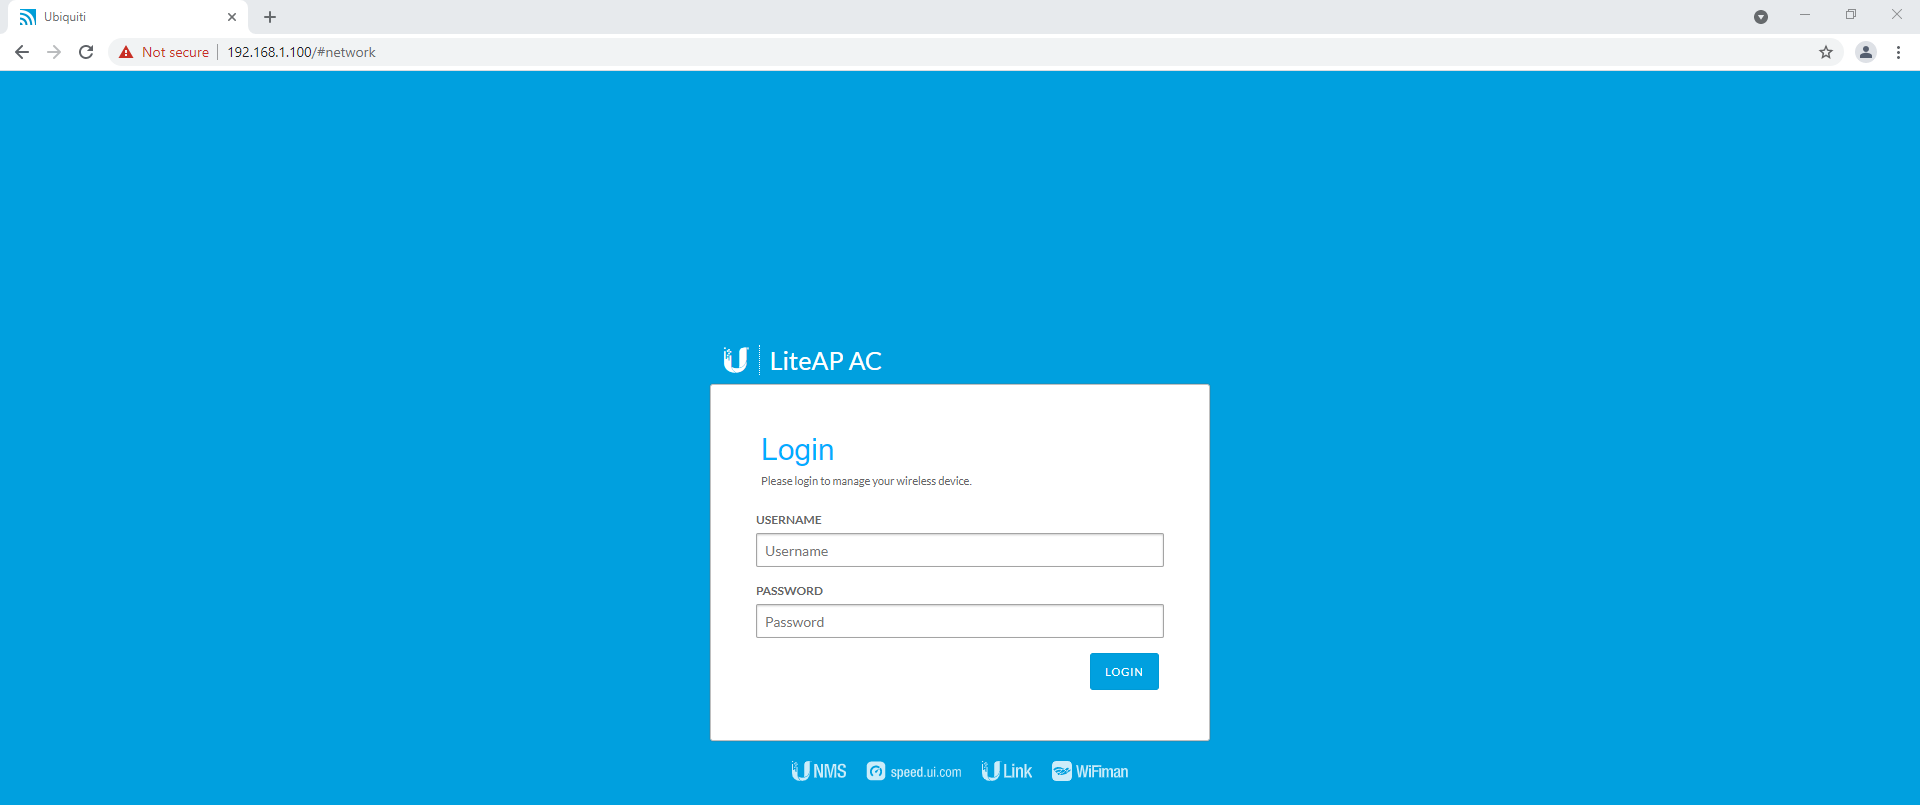
- You will loose connection to the device, wait 1-2 minutes and enter the new IP address into your web browser. You will be required to log into the device again.
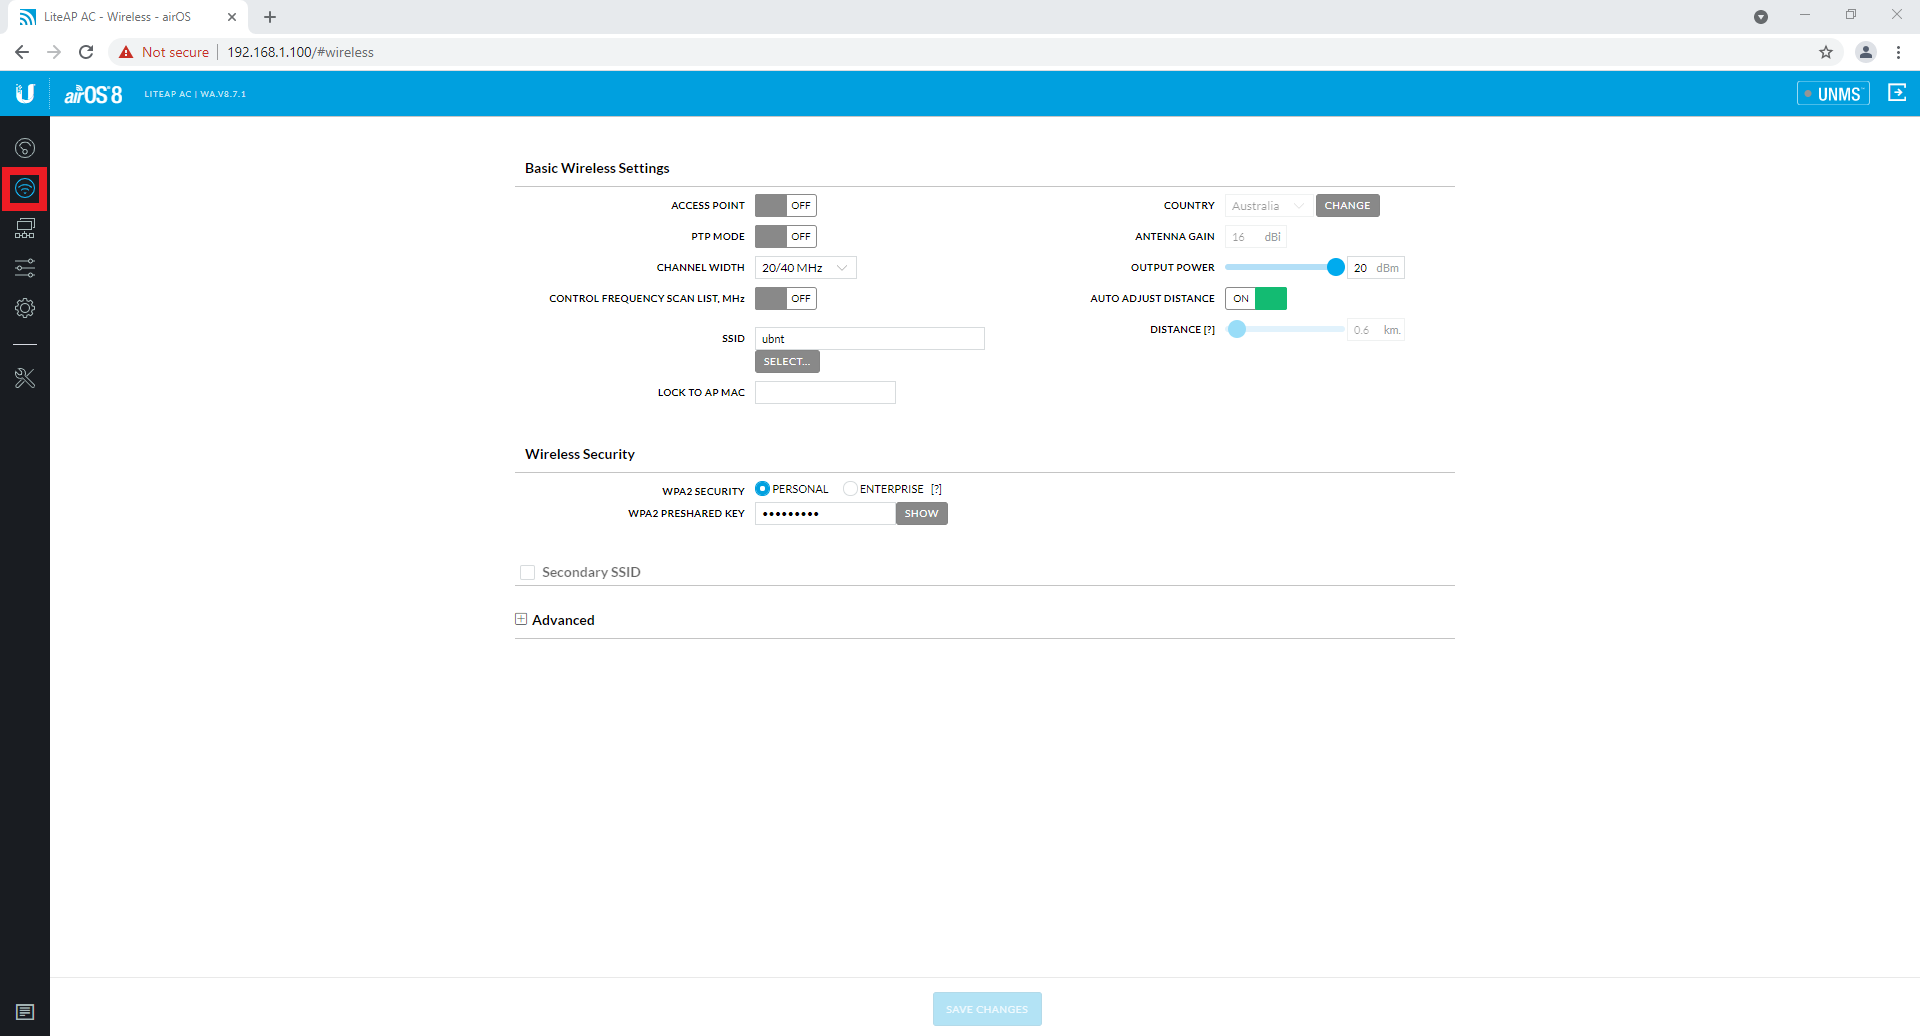
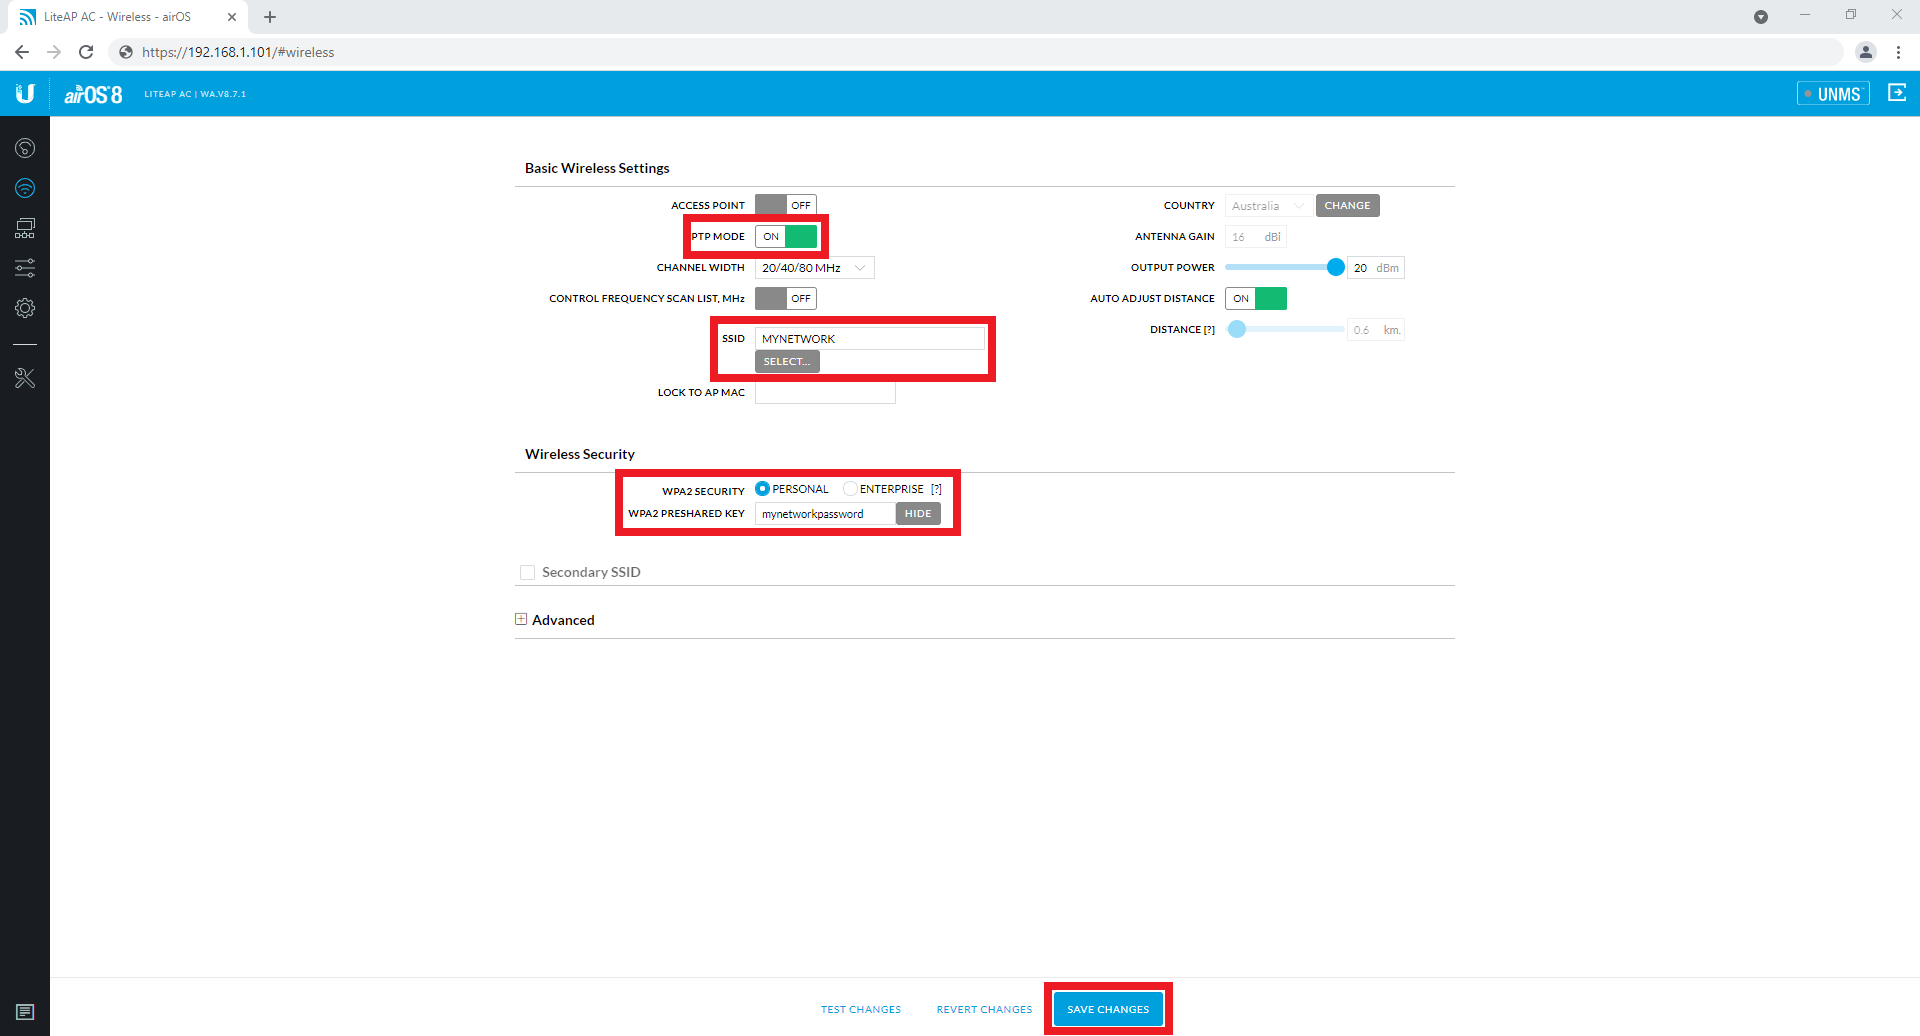
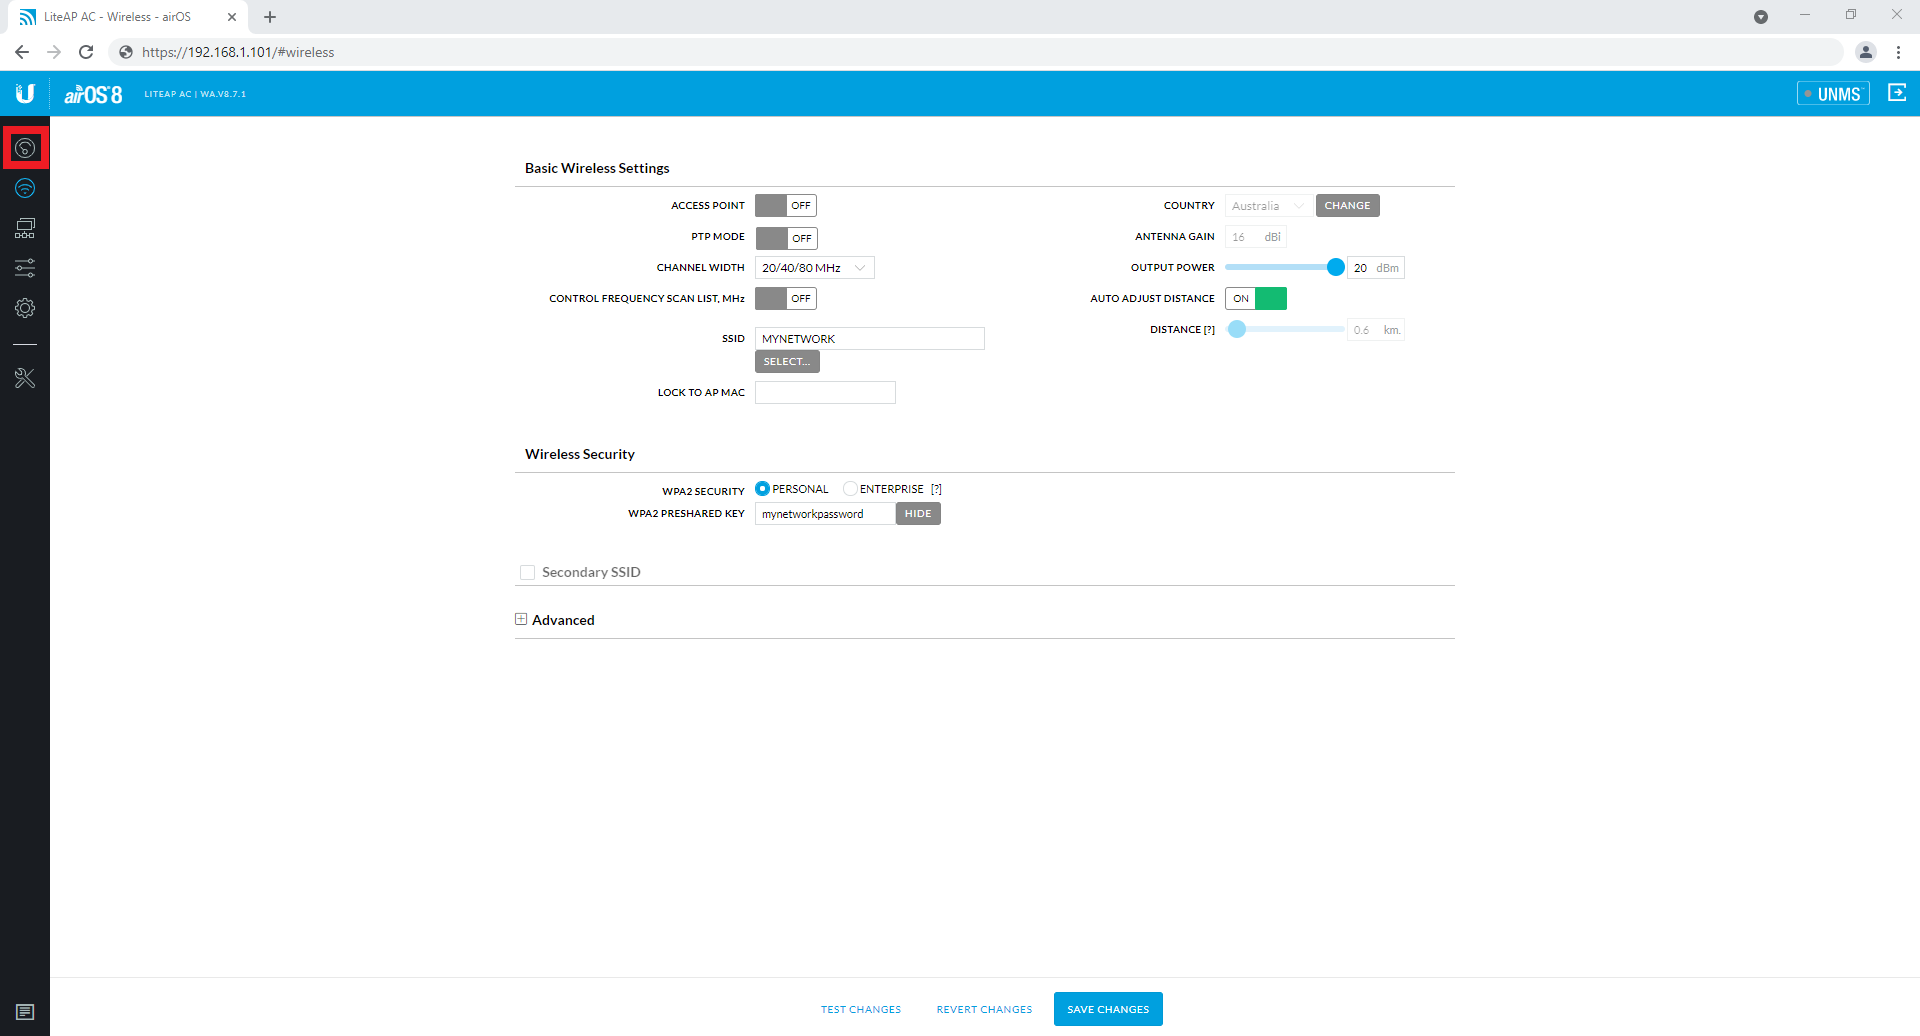
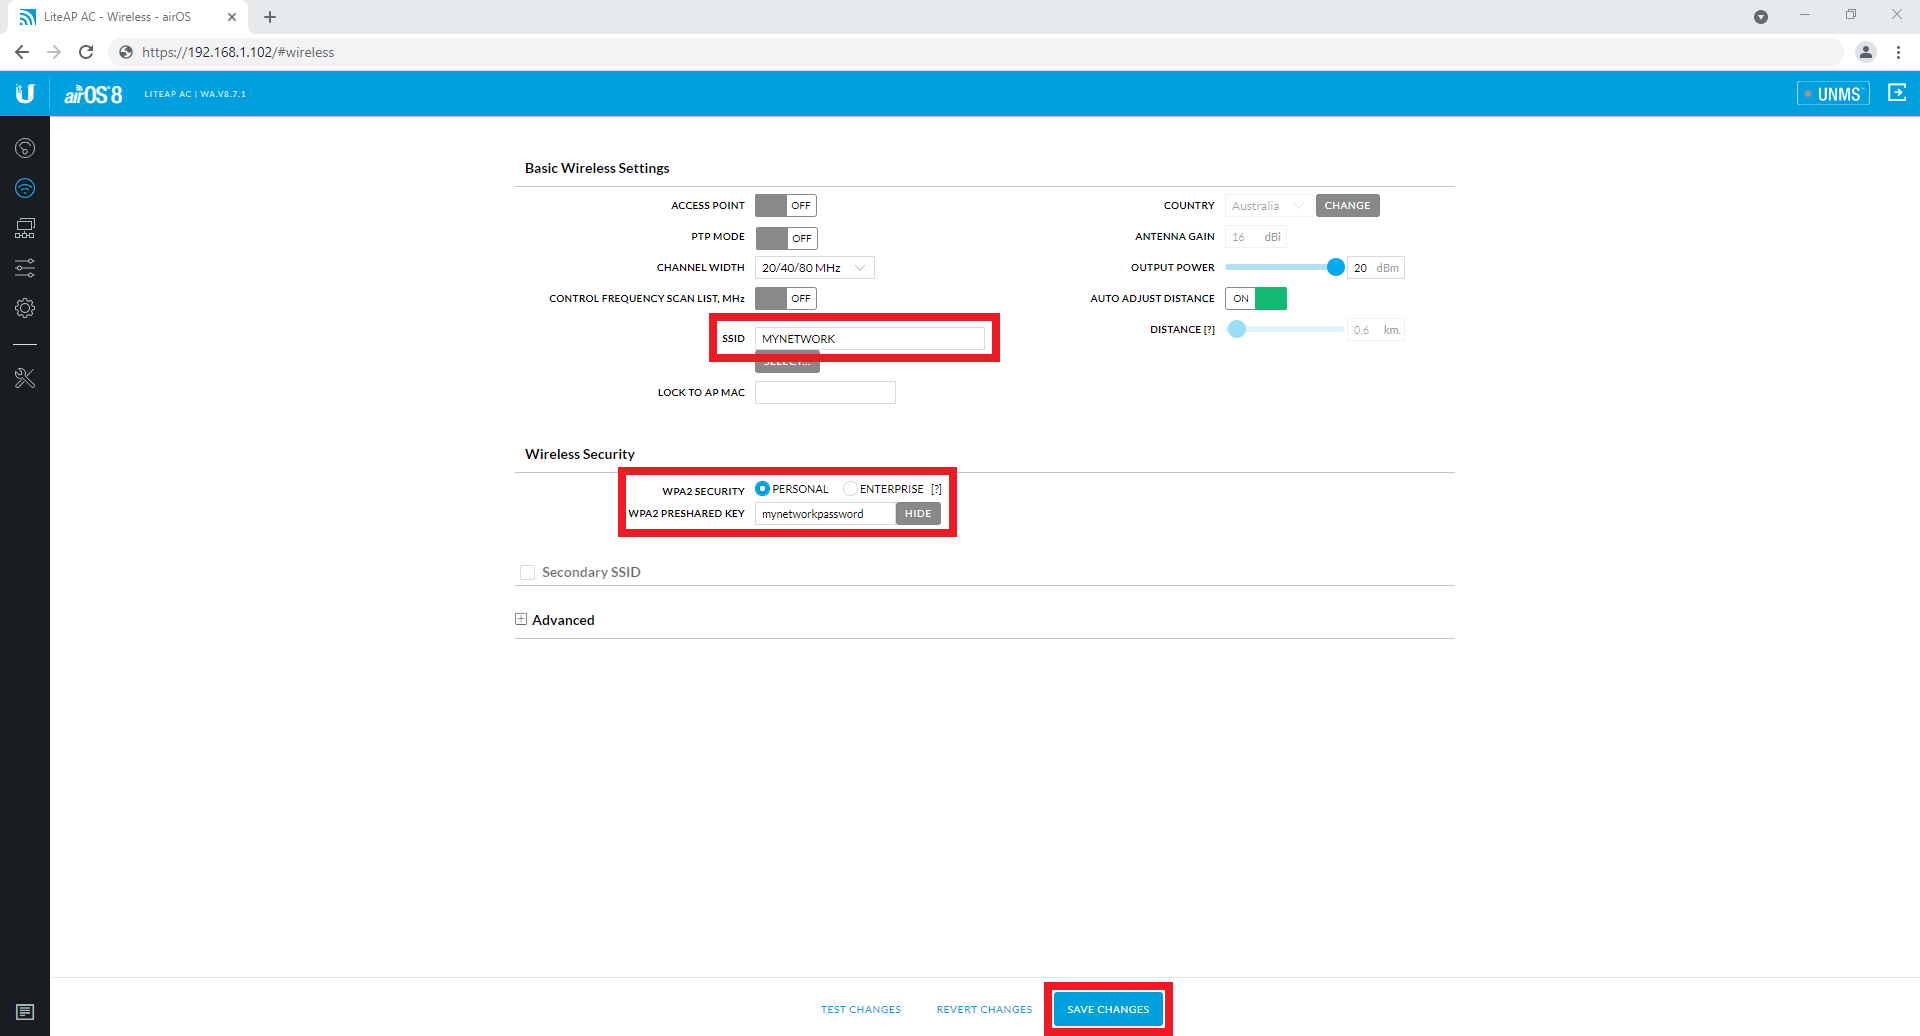
- Select the Wireless Settings option.
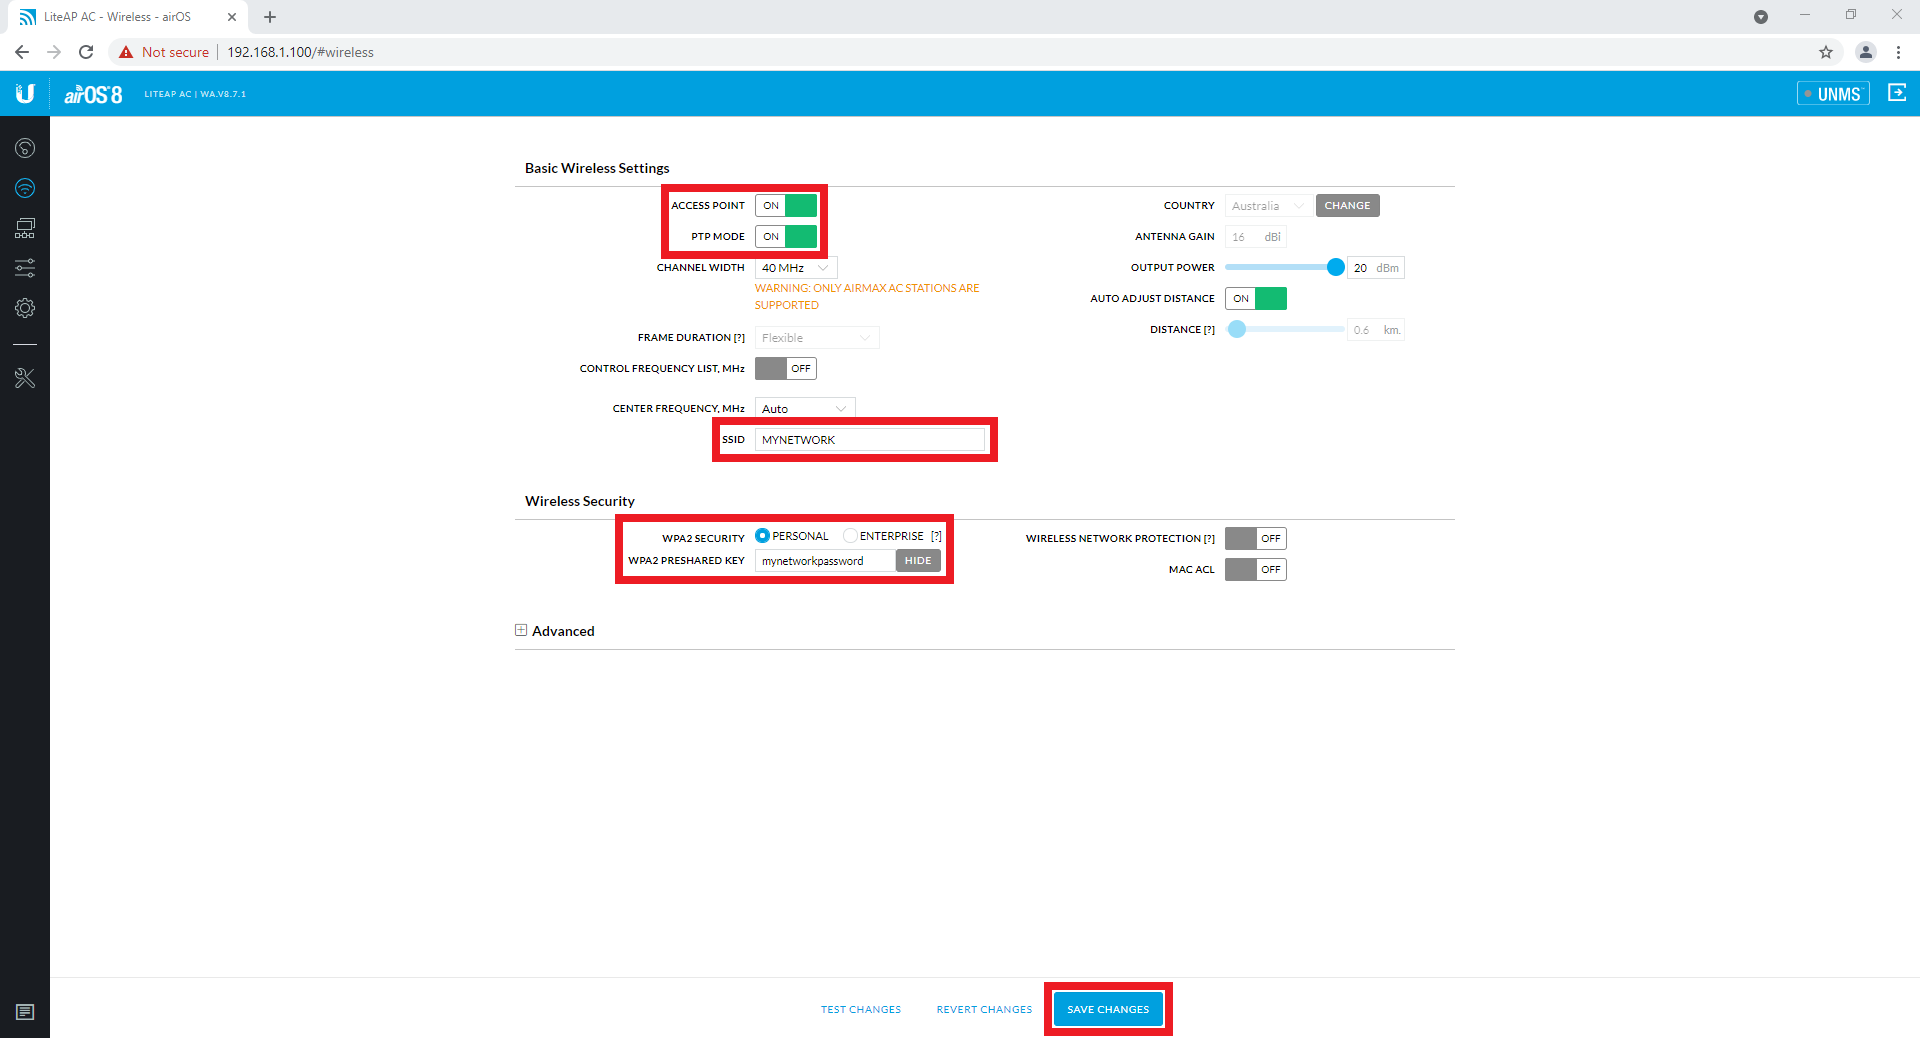
- Turn on Access Point and PTP Mode. Enter a SSID, this can be anything, it will be the Wi-Fi network name. Enter a WPA2 Preshared Key, this will be the password for the Wi-Fi network you are creating. Select Save Changes. Record these details in a safe place for later use.
- Disconnect your computer from the Ubiqutii, leaving the Ubiquiti connected to the PoE injector.
Station Setup
- Connect power to the included Ubiquiti PoE Injector, and connect the Ubiquiti antenna to the PoE port. Connect the LAN port to the ethernet port on the computer. Allow 2 minutes for the device to power up.
- Open Google Chrome, and enter the default IP address for the device, 192.168.1.20 (If you are unable to connect to the device, ensure your computer is in the same IP address range.)
NOTE: As of February 2025 Ubiquiti ULB devices have DHCP enabled by default - If you have a router attached to your network the Ubiquiti may not be on the 192.168.1.20 address. If this happens, login to your router to find what IP address it has give to the Ubiquiti device. - You may be prompted that the connection is not private, select the proceed option.
- Select your Country, and Language. Tick the agreement box, and select Continue.
- Enter a Username and Password. Record these details in a safe place for later use. Select Save.
- Select Network.
- Change the IP address of the device to suit your network. In our example it will be static, with the address of 192.168.1.101. Select Save Changes.

- You will loose connection to the device, wait 1-2 minutes and enter the new IP address into your web browser. You will be required to log into the device again.

- Select the Wireless Settings option.
- Turn on PTP Mode. Enter the same SSID and WPA2 Preshared Key as set on the Access Point. Select Save Changes.
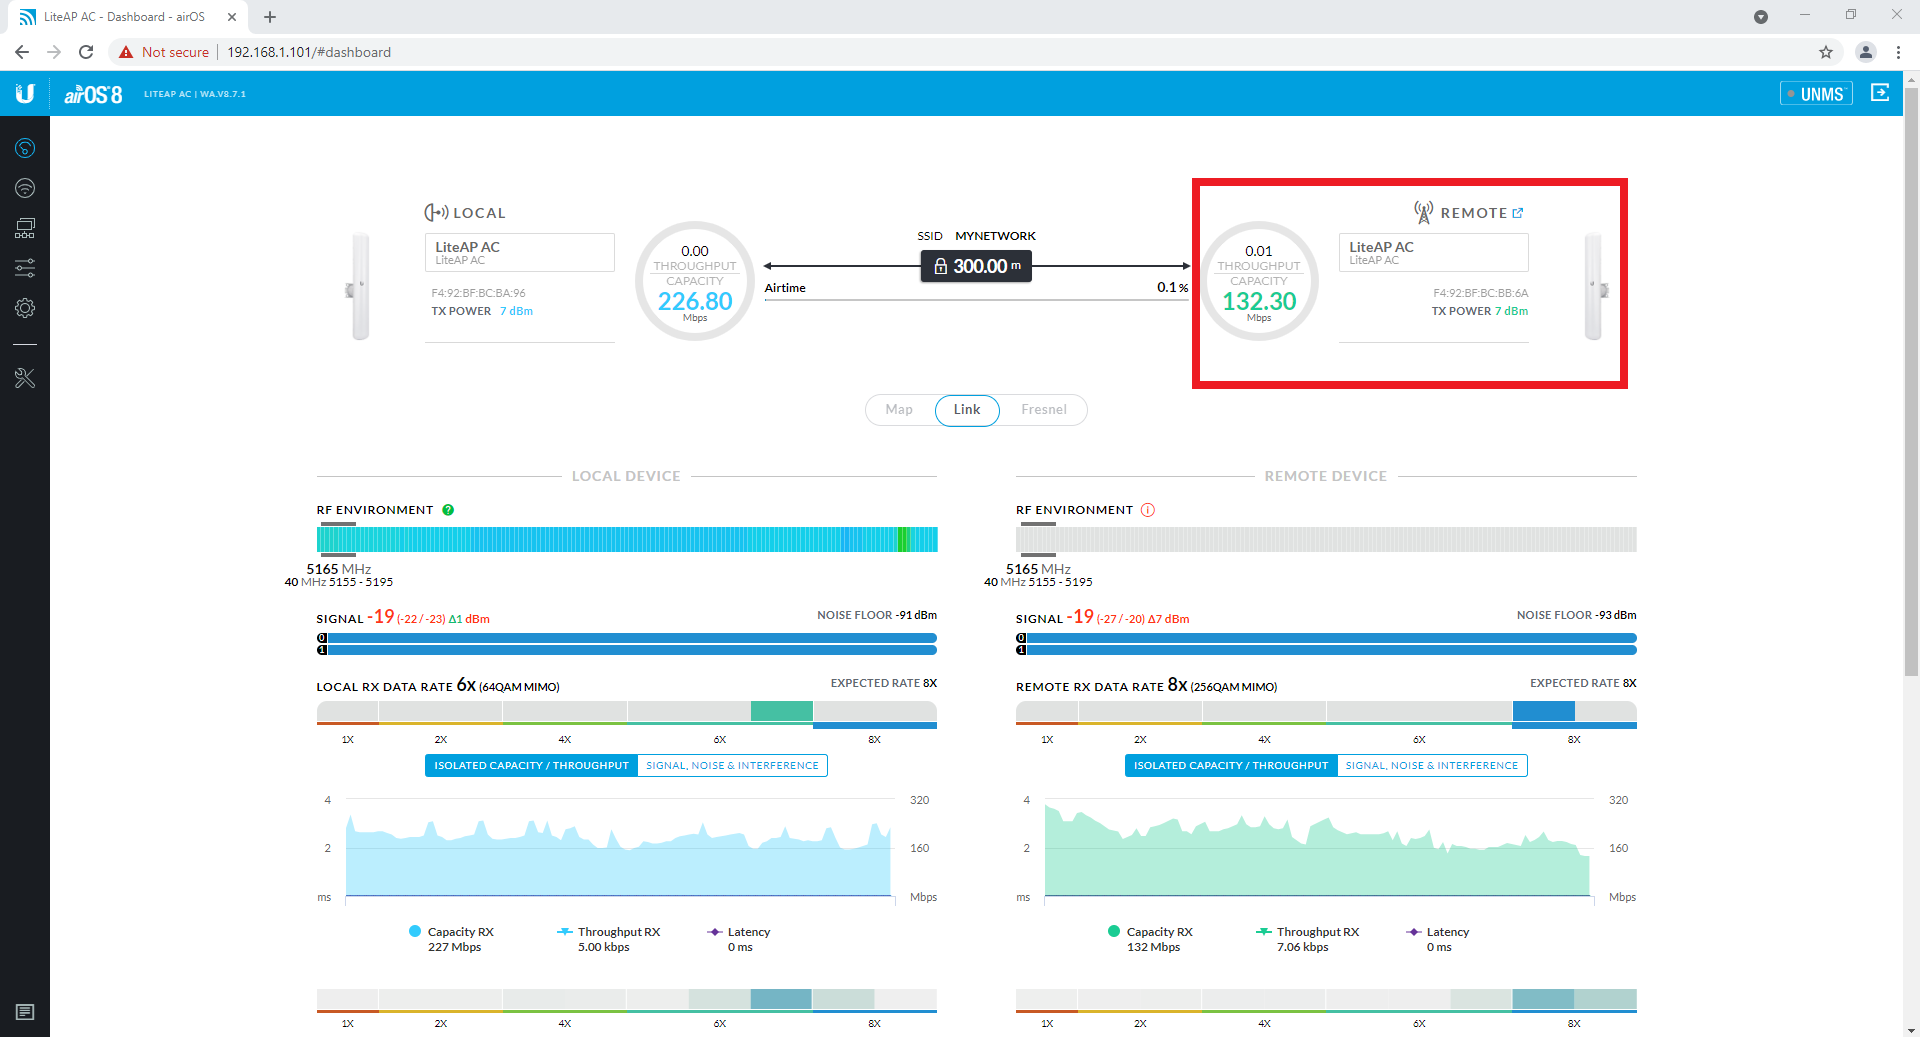
- Select the Dashboard option.

- Once the Ubiquiti's are connected, you will see a device listed as Remote.
Setting up 1 Access Point and 2 Stations
Before beginning, it is recommended to setup the devices first, before mounting them. A computer with a ethernet port will be required.
Access Point Setup
- Connect power to the included Ubiquiti PoE Injector, and connect the Ubiquiti antenna to the PoE port. Connect the LAN port to the ethernet port on the computer. Allow 2 minutes for the device to power up.

- Open Google Chrome, and enter the default IP address for the device, 192.168.1.20 (If you are unable to connect to the device, ensure your computer is in the same IP address range.)
NOTE: As of February 2025 Ubiquiti ULB devices have DHCP enabled by default - If you have a router attached to your network the Ubiquiti may not be on the 192.168.1.20 address. If this happens, login to your router to find what IP address it has give to the Ubiquiti device. - You may be prompted that the connection is not private, select the proceed option.
- Select your Country, and Language. Tick the agreement box, and select Continue.
- Enter a Username and Password. Record these details in a safe place for later use. Select Save.
- Select Network.
- Change the IP address of the device to suit your network. In our example it will be static, with the address of 192.168.1.100. Select Save Changes.8. You will loose connection to the device, wait 1-2 minutes and enter the new IP address into your web browser. You will be required to log into the device again.9. Select the Wireless Settings option.10. Turn on Access Point. Enter a SSID, this can be anything, it will be the Wi-Fi network name. Enter a WPA2 Preshared Key, this will be the password for the Wi-Fi network you are creating. Select Save Changes. Record these details in a safe place for later use.
 11. Disconnect your computer from the Ubiquiti, leaving the Ubiquiti connected to the PoE injector.
Station 1 Setup
- Connect power to the included Ubiquiti PoE Injector, and connect the Ubiquiti antenna to the PoE port. Connect the LAN port to the ethernet port on the computer. Allow 2 minutes for the device to power up.

- Open Google Chrome, and enter the default IP address for the device, 192.168.1.20 (If you are unable to connect to the device, ensure your computer is in the same IP address range.)
NOTE: As of February 2025 Ubiquiti ULB devices have DHCP enabled by default - If you have a router attached to your network the Ubiquiti may not be on the 192.168.1.20 address. If this happens, login to your router to find what IP address it has give to the Ubiquiti device. - You may be prompted that the connection is not private, select the proceed option.
- Select your Country, and Language. Tick the agreement box, and select Continue.
- Enter a Username and Password. Record these details in a safe place for later use. Select Save.
- Select Network.
- Change the IP address of the device to suit your network. In our example it will be static, with the address of 192.168.1.101. Select Save Changes.
- You will loose connection to the device, wait 1-2 minutes and enter the new IP address into your web browser. You will be required to log into the device again.
- Select the Wireless Settings option.

- Enter the same SSID and WPA2 Preshared Key as set on the Access Point. Select Save Changes.

- Select the Dashboard option.
Station 2 Setup
Configuration of this station is identical to station 1, the only difference being the IP address, which will be 192.168.1.102 in our example.
- Connect power to the included Ubiquiti PoE Injector, and connect the Ubiquiti antenna to the PoE port. Connect the LAN port to the ethernet port on the computer. Allow 2 minutes for the device to power up.

- Open Google Chrome, and enter the default IP address for the device, 192.168.1.20 (If you are unable to connect to the device, ensure your computer is in the same IP address range.)
NOTE: As of February 2025 Ubiquiti ULB devices have DHCP enabled by default - If you have a router attached to your network the Ubiquiti may not be on the 192.168.1.20 address. If this happens, login to your router to find what IP address it has give to the Ubiquiti device. - You may be prompted that the connection is not private, select the proceed option.
- Select your Country, and Language. Tick the agreement box, and select Continue.
- Enter a Username and Password. Record these details in a safe place for later use. Select Save.
- Select Network.
- Change the IP address of the device to suit your network. In our example it will be static, with the address of 192.168.1.102. Select Save Changes.

- You will loose connection to the device, wait 1-2 minutes and enter the new IP address into your web browser. You will be required to log into the device again.

- Select the Wireless Settings option.

- Enter the same SSID and WPA2 Preshared Key as set on the Access Point. Select Save Changes.
- Select the Dashboard option.

Updating Ubiquiti WT5-ULB Firmware
If you need to update firmware on the a Ubiquiti device with running AirOS8 firmware, follow the steps below.
It is recommended to update all the Ubiquiti devices to the same version, if the devices will be connecting to each other.
Updating Firmware
- Open Google Chrome and enter the IP address of the Ubiquiti device.
-
Login using the username and password.
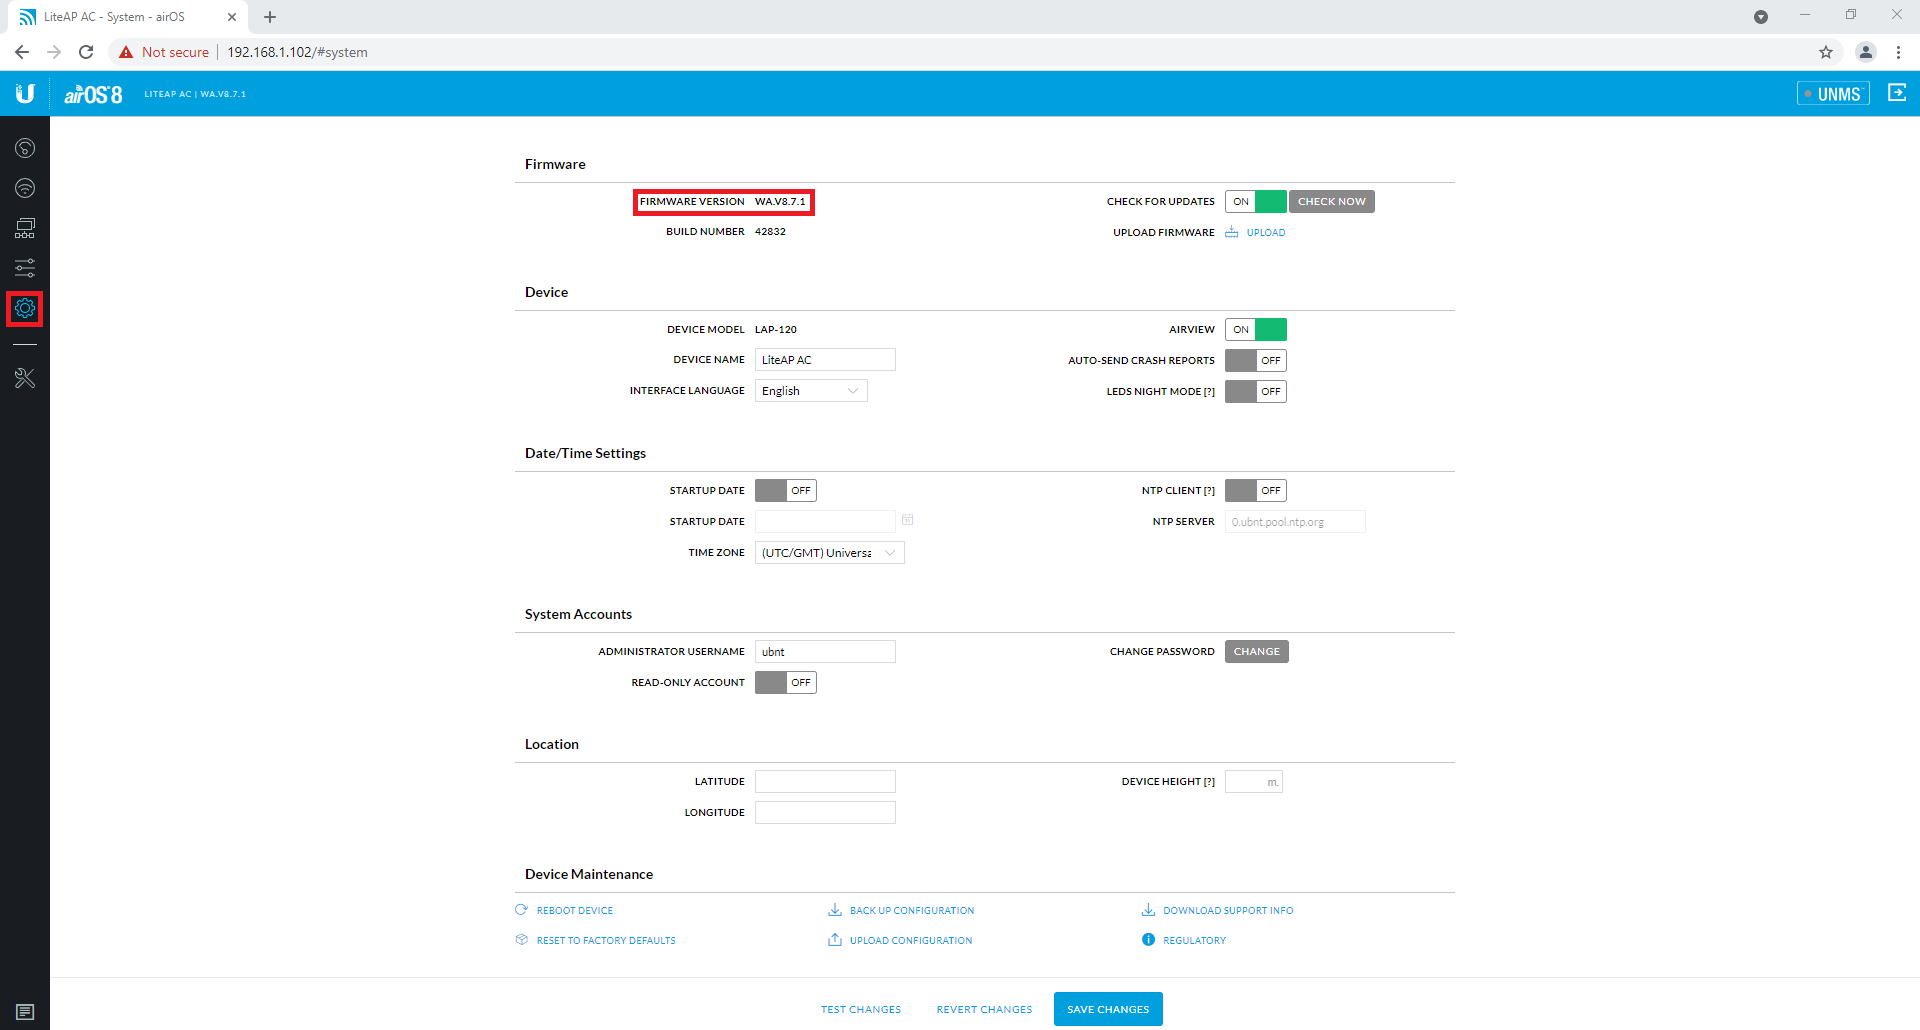
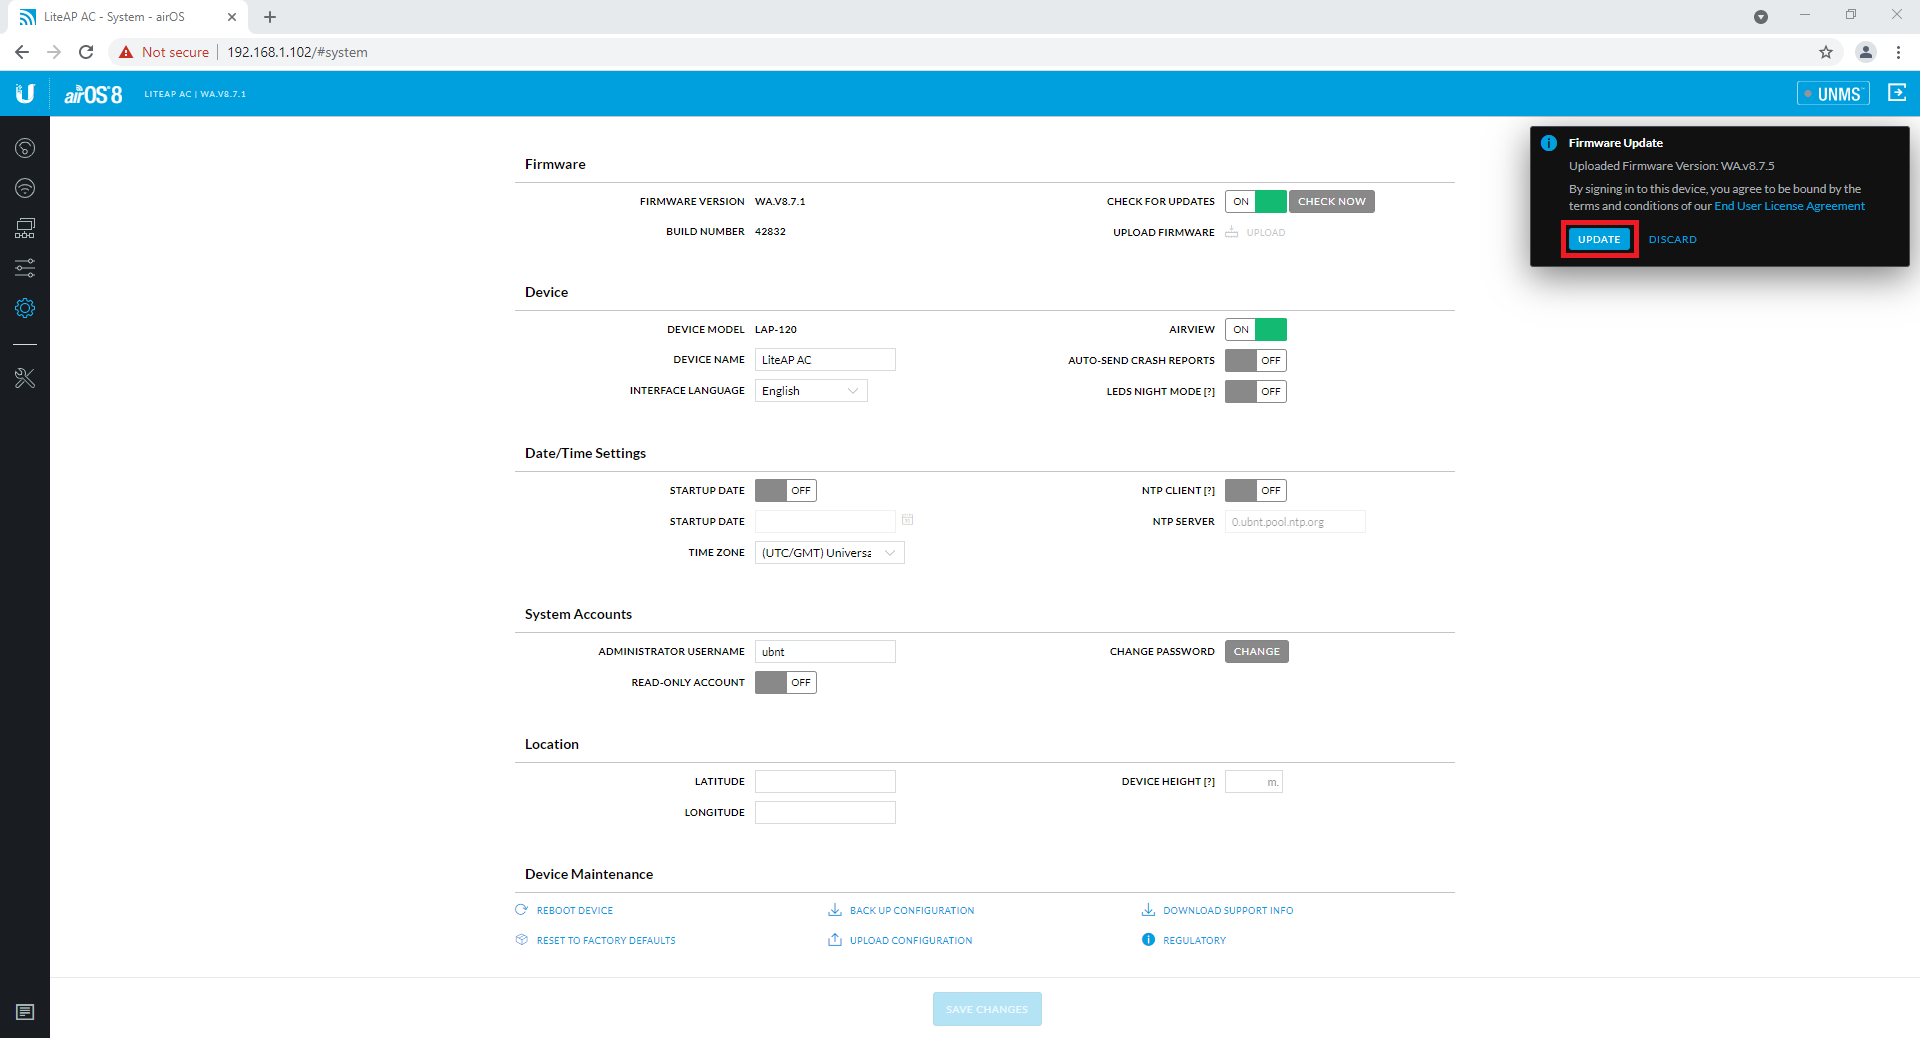
- Select System, then note down the Firmware Version.
- Go to the Ubiquiti website, and download the correct firmware version for your device - https://www.ui.com/download/
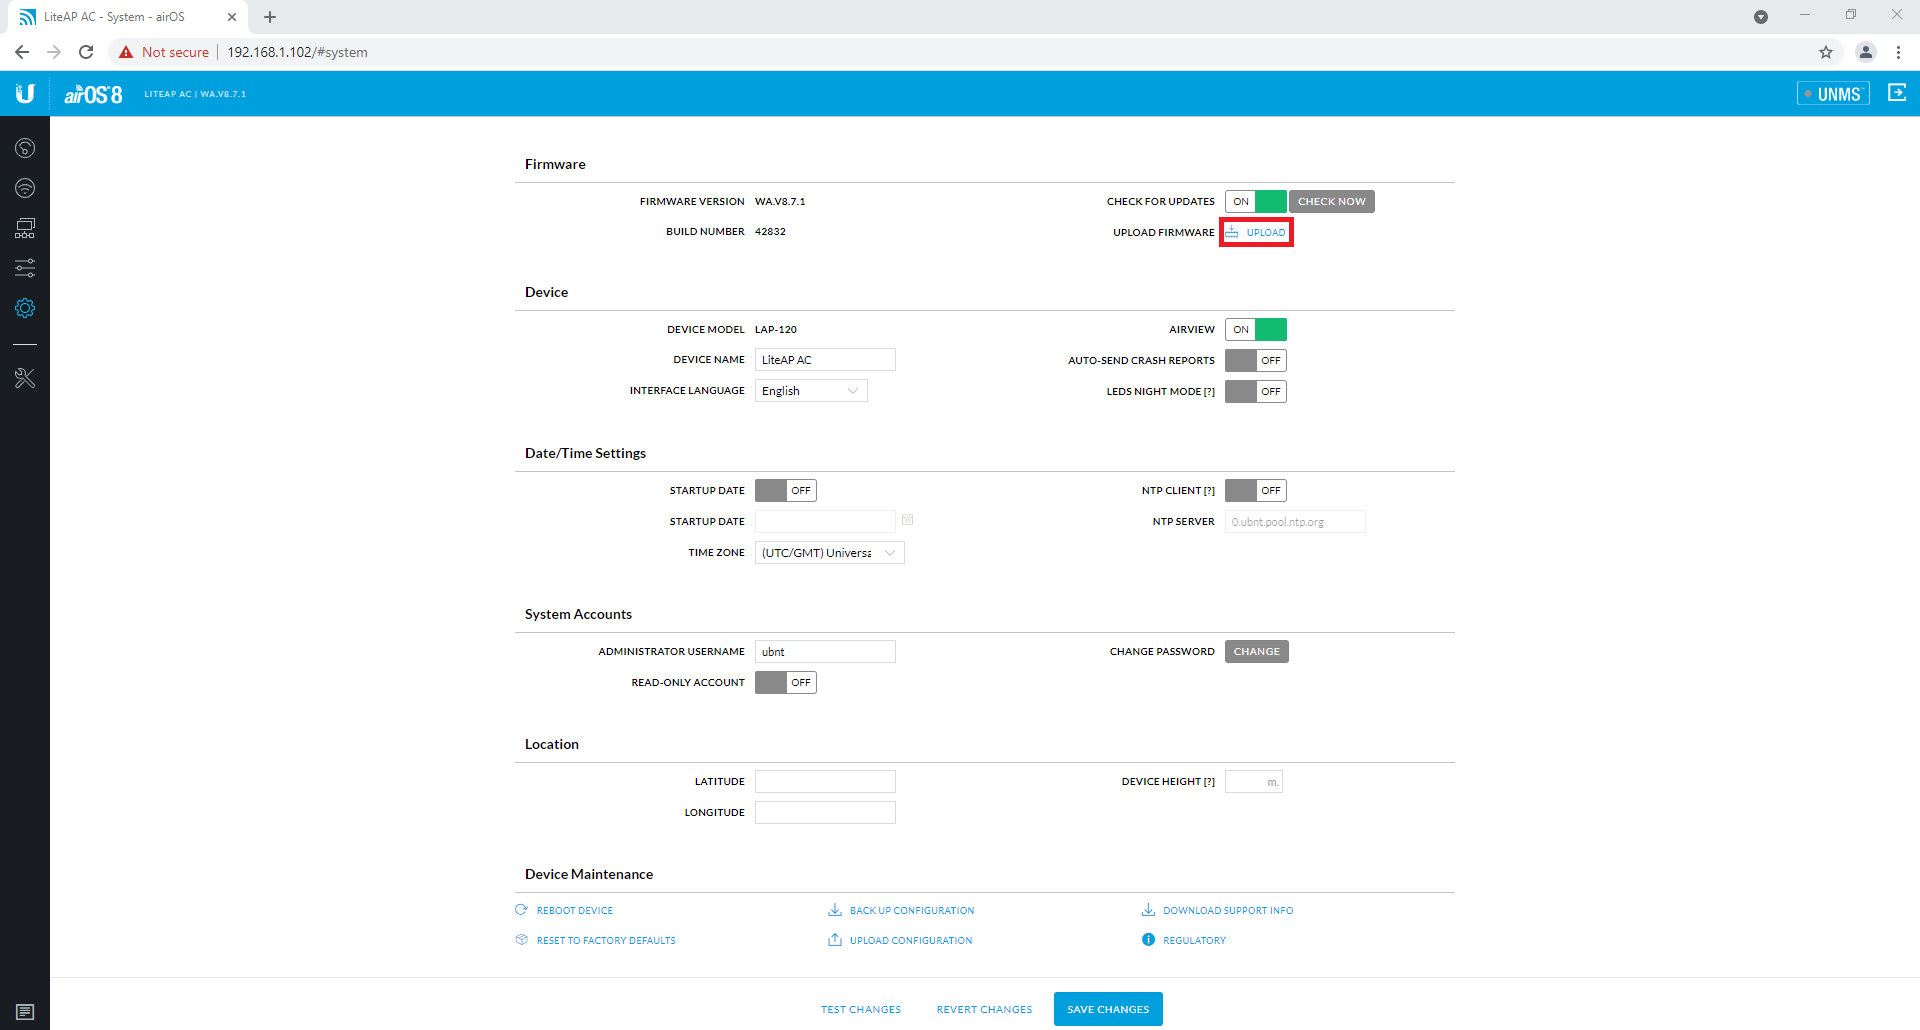
- Once the file has been downloaded, select the Upload button and select the correct firmware.
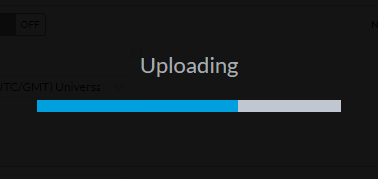
- The file will now upload to the device. Do not disconnect power to the device.
- Select Update.
-
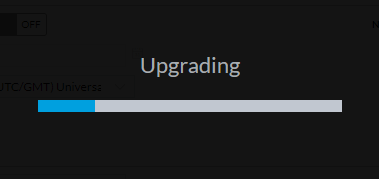
The device will begin upgrading. Do not disconnect power to the device during this process.
- The device will reboot once the upgrade is complete. Log back into the device and ensure the version number changed, meaning the upgrade was successful.
Wiring Examples
Standalone Cameras over a pair of WT5-ULBs

Cameras connected to an NVR over a pair of WT5-ULBs

You can have multiple Cameras if you add them to either of the Switches. If you do so, we recommend that the Ethernet cable that runs between the Switch and the PoE Injector is plugged into the uplink or gigabit port on the Switch.
Multiple Cameras connected to an NVR over multiple WT5-ULBs
In this example, there are multiple stations sending data back to one access point. This is useful if you have multiple buildings in the 120 degree field of view from the access point. The same steps as above are followed for configuration.
WiFi via an Access Point across a pair of WT5-ULBs
Using a Switch between the AP's POE injector and the Station's PoE injector will allow you to connect multiple cameras/devices. If you do so, we recommend that the ethernet cable that runs between the Switch and the PoE Injector is plugged into the uplink or gigabit port on the Switch.

To configure remote IP cameras - Please see the guide below.
https://help.c5k.info/176987-quick-start-guides/488068-configuring-remote-network-cameras