You can define the recorded footage schedule in the Record menu, and the recorded image snapshot schedule in the Snapshot menu. By default, cameras are set to non-stop Regular recording (24 hours a day, 7 days a week). Motion detection recording is not set by default. Schedules can be set in hourly periods for individual days for each camera, with colour-coded options for:
- Regular/General for all regular recording.
- MD/Motion for recording on motion detection.
- Alarm for recording on triggering an integrated alarm.
- MD & Alarm for simultaneous alarm/motion detection recording.
- IVS for recording on triggering IVS (Intelligent Video Surveillance) such as a virtual tripwire.
- POS for point of sale transactions.
We recommend adding MD & Alarm & IVS to all channels to accompany your regular recording.
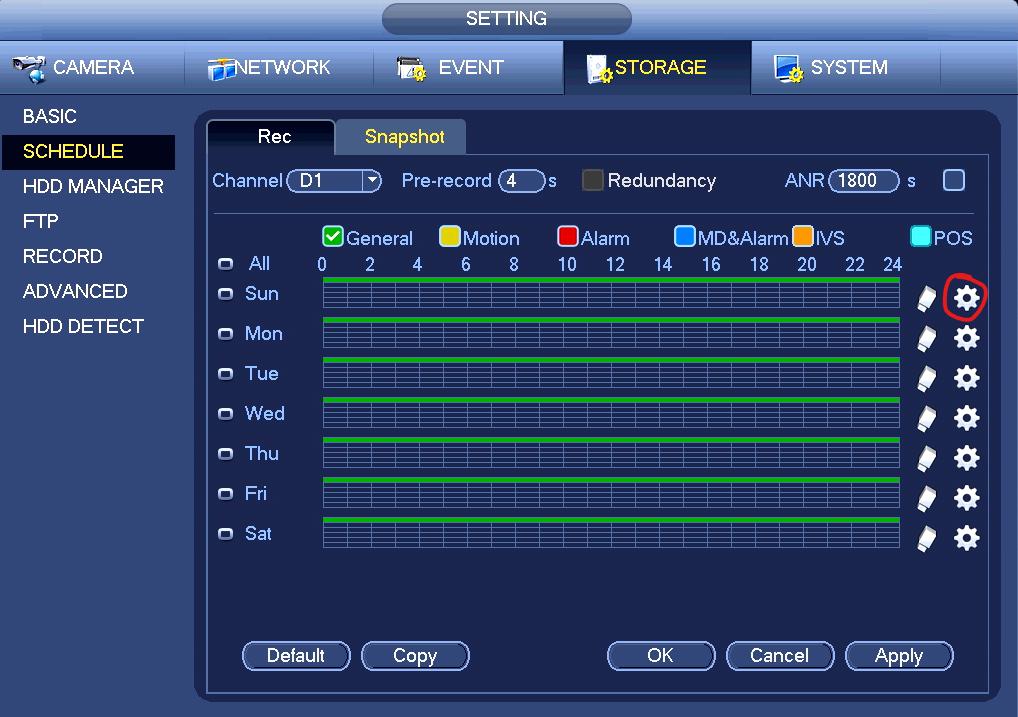
NVR - Configuring Motion Detection & Intelligent Recording
(Black GUI)
- Click the Channel drop down to select All cameras.
- In the days column, toggle the All check box to simultaneously set recording schedule parameters for every day of the week.
- Check the yellow MD check box to select motion detection recording.
- Click the schedule to fill in areas for motion detection recording. We recommend a 24/7 schedule to mirror the Regular recording schedule.
- Repeat steps 3 & 4 with the blue IVS check box to set intelligent recording (tripwire, face detection, etc).
- Click Apply to the confirm recording schedule changes and move on to Snapshot Schedule.

(Blue GUI)
- Click the Channel drop down to select All cameras.
- In the days column, toggle the All check box to simultaneously set recording schedule parameters for every day of the week.
- Check the yellow Motion check box to select motion detection recording.
- Click the schedule to fill in areas for motion detection recording. We recommend a 24/7 schedule to mirror the Regular recording schedule.
- Repeat steps 3 & 4 with the blue IVS check box to set intelligent recording (tripwire, face detection, etc).
- Click Apply to the confirm recording schedule changes and move on to Snapshot Schedule.
Delete
Standalone IP Camera - Configuring Motion Detection & Intelligent Recording
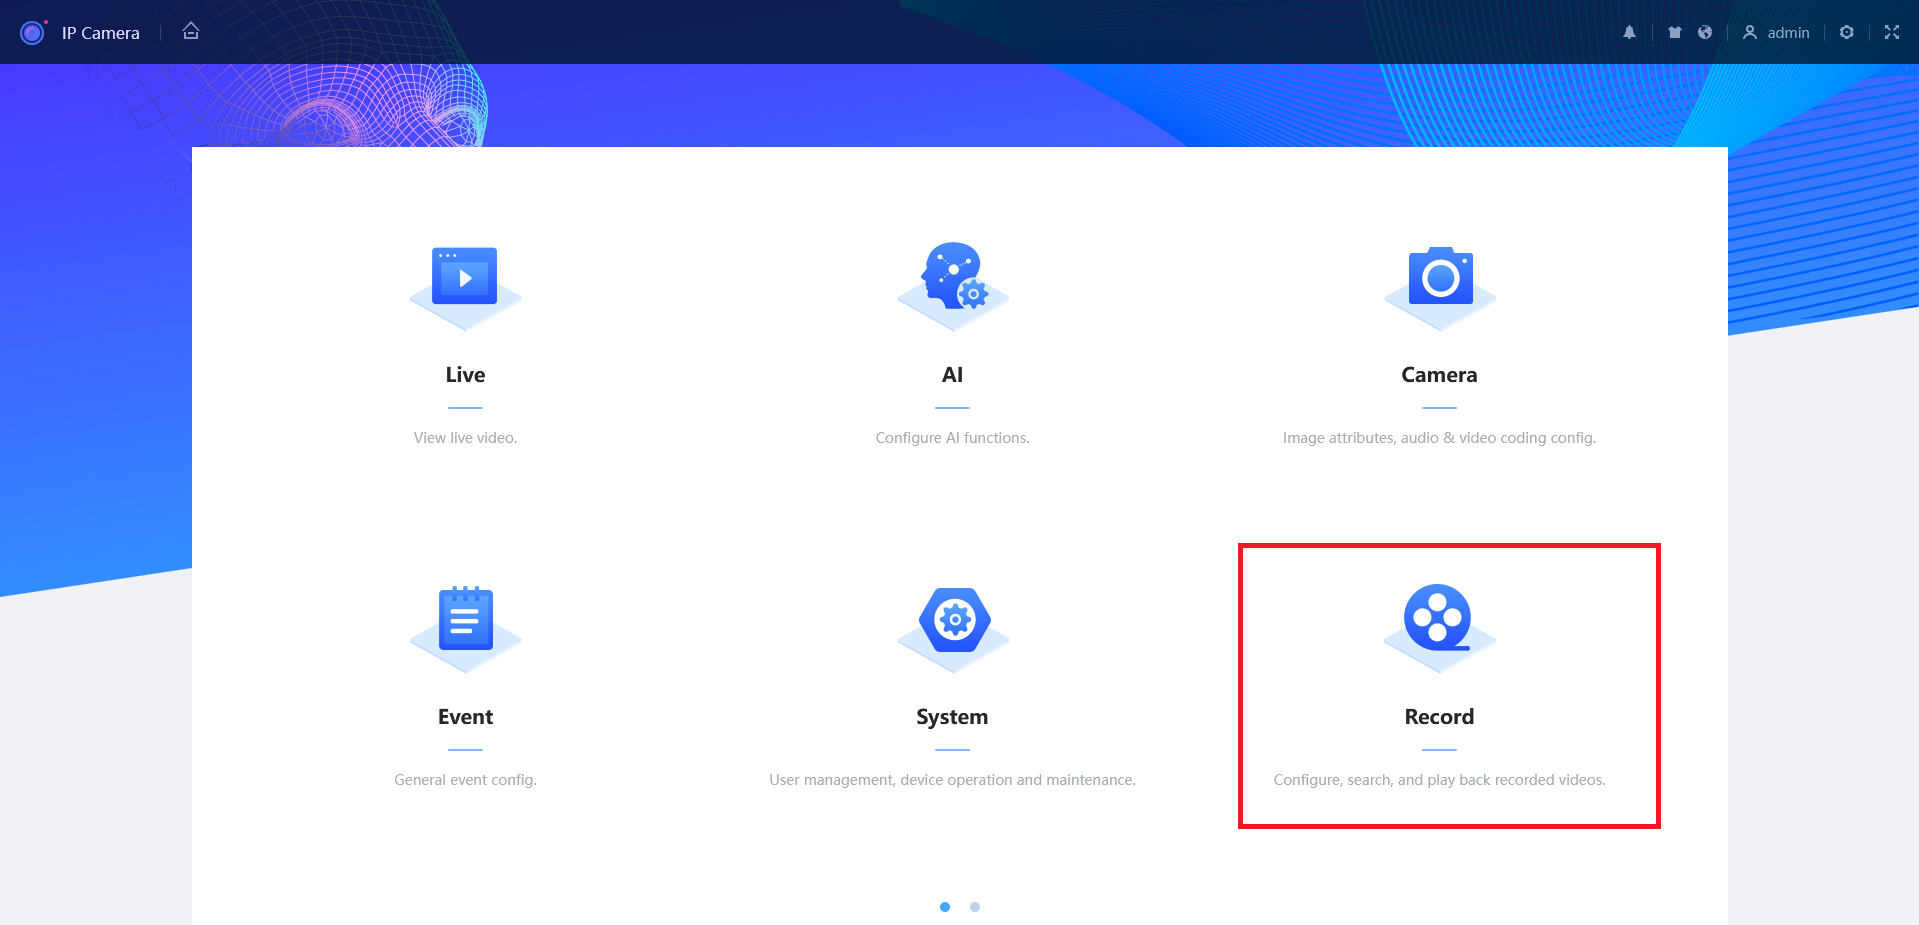
New GUI (White/Blue)
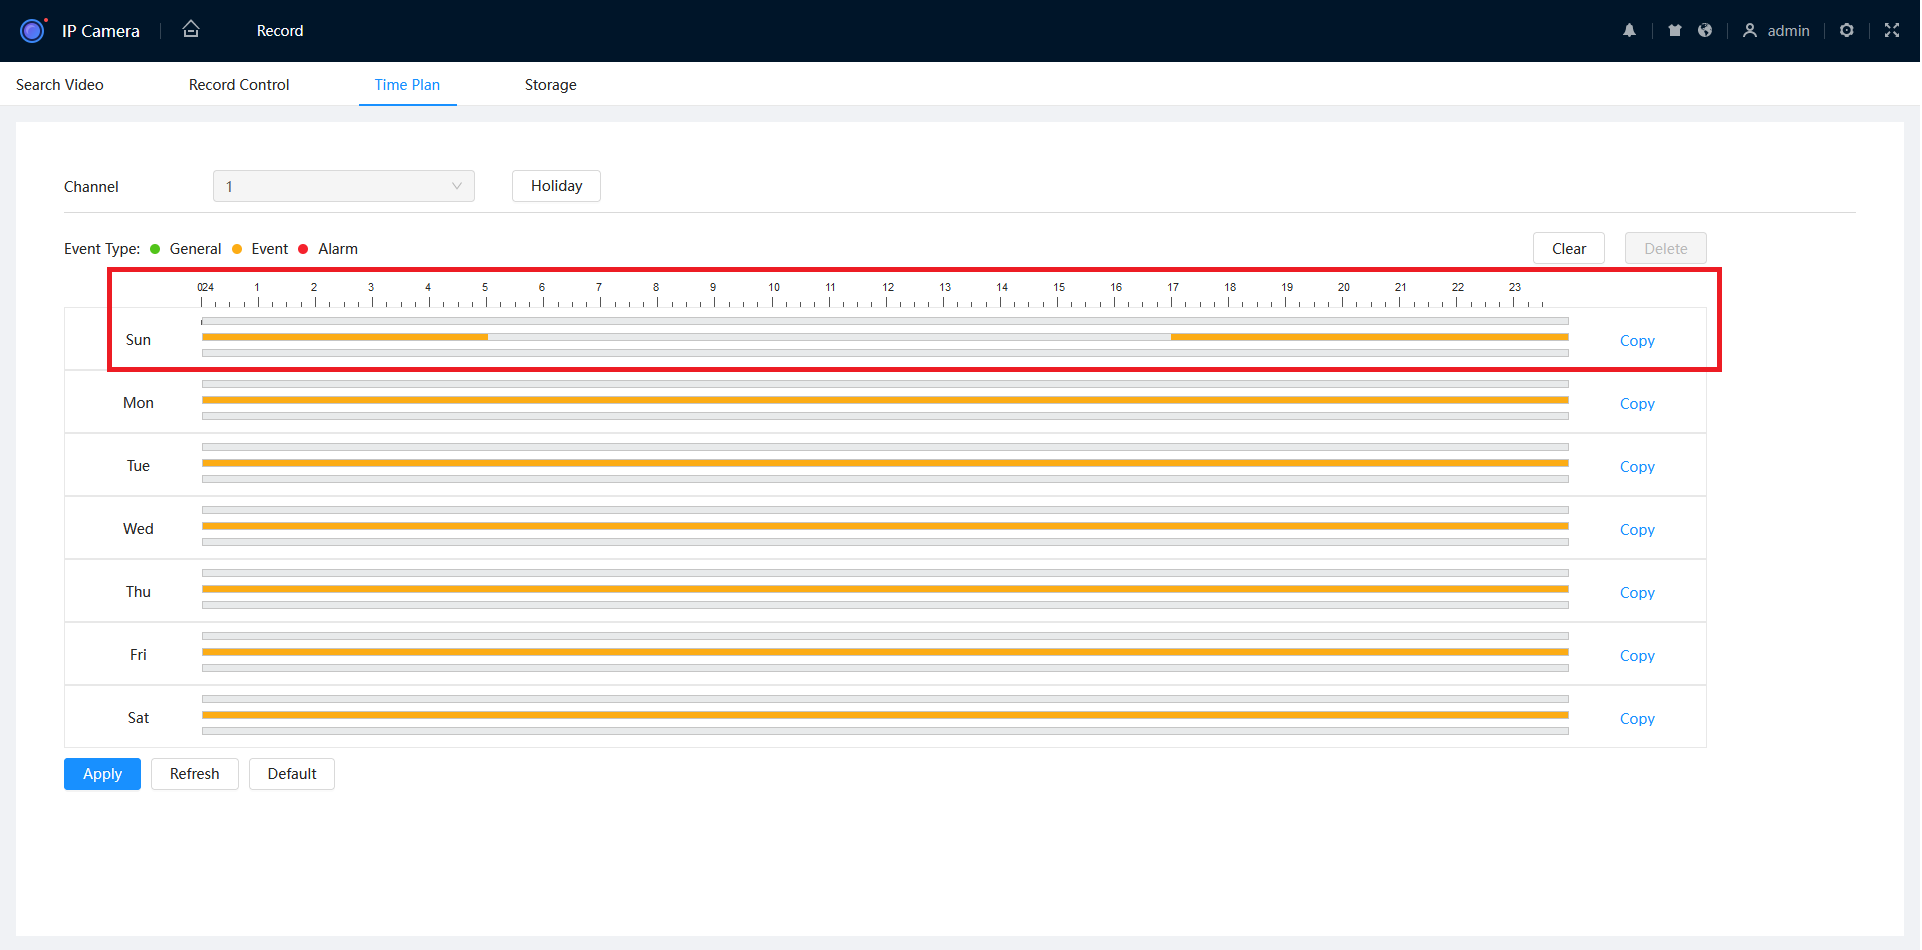
- From the Home page, select Record.
- Select Time Plan.
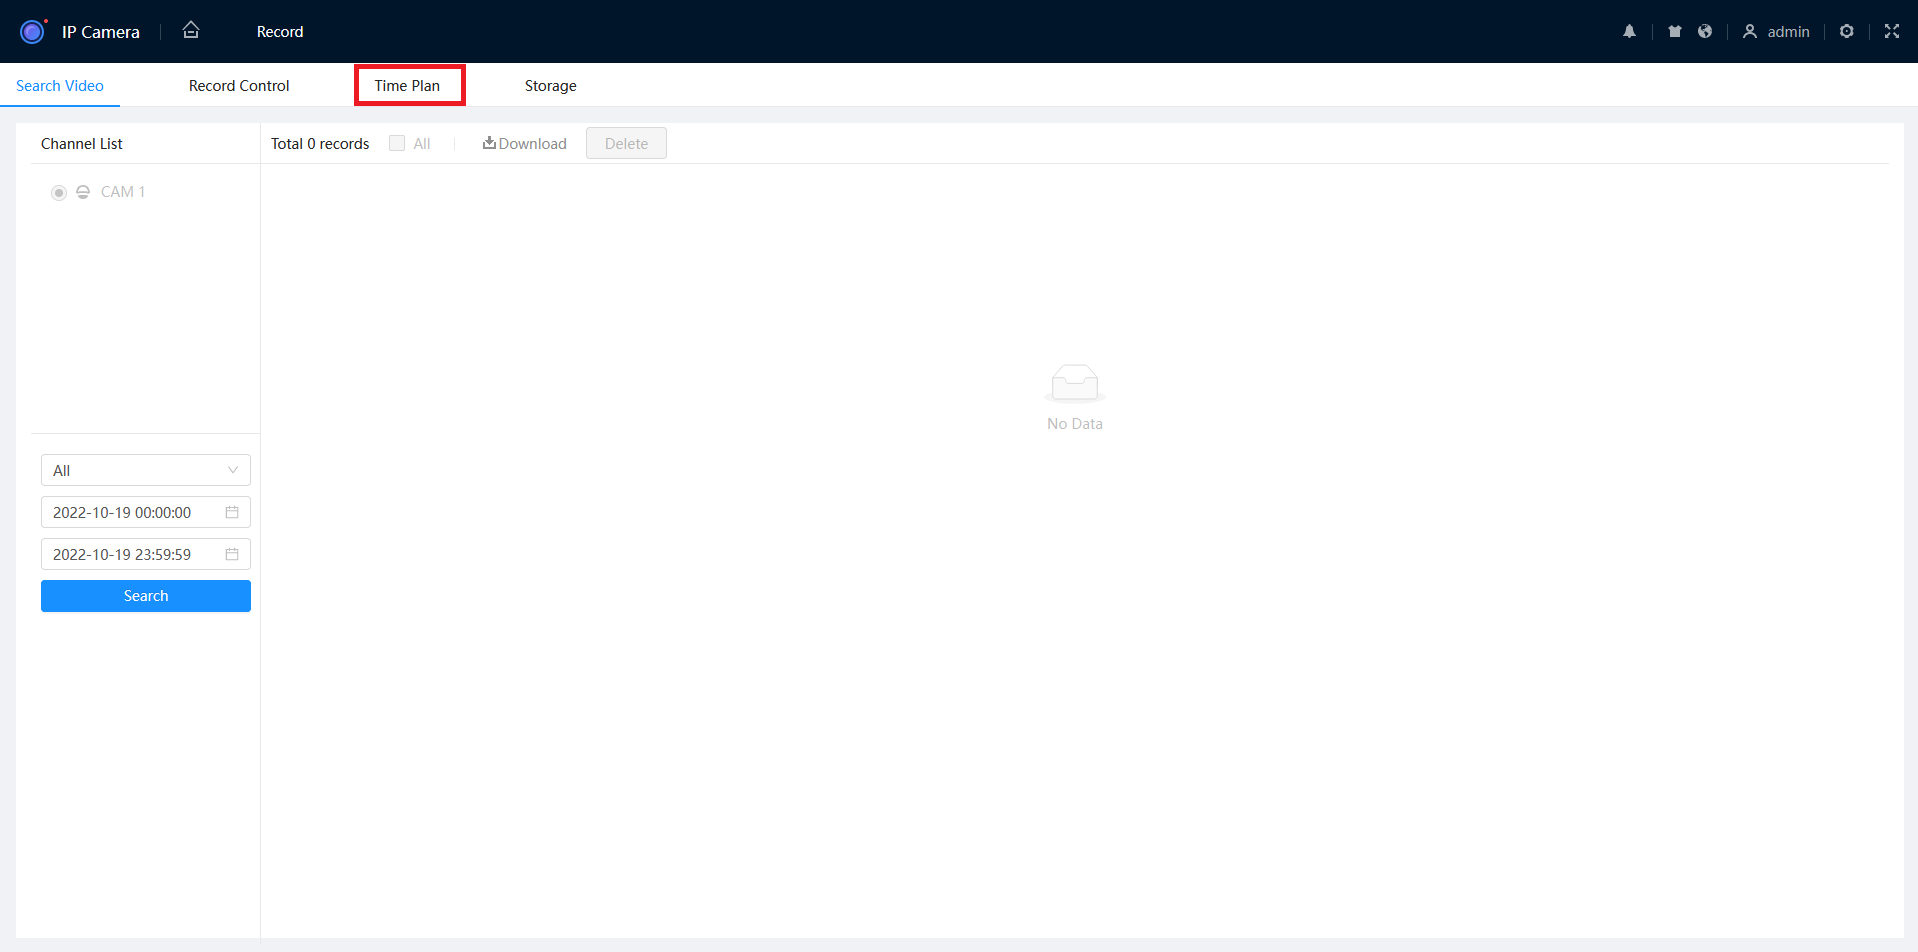
- Use the mouse to drag the Event line to the desired time. In this example we are setting Event recording to be active between 5pm and 5am.
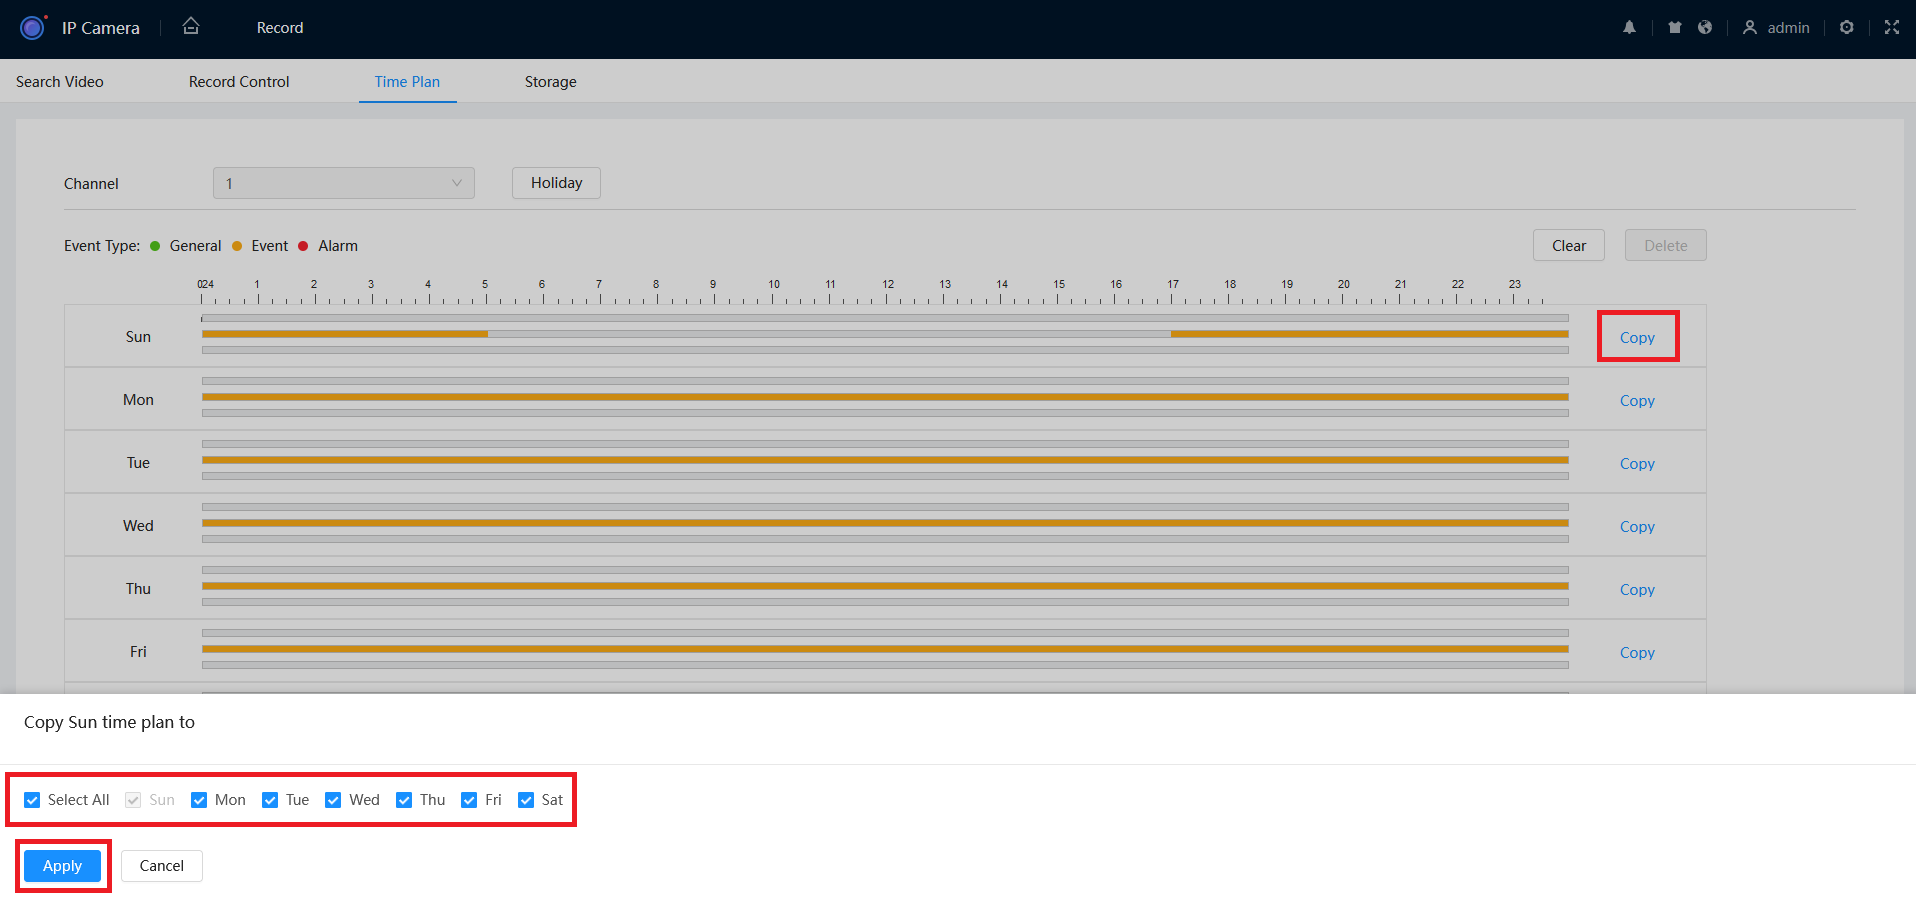
- Press Copy, then select each day that you want to apply this Time Plan too. Once selected, press Apply.
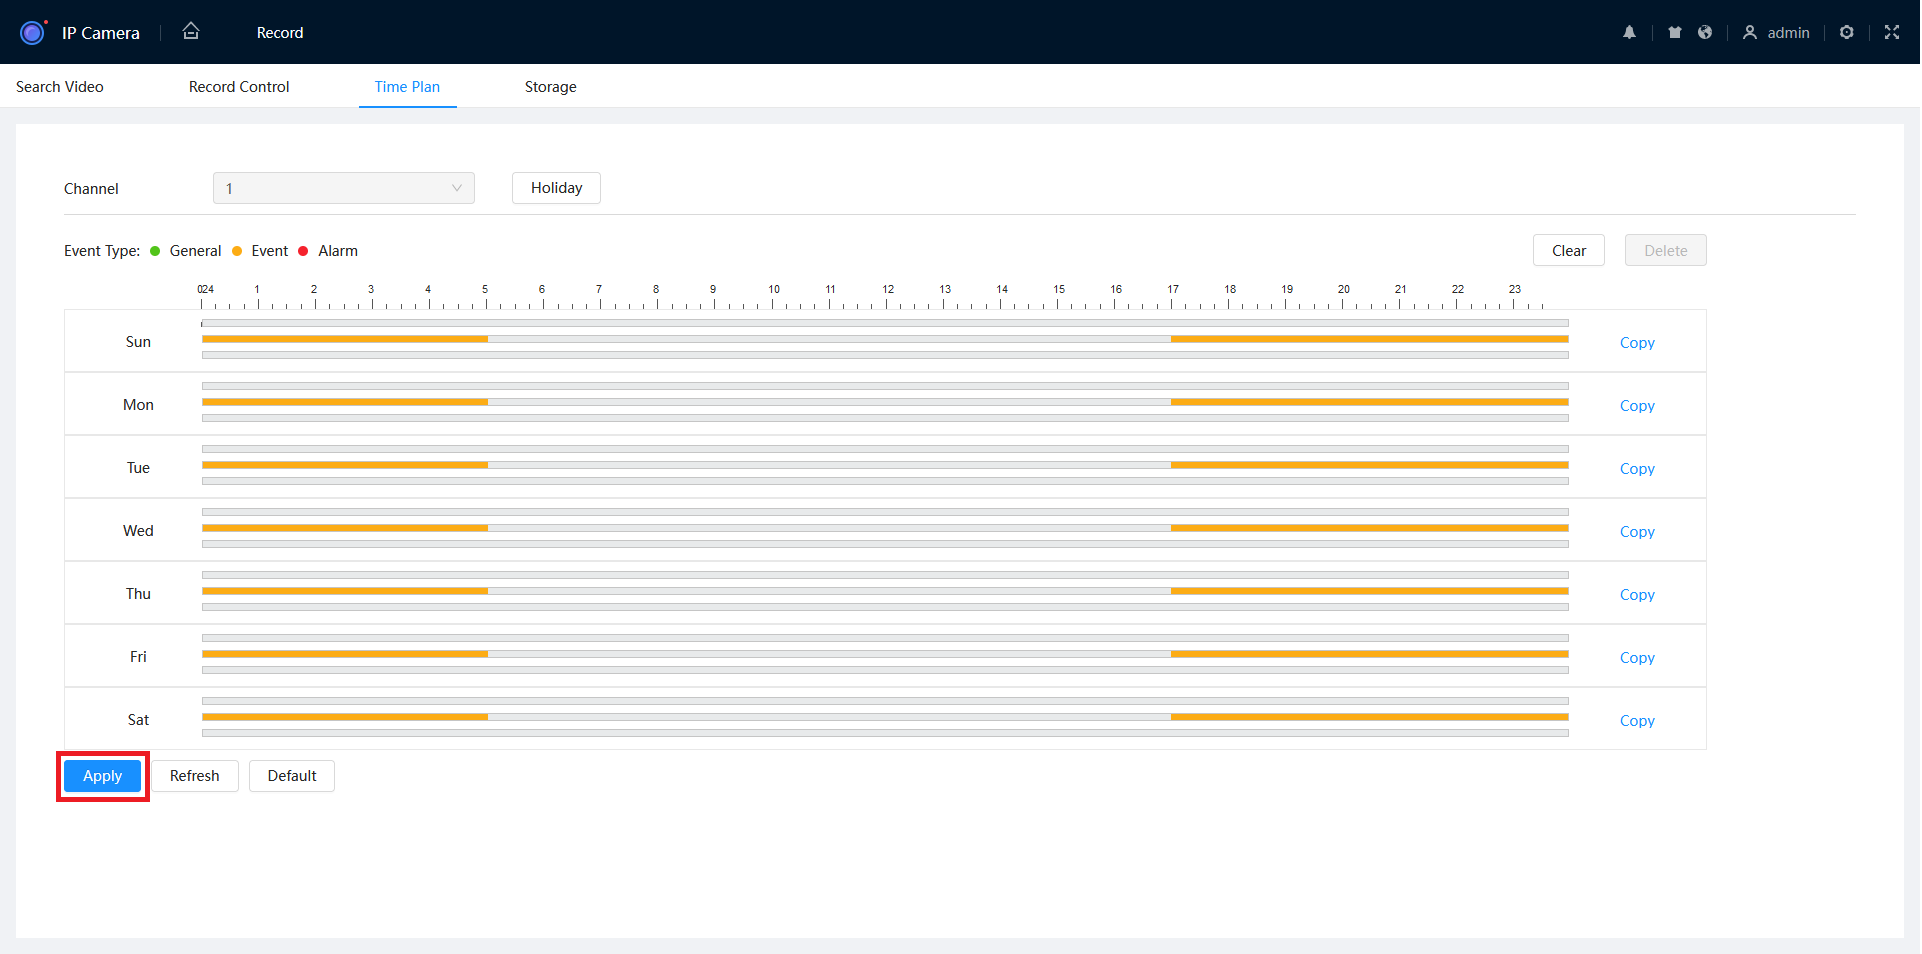
- Press Apply.
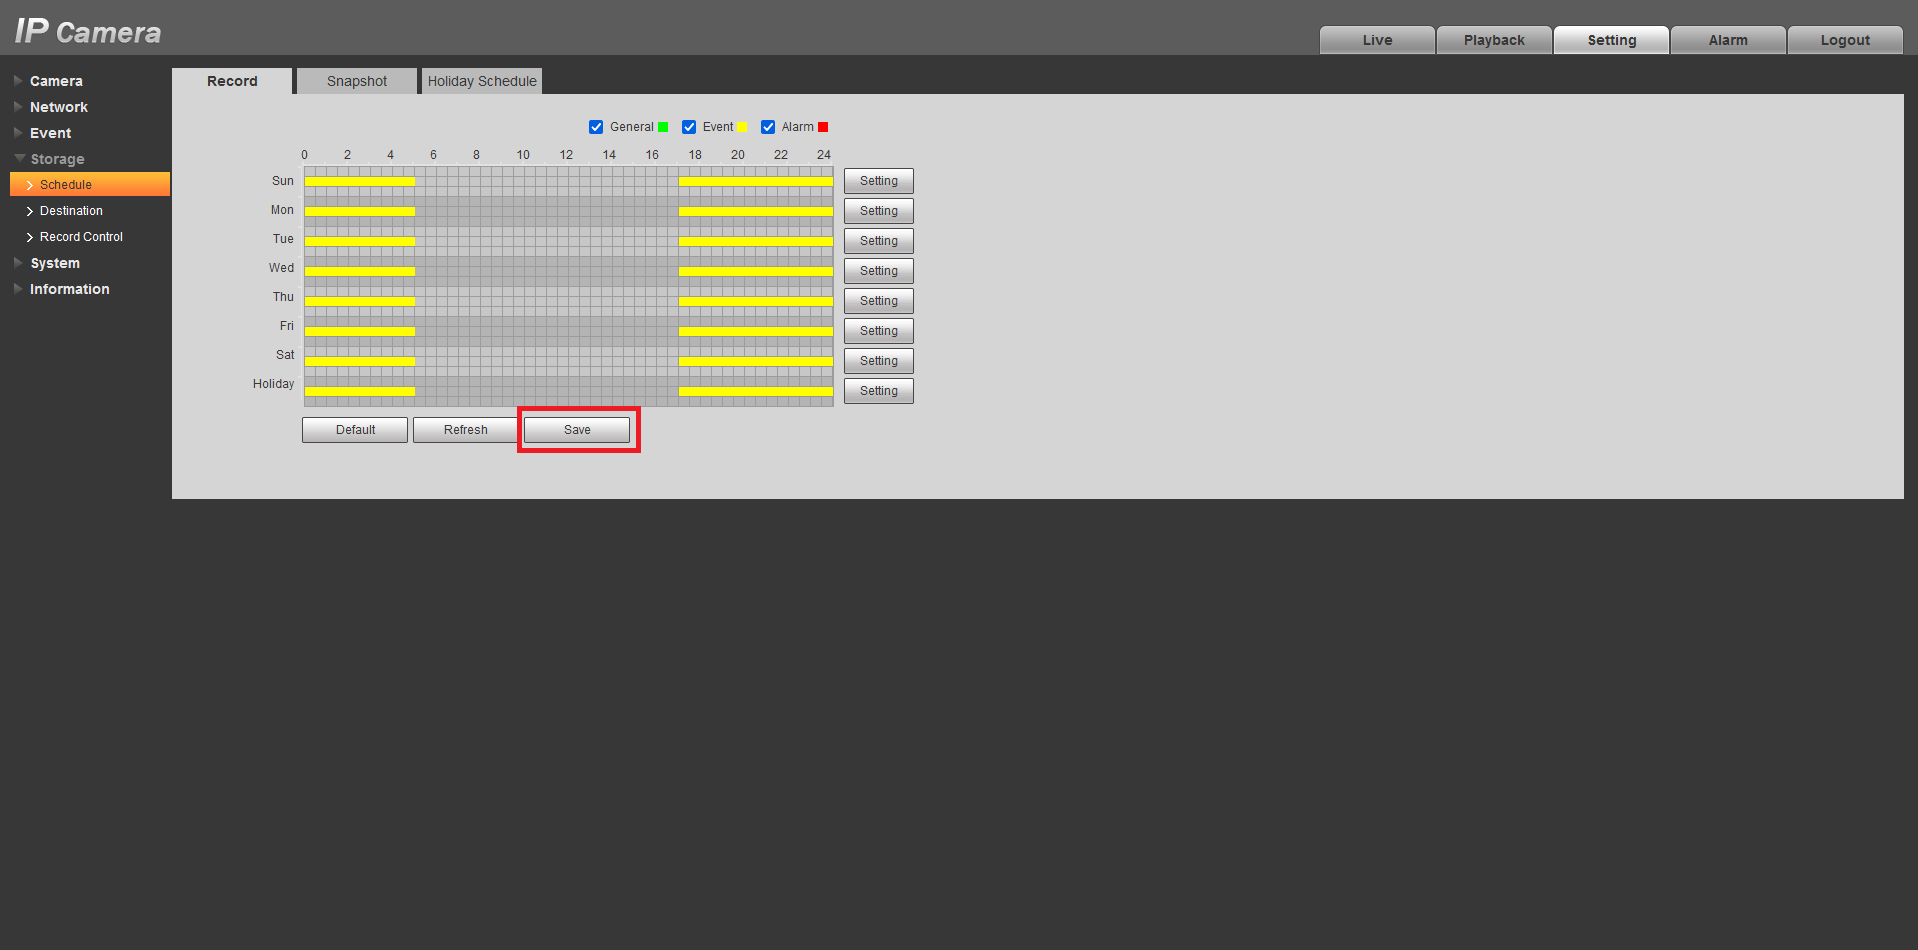
Old GUI (Grey)
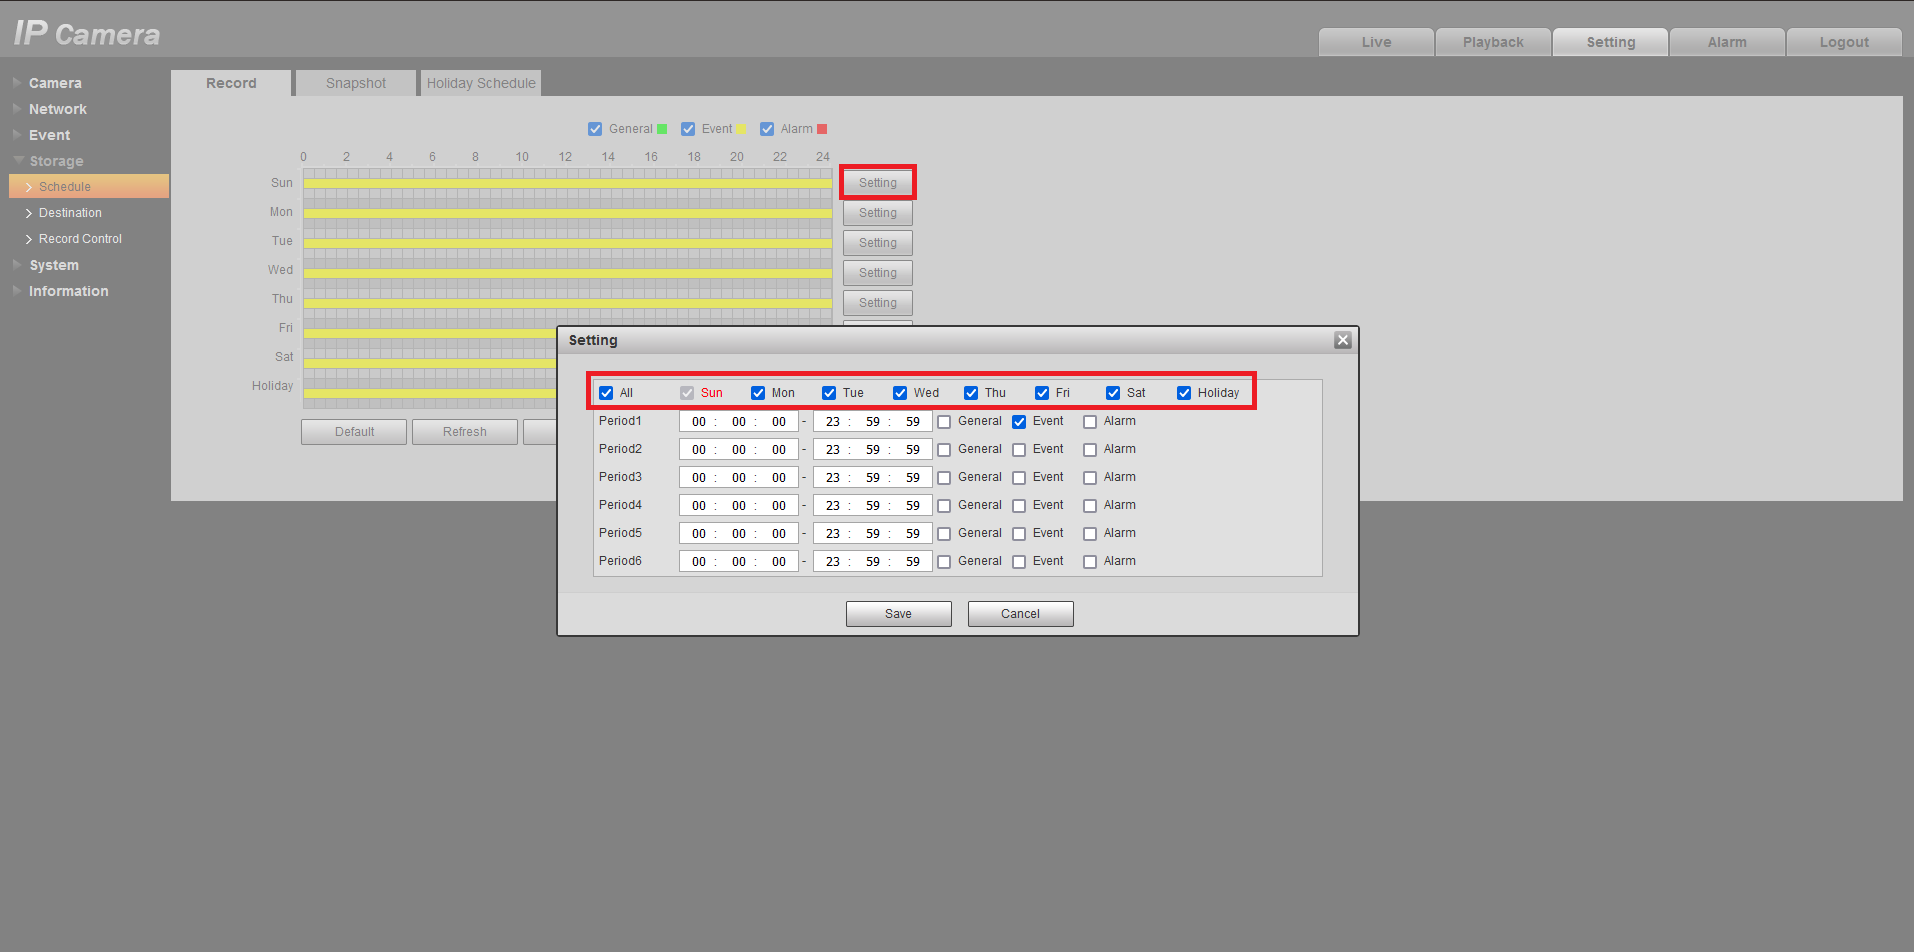
- Navigate to Setting > Storage > Schedule.
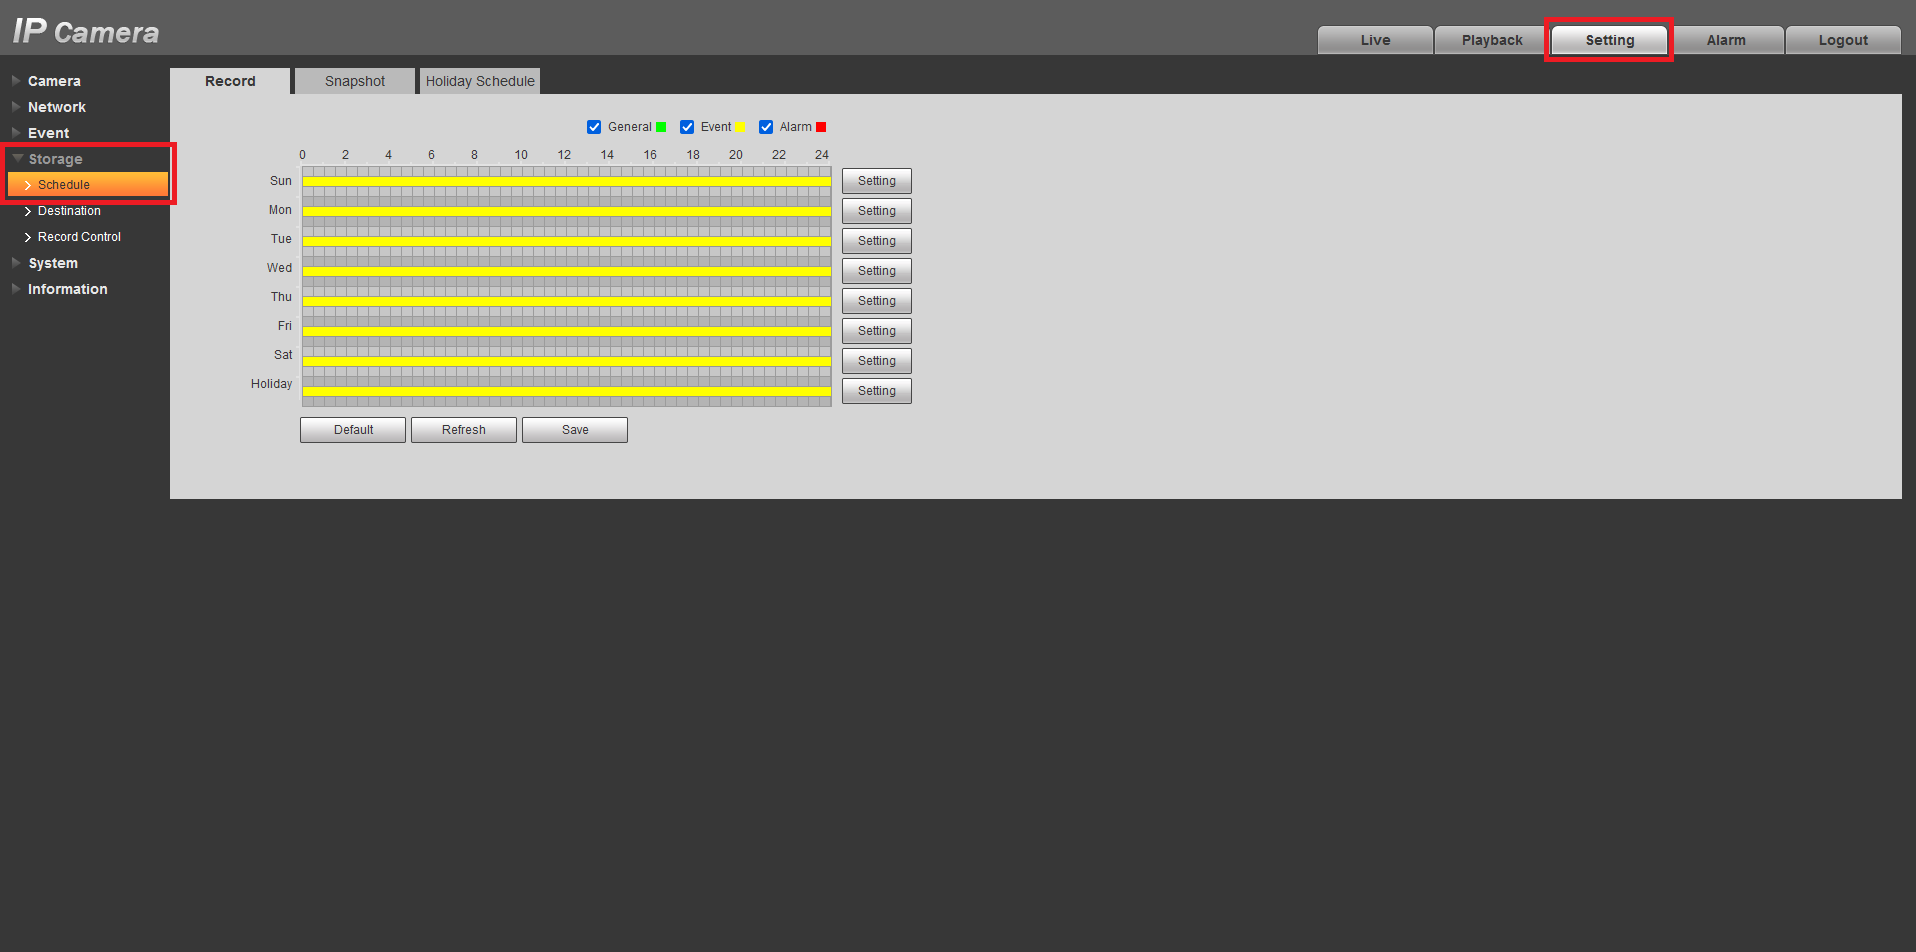
- Select Setting, then select the days you want to modify.
- Adjust the Period Settings to the desired time and recording type, then press Save. In this example we are setting Event recording to be active between 5pm and 5am.
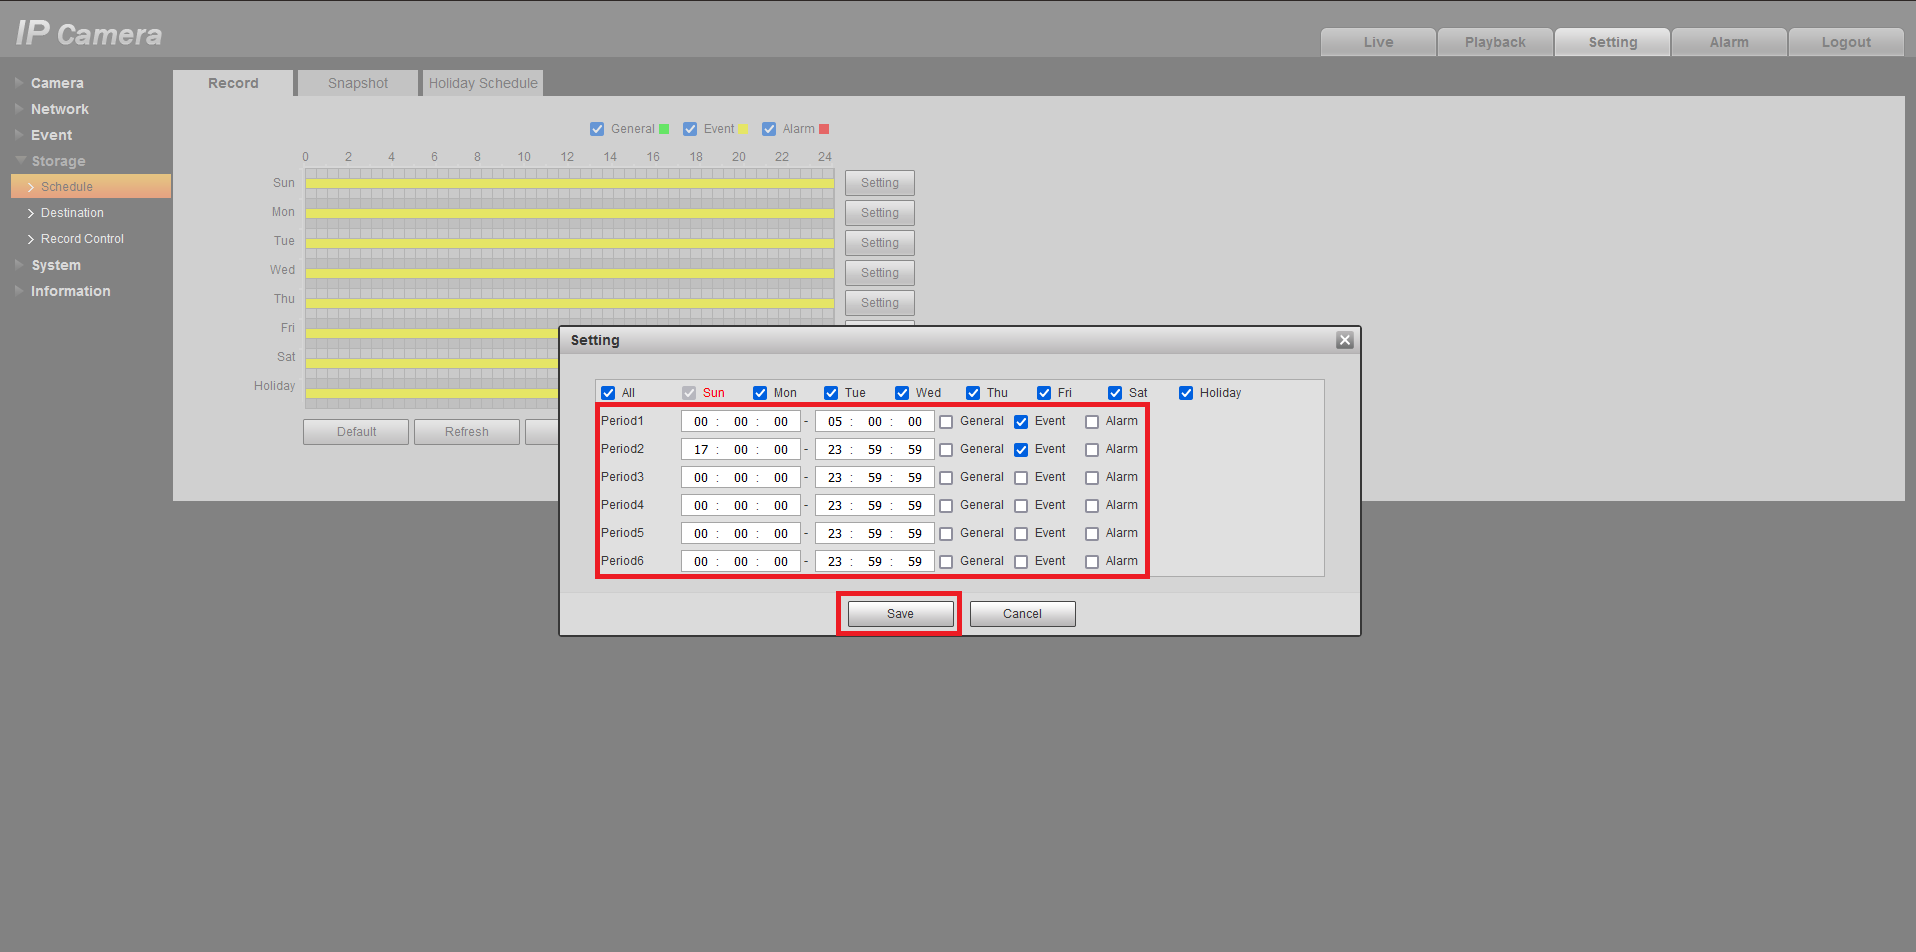
- Press Save.