CVRs can allow you to add IP cameras to open channels. Some models will have additional channels available for IP Cameras by default, others will require you to designate a HDCVI channel to be used for IP cameras instead.
IP cameras can only be added after HDCVI cameras. For example on an 8 channel CVR if you have 5 HDCVI cameras and 3 IP cameras the first 5 channels will be the HDCVI cameras, the last 3 will be the IP cameras.
Step 1 - Enable IP Channels on the CVR
- Navigate to Main Menu > Camera > Channel Type
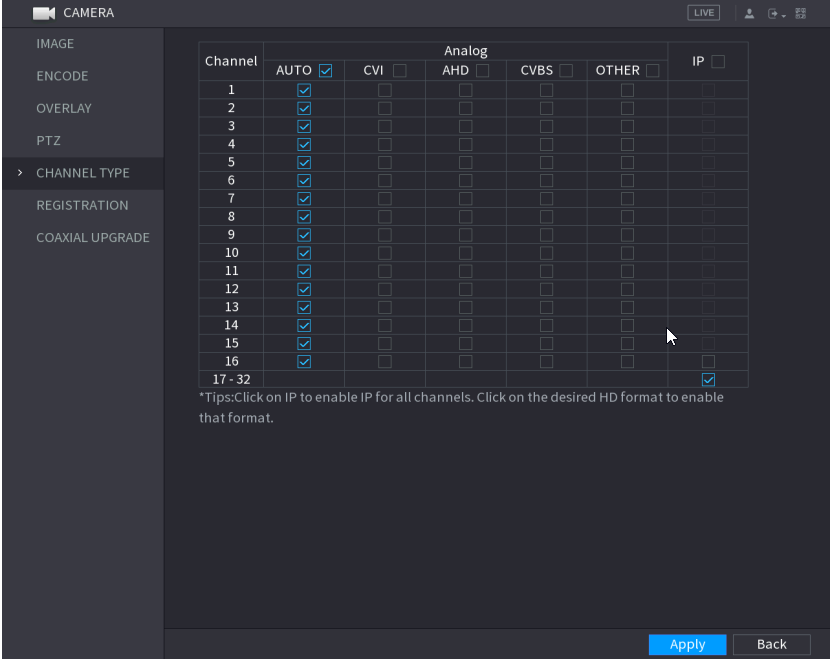
- Starting from the bottom of the list, in the IP column tick each channel you wish to designate for IP channels. E.g For a 8 channel CVR tick the boxes for channel 8, 7 and 6 to reserve ports 6-8 for IP channels. Some CVRs will have additional channels reserved for IP cameras by default, in the above image that is channels 17-32. Ensure that the checkbox in the IP column is ticked for this row.
- Click Apply.
Step 2a - Add standalone IP Cameras
- Navigate to Main Menu > Camera > Camera List
- Select Search Device. The cameras that are connected should be listed in the top list.
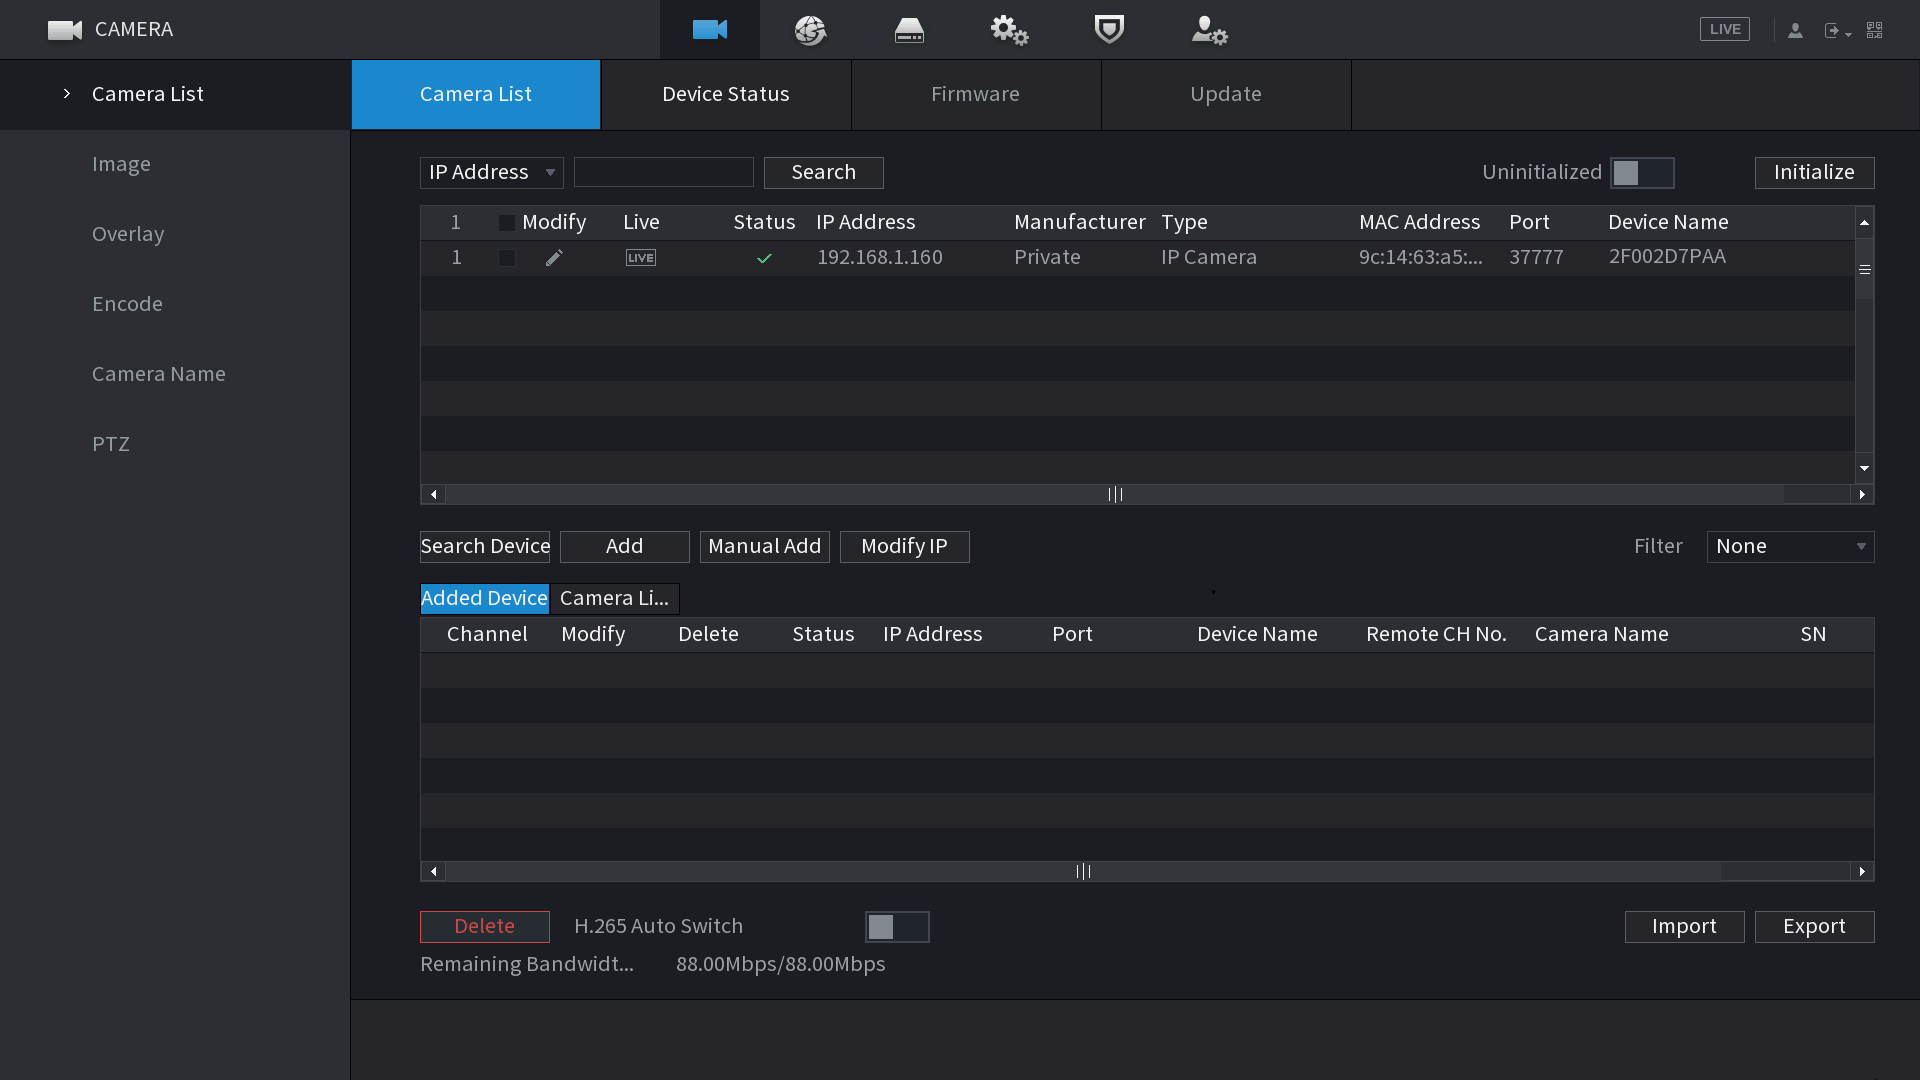
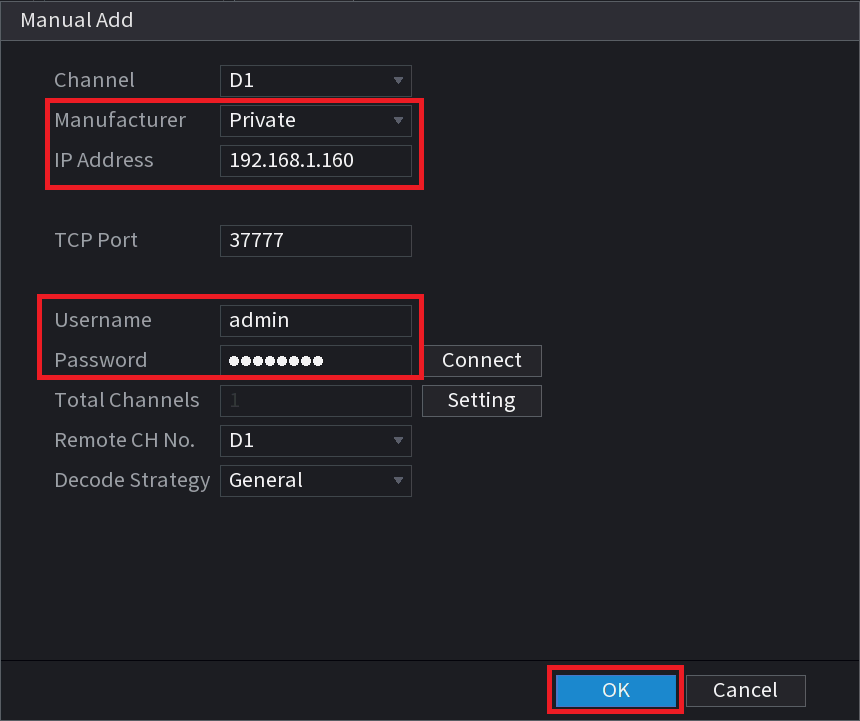
- Select the check box next to the camera/s, then select Add. If you cannot see any cameras, you must add them manually. Select Manual Add, and enter the IP Address, username and password and select OK
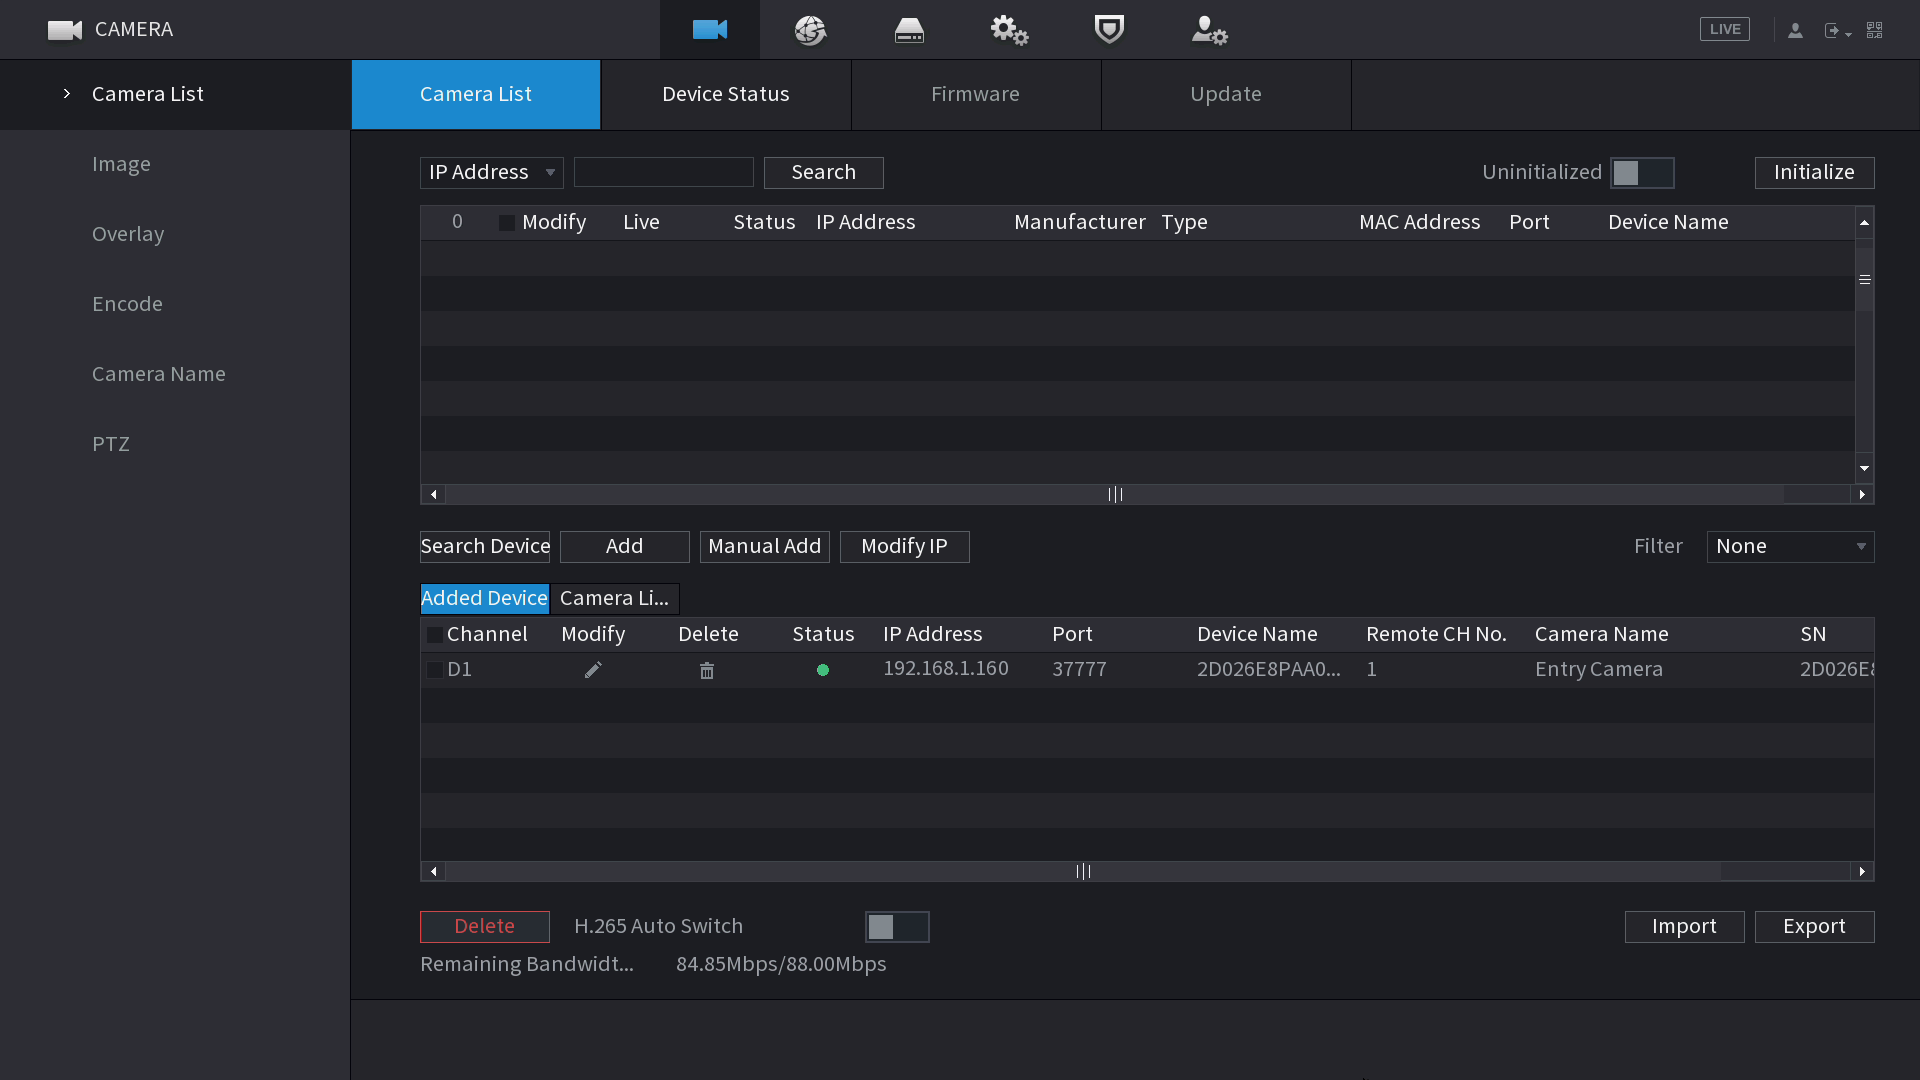
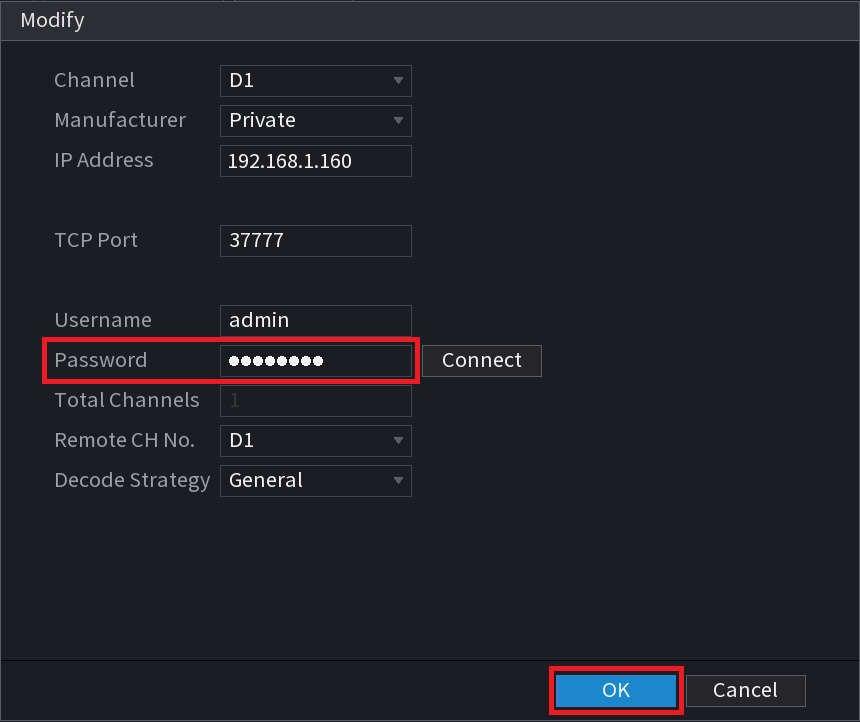
- The camera/s should now be added to the bottom list, and the status green. If the status is red, select the modify button, and ensure the password is entered correctly and select OK.
Step 2b - Add camera channels from another NVR/CVR
- Navigate to Main Menu > Camera > Camera List
-
Select Manual Add, and enter the IP Address, username and password of the NVR/CVR whose cameras you are trying to add, then click Connect.
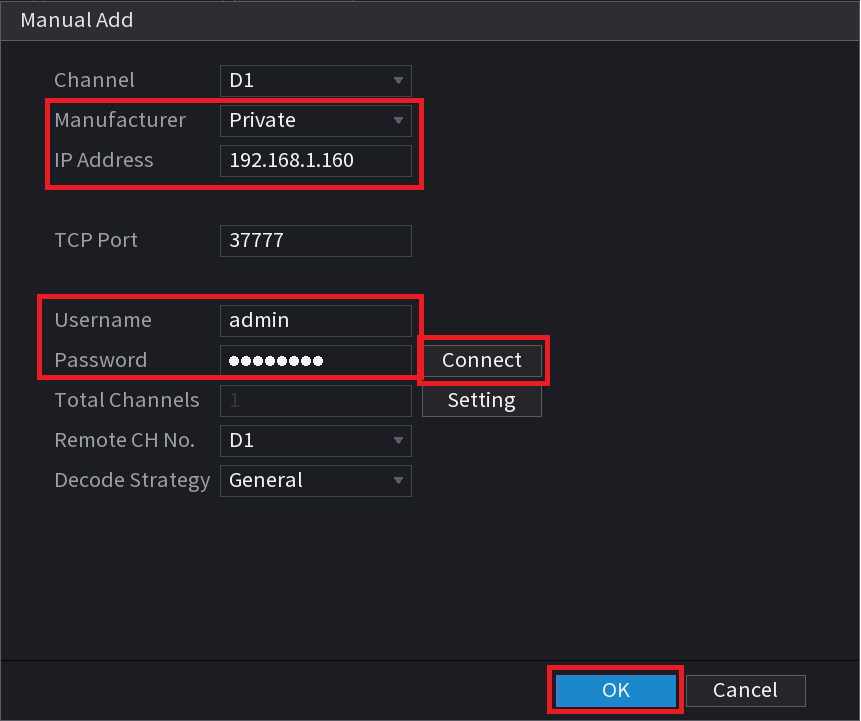
- The Total Channels should update to the number of channels of the NVR/CVR whose details you entered in the previous step. If it does not, check the details added in the previous step.
-
Set the Remote CH No. to the channel of the NVR/CVR the camera is on.
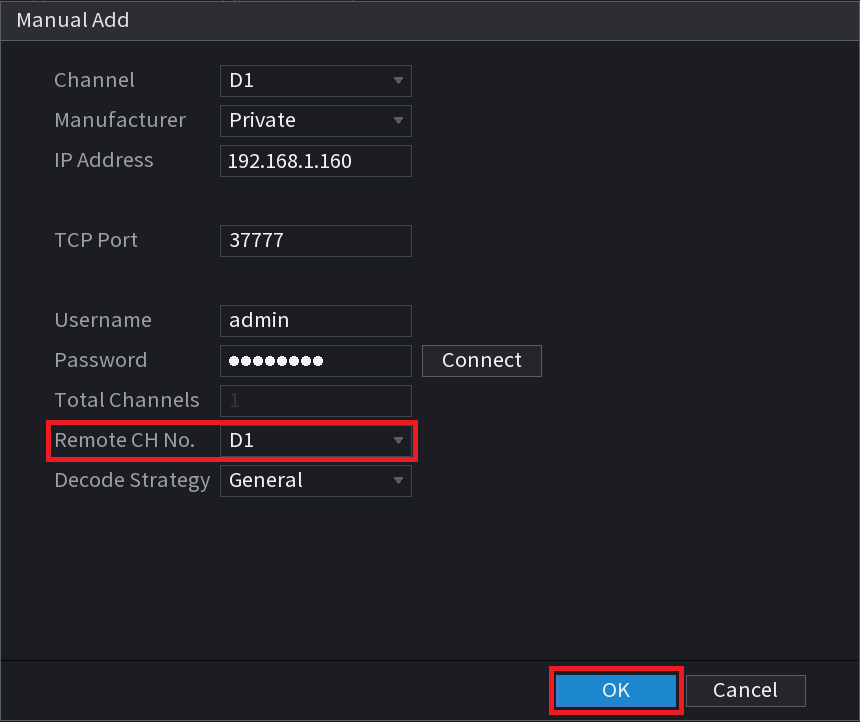
- Select OK
- Repeat steps 2-5 for each additional channel.