Follow the steps below to modify an existing user or create a new user account with limited authority.
Creating or Modifying a User
(Black GUI) Creating a new User
Navigate to Main Menu > Account
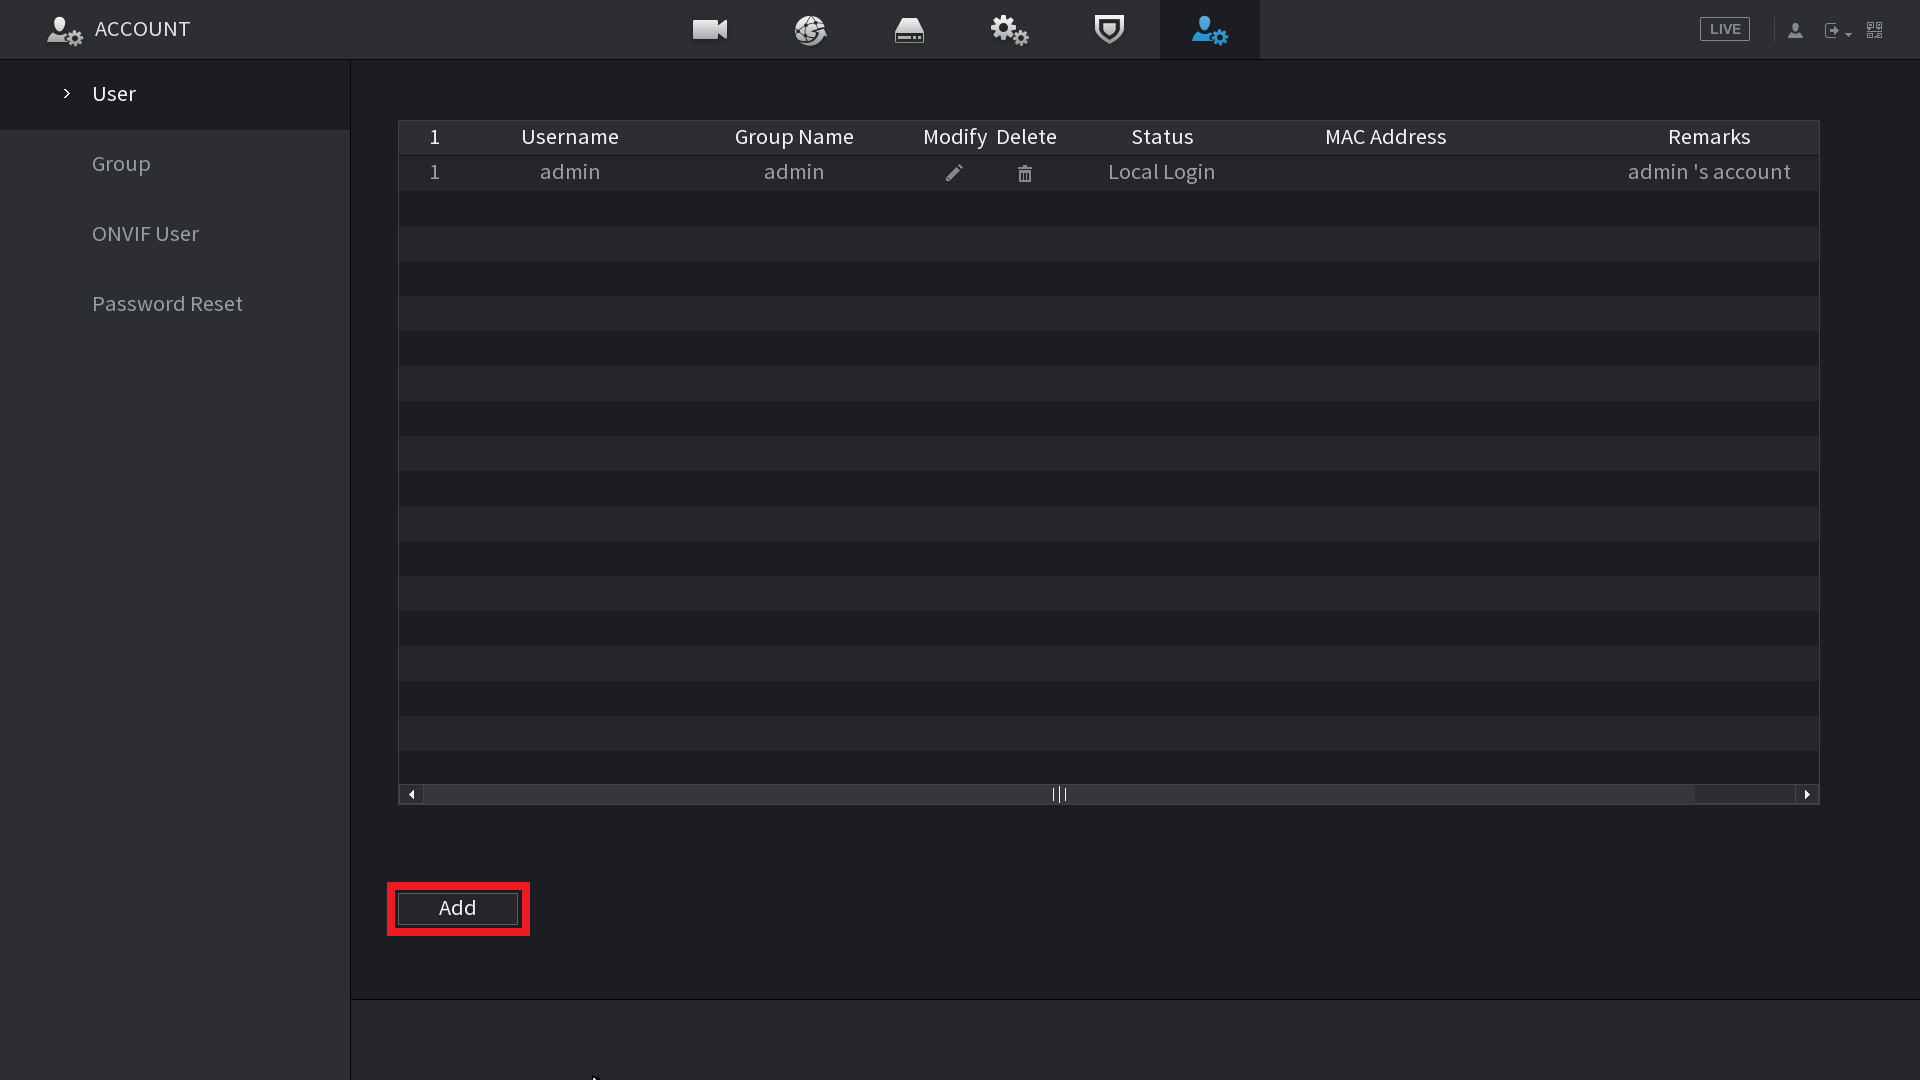
Click on "Add"
Enter a Username & Password for the new User, then select OK.
(Black GUI) Modifying an existing User
Navigate to Main Menu > Account
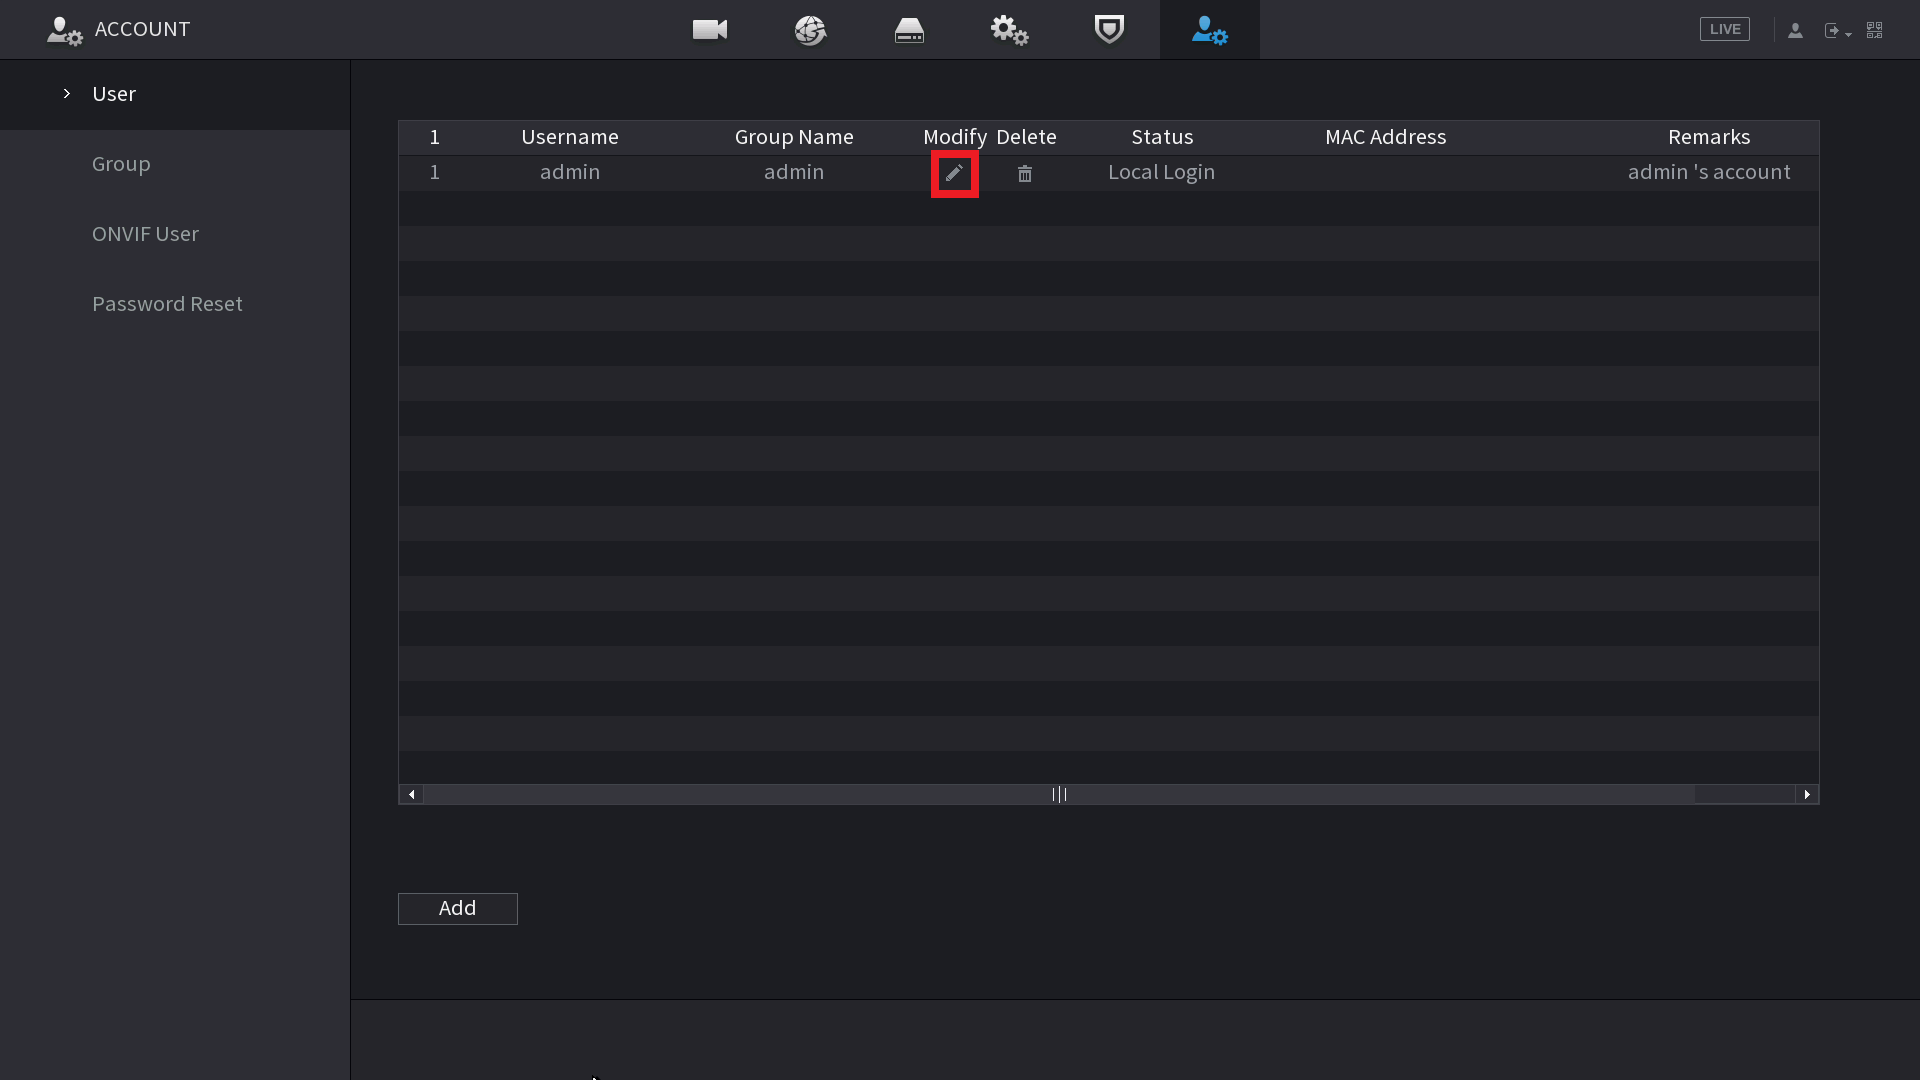
Click on the Modify Pencil next to the user you wish to modify.
(Blue GUI) Creating a new User
Navigate to Main Menu > System > Account
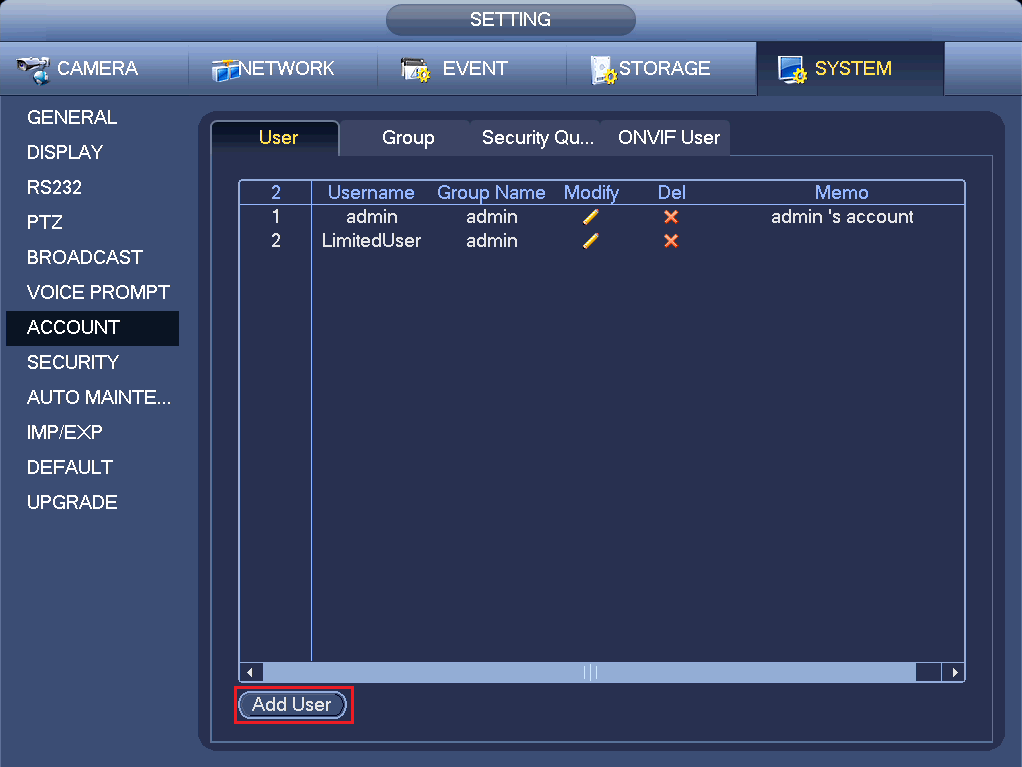
Click on "Add User"
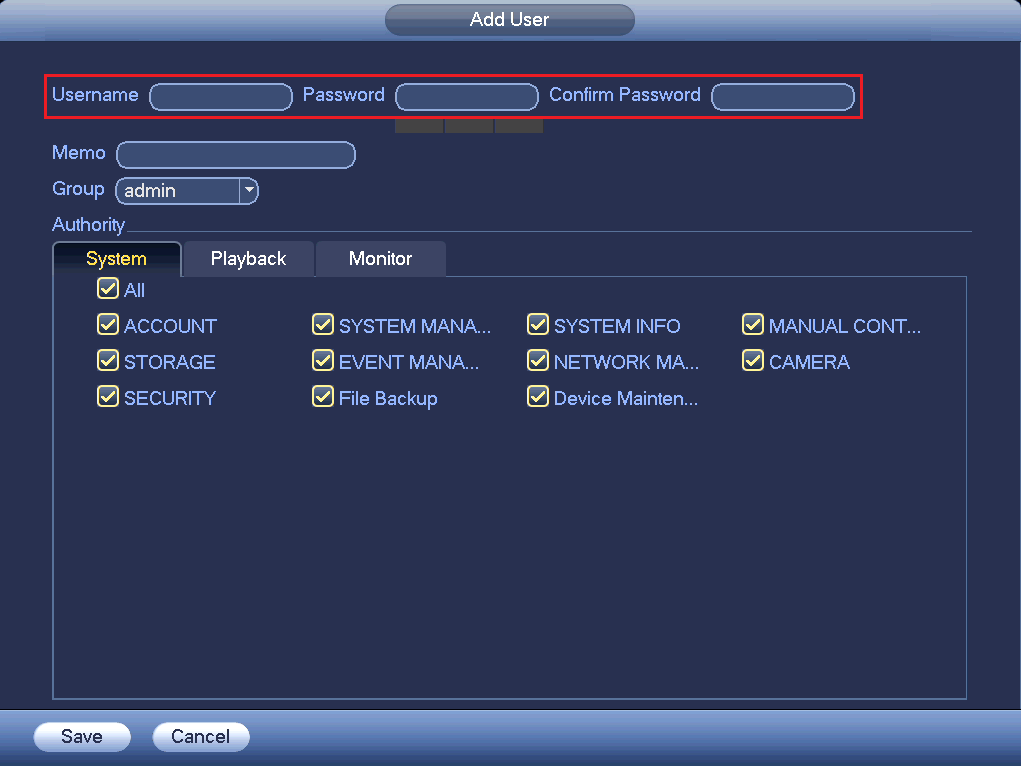
Enter a Username & Password for the new User
(Black GUI) Modifying an existing User
Navigate to Main Menu > System > Account
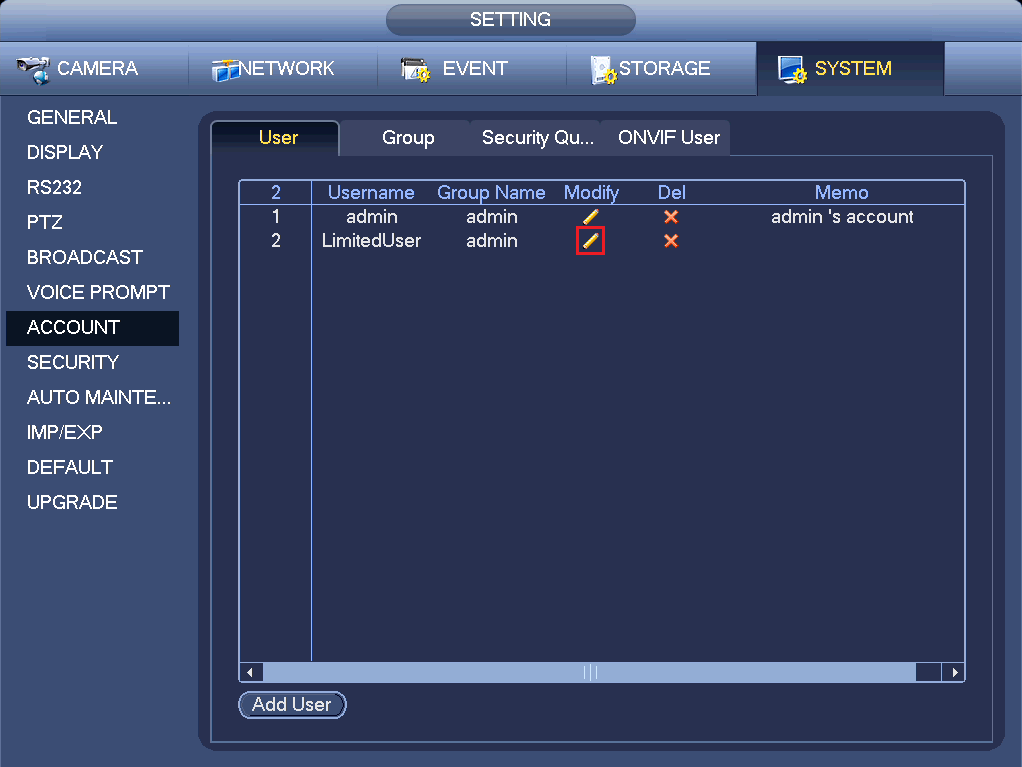
Click on the Modify Pencil next to the user you wish to modify.
Limit Options
(Black GUI) Limit Camera Playback
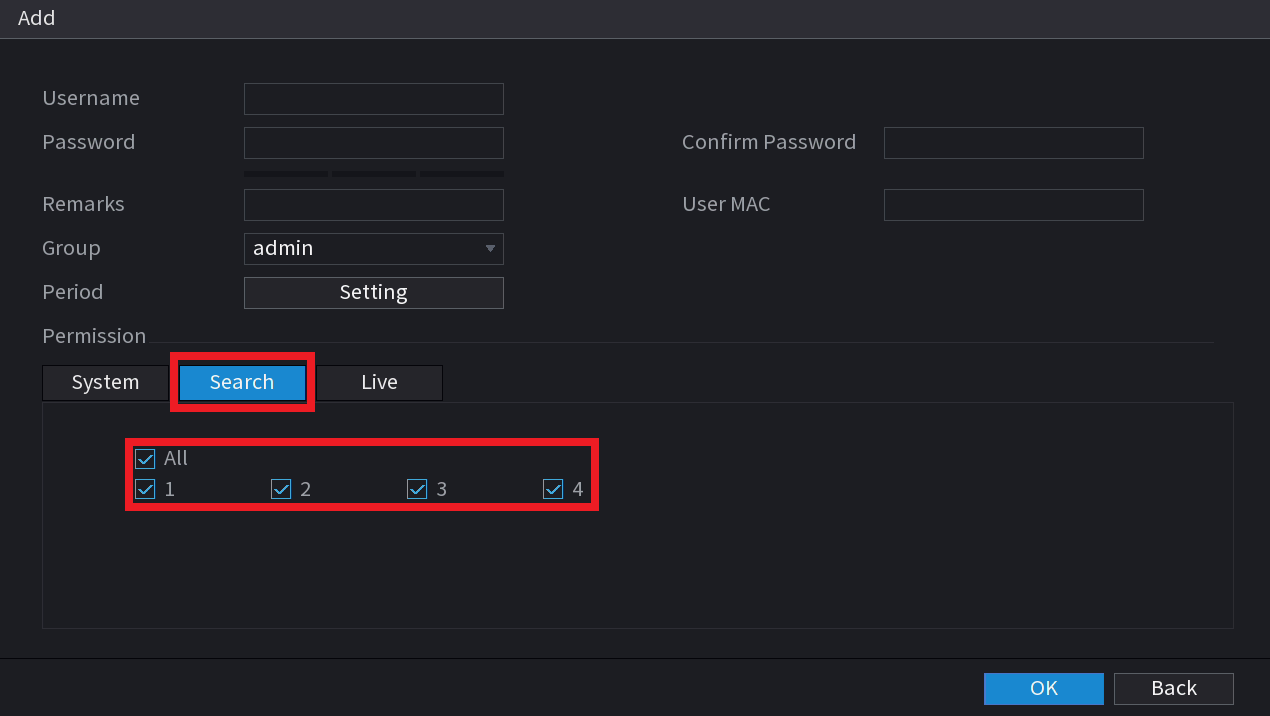
Click on the "Search" tab and tick all of the cameras you wish for the User to have access to.
(Black GUI) Limit Camera Live View
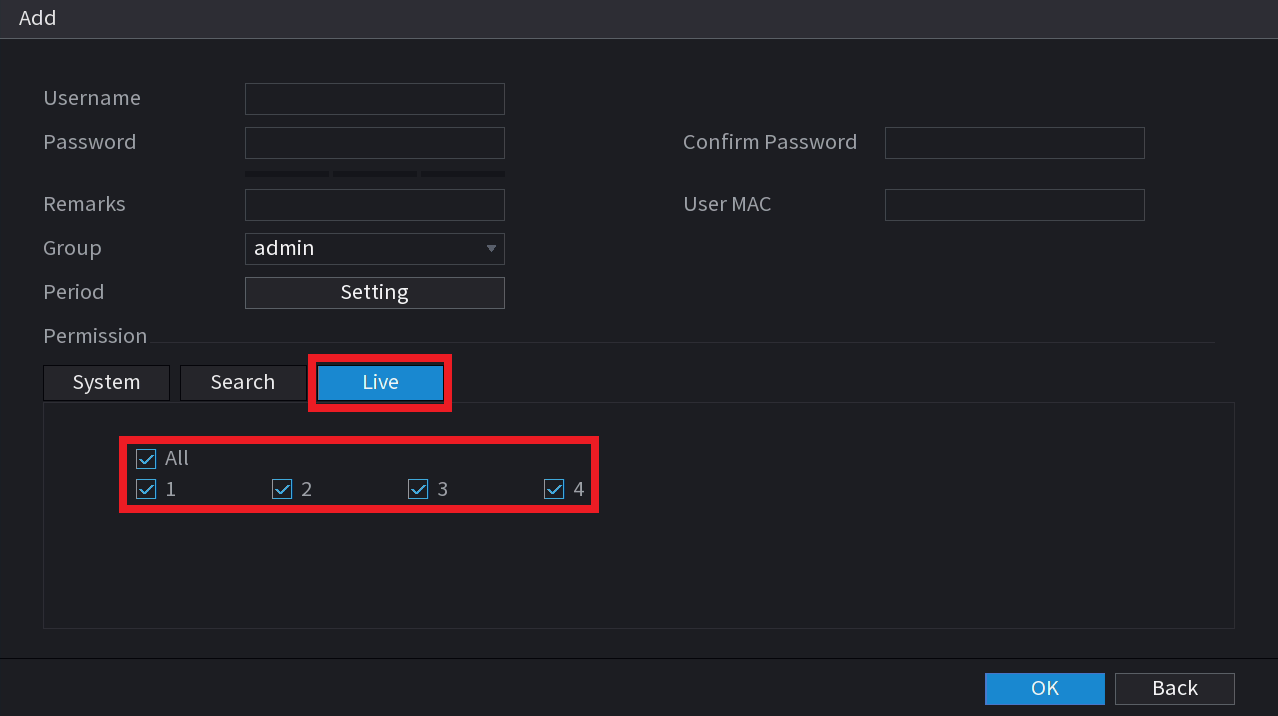
Click on the "Live" tab and tick all of the cameras you wish for the User to have access to.
(Black GUI) Limit access to sections of the Main Menu
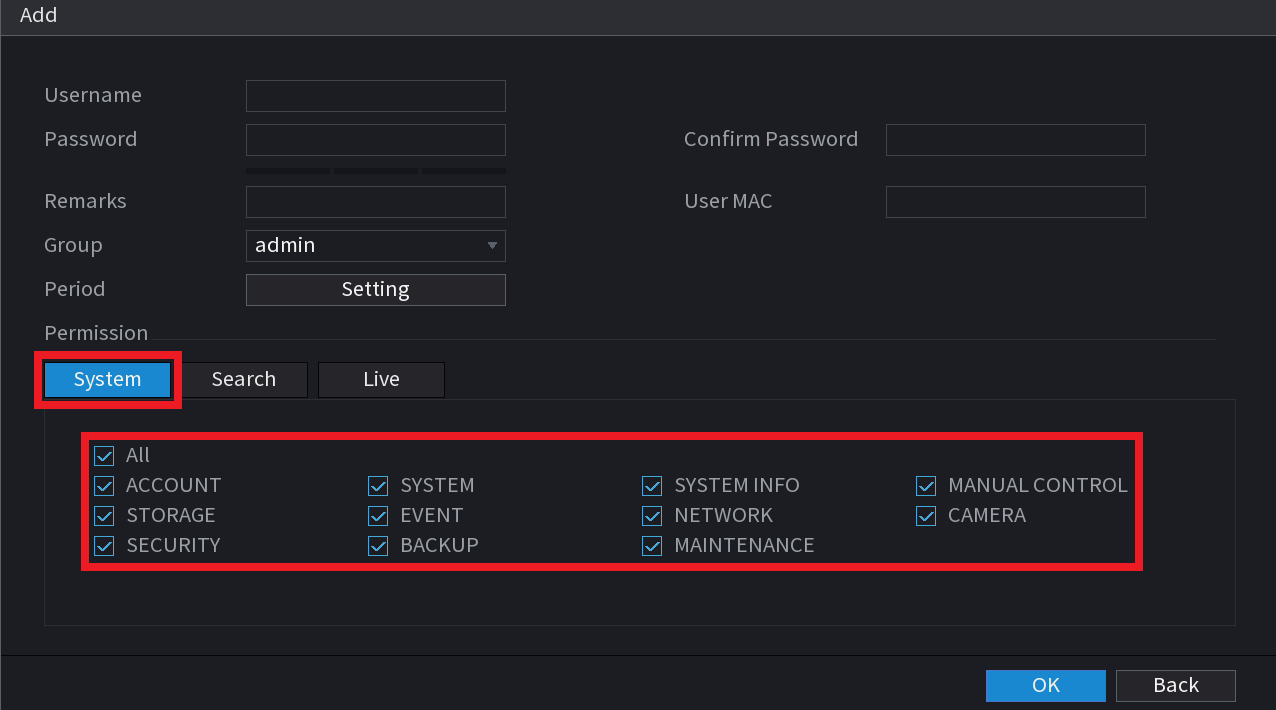
Click on the "System" tab and tick the options you want the user to be able to access in the Main Menu
(Blue GUI) Limit Camera Playback
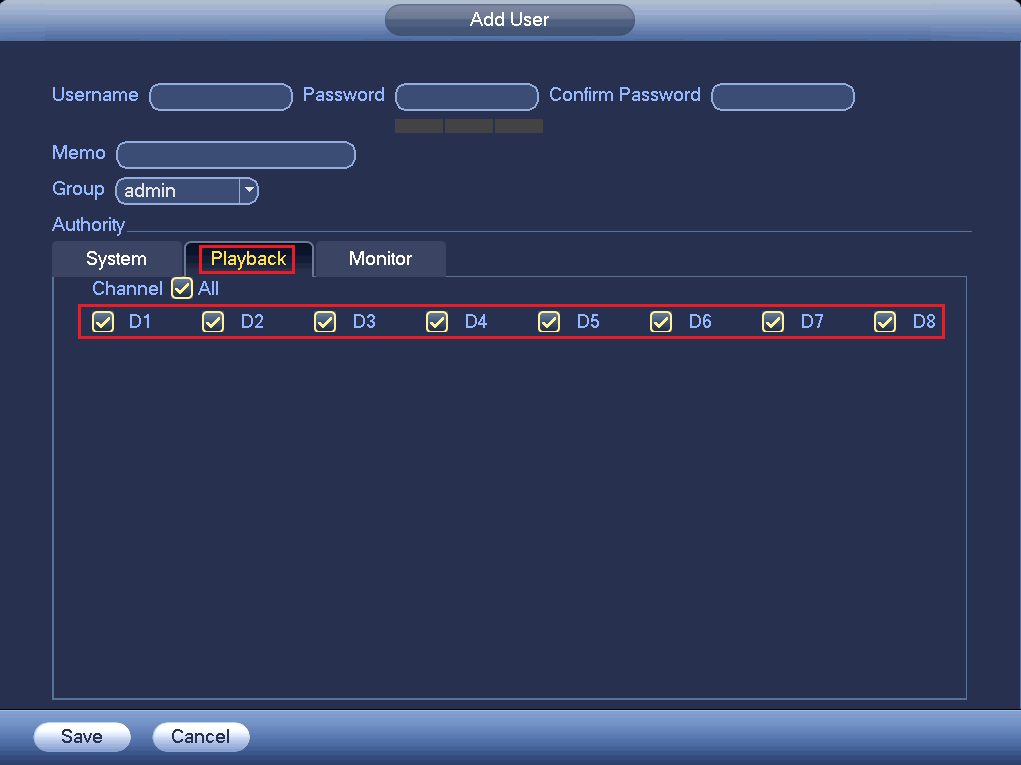
Click on the "Playback" tab and tick all of the cameras you wish for the User to have access to.
(Blue GUI) Limit Camera Live View
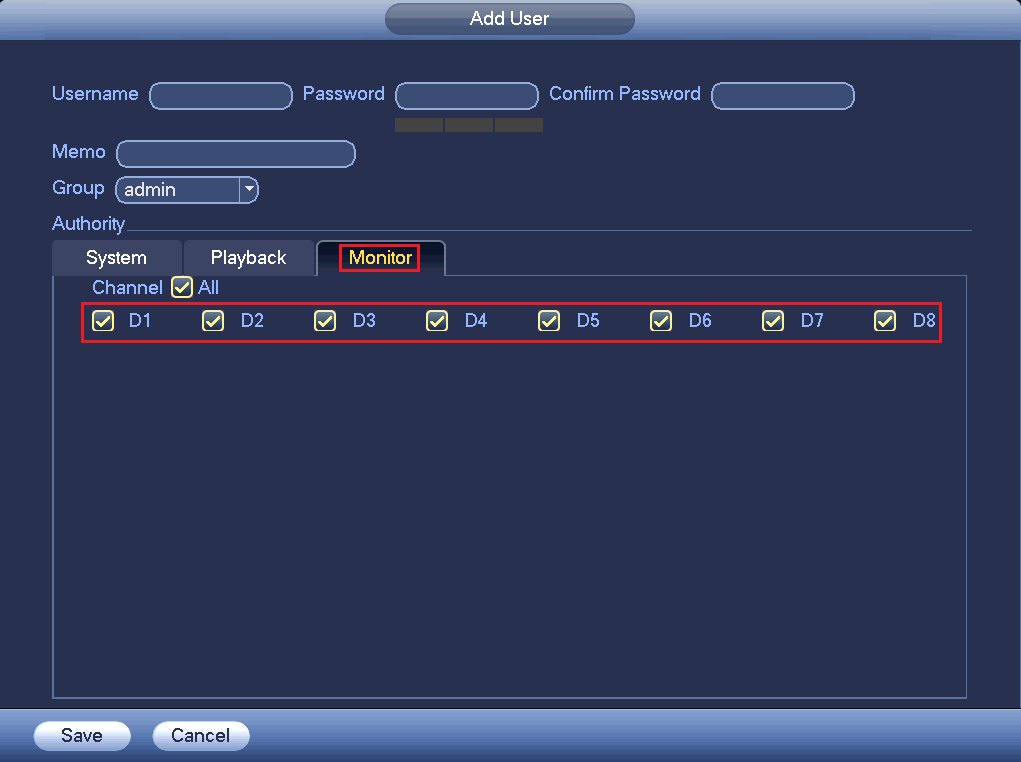
Click on the "Monitor" tab and tick all of the cameras you wish for the User to have access to.
(Blue GUI) Limit access to sections of the Main Menu
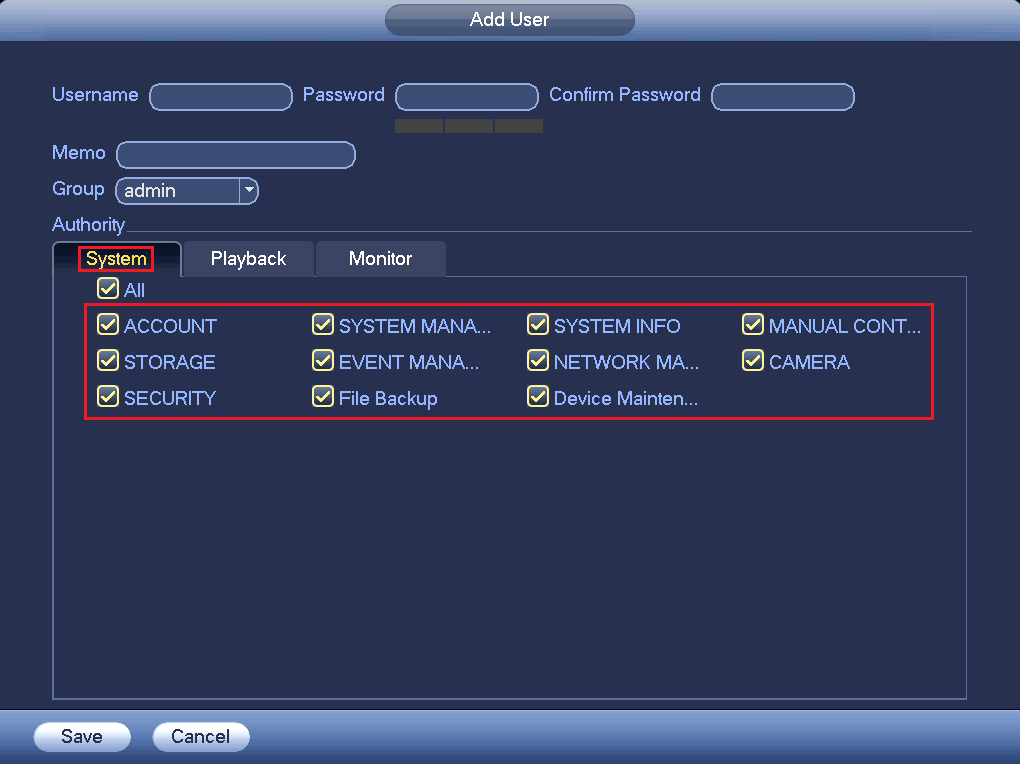
Click on the "System" tab and tick the options you want the user to be able to access in the Main Menu
How to limit access when no user is logged in
Limiting the access when no user is logged in
Hide Cameras when Logged out
To prevent cameras from being viewed when no user is logged in, follow the steps below.
(Blue GUI) Setup Instructions
Navigate to Main Menu > Settings > System > General
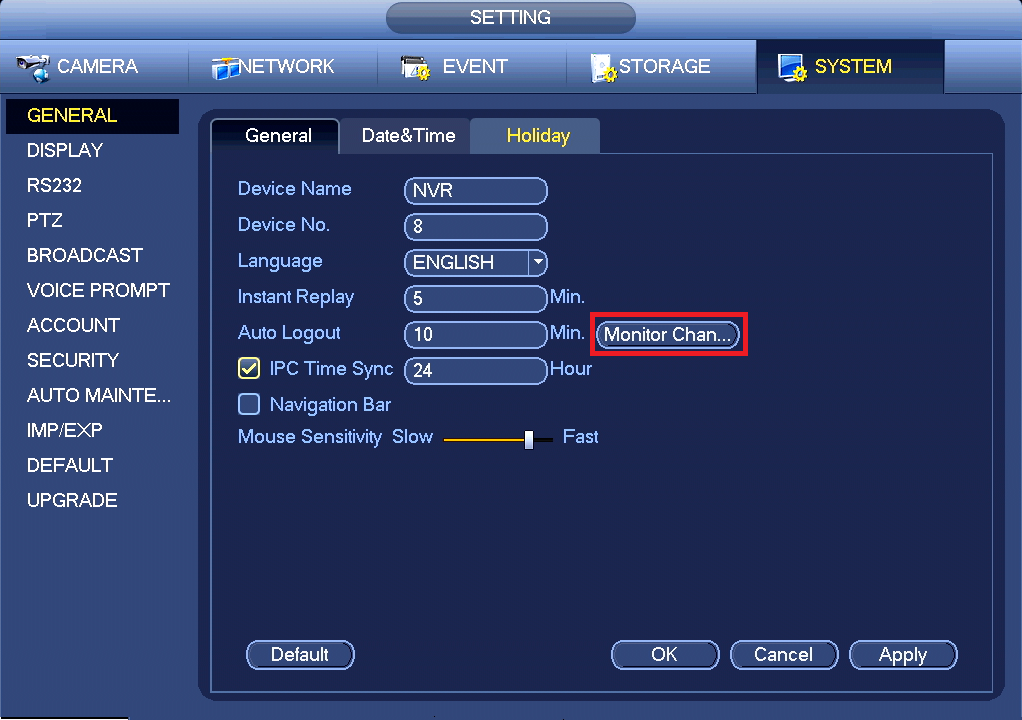
Click on Monitor Channel(s) when logout
%20when%20logout.png)
Tick the channels that you would like to be viewable when no user is logged in, then click Save.
(Black GUI) Setup Instructions
Navigate to Main Menu > System > General > General
It will be called either Monitor Channel(s) when logout or Non-Login User Permission.
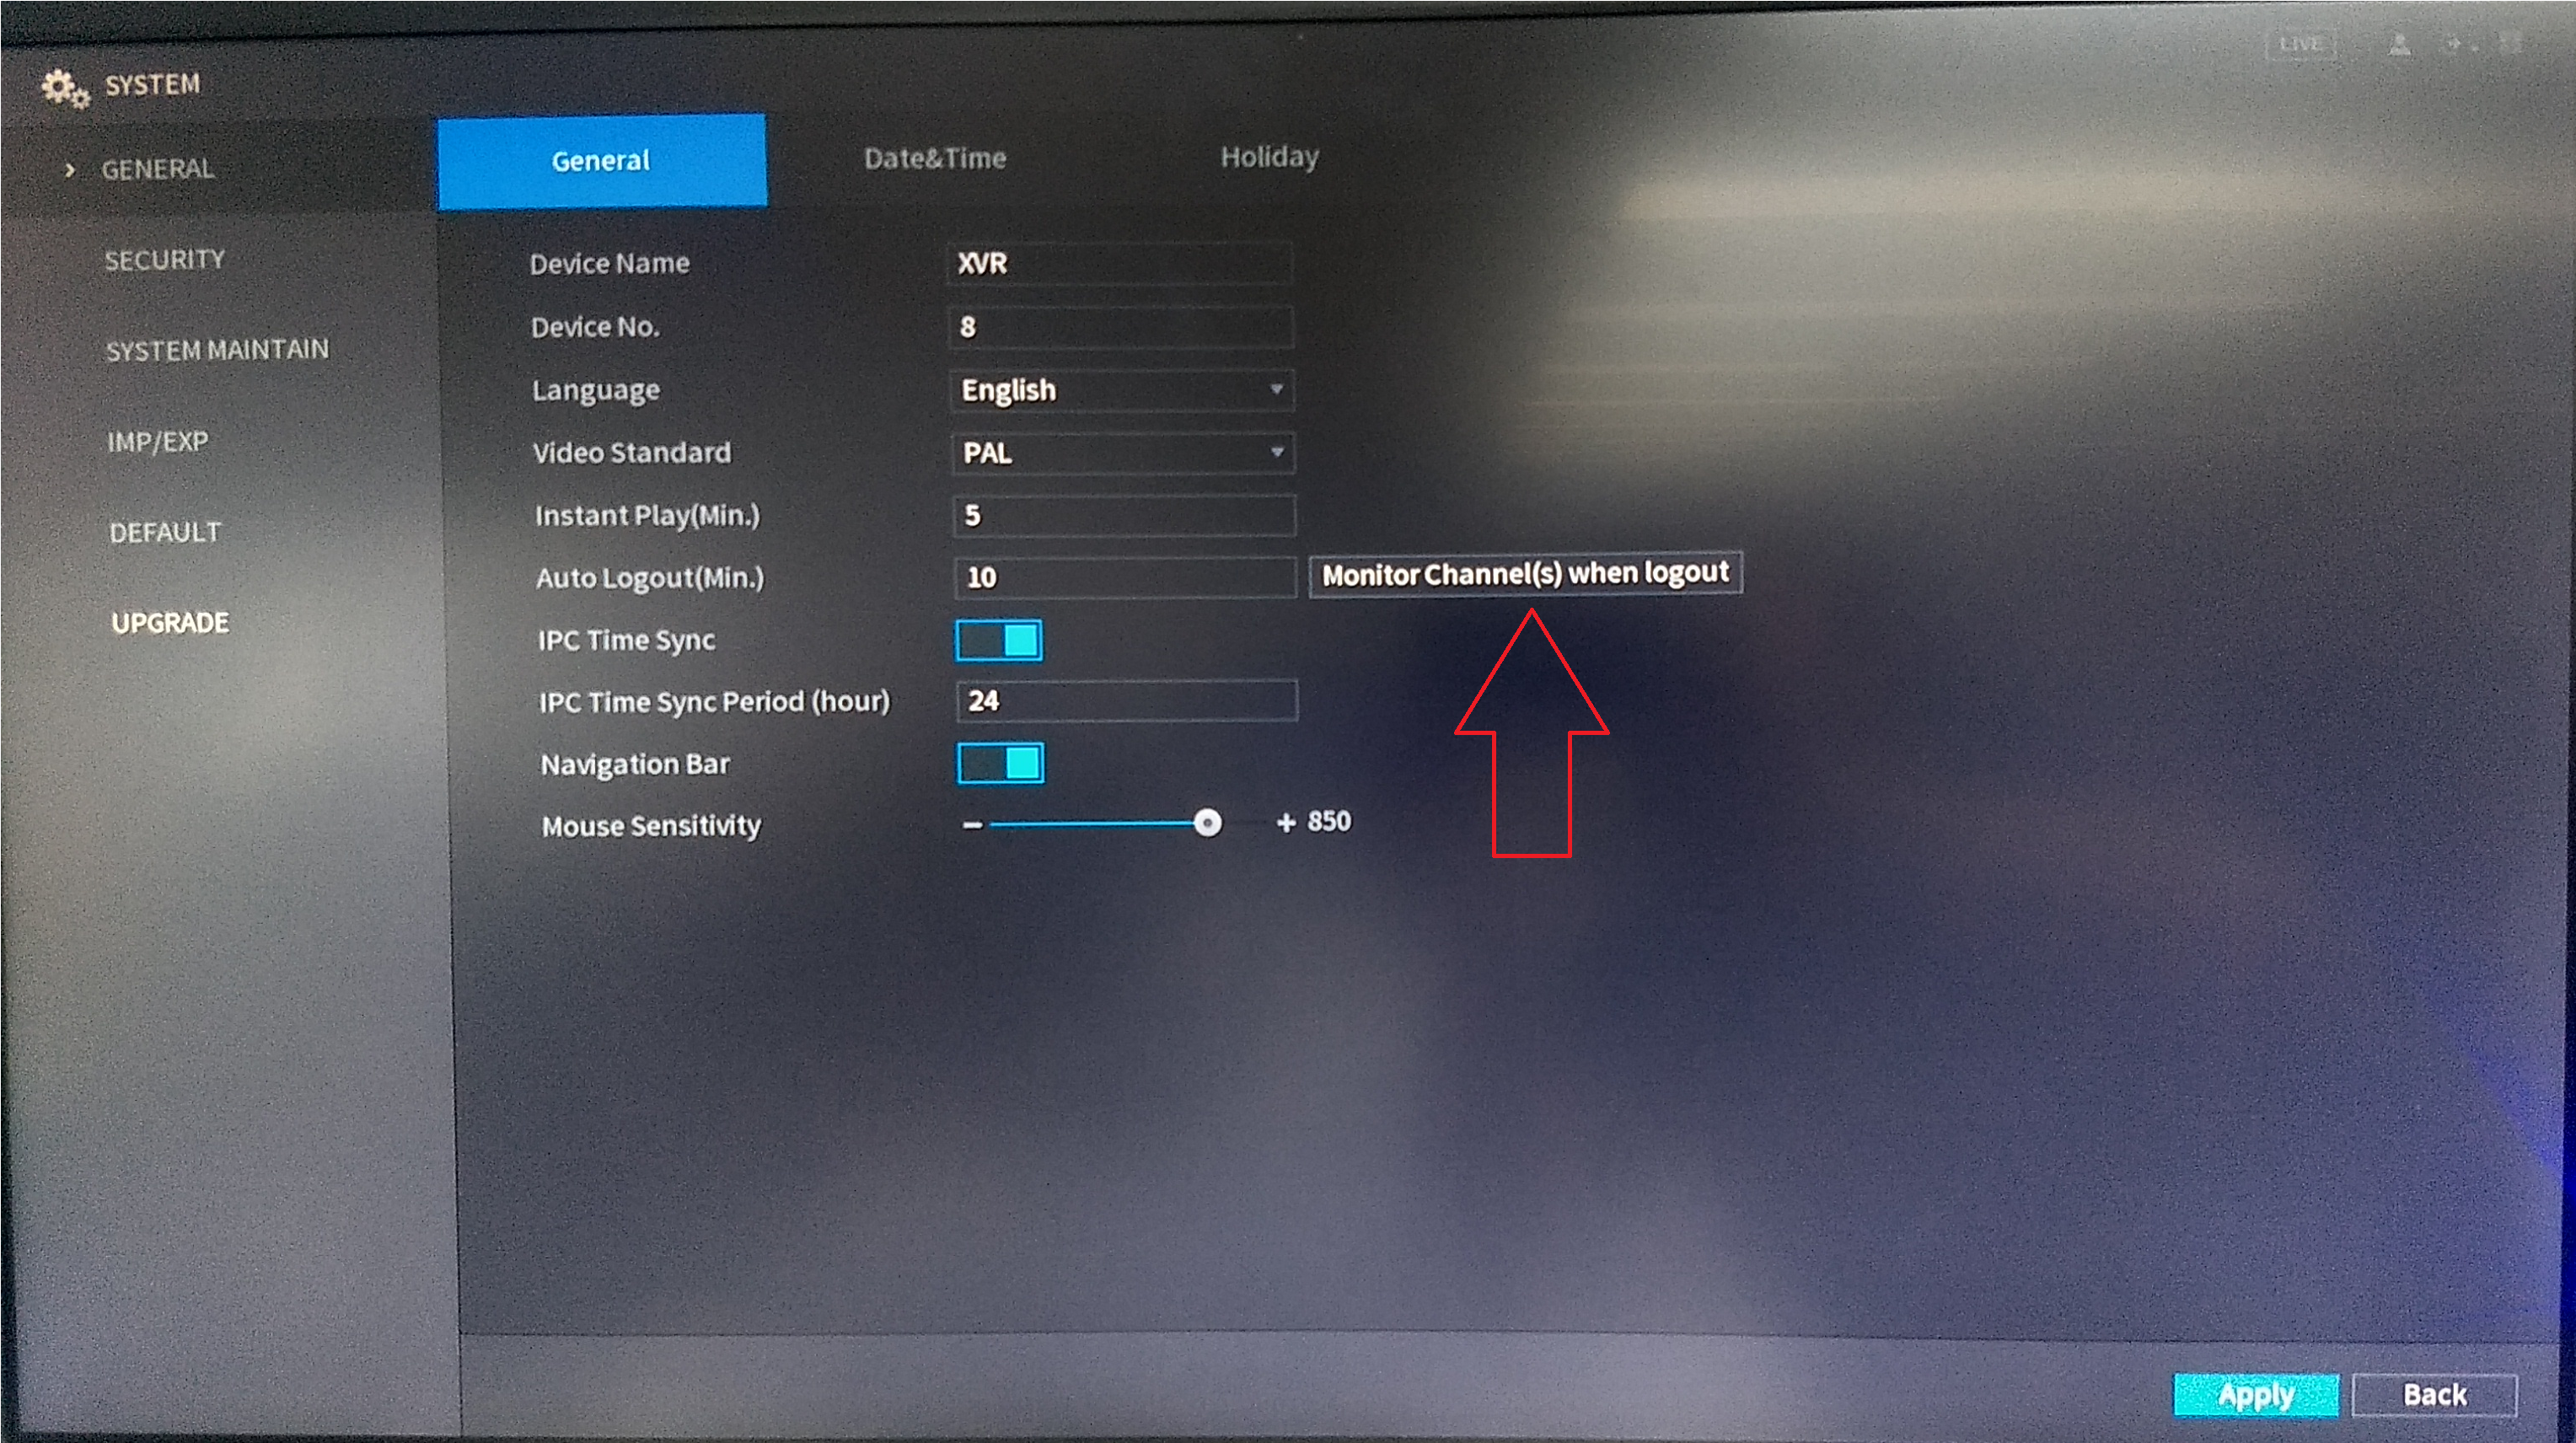
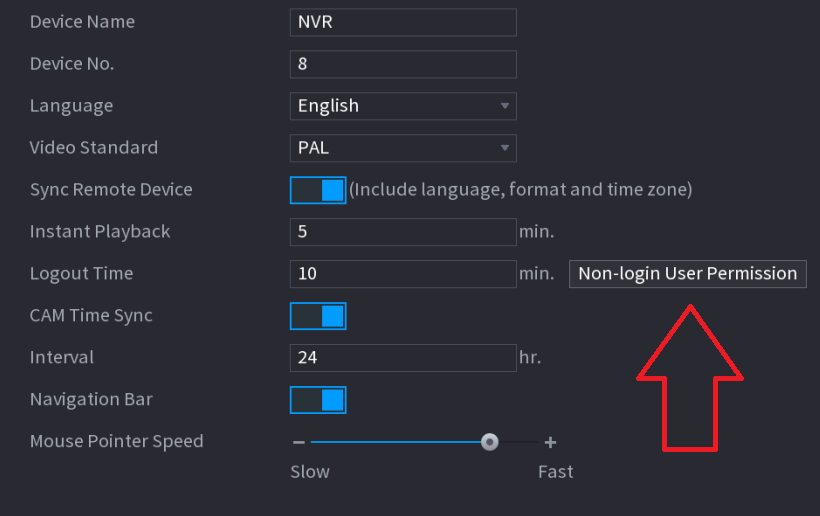
A window will pop up with a list of channels.
Tick the channels that you would like to be viewable when no user is logged in, then click Apply.
Older Firmware
If the above options are not available, such as on older firmware, the default user permissions will need to be changed, similar to hiding cameras when logged in. (The default user is the user when no one Is logged in, such as when just viewing the cameras on a monitor.)
Navigate to Main Menu > Advanced > Account
And navigate to the Default User and select Modify User

Select the cameras that you do not wish the default user to see, in this example all cameras were selected.
Make sure to have at least One item selected, such as playback or there will be an error. And Save to apply settings.

To confirm correct setting navigate to Main Menu > Shutdown > Logout Menu User

If done correctly the camera should no longer be visible and with a red lock symbol on the bottom left of each camera.

Hide Cameras when Logged in
You can limit the access to cameras in Playback & Live View of specific accounts. See below for instructions
