To download SmartPSS for your device, choose your Operating System below.MacOS Catalina 10.15.1 - 1.10.7
Video Tutorial
Installing the Application
- Download the software onto your computer.
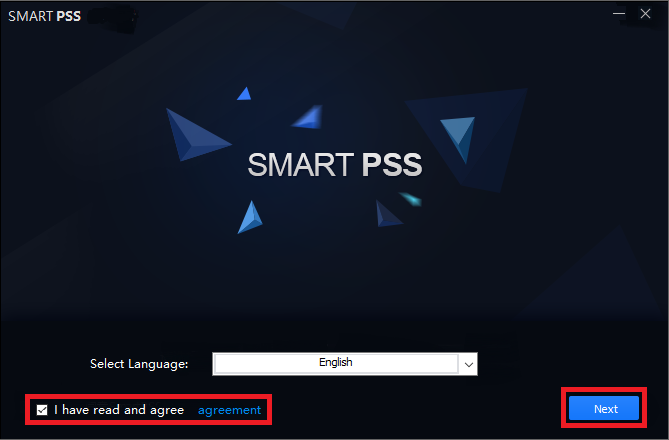
- Open the software, tick the agreement box, and select Next.
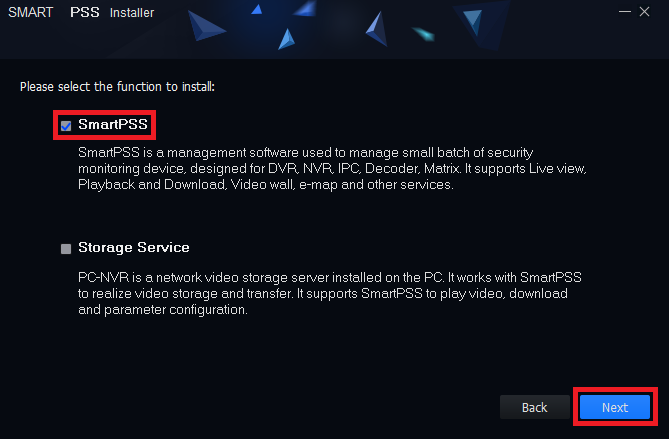
- Select the Smart PSS option, and de-select the Storage Service. Select Next.
- After the installation is complete, open the software. You will be prompted to set a password, keep this password recorded for later use.
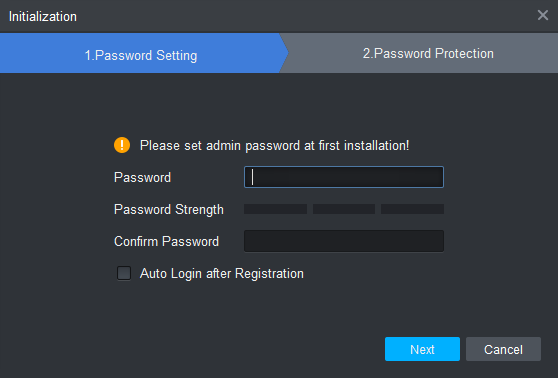
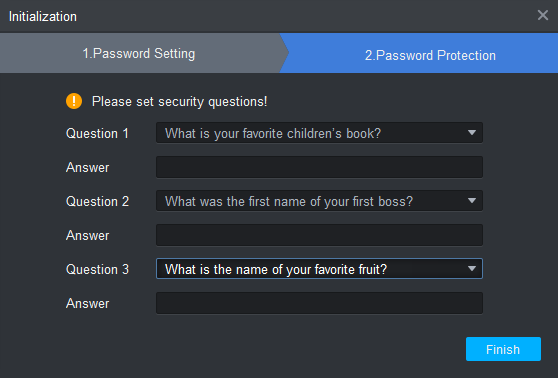
- Set memorable security questions, then select Finish.
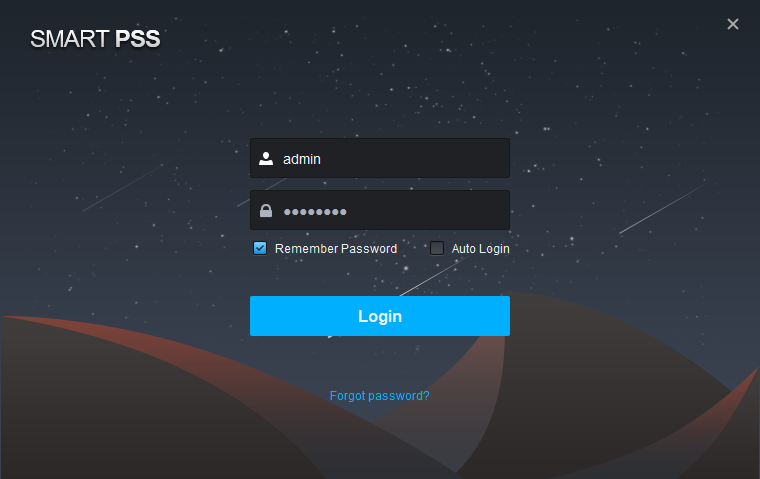
- Enter the password you have set for the software the select Login.
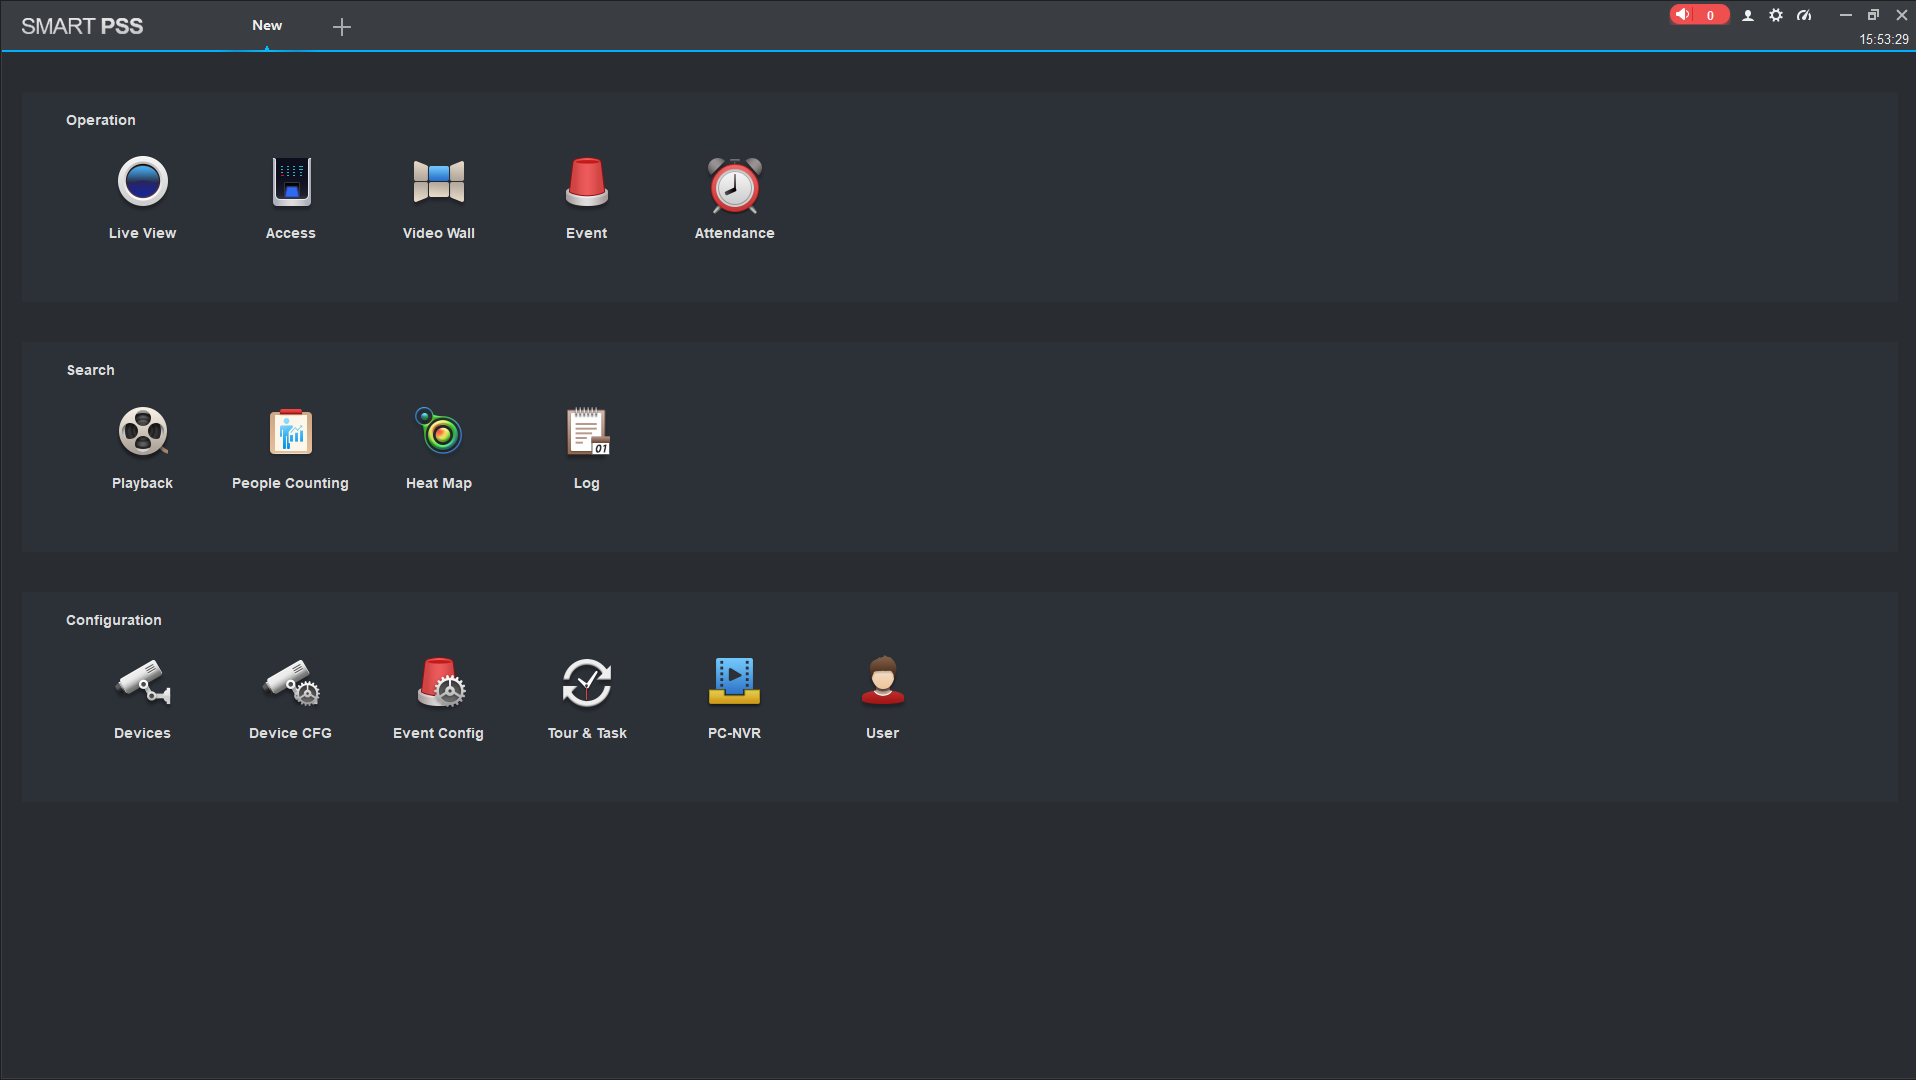
- The software will now be open, and you will be on the Home Page.
Manually connecting your device to Smart PSS
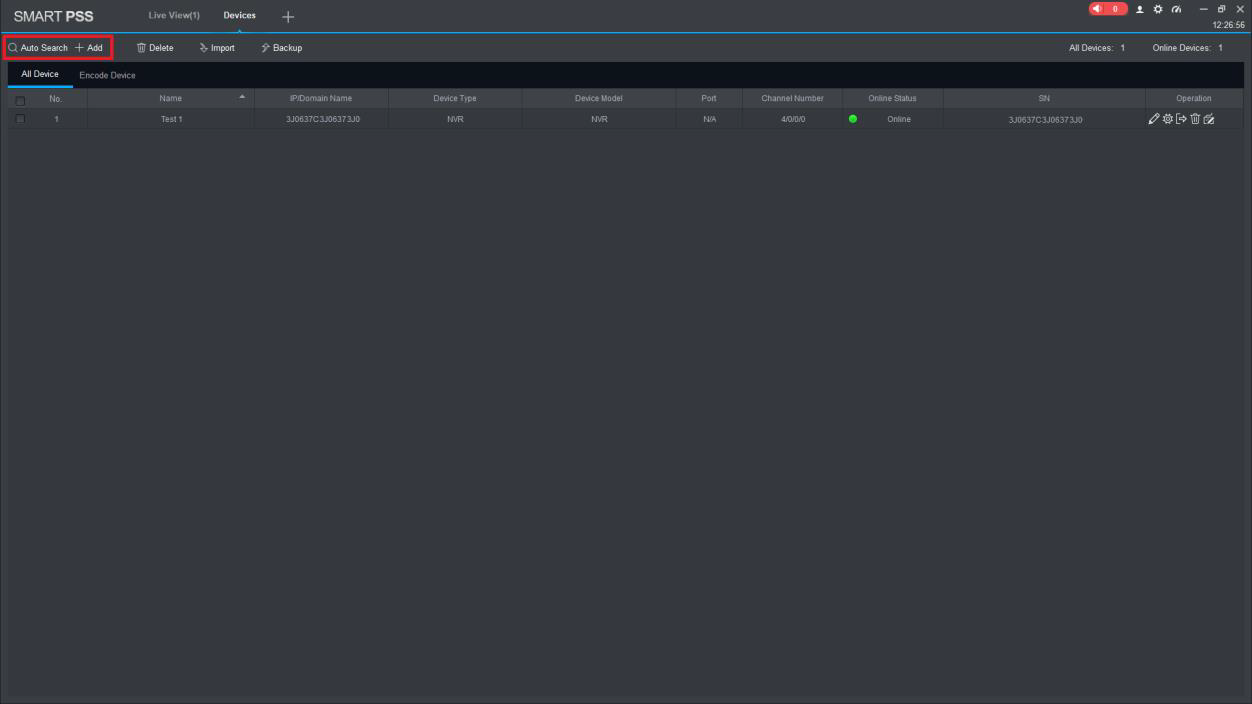
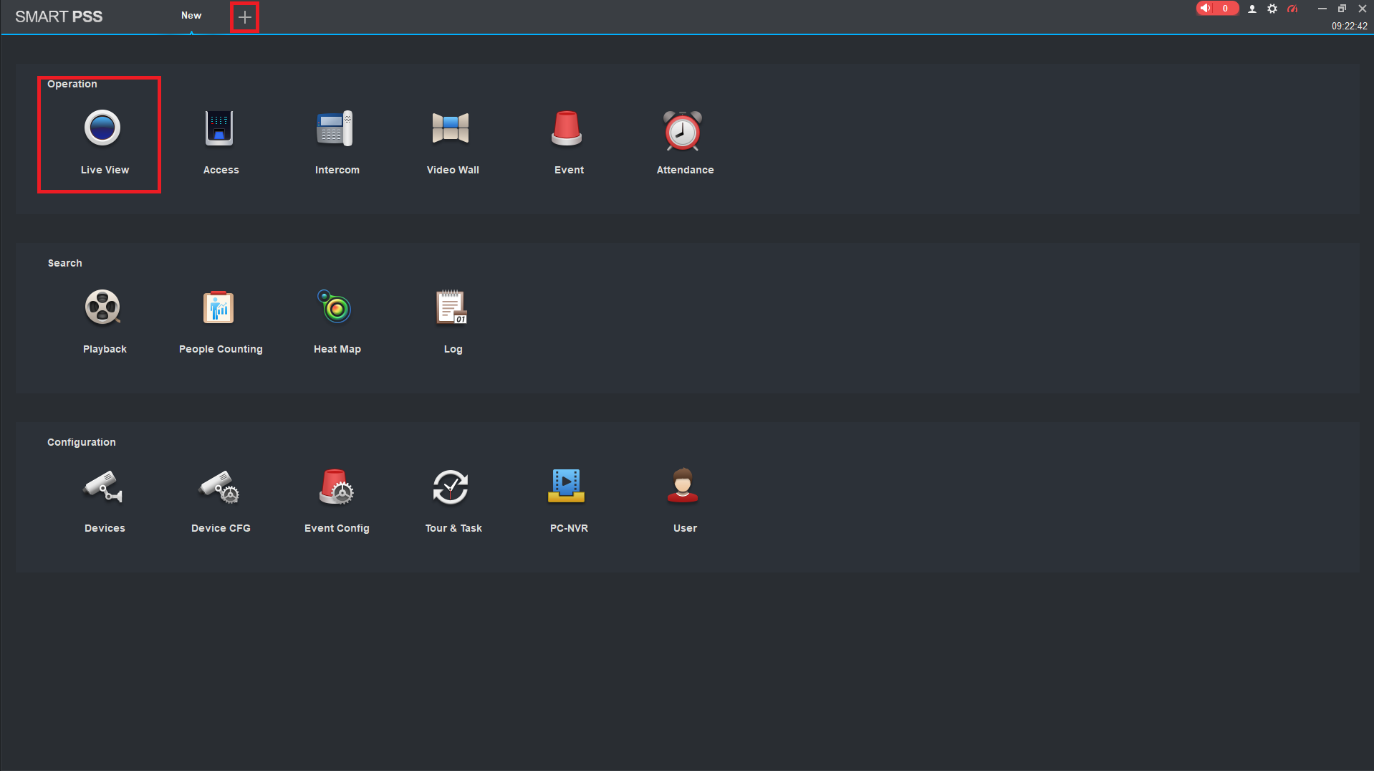
To add a device, click on Devices from the Main Menu. To get back to the menu click the + icon next to the tab name.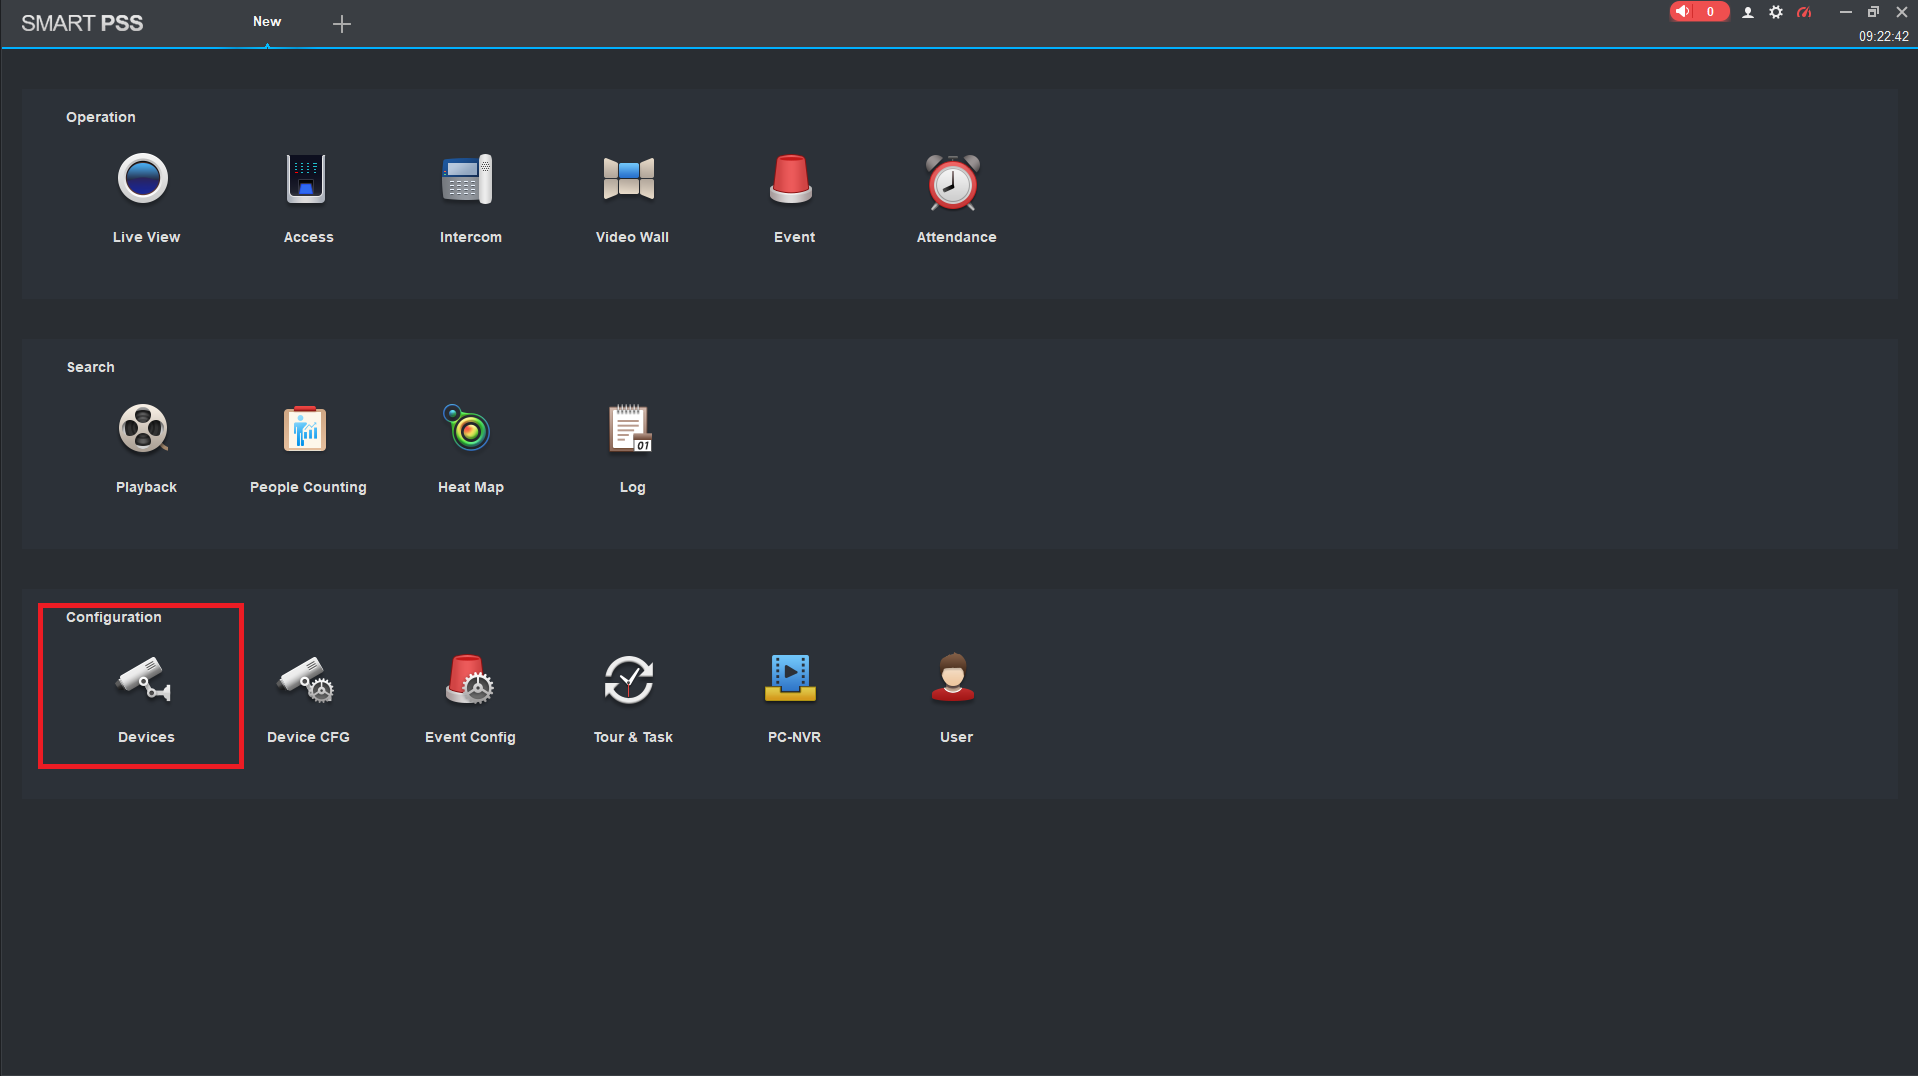
Add a Device and Selecting a Connection Method.
There are two ways to connect to your recorder, Serial Number and IP Address. SN is best to use if you are unsure. Otherwise, you can use auto search and add the local IP address/device.
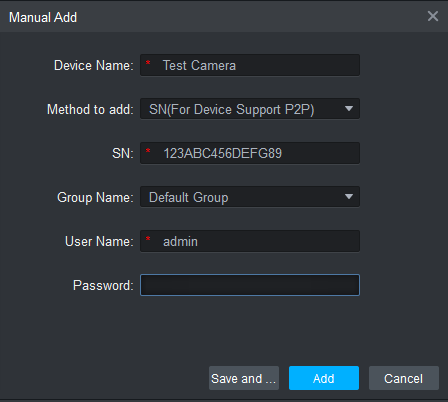
Enter your device's login details
This will be the same as the login details you use to login to the recorder. If you do not have the login details you will need to acquire them from the installer or owner of the machine.
Once you have entered in the details click Add to save the device.
|
Method to add: Choose between the Serial Number and IP address SN or IP/DOMAIN: Enter the SN or IP of your device Group Name: If using multiple sites, you can group them for easier viewing. User Name: The username of the account you are using to login Password: The password of this account |
 |
Verify Online Status
Once the recorder is added your device should appear as "Online", if the status says otherwise refer to the below.
Offline(Locked) - The device has had too many failed login attempts. The password may be incorrect or there is another connection to the recorder with the incorrect password.
Offline(Invalid user name or password) - The SN/IP of the device is not currently connected. Verify the recorder is online and connected.

Importing Devices from a file
This method is used when the same devices are to be shared across multiple computers. Ensure you have the backup file saved to your computer before beginning.
- To import a devices from a file, click on Devices from the Main Menu. To get back to the menu click the + icon next to the tab name.
- Select Import.

- Select the folder icon, and locate the backup file.
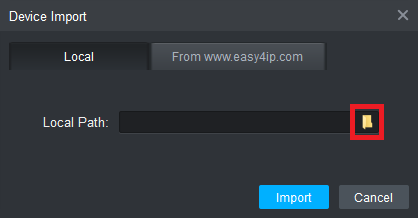
- Select Import, the devices will now be added to the software.
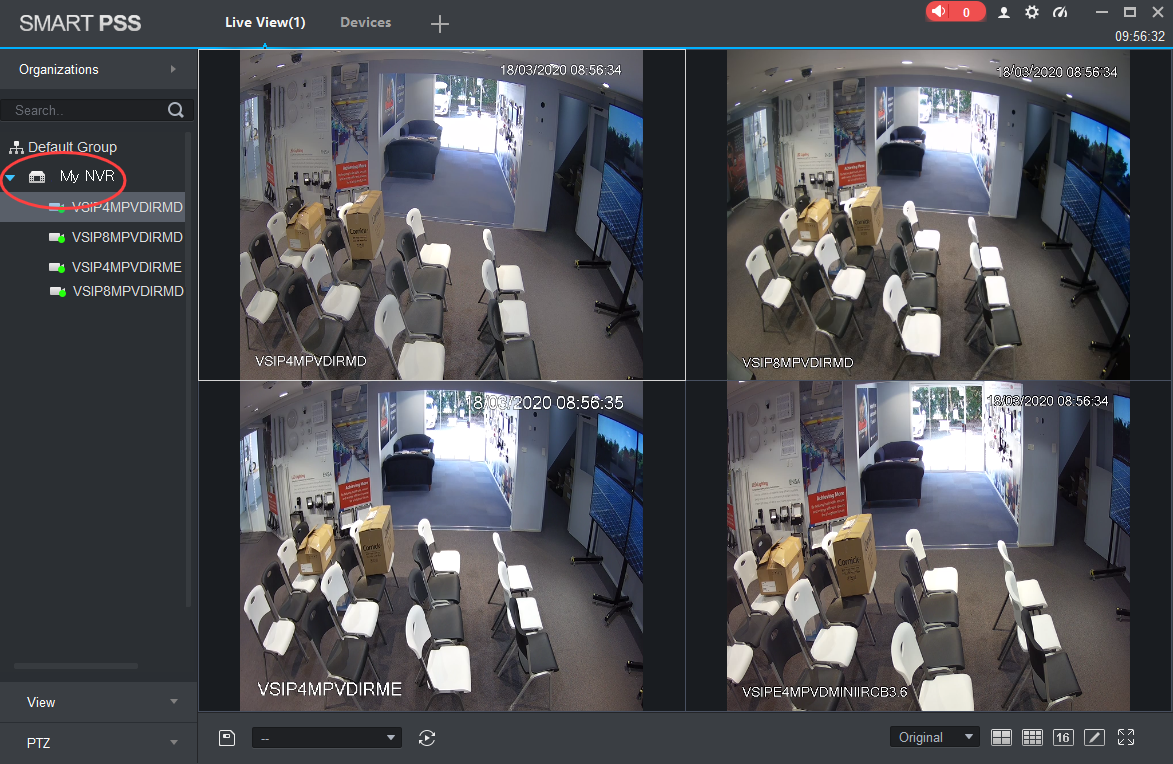
How to Live View Cameras
Once you have added your device, select the plus icon at the top left.
- Select Live View, under operation.
- Click the arrow to expand the recorder and list available cameras.
- Click and drag or double click each channel to load it into the view.
 To open a camera channel in fullscreen simply double click on that channel. To revert back to the channel split, double click again.
To change the channel split, choose from the presets or create your own custom split in the bottom right corner.
If you have a PTZ or Motorised camera, they can be adjusted from the PTZ panel.
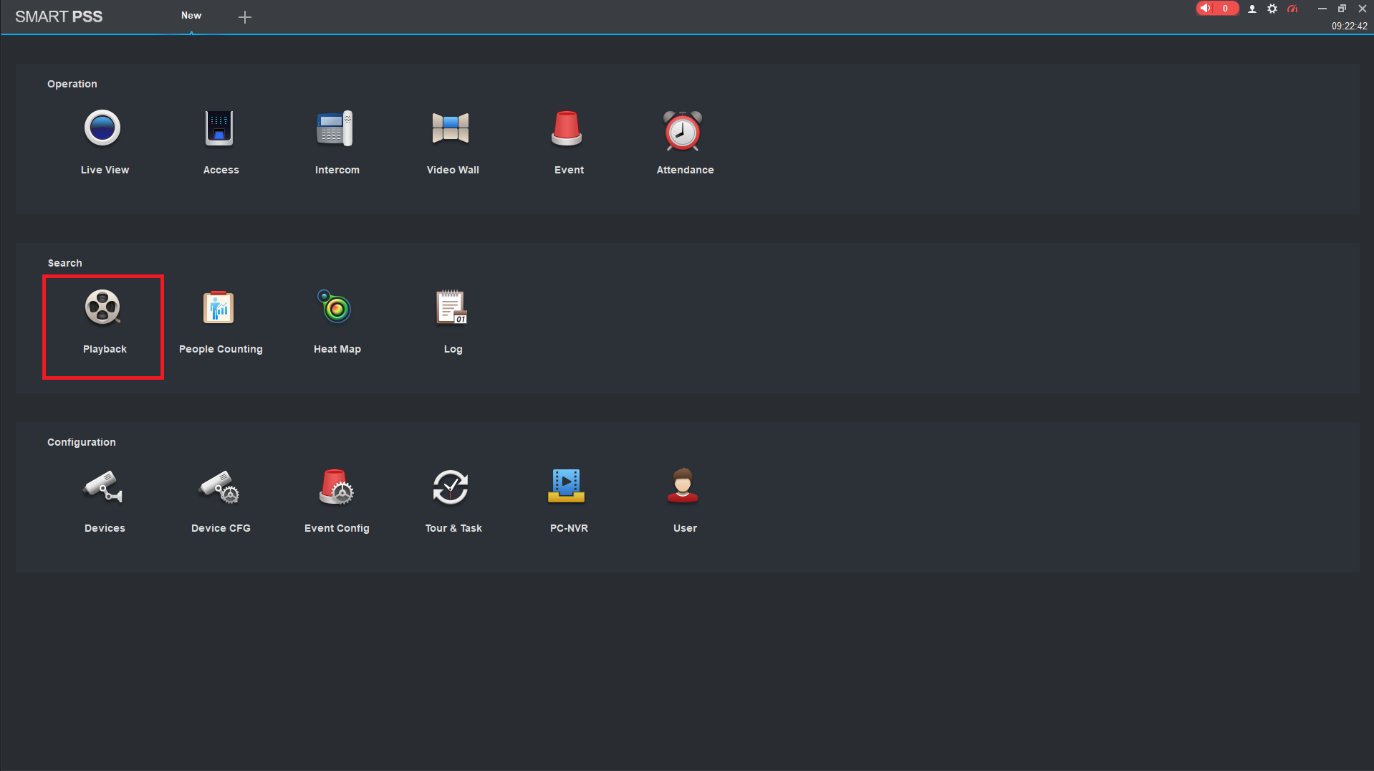
How to Playback Footage
1. From the Main Menu of Smart PSS, go to Playback under the search tab.
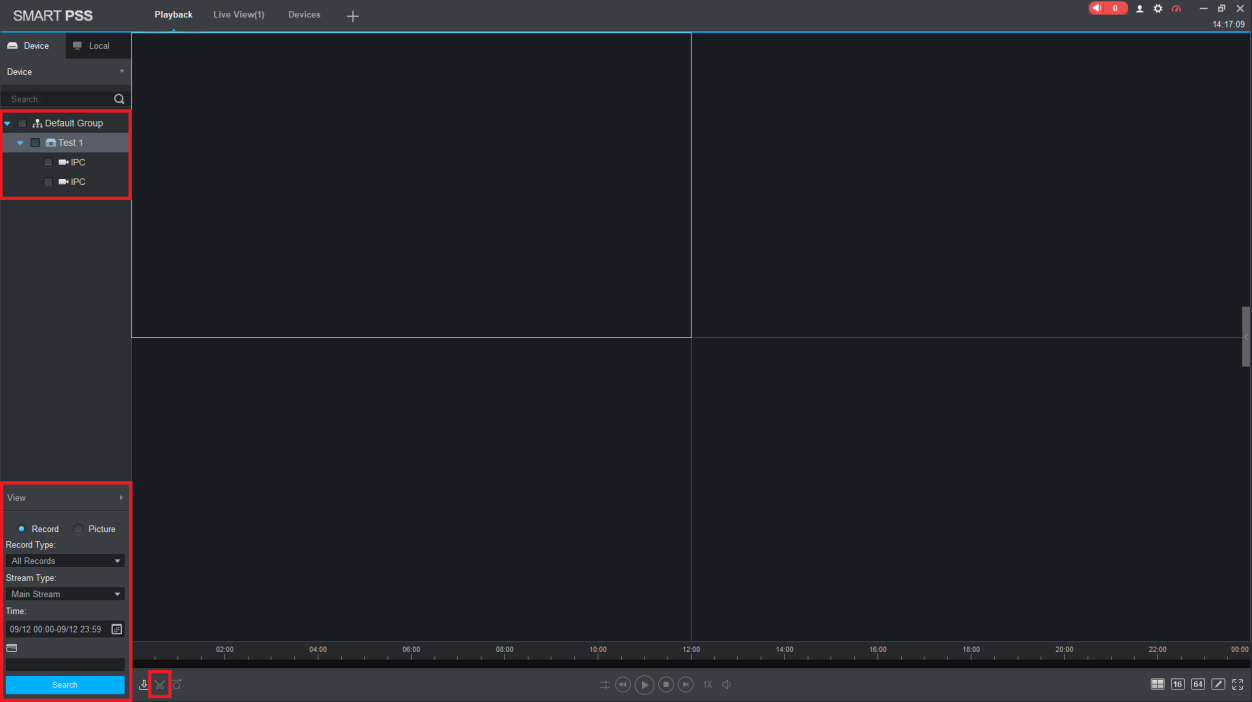 Click on search. Once the search completes, click on play to start playback.
If you select multiple cameras at one make sure to turn SYNC on.

How to Backup Footage
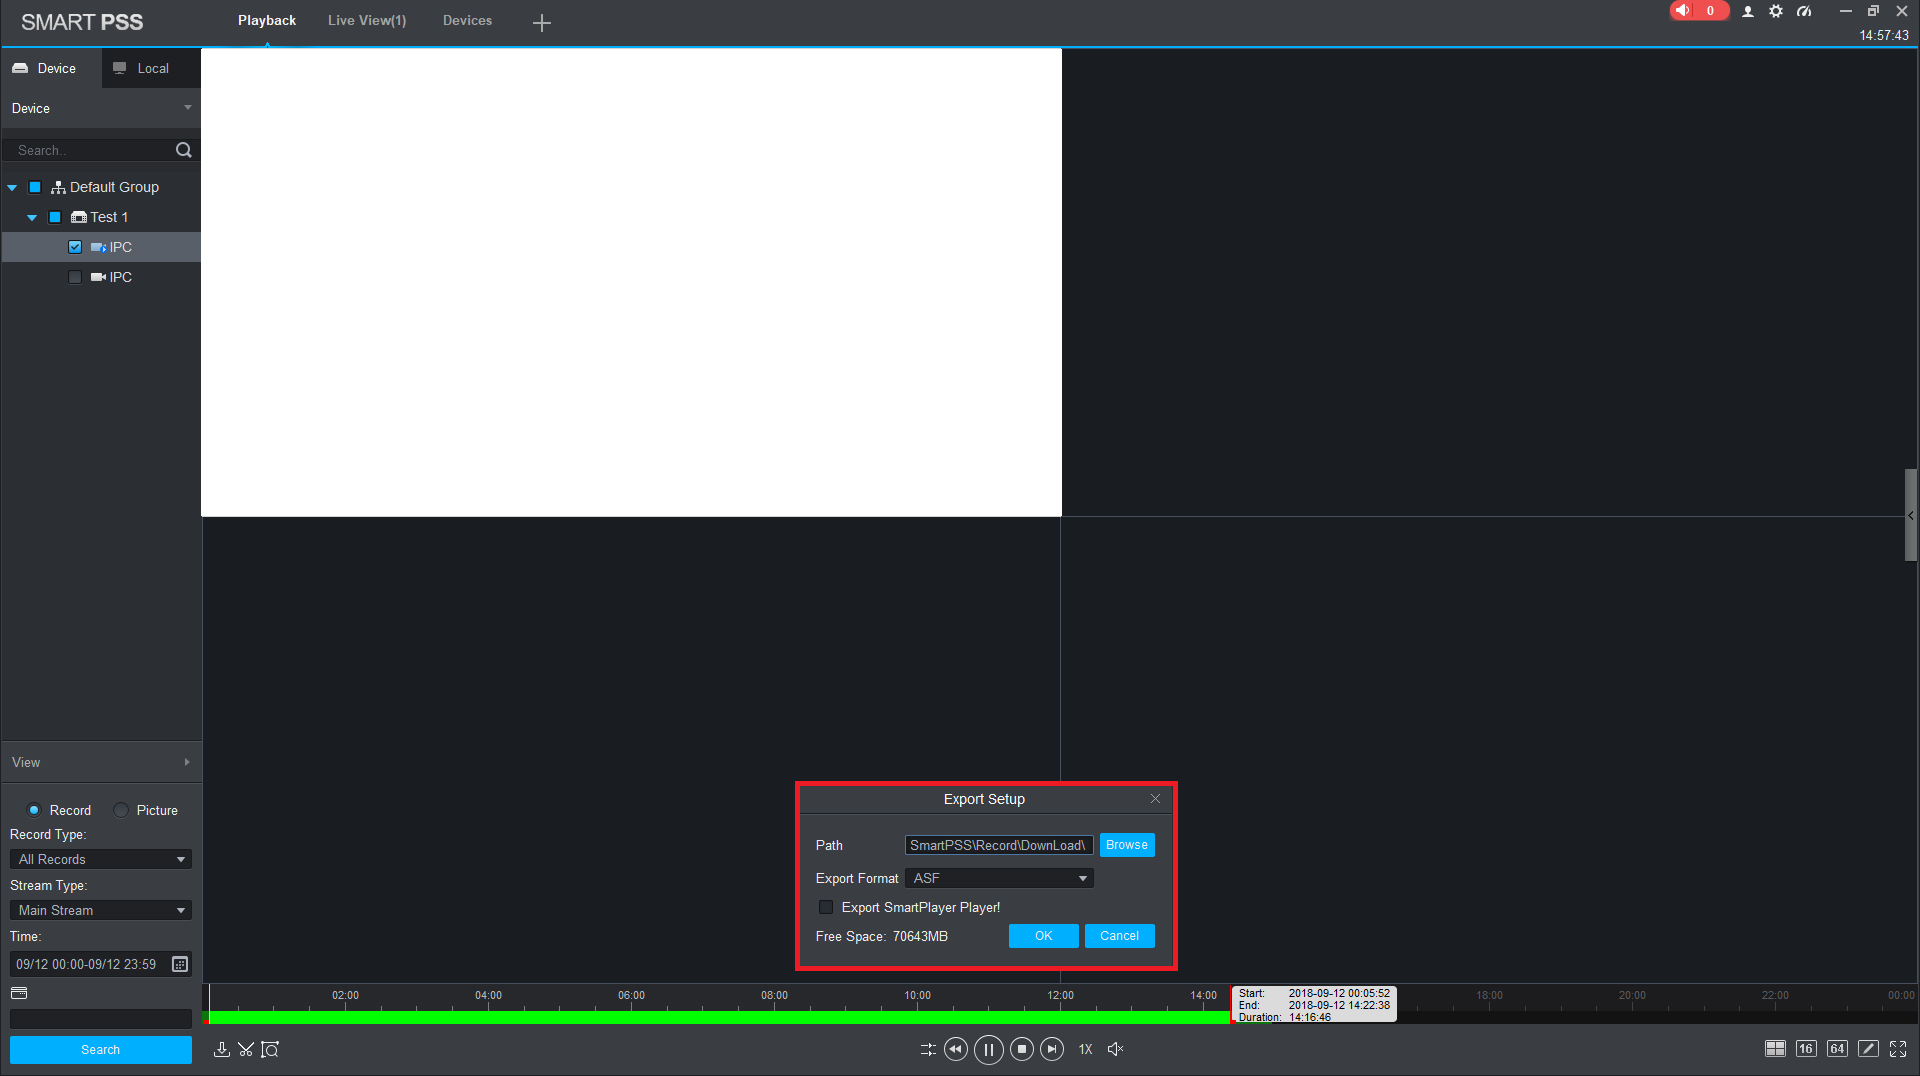
Once your footage is playing back you can click the scissors icon bottom left hand corner. See Example 3-2
This will pre select 1 hour of footage on the timeline bar. Click and drag the red box to change the start/end time. Once you have the correct time, click the scissor icon again to cut the footage. This will prompt you with a backup window asking where you would like to export the file.
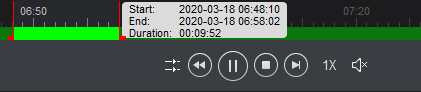
Figure 3-3