Out of Box State
This Setup Wizard is for Recorder that are Brand new or have been Factory Defaulted. If wishing to Factory Default recorder see Article Below
Factory Defaulting Recorder
Factory Defaulting your Recorder
To reset your device, refer to either of the following images.
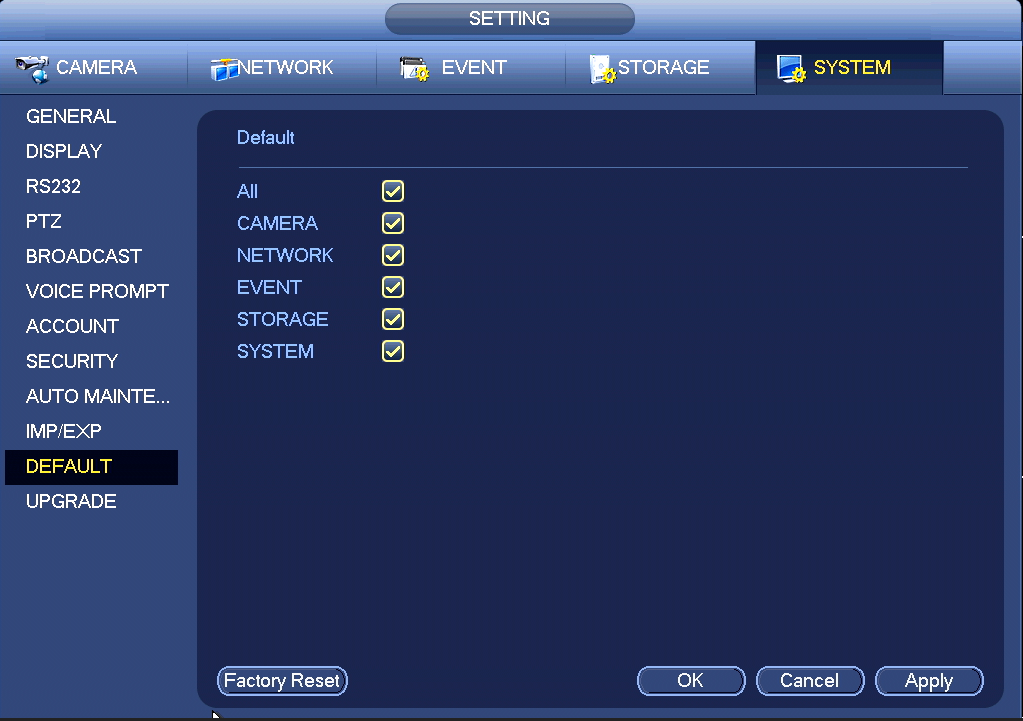
You can choose to reset back to factory defaults, removing all configuration and user settings on the recorder. This is done by clicking the factory reset button on the bottom left.
To reset particular sections, tick the enable box then click apply and OK. The recorder may restart after any changes are applied.
Blue GUI
Login > Main Menu > System(Setting)
Black GUI (Old)
Login > Main Menu > Operation >System Maintain > Default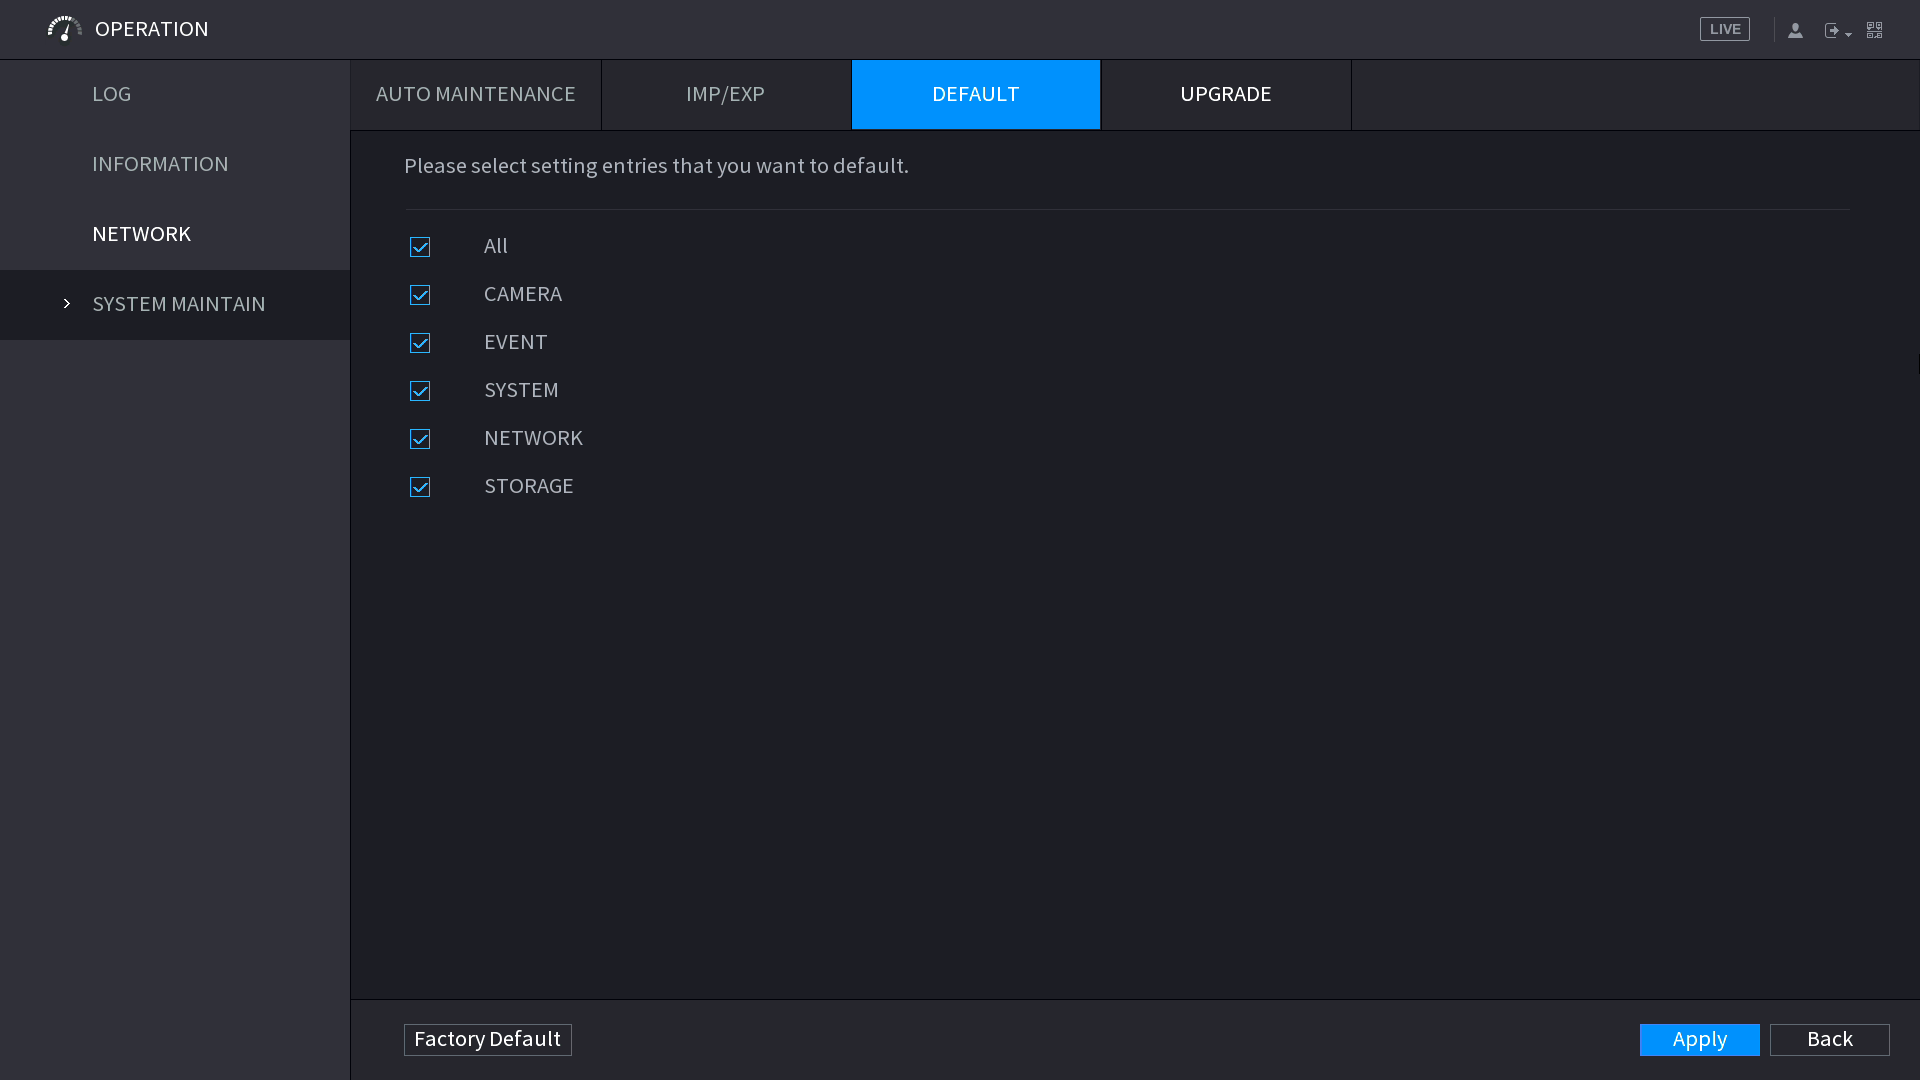

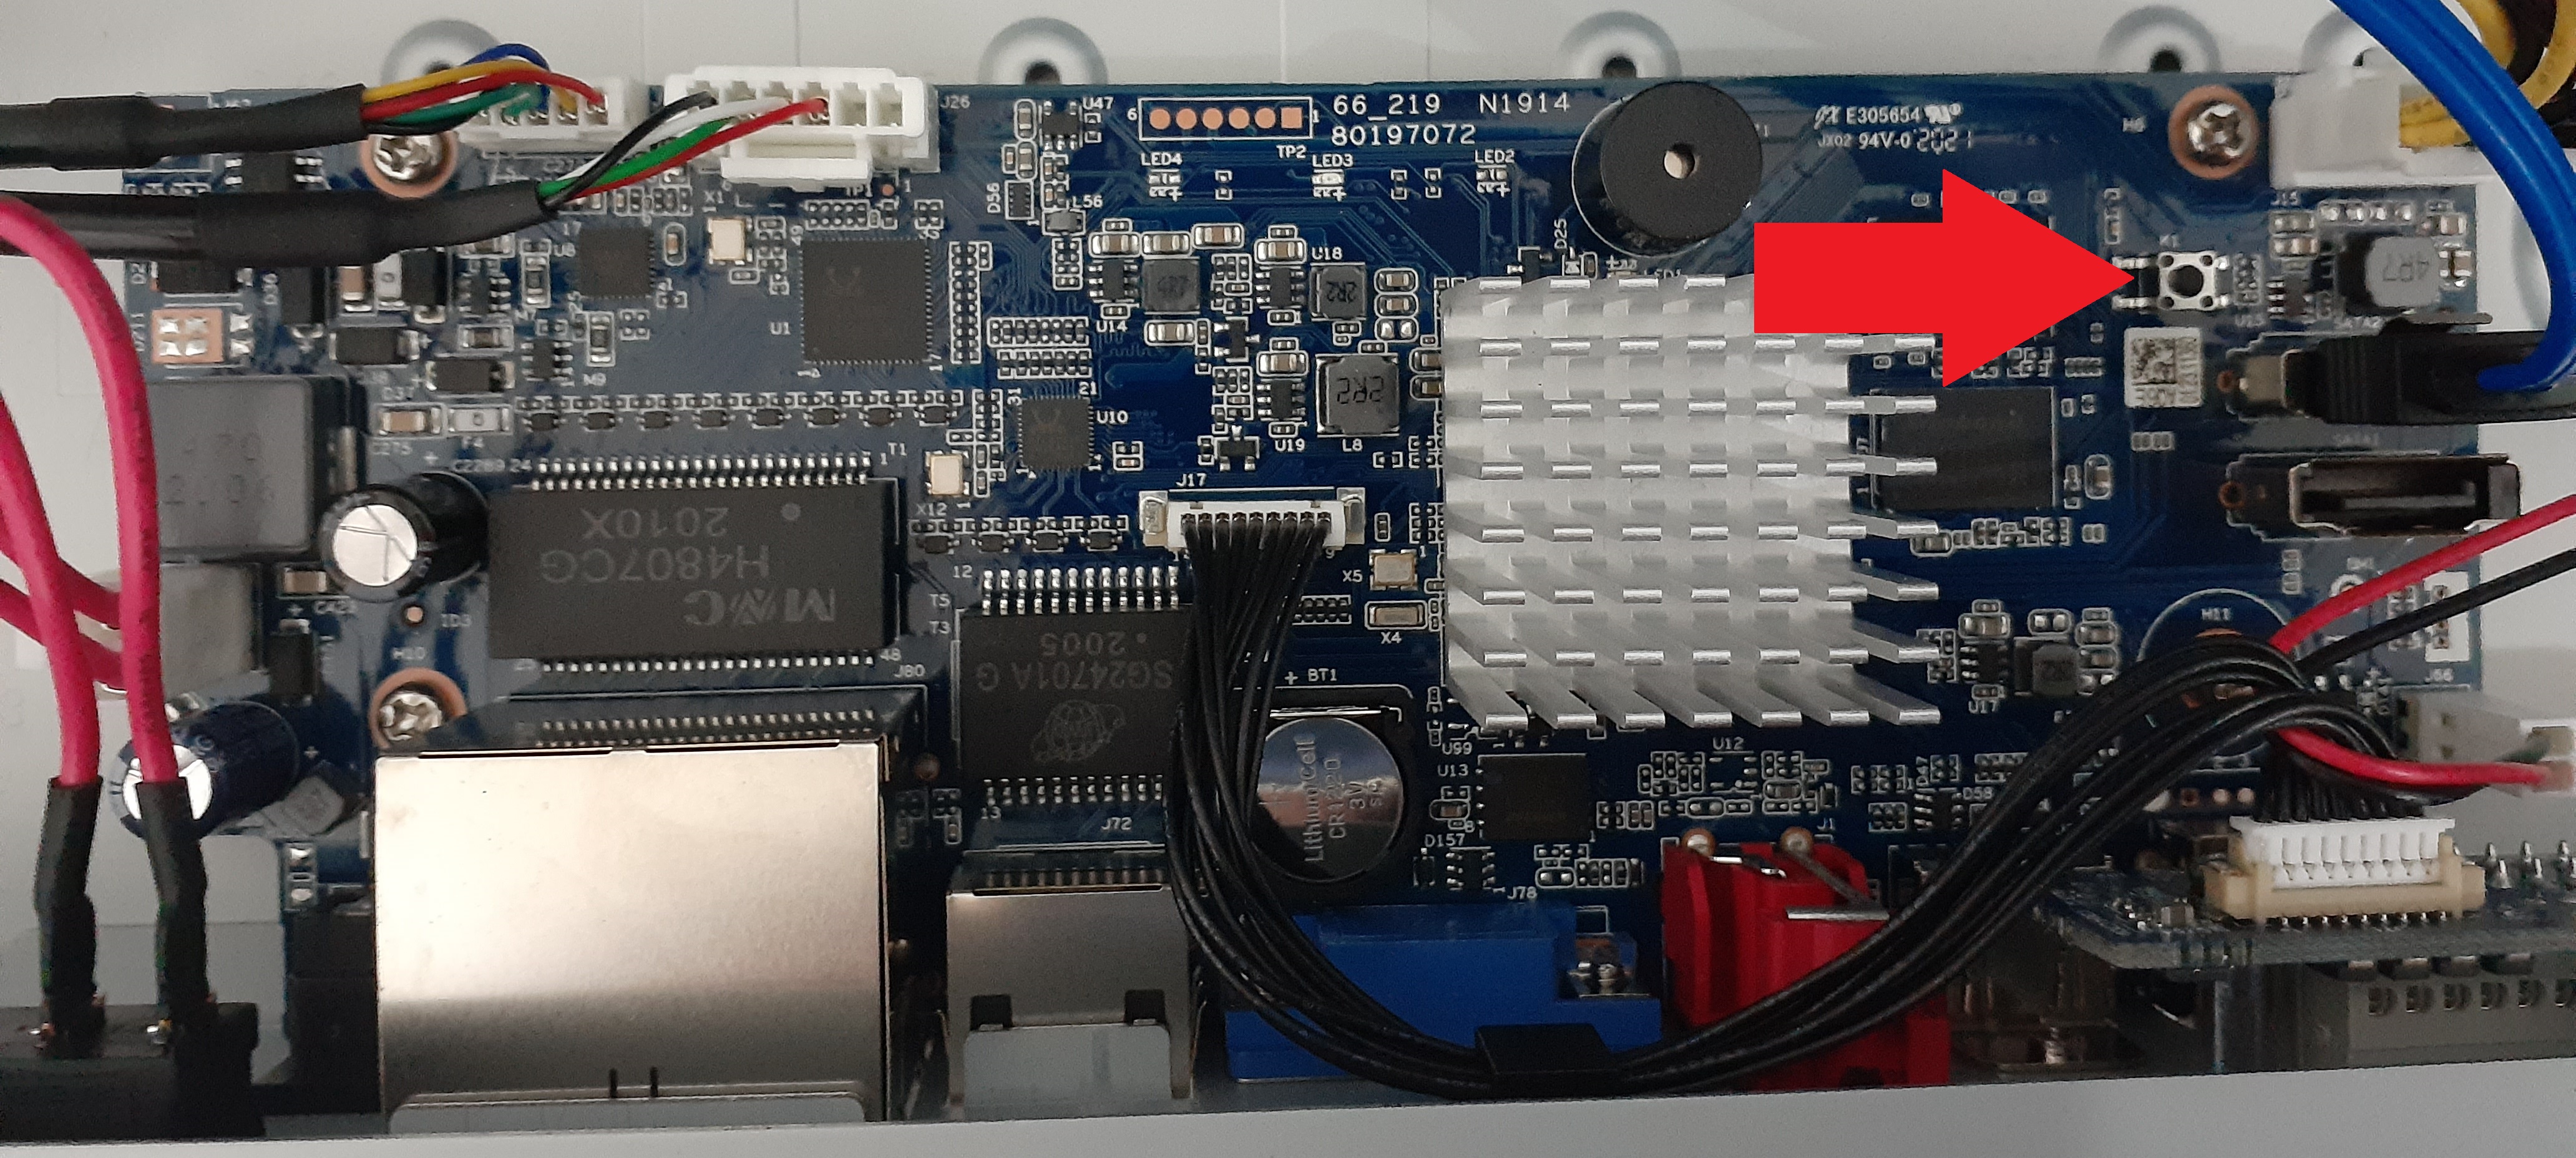
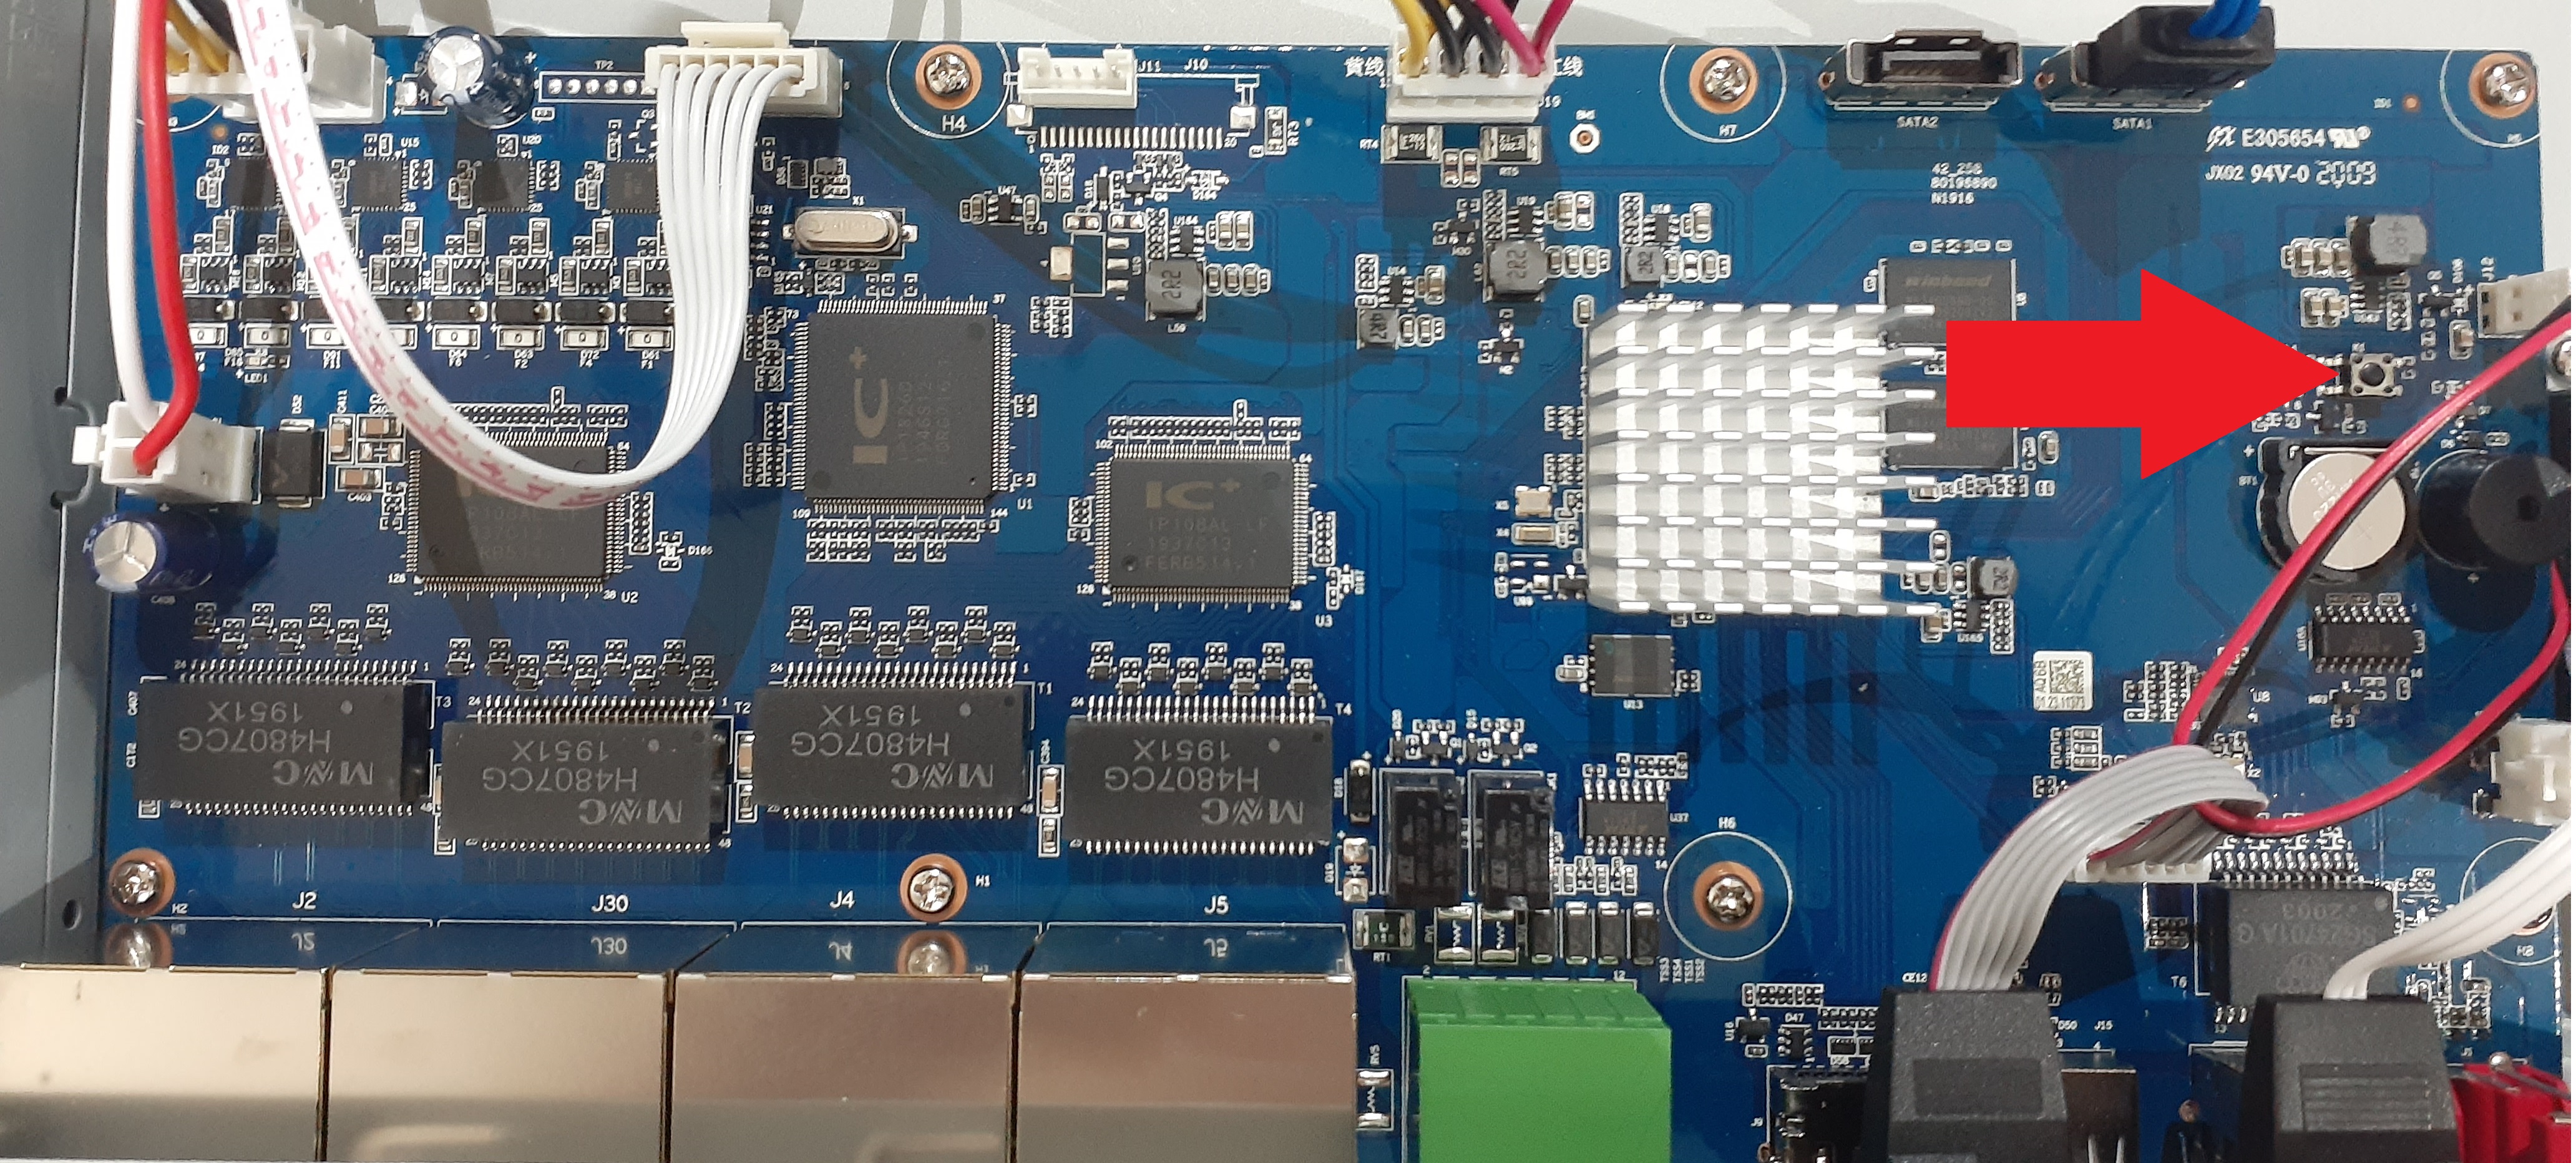
Using the Reset Button (Select Recorders Only)
Some recorders have a reset button on the PCB. Turn the recorder off then press and hold down the reset button, while holding the button down turn the recorder on. Once you hear a beep, release the button.
NVR4PRO4
NVR16COM3
Setting up Physical connections
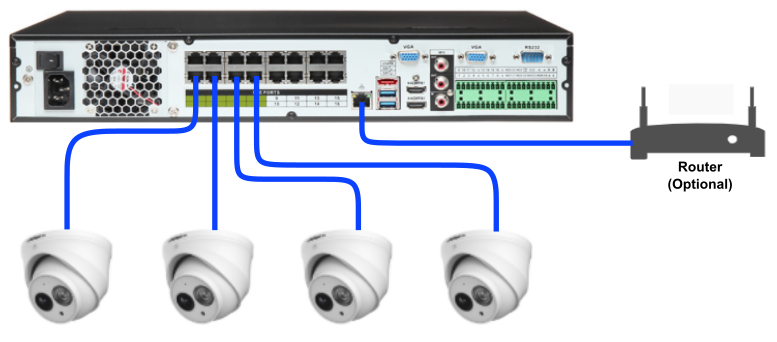
Cameras connected to NVR
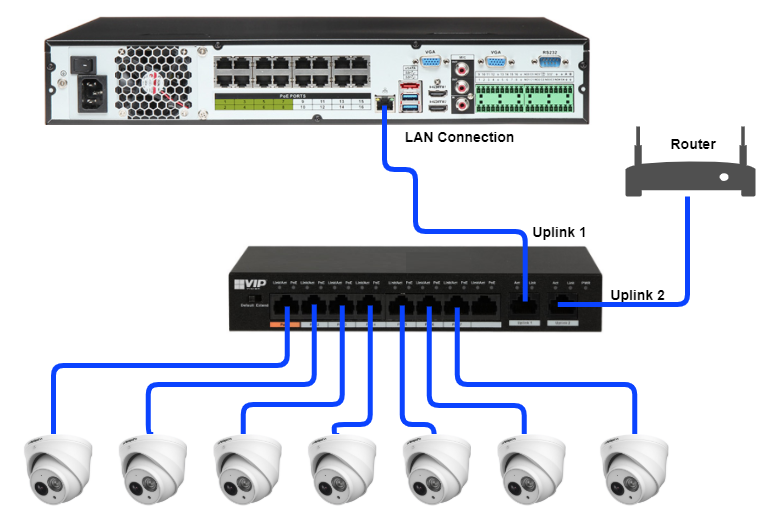
Cameras Connected to Network
Setup Wizard
When first Powered on the Setup Wizard will take you through first setup.
1. Select Region and Language.
2. Select Correct Time Zone and Time for your Recorder. (Enable DST and NTP if desired)

3. Create Password for your Recorder.
4. Toggle if you want to create an unlock pattern
5. Create Camera Login Password if you want it to be different to the Recorder. (Recommended to set as same)

6. If selected unlock pattern draw it and then confirm it.

7. Create a Backup Email and Questions for Password Forget. untoggle if unneeded. (note that if not created During Setup or Later in Account setting, there will be no way to change password and the device will have to be factory defaulted)

8. Network settings, DHCP is on by default, recorder will automatically get an IP if connected to a network that has an active internet Connection.
to turn off DHCP and set IP Manually, Select the Modify button on NIC1

.jpg)
9. Enable or Disable P2P, as well as the Device SN that needs to be scanned on DMSS to add the device. QR code can also be found later.

10. Add camera page, if any Cameras are plugged into the POE and have had time to power on and initalise, they will show here.

11. Any HDD that are connected will appear in the list, if not shown or is not showing normal in health Status, they may be an issue with the HDD.

.
12.The device has now been Set up And is Ready to use.
