There are multiple options for configuring how the PTZ will function. See below for the different types and how to configure them.
Preset - A saved position. The cameras Pan (Left/Right), Tilt (Up/Down), Zoom (In/Out) and focus position is saved in the preset.
Tour - A collection of presets that the PTZ moves between automatically.
Scan - The PTZ will move left and right between set boundaries at a set speed.
Pattern - A recorded series of pan, tilt and zoom movements that will be performed on repeat.
Pan - The PTZ will spin 360° at a set speed.
Presets
A Preset is saved position of the PTZ. The cameras Pan (Left/Right), Tilt (Up/Down), Zoom (In/Out) and focus position is saved in the preset. It can be configured via the PTZ's Web interface or an NVR.
Presets (via Web Interface 5.0)
- Navigate to Setting
 > PTZ > Preset
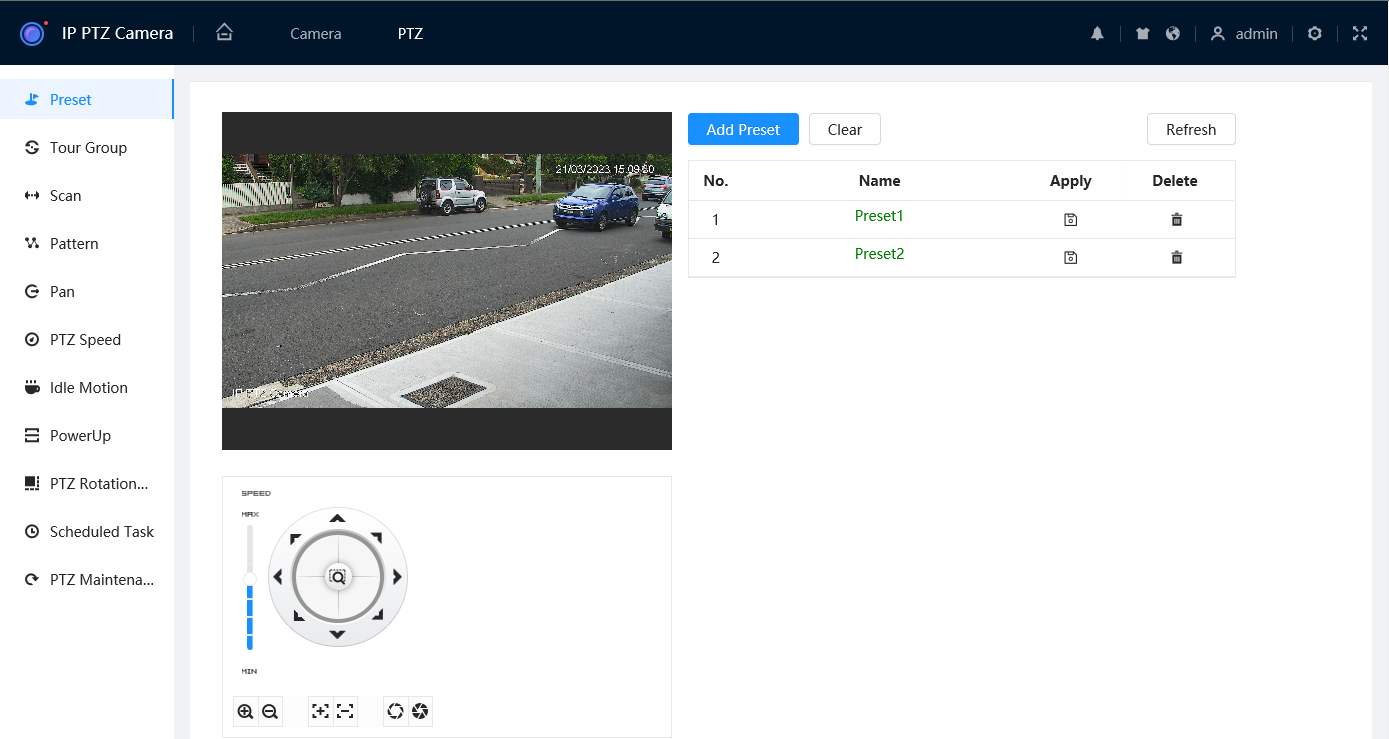
- Click
 to add a new preset.
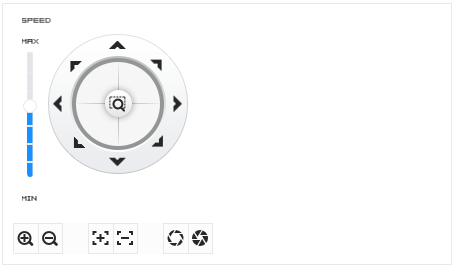
- Use the PTZ controls to position the camera where you would like to create a preset. Then click Save
 to save the preset position.
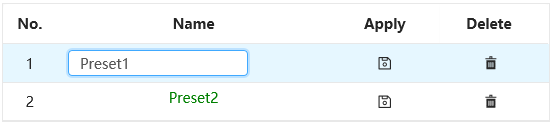
- Double-click on the preset Name to rename the preset to something descriptive (E.g. Front Gate), then press Enter
- Click Save
 .
. - Repeat Steps 1-4 to create as many presets as you require.
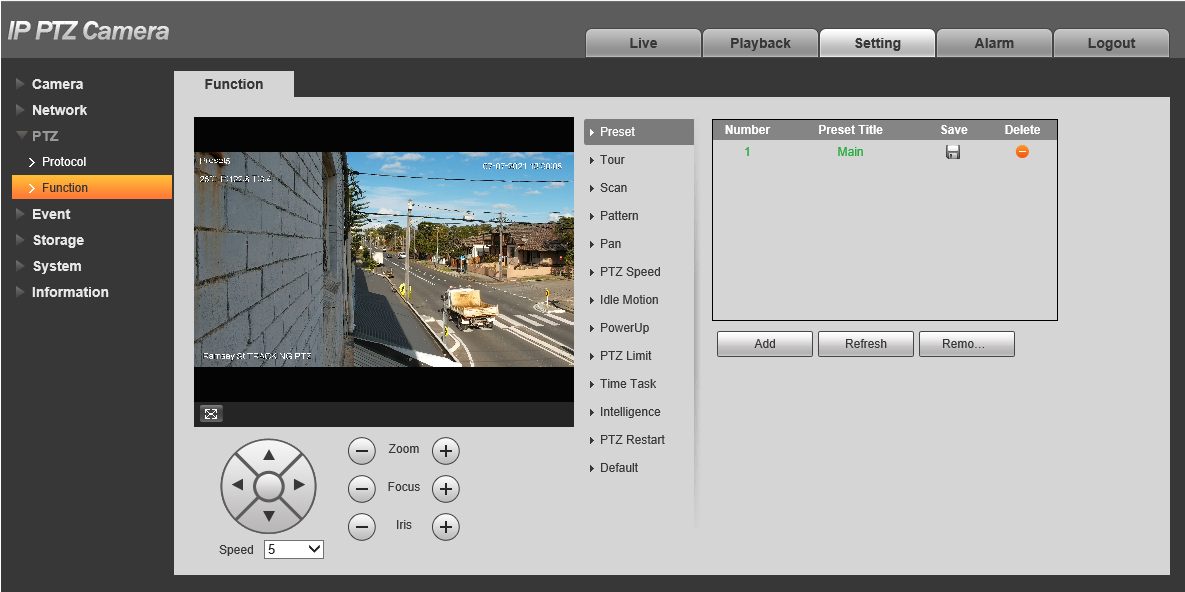
Presets (via Web Interface 3.0)
- Navigate to Setting > PTZ > Function > Preset.
- Click
 to add a new preset
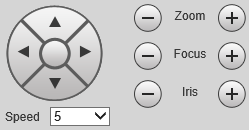
- Use the PTZ controls to position the camera where you would like to create a preset. Then click Save
 to save the preset position.
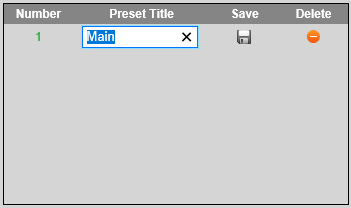
- Double-click on the preset title to rename the preset to something descriptive (E.g. Front Gate), then press Enter
- Click Save .
- Repeat Steps 1-4 to create as many presets as you require.
Presets (Via Black UI NVR)
-
Right-click on the Live view Page

- Select PTZ Control.
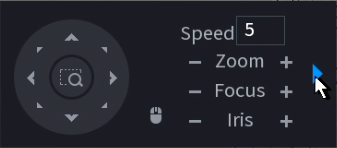
- Click the
 to open additional settings.
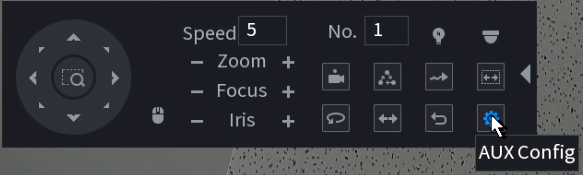
- Click the
 to open PTZ Config.
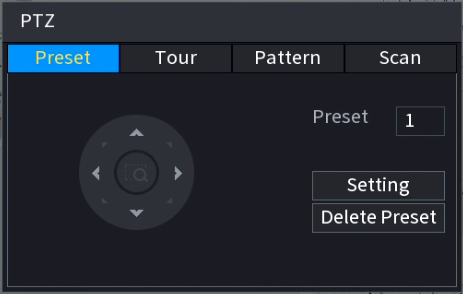
- Use the PTZ controls to move the PTZ to where you want to create the Preset.
- Click Setting to Save the Preset.
- For each additional Preset, increase the Preset Number by 1, then repeat steps 5 & 6.
- To edit a preset position, use the PTZ controls to move the PTZ where you want the Preset, enter the Preset Number of the Preset, then click Setting.
- To Delete a Preset, type the number of the Preset into the Preset Number, and click Delete Preset.
Tours
A Tour is a collection of presets that the PTZ moves between automatically. It can be configured via the PTZ's Web interface or an NVR.
Tours (via Web Interface 5.0)
- Navigate to Setting > PTZ > Tour Group.
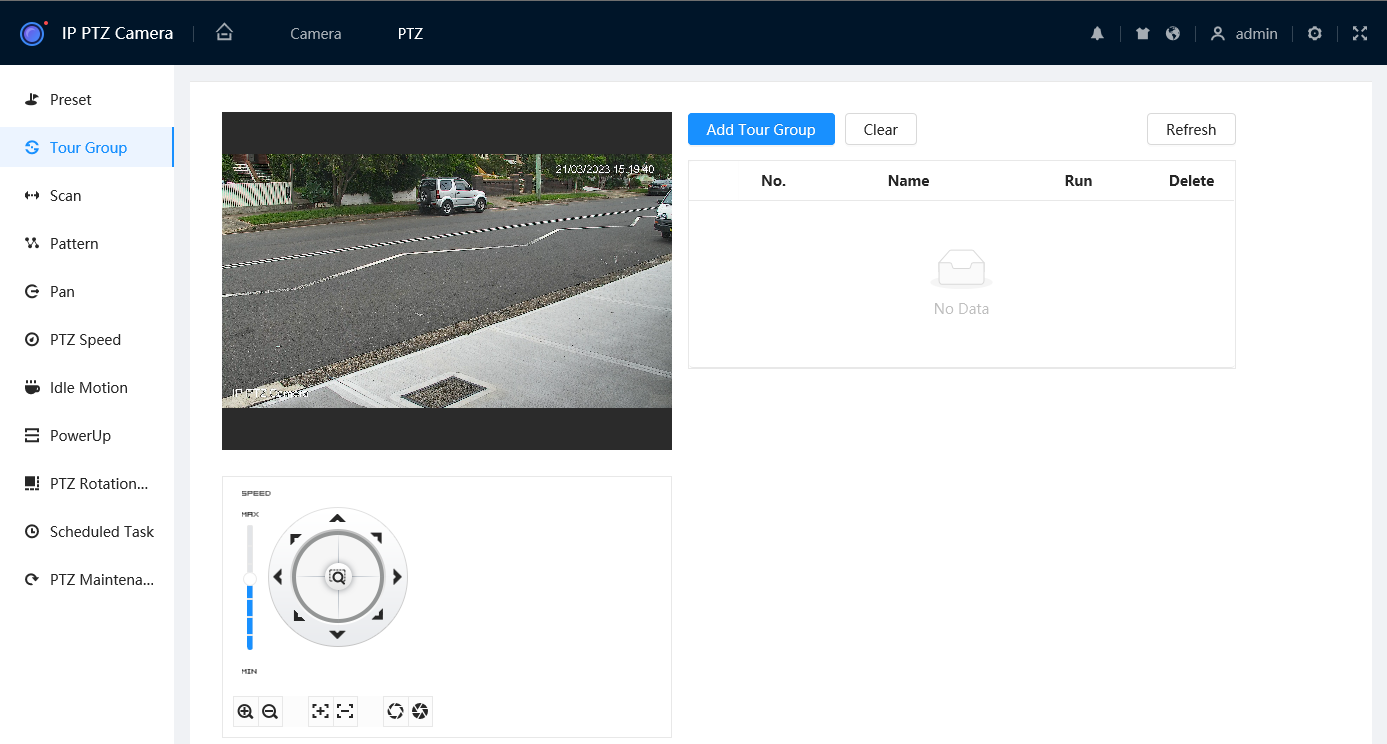
- Select
 to add a Tour.
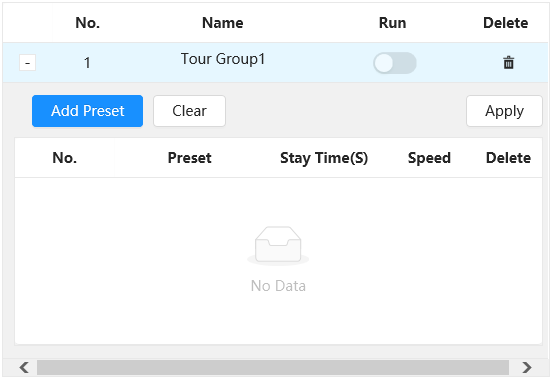
- Select
 to add a Preset to the Tour.
- Select the Preset from the Preset drop down list, then adjust the Stay Time(S) (How long it stays on this preset for) and Speed (Speed of the camera when changing between presets) if required.
- Repeat steps 3-4 for each Preset.
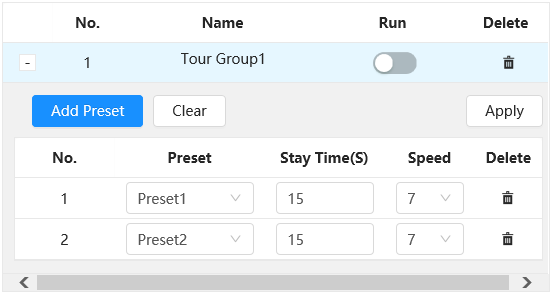
- Select
 to save your changes.
- Toggle Run to On
 to the start the Tour.
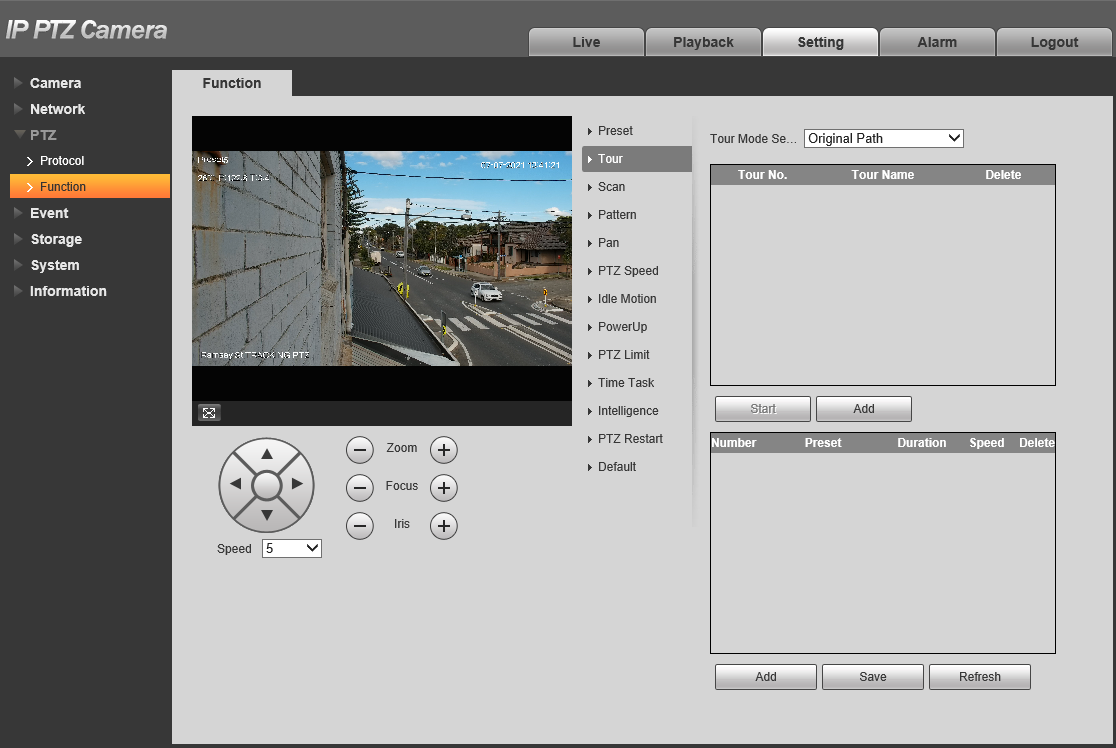
Tours (via Web Interface 3.0)
- Navigate to Setting > PTZ > Function > Tour
- Follow the previous steps to create the presets your PTZ will switch between.

- Set the Tour Mode Select. This will apply to all tours.
Original Path: The PTZ camera moves in the order of the selected presets.
Shortest Path: The PTZ camera ranks presets by distance, and moves in an optimal path.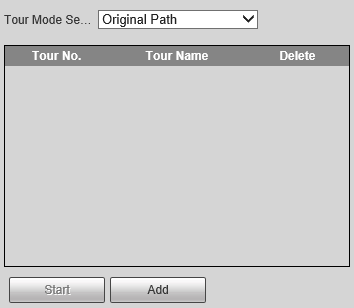
- Click
 to add a new tour.
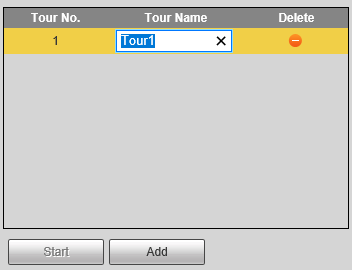
- Double-click on the tour name to rename the tour to something descriptive (E.g. Driveway Patrol), then press Enter.
- Click
 to add a preset to the tour.
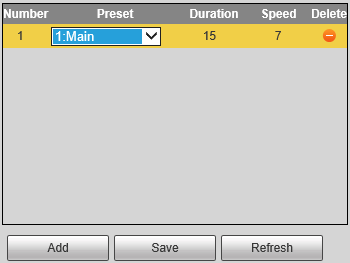
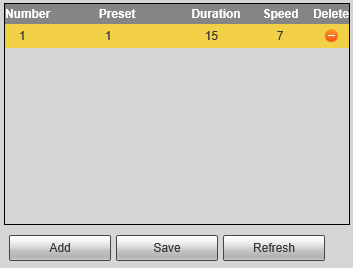
- Double click on the preset number to select the preset you want to use.
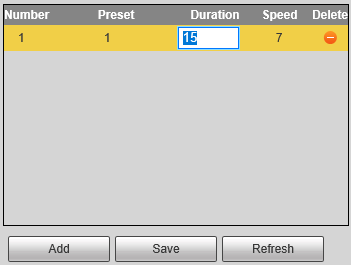
- Double click on the duration to change it (15 is the lowest value). The duration is how long the PTZ will stay on that preset for.
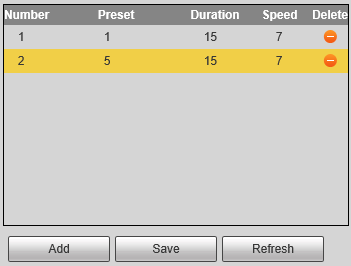
- Repeats Steps 6-8 for each preset you want to add to the tour. Click
 when done.
Tours (via Black UI NVR)
-
Right-click on the Live view Page

- Select PTZ Control.
- Click the to open additional settings.
- Click the to open PTZ Config.
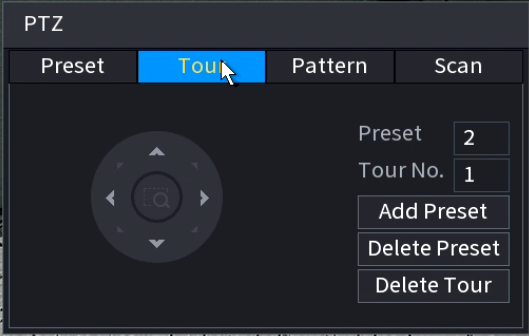
- Click Tour.
- Set the Tour No. of the Tour you will be creating. I.e. if it is the first tour created, set it to 1.
- Add a Preset to the Tour. Enter the number of the Preset, then click Add Preset. Repeat for each preset.
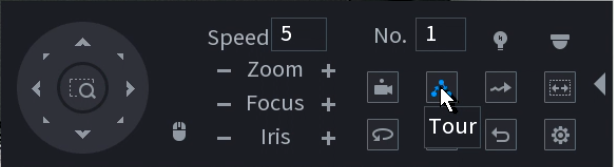
- To start the Tour enter the tour number into the No. box, then click the Tour Button.
Scans
A Scan makes the PTZ move left and right between set boundaries at a set speed. It can be configured via the PTZ's Web interface or an NVR.
Scans (via Web Interface 5.0)
- Navigate to Setting > PTZ > Scan
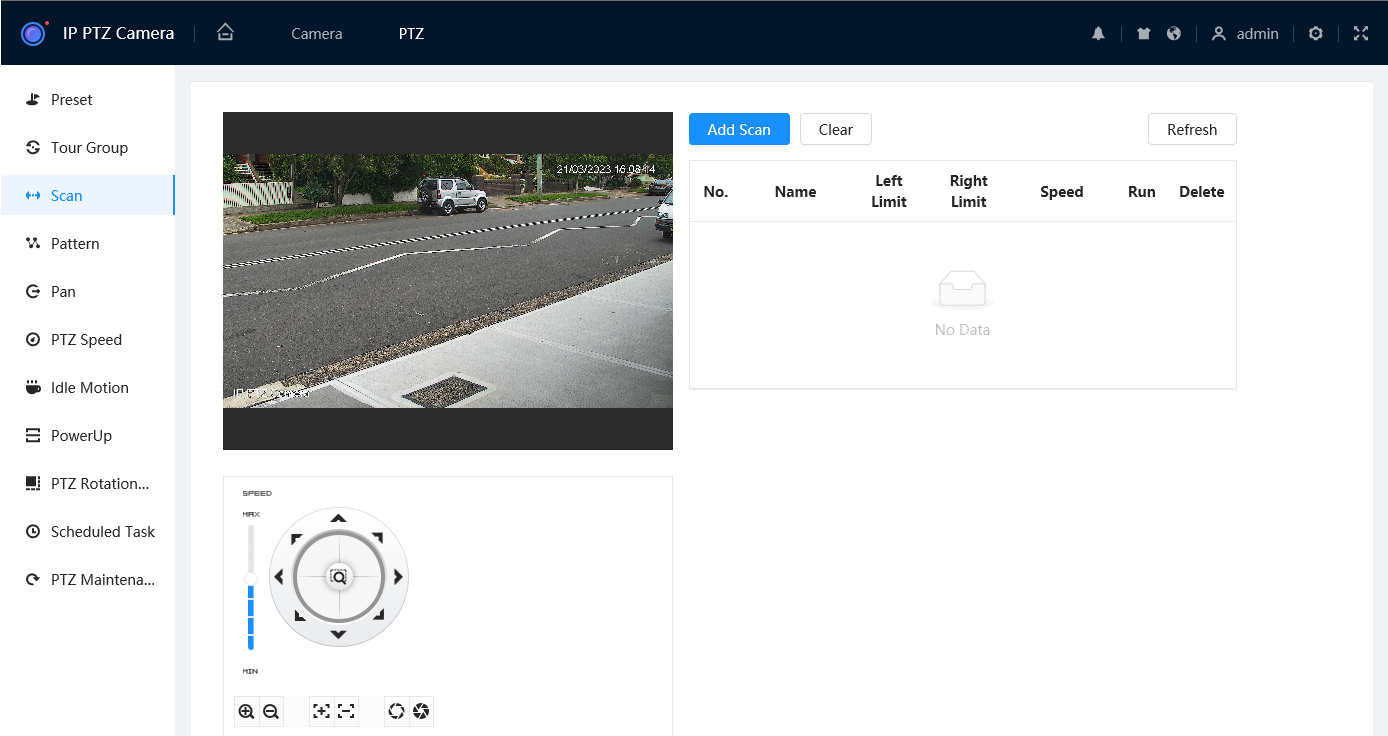
- Select
 to add a Scan.

- Use the PTZ Controls to position the PTZ to where you want the left limit to be, then press
 under Left Limit.
 - Use the PTZ Controls to position the PTZ to where you want the right limit to be, then press under Right Limit.

- Toggle Run to On to start the Scan.
Scans (via Web Interface 3.0)
- Navigate to Setting > PTZ > Function > Scan
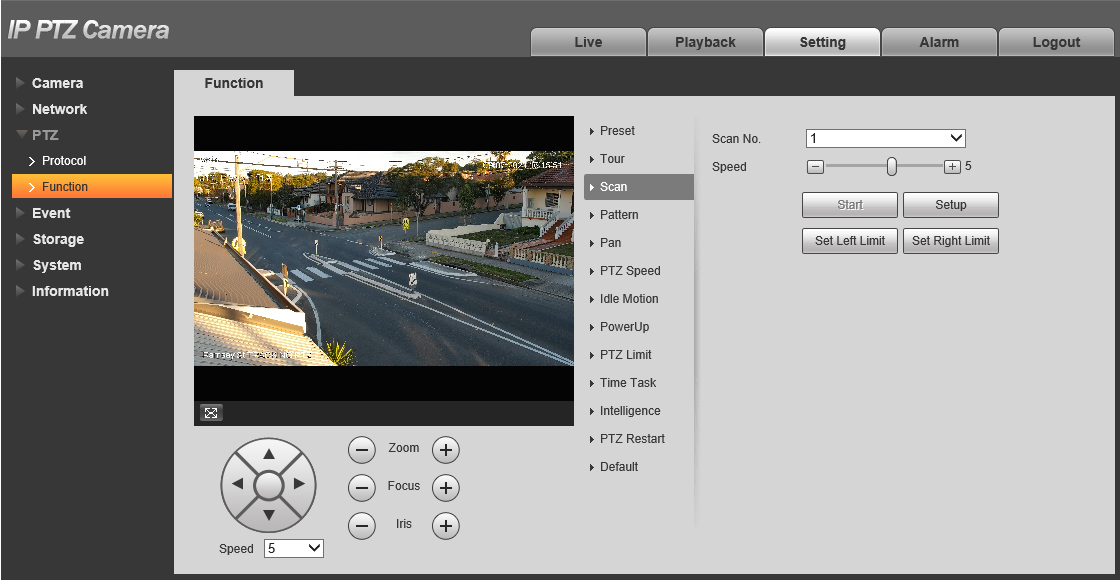
- Click

- Use the PTZ controls to move the PTZ to where you want the left limit to be, then click

- Use the PTZ controls to move the PTZ to where you want the right limit to be, then click


- Set the Speed. 5 is the default.
- Click Start to start the scan, click Stop to stop the scan.
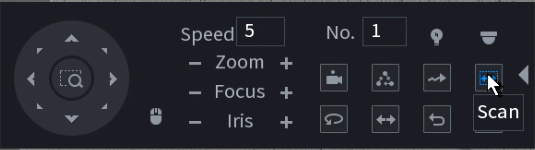
Scans (via Black UI NVR)
-
Right-click on the Live view Page

- Select PTZ Control.
- Click the to open additional settings.
- Click the to open PTZ Config.
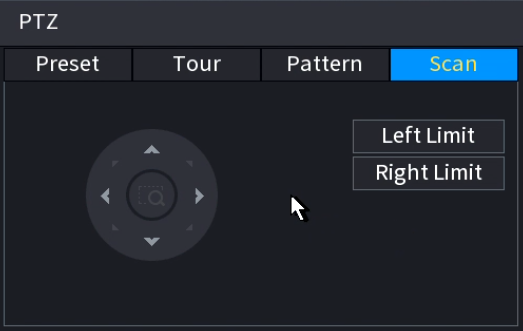
- Click Scan.
- Use the PTZ Controls to move the PTZ to where you want the Left Limit to be, then press
 .
. - Use the PTZ Controls to move the PTZ to where you want the Right Limit to be, then press
 .
.
- Set the Speed and then press the Scan button to start the Scan.
Patterns
A Pattern is a recorded series of pan, tilt and zoom movements that will be performed on repeat. It can only be configured via the PTZ's Web interface.
Patterns (via Web Interface 5.0)
- Navigate to Setting > PTZ > Pattern.
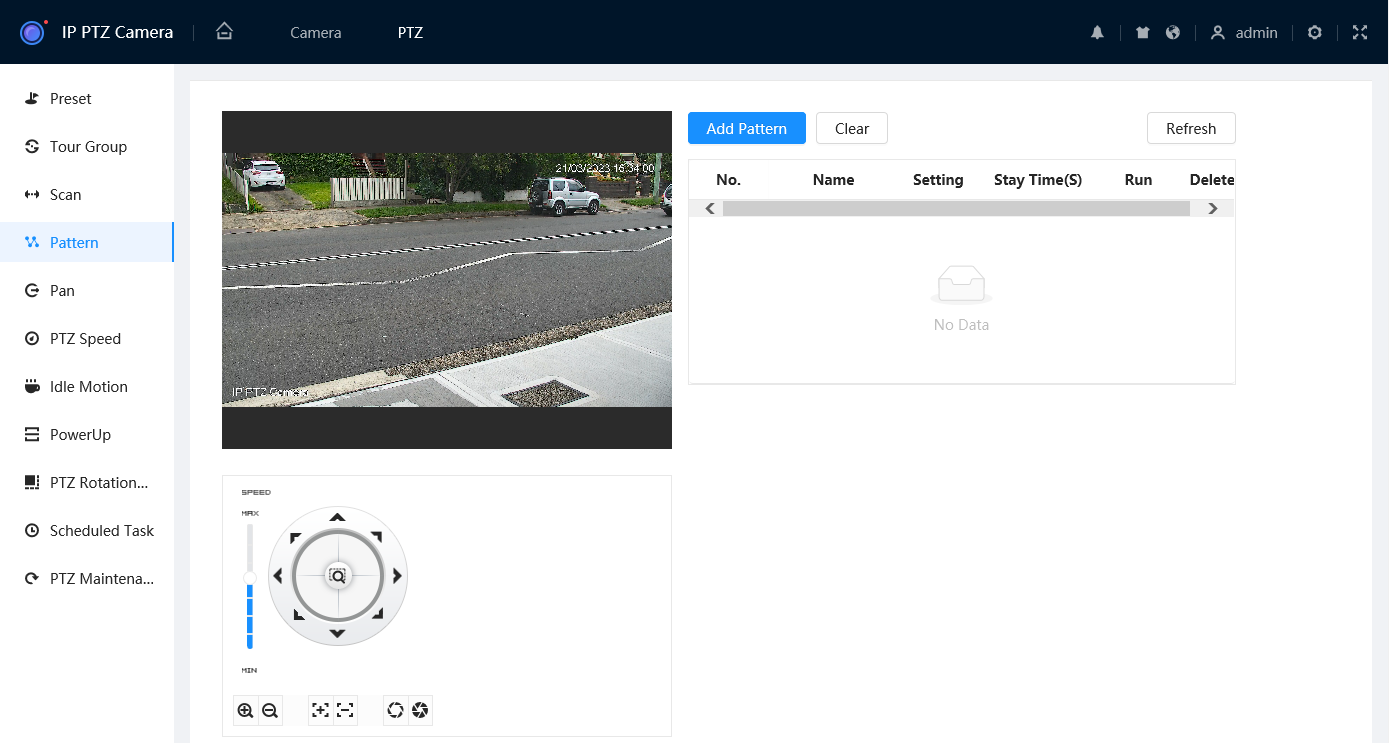
- Select
 to add a Pattern.
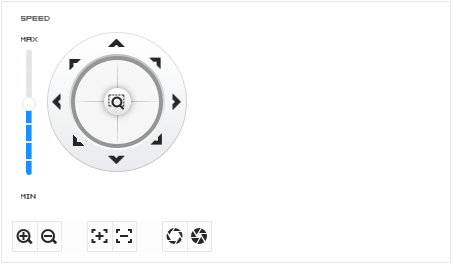
- Select Start Record
 then use the PTZ controls to move/zoom the PTZ in the pattern you wish it to follow, then select Stop Record
  to save the pattern.
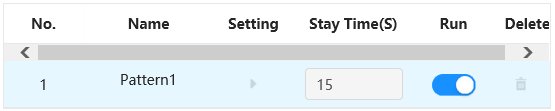
- Toggle Run to On to start the Pattern.
Patterns (via Web Interface 3.0)
- Navigate to Setting > PTZ > Function > Pattern
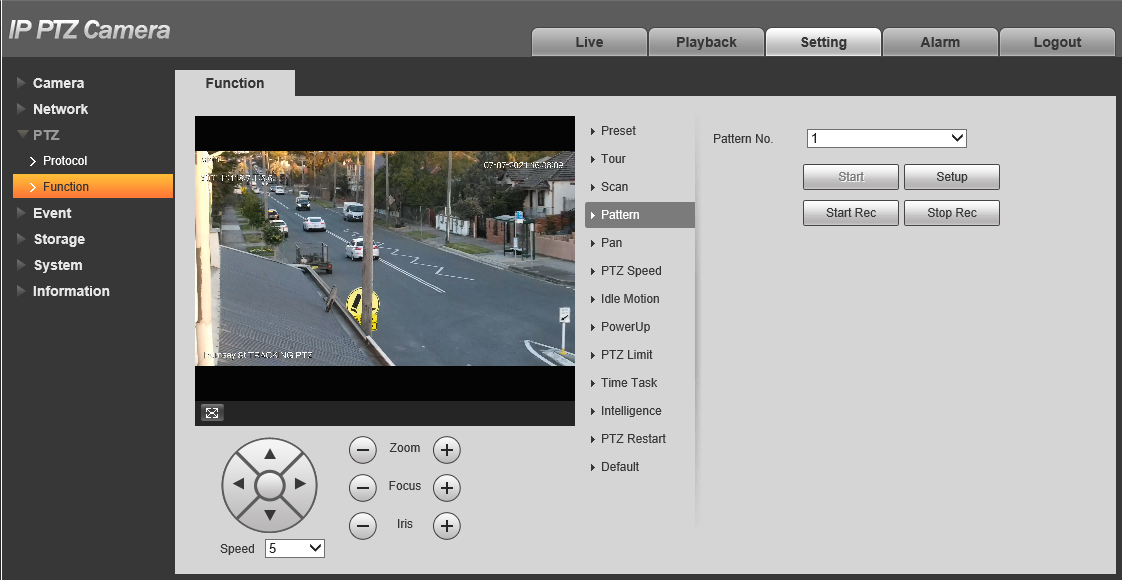
- Click

- Use the PTZ controls to position the PTZ where you want to start the pattern.
- Press

- Use the PTZ controls to move/zoom the PTZ in the pattern you wish it to follow
- Press

- Press Start to start the pattern, press Stop to stop the pattern.
Pans
A Pan moves the PTZ 360° at a set speed. It can be configured via the PTZ's Web interface or an NVR.
Pans (via Web Interface 5.0)
- Navigate to Setting > PTZ > Pan.
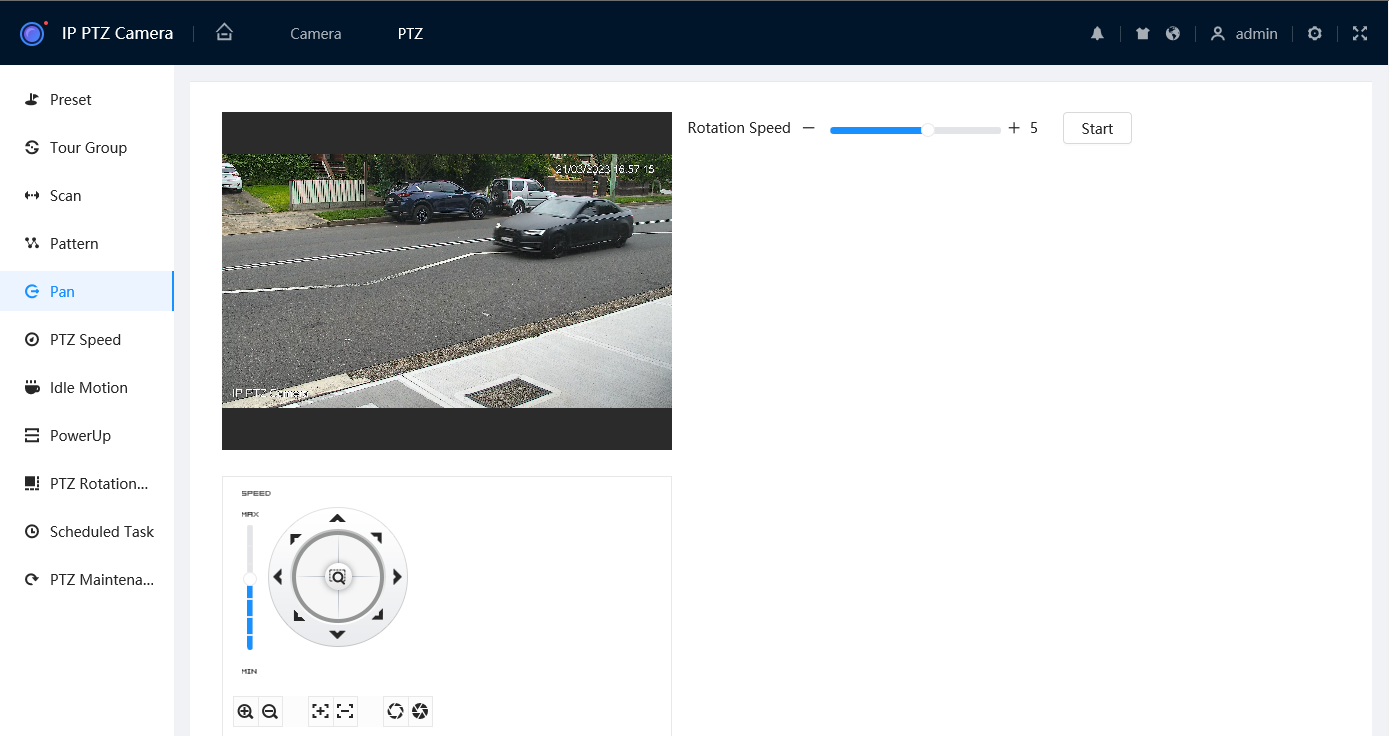
- Set the Rotation Speed. 5 is the default.
- Click Start
 to start the pattern, press Stop
  to stop the pattern.
Pans (via Web Interface 3.0)
- Navigate to Setting > PTZ > Function > Pan


- Set the Pan Speed. 5 is the default.
- Click Start to start the pattern, press Stop to stop the pattern.
Pans (Via Black UI NVR)
-
Right-click on the Live view Page.
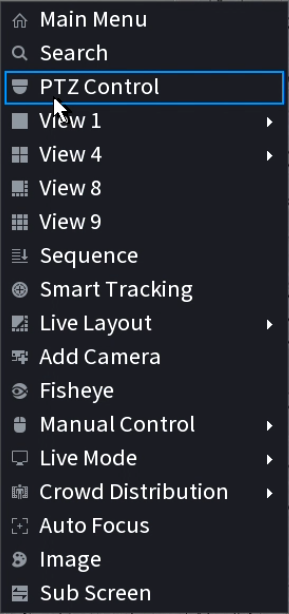
- Select PTZ Control.
- Click the to open additional settings.
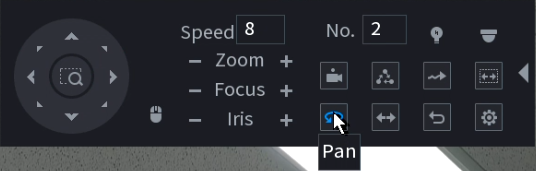
- Click the Pan button to start the Pan. Adjust the Speed if necessary.