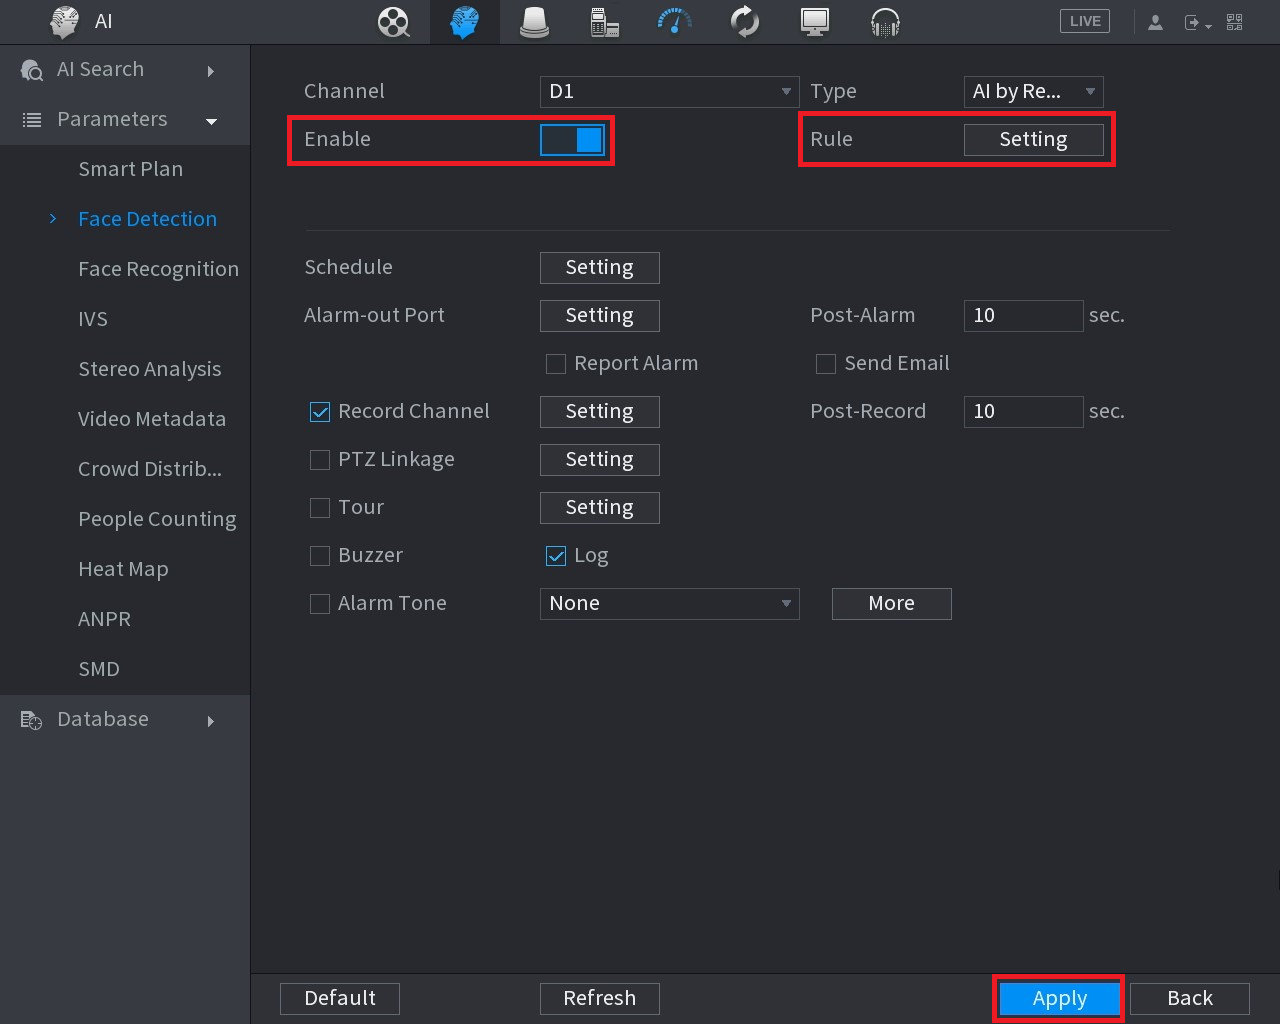
Enabling Face Detection by Recorder
- From the Main Menu, select AI > Parameters > Face Detection. Select the channel you want to set up face detection for.
- Select the Enable button.
- Select Rule to adjust the minimum and maximum face detection size. The minimum and maximum value will depend on how far away the camera is from the faces that are getting captured. In most cases, this setting does not require adjustment.
- Select Apply.
Enabling Face Recognition by Recorder
Used in conjunction with Face Detection, Face Recognition can detect people that have been added to a “Face Library”, and trigger events off this. Generally, this function is used to trigger an action on the recorder when a person in a predetermined face list is seen.
Info
Before enabling Face Recognition, ensure that Face Detection is enabled.
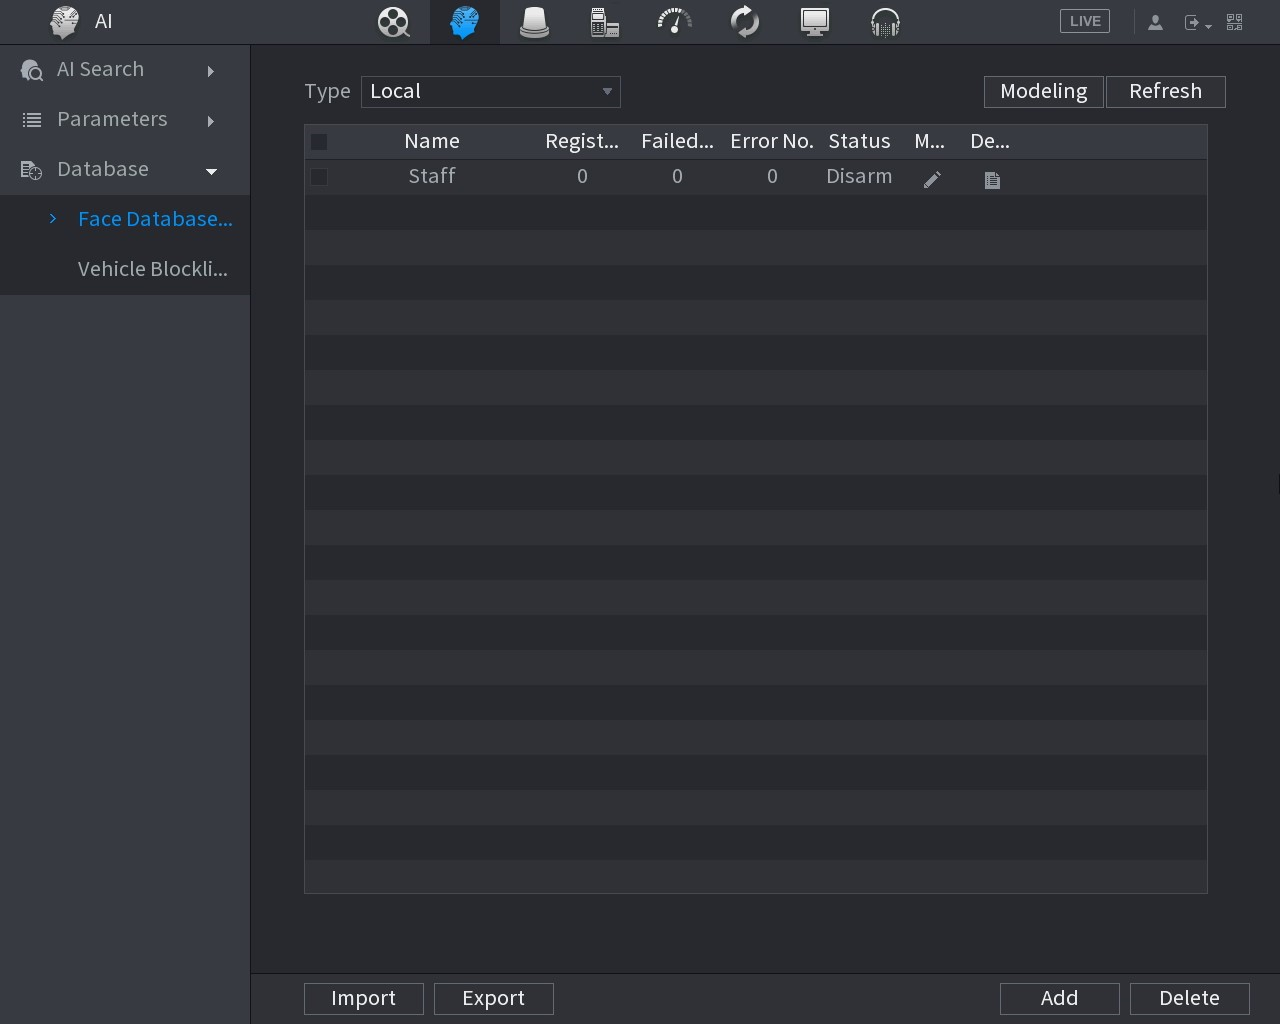
- From the Main Menu, select AI > Database > Face Database.
- Select Add. Give the Face Library a name, and then select OK.
- Select Parameters > Face Recognition.
- Select the channel you wish to setup Face Recognition on, then select Enable.

- Select Target Face Database Setting and select the Face Library you created. Select OK.
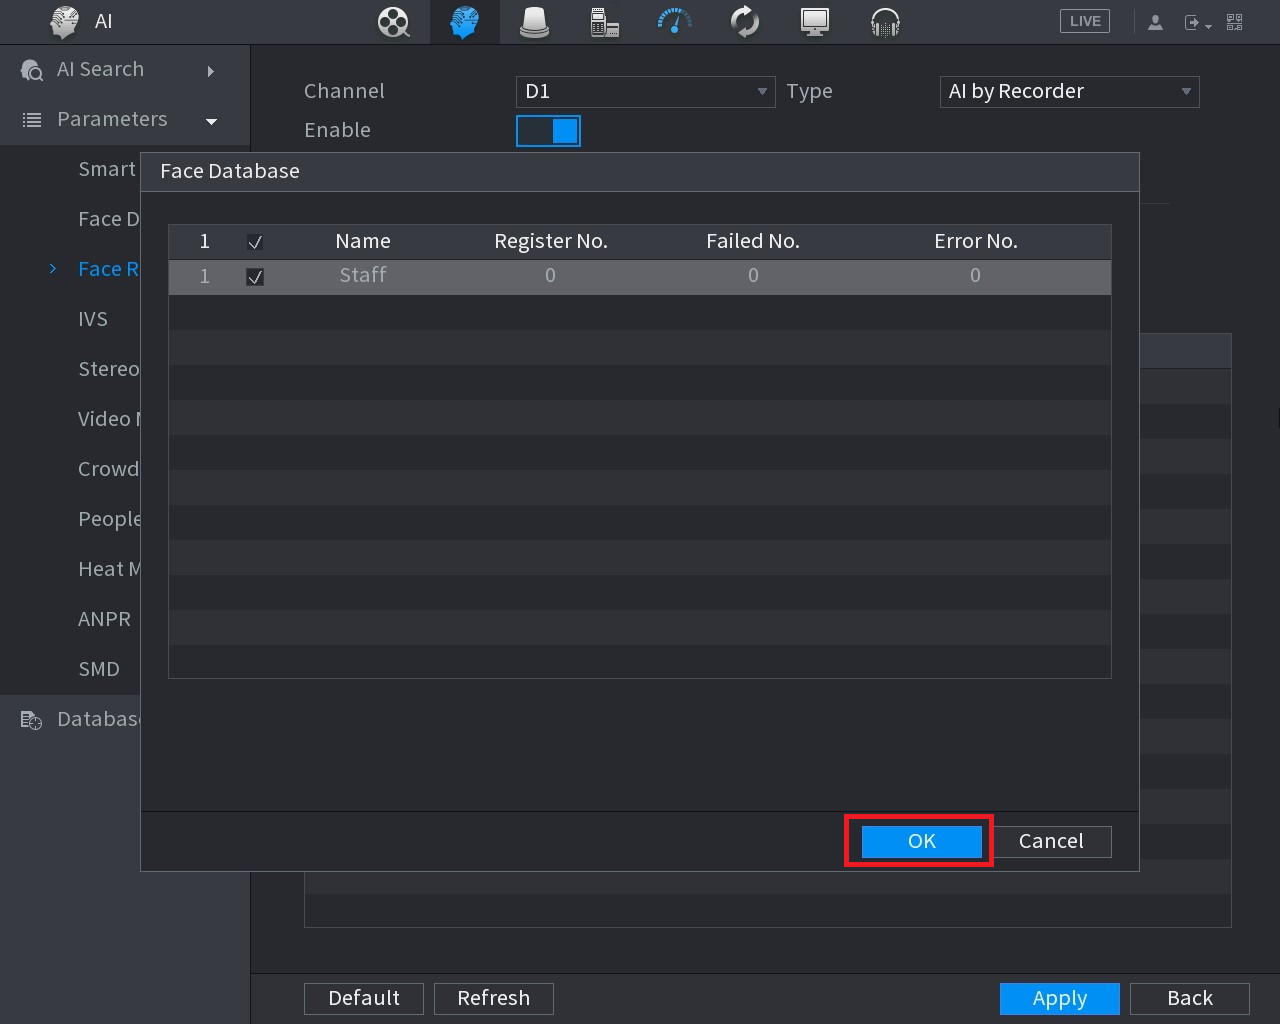
- Select General Alarm or Stranger Alarm. General Alarm will detect faces in the Face Library. Stranger Alarm will detect faces not in the Face Library and mark them as stranger.
- Select Apply to save your changes.
Adding/Deleting Face from Library
Method 1 - Add Faces from a Captured Face Detection
- Ensure AI Preview mode is configured.
- Once a face appears in the list you would like to add to the Face Library, double click on it, and select Add to Human Face Database.
- Enter the details of the person and select the Face Library you would like to add the face too.
- Select OK.

Method 2 - Manual Photo Upload via USB Flash Drive
This method is useful if multiple faces are being added to the face database. You can also choose to import the faces and data, by naming the images files, explained below:
Name#SGender#BBirthday#NCountry#TIDType#MIDNo.#AAddress.jpg
Gender: 1 Male, 2 Female / Identity: 1 – Identity Card, 2 - Passport, 3 – Military Office Passport
Example: John#S1#B19900101#NAustralia#T1#M123456789#1 Smith St Sydney 2000 NSW.jpg
- Save the face/faces to a .jpg image file on a USB Flash drive.
- 2. Insert the USB Flash Drive into a free USB Port on the NVR.
- From the Main Menu, select AI > Database > Face Library.
- Select Details.
- Select Batch Register, then select File or Folder, and select the photos you wish to upload.
- The recorder will then upload the files. Once complete, press Search to update the Face Library
- Select the Edit icon next to the faces that have been added, to update name and other details.
Deleting Faces from Face Library
To remove a face from a face library, select AI > Database > Face Library. Select the Details button in the face library to view the faces that have been added to it. Select the face you wish to delete, then select Delete.
Additional Setup
Schedule Recording
Configuring Recording Schedules
You can define the recorded footage schedule in the Record menu, and the recorded...
You can define the recorded footage schedule in the Record menu, and the recorded image snapshot schedule in the Snapshot menu. By default, cameras are set to non-stop Regular recording (24 hours a day, 7 days a week). Motion detection recording is not set by default. Schedules can be set in hourly periods for individual days for each camera, with colour-coded options for:
- Regular/General for all regular recording.
- MD/Motion for recording on motion detection.
- Alarm for recording on triggering an integrated alarm.
- MD & Alarm for simultaneous alarm/motion detection recording.
- IVS for recording on triggering IVS (Intelligent Video Surveillance) such as a virtual tripwire.
- POS for point of sale transactions.
We recommend adding MD & Alarm & IVS to all channels to accompany your regular recording.
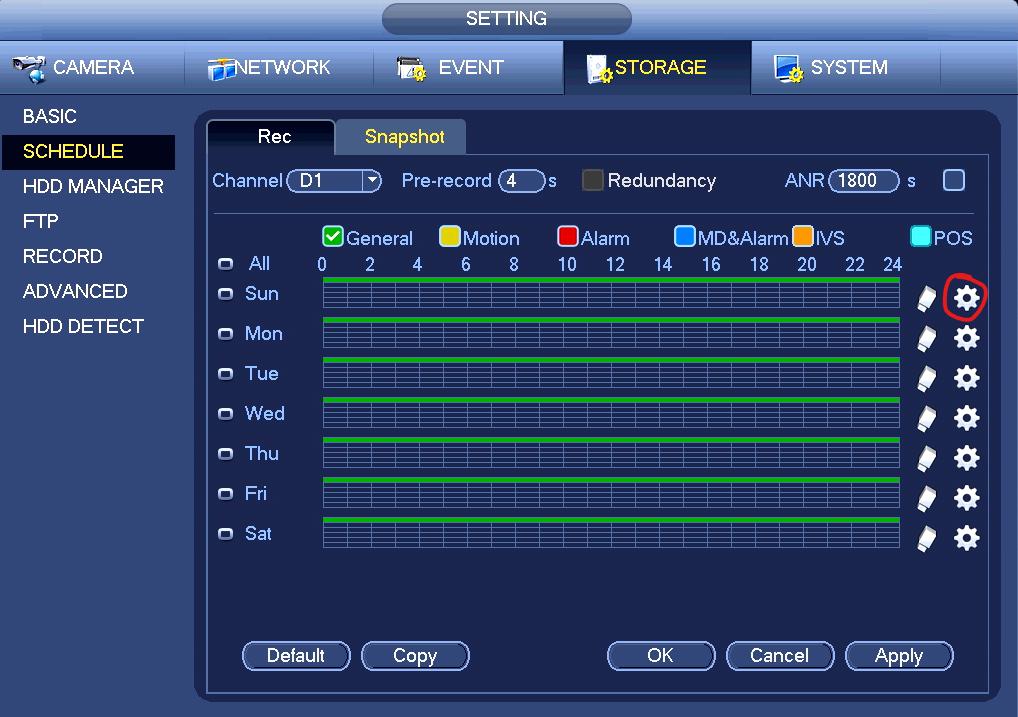
NVR - Configuring Motion Detection & Intelligent Recording
(Black GUI)
- Click the Channel drop down to select All cameras.
- In the days column, toggle the All check box to simultaneously set recording schedule parameters for every day of the week.
- Check the yellow MD check box to select motion detection recording.
- Click the schedule to fill in areas for motion detection recording. We recommend a 24/7 schedule to mirror the Regular recording schedule.
- Repeat steps 3 & 4 with the blue IVS check box to set intelligent recording (tripwire, face detection, etc).
- Click Apply to the confirm recording schedule changes and move on to Snapshot Schedule.

(Blue GUI)
- Click the Channel drop down to select All cameras.
- In the days column, toggle the All check box to simultaneously set recording schedule parameters for every day of the week.
- Check the yellow Motion check box to select motion detection recording.
- Click the schedule to fill in areas for motion detection recording. We recommend a 24/7 schedule to mirror the Regular recording schedule.
- Repeat steps 3 & 4 with the blue IVS check box to set intelligent recording (tripwire, face detection, etc).
- Click Apply to the confirm recording schedule changes and move on to Snapshot Schedule.
Delete
Standalone IP Camera - Configuring Motion Detection & Intelligent Recording
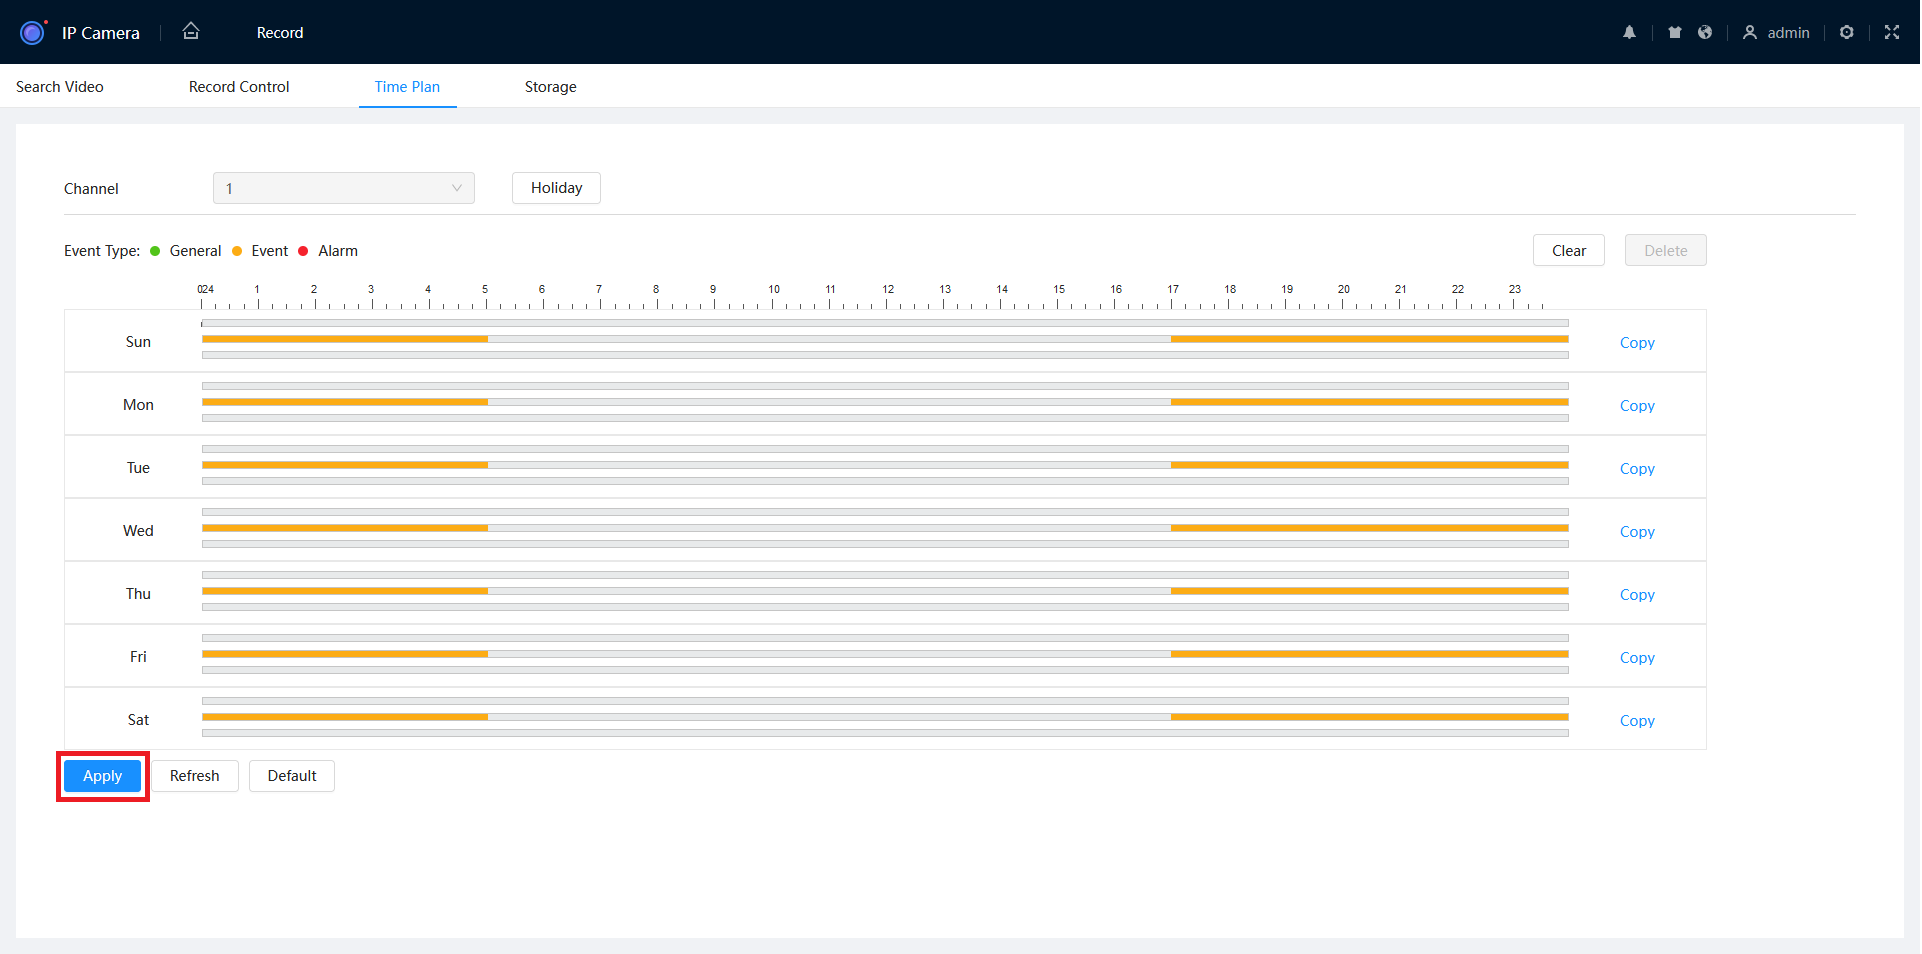
New GUI (White/Blue)
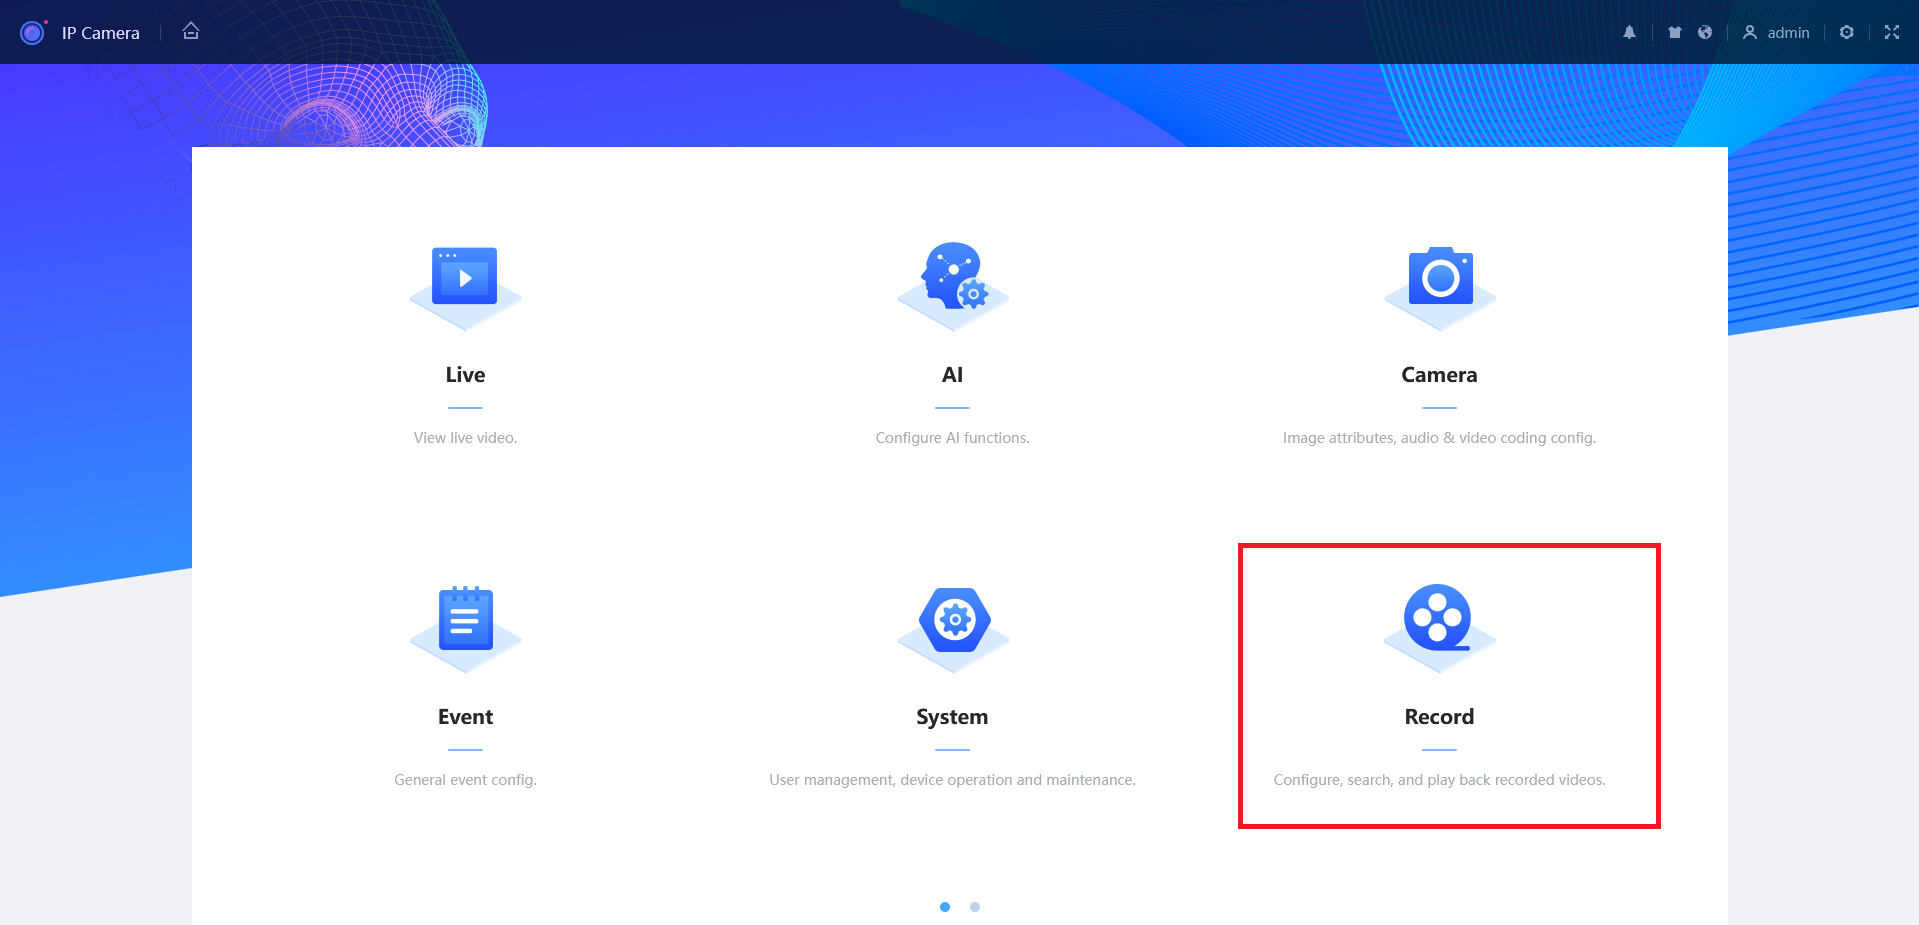
- From the Home page, select Record.
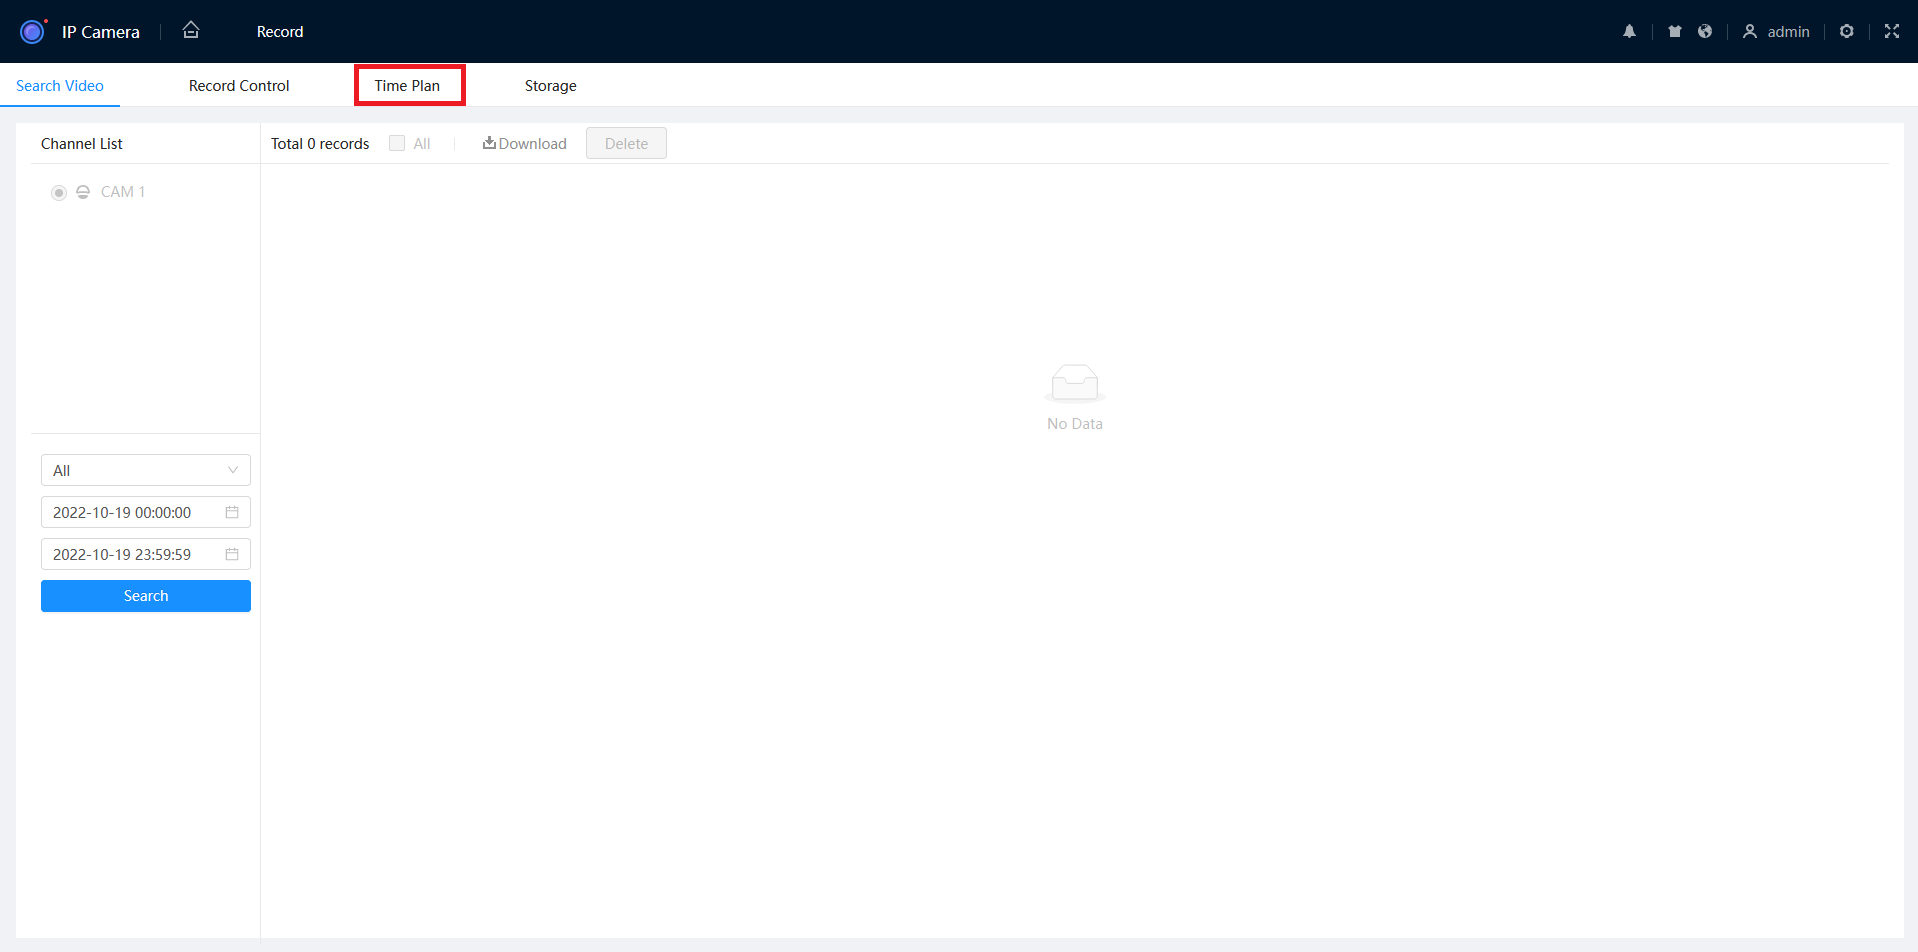
- Select Time Plan.
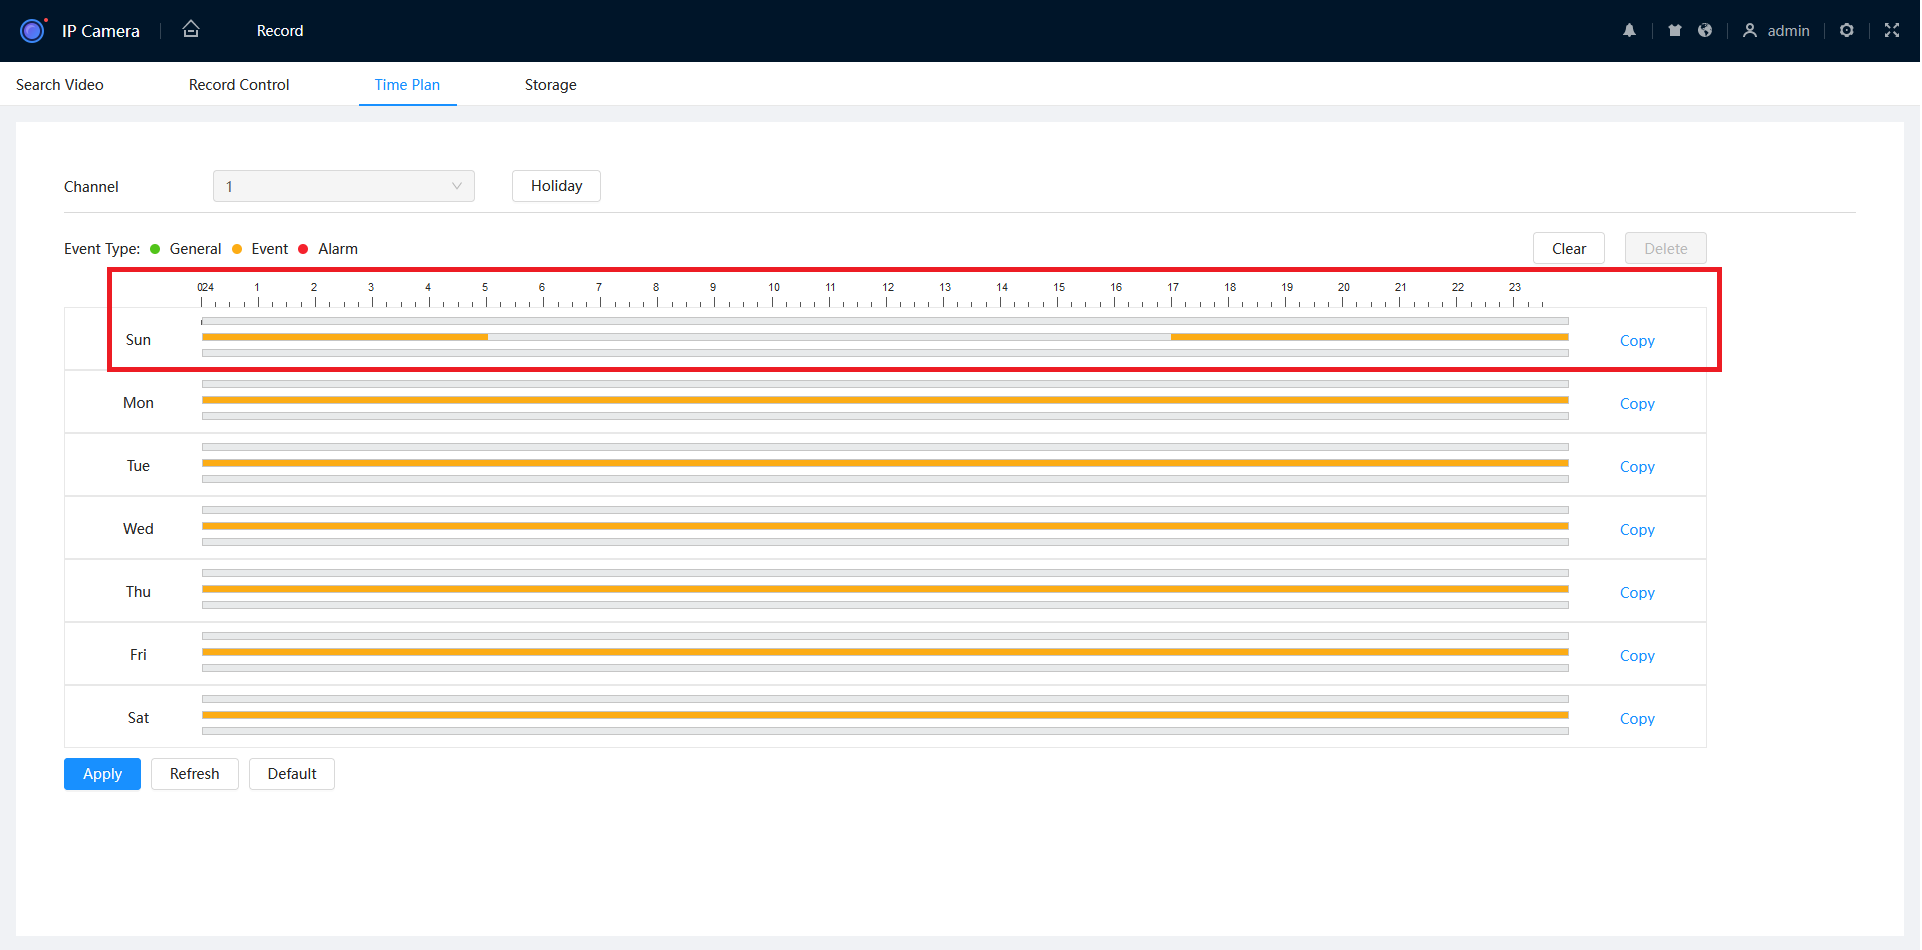
- Use the mouse to drag the Event line to the desired time. In this example we are setting Event recording to be active between 5pm and 5am.
- Press Copy, then select each day that you want to apply this Time Plan too. Once selected, press Apply.
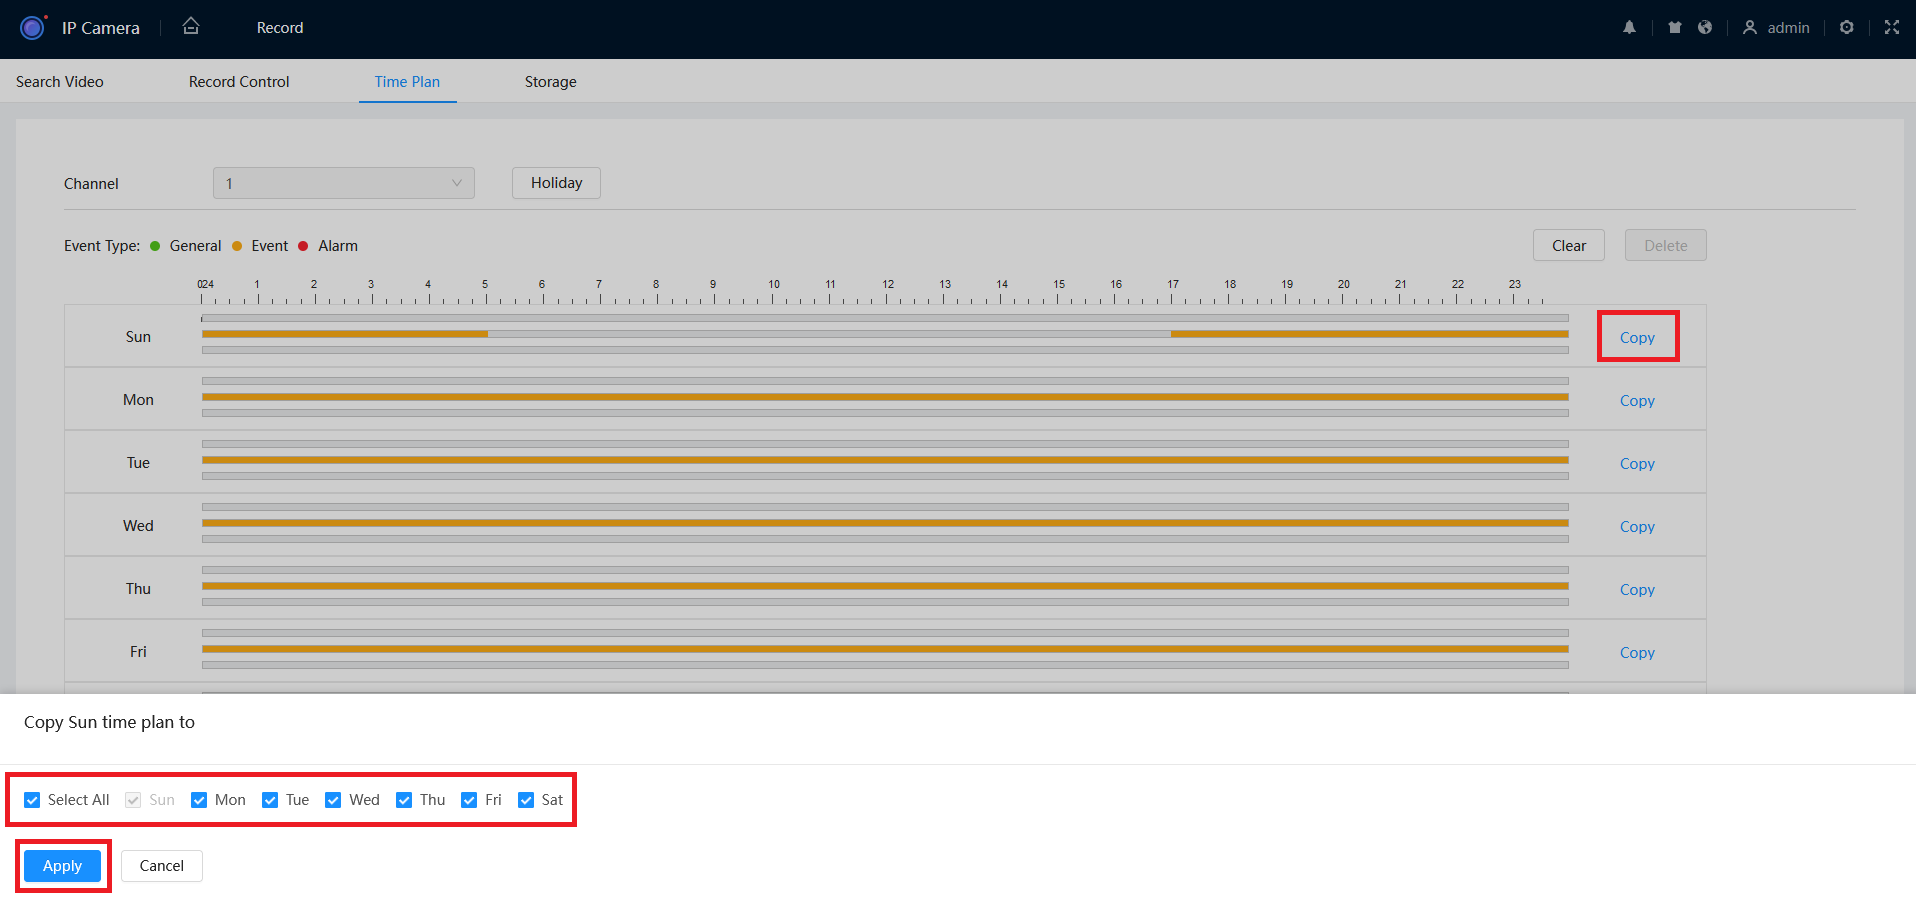
- Press Apply.
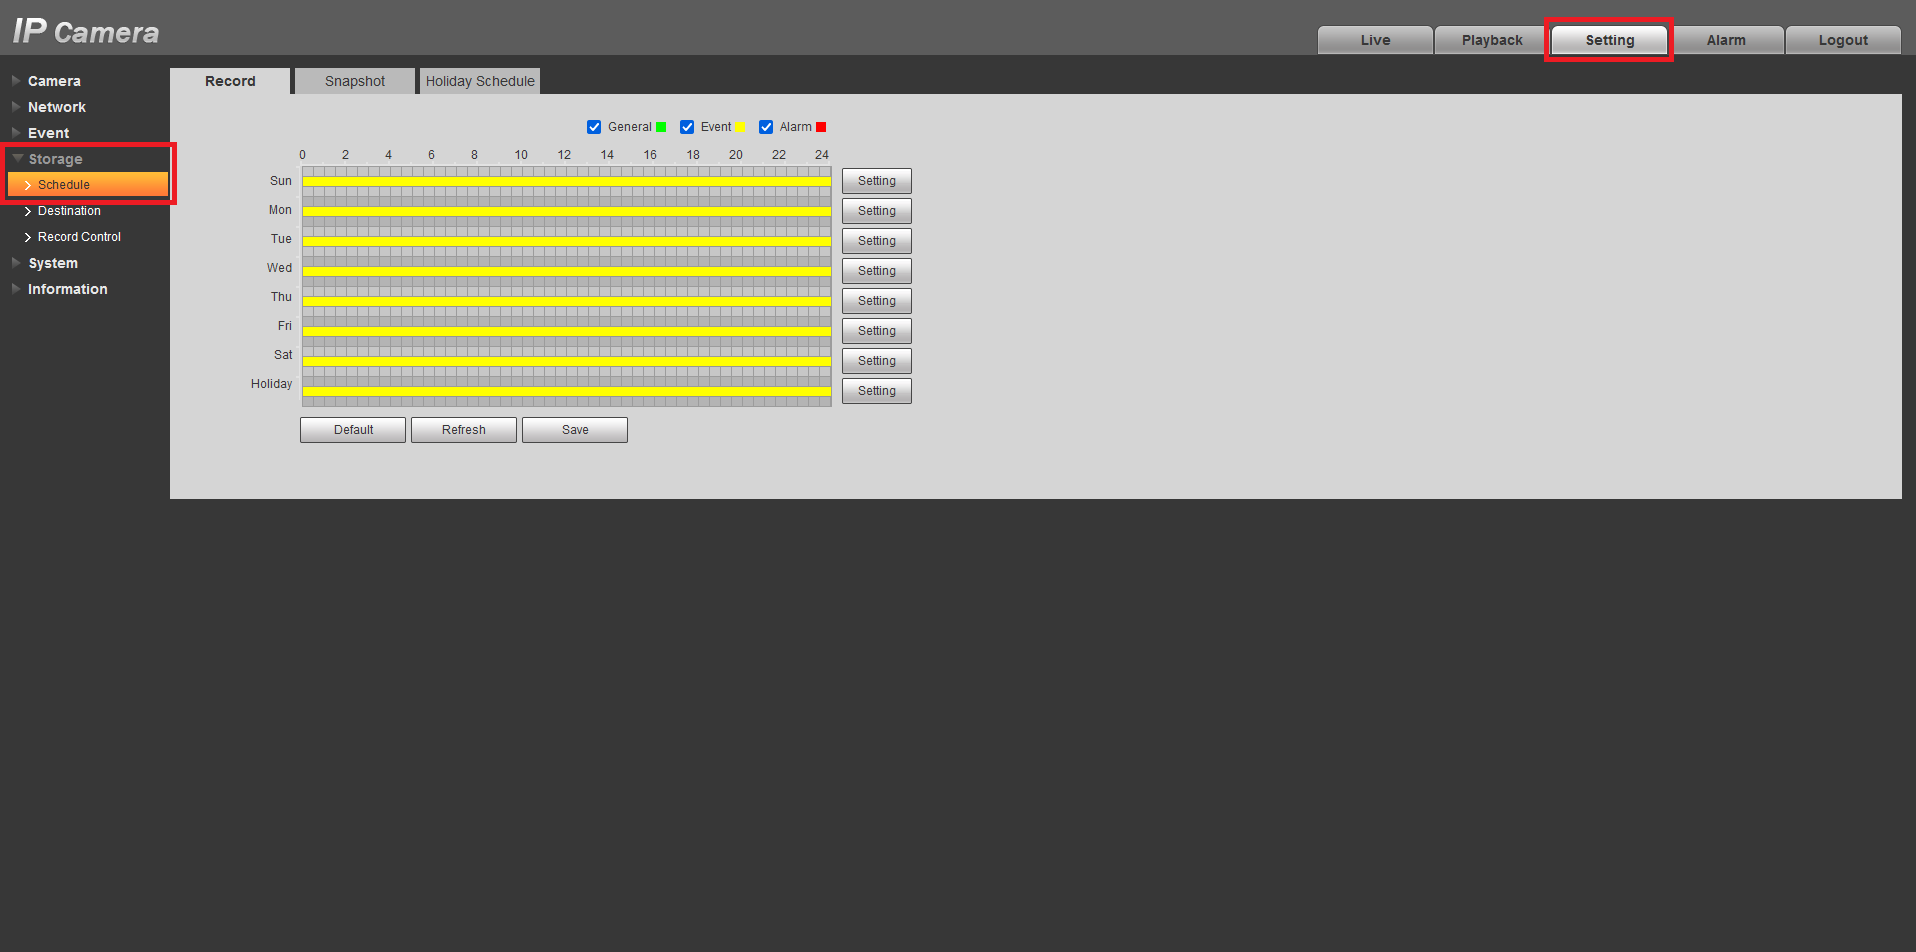
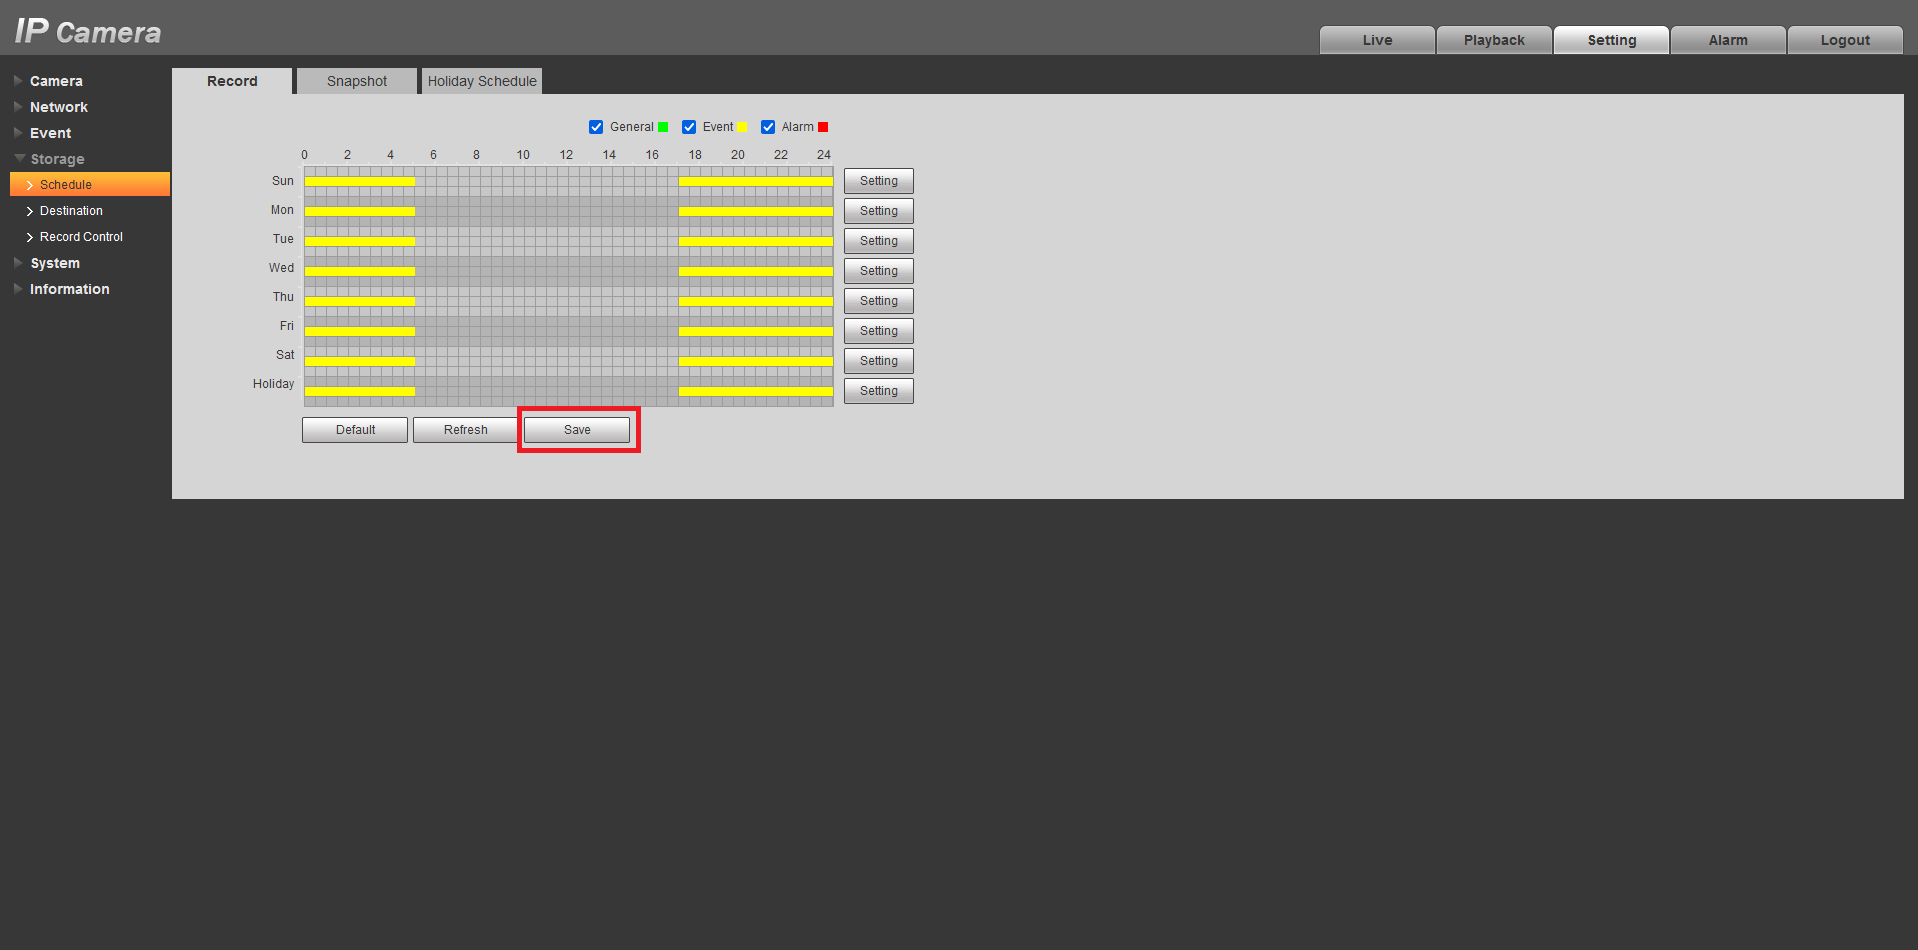
Old GUI (Grey)
- Navigate to Setting > Storage > Schedule.
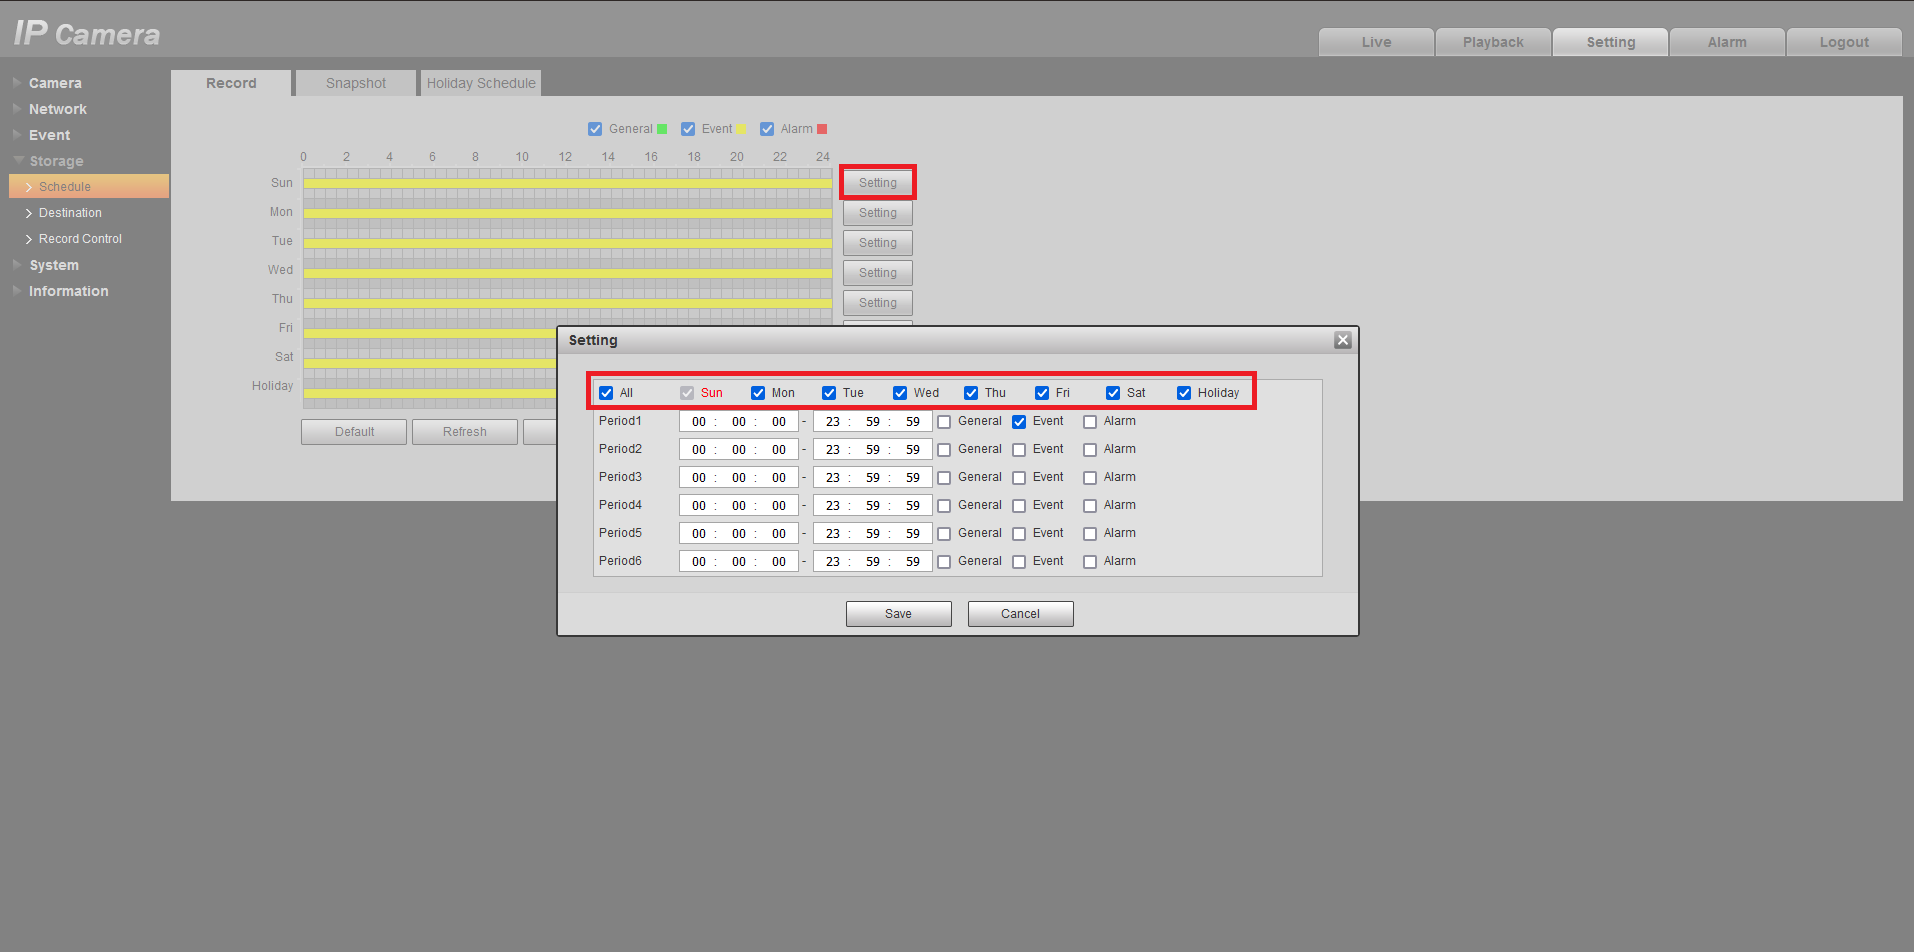
- Select Setting, then select the days you want to modify.
- Adjust the Period Settings to the desired time and recording type, then press Save. In this example we are setting Event recording to be active between 5pm and 5am.
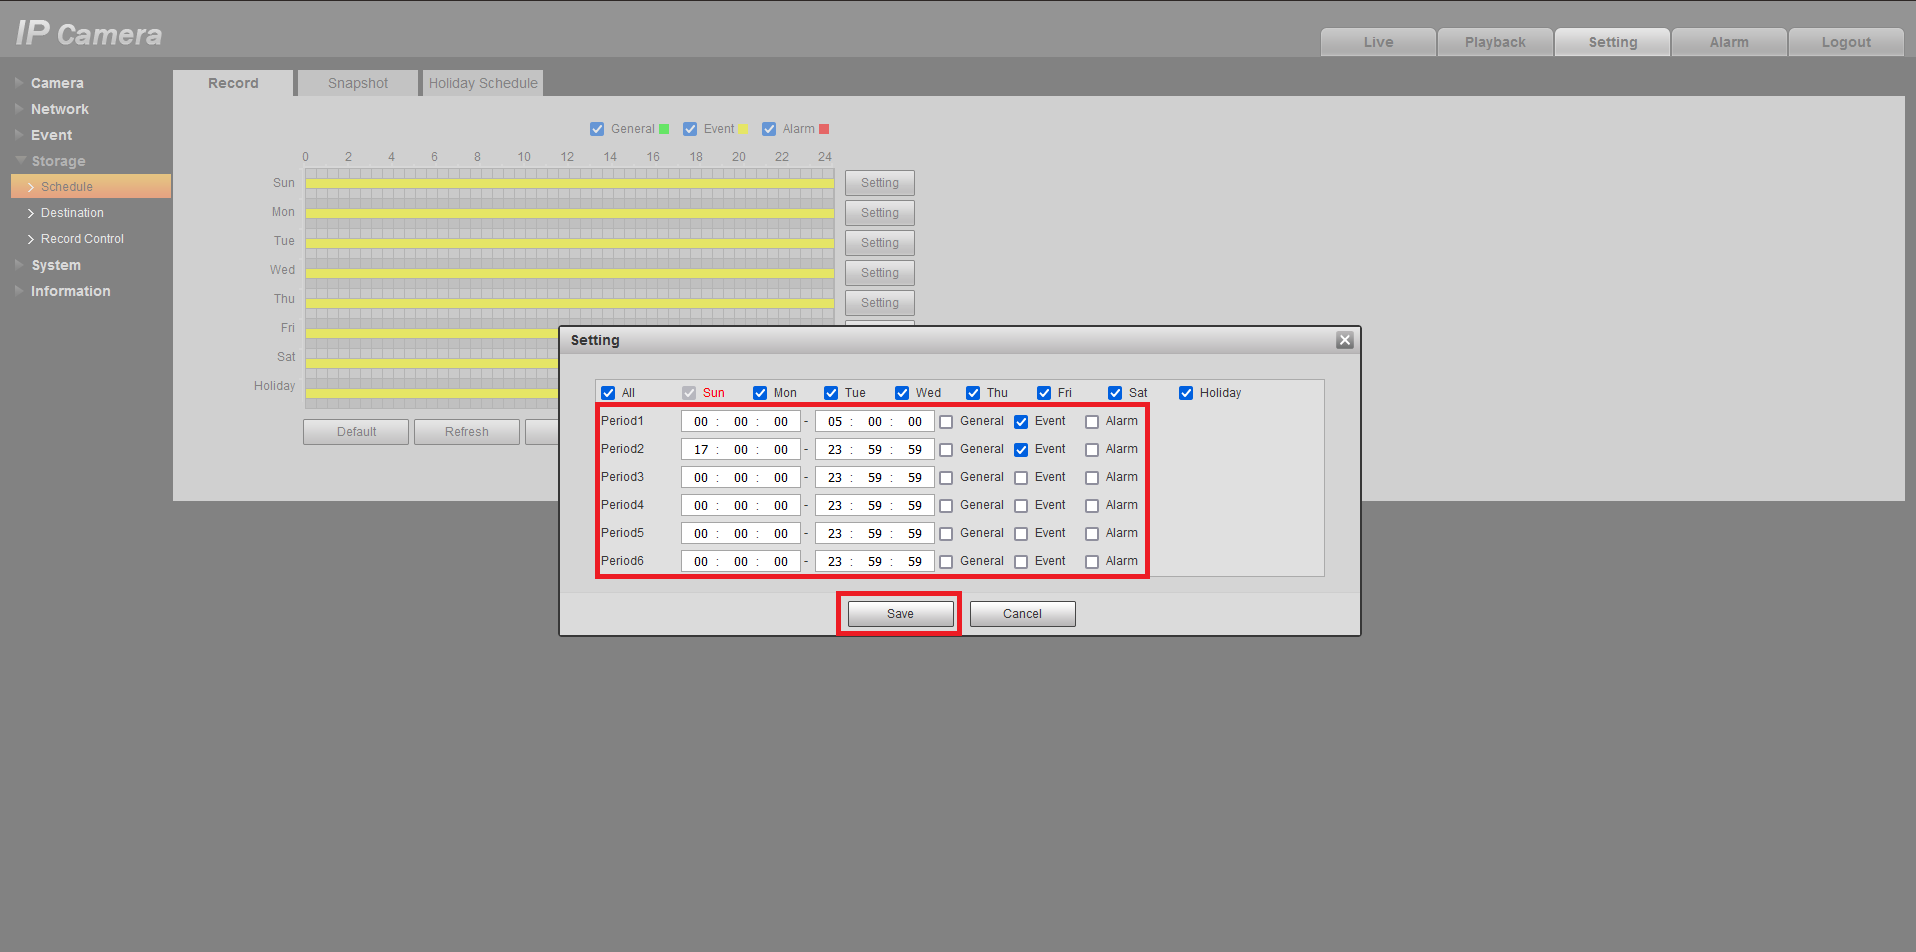
- Press Save.
Trigger Actions
AI Trigger Actions
AI Trigger Actions Explained Schedule: Sets the time when the rule is active an...
Event Trigger Actions Explained

-
Schedule: Sets the time when the rule is active and a trigger will occur.

Multiple IVS Rules on Single Camera
If creating multiple IVS rules on a Single camera that are scheduled for different times. Those Schedules must be configured in the Cameras Web interface.
- Anti Dither: The amount of time before an event will get triggered again.
-
Alarm-Out Port: Set if the Event will trigger the local alarm out put on the recorder/Camera

- Post-Alarm: The time the Alarm-out port will be Active for.
-
Show Message: Displays a Message on top of the live view that the Event has Occurred.

- Send Email: Will send the email with the event details. Requires configuration.
- Report Alarm: Sends Trigger Details to the Alarm Centre/Third party monitoring. Requires Configuration.
- Record Channel: Sets if the event will be recorded. (AI search, coloured on playback timeline).
- Post Record: Sets recording time after event occurred.
-
PTZ Linkage: Allows calling PTZ functions from other channels PTZ Linkage

- Tour: Starts a tour of selected channels.
- Picture Storage: Set if the event will take a snapshot of the event.
- Buzzer: Set if the NVR will Beep and event triggers.
- Log: If the Event will be Logged.
- Alarm Tone: Plays a designated .wav file in response to an event trigger. This can be imported via a USB flash drive to the NVR.
- Camera Audio: Selects to play Audio from active deterrent Camera.
-
Remote Warning Light: Select to set off Active deterrent lights.
