(Black GUI) HDMI 2 Setup
- Right Click and select Main Menu.
- Select Display (if you do not see Display go to the second page by clicking the dots underneath the backup option.)

-
Enable Extra Screen, then select Apply.

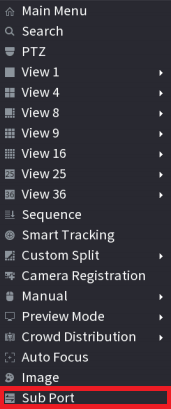
- Go back to live view, then right-click and select Sub Port. This will display the HDMI 2's video on your Primary Monitor.
- Right-click and select which window split you would like to view.
- Right-click and select Main Port to set the video back to HDMI 1.

(Blue GUI) HDMI 2 Setup
Enable the Navigation Bar
- Navigate to Main Menu > System > General
-
Enable Navigation Bar.

- Navigate to Main Menu > System > Display

- Tick Screen 2 and select Apply.
Configure the Second Display via the Navigation bar
- Move the mouse cursor so it is positioned just off of the bottom of the screen, then left click. This should bring up the Navigation bar.

- Select Screen 2.

- Select the Screen Layout and cameras you wish to use on the second screen

- Switch back to Screen 1.