Tripwire & IVS Setup
NVR
The below instructions are for setting up a Tripwire, however the same process is followed for Intrusion & Abandoned/Missing Object.
- From the Main Menu, select AI > Parameters > Smart Plan.
- Select a channel with IVS functionality. Click the
 icon then Apply to enable the IVS.
- Select the IVS tab. Select the same camera channel, then click Add button at the bottom. This will create a new IVS setting (Tripwire by default).
- Click the Draw button
 to open the Draw screen.
- Left-click on the screen to start drawing the Tripwire line. Left-click again to finish the line (optionally, you can add additional corners to the line by continuing to leftclick). Right-click to finish placing the line.
- When using select functions such as Tripwire, In the top left window, you can alter the Direction that the line must be passed from to activate the event, as indicated by the arrow going across the line (A to B, B to A, or both ways).
- (NOTE: This step requires an AI camera.) AI Recognition enables Perimeter Protection when using Tripwire or Intrusion functions. This will recognise and differentiate between people, vehicles and other moving objects. Turn the option On to enable this function.

- Click OK to finish.
- Click the Enable box to turn on the IVS rule.
- Click Apply to save changes. If done correctly, you will see the Tripwire in live view
NVR (Web Interface)
The below instructions are for setting up a Tripwire, however the same process is followed for Intrusion & Abandoned/Missing Object.
1. Log in to the NVR web interface.
Accessing the Web Interface of an NVR
There are 3 ways to access the web interface of an NVR.
- Logging in directly using the IP address.
- Logging in via SmartPSS
- Logging in via SmartPSS Lite
Logging in to NVR Directly
Connect your device to the same network as your NVR Either through a Switch or directly to the LAN port of the NVR.

Depending on how your network and NVR are Configured you may have to change the IP of the device so it is the same IP range of the NVR.
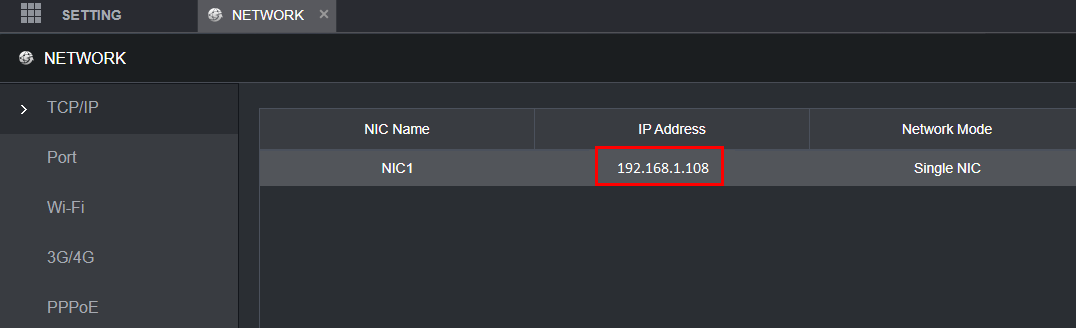
To Find IP of Recorder, got to Main Menu > Network > TCP/IP and note down the IP of your NVR.
Changing the IP address on a Windows Computer
Windows 10
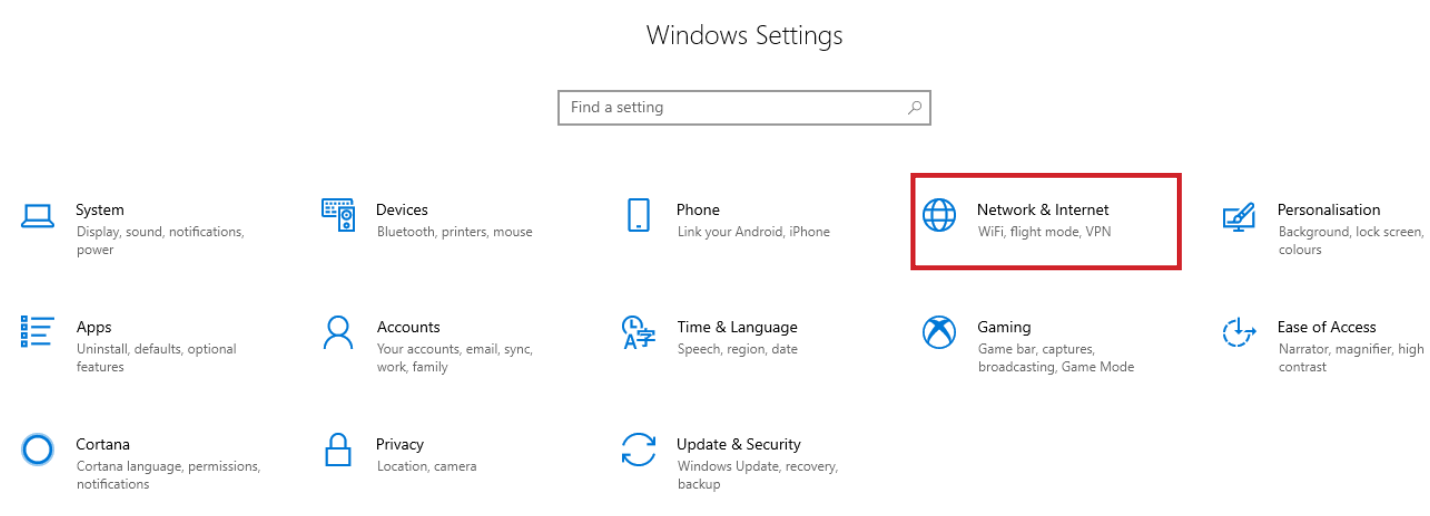
- Open Settings.
- Select Network & Internet.
- Select Status, then Change Adapter Options.
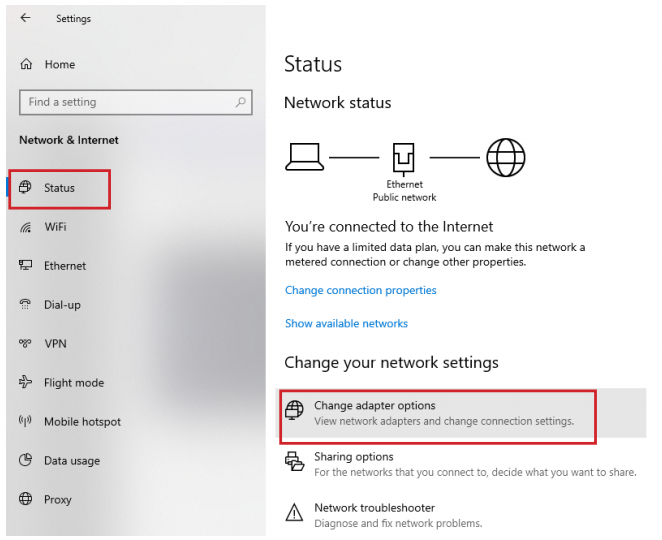
-
Right-click the network adapter you want to change the IP address for, and select Properties.
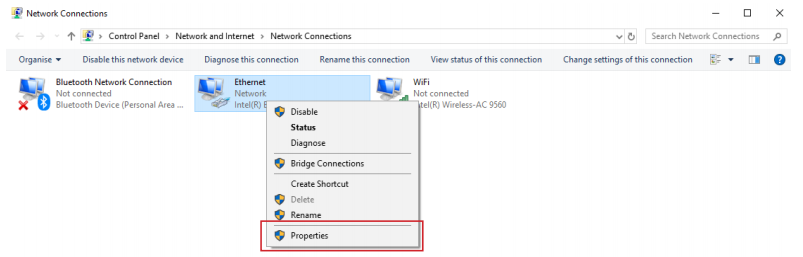
-
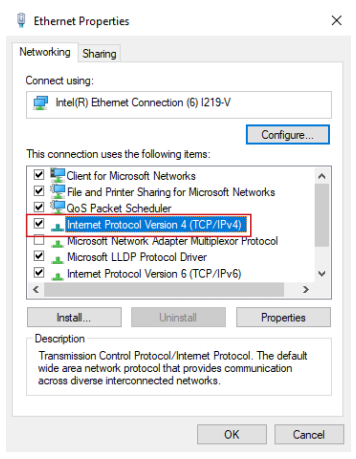
Double-click the Internet Protocol Version 4 (TCP/IPv4) item.
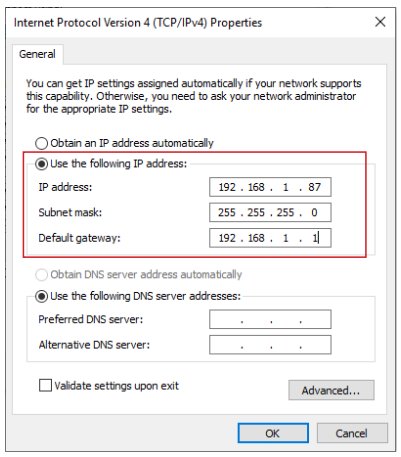
- Click Use the following IP address and enter an IP address in the same range as the device you are trying to access. (E.g when trying to access 192.168.1.108 use a IP address in the 192.168.1.x range.) Note: This cannot be the same as the device you are trying to connect to or any other device on the same network. Save your changes on both windows.
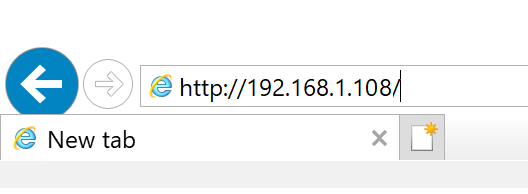
- Type the IP address of the device you are trying to access into the address bar of your web browser.
- Once finished configuring the device, change the adapter settings back to normal by following steps 1-5 and clicking Obtain an IP address automatically.
Windows 11
1. In the Windows search bar at the bottom of the page, type Control Panel and press enter.
2. Select Network and Internet.

3. Select Network and Sharing Centre.

4. Select the link for Connections in the network that you want to change the IP address for.

5. Select Properties.

6. Double-click the Internet Protocol Version 4 (TCP/IPv4) item.

7. Click Use the following IP address and enter an IP address in the same range as the device you are trying to access. (E.g when trying to access 192.168.1.108 use a IP address in the 192.168.1.x range.) Note: This cannot be the same as the device you are trying to connect to or any other device on the same network. Save your changes on both windows.

8. Type the IP address of the device you are trying to access into the address bar of your web browser.
9. Once finished configuring the device, change the adapter settings back to normal by following steps 1-6 and clicking Obtain an IP address automatically.
See the video below for a visual guide of the steps above:
Shortcut
1. In the Windows search bar at the bottom of the page, type Ncpa.cpl and press enter.
2. Right-click the network adapter you want to change the IP address for, and select Properties.
3. Select the Internet Protocol Version 4 (TCP/IPv4) item.

4. Click Use the following IP address and enter an IP address in the same range as the device you are trying to access. (E.g when trying to access 192.168.1.108 use a IP address in the 192.168.1.x range.) Note: This cannot be the same as the device you are trying to connect to or any other device on the same network. Save your changes on both windows.
5. Type the IP address of the device you are trying to access into the address bar of your web browser.
6. Once finished configuring the device, change the adapter settings back to normal by following steps 1-3 and clicking Obtain an IP address automatically.
See the video below for a visual guide of the steps above:
Once Device is in Same Range of the NVR. On the computer, open Internet Explorer and enter the IP address of the recorder.
If Device is in same range and the IP Address is correct, you will be Prompted with a login page.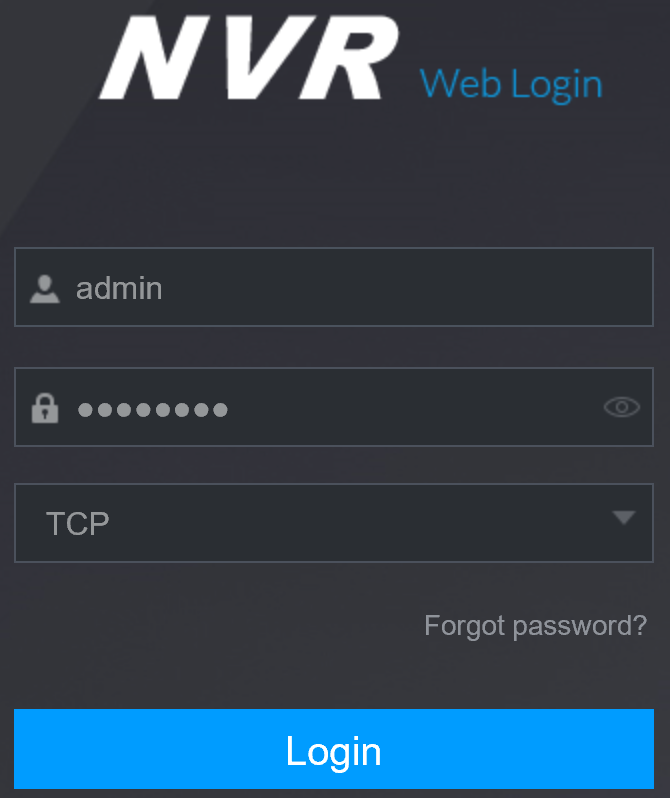
After Login The NVR web Interface will be Shown as below.
Accessing the Web Interface via SmartPSS
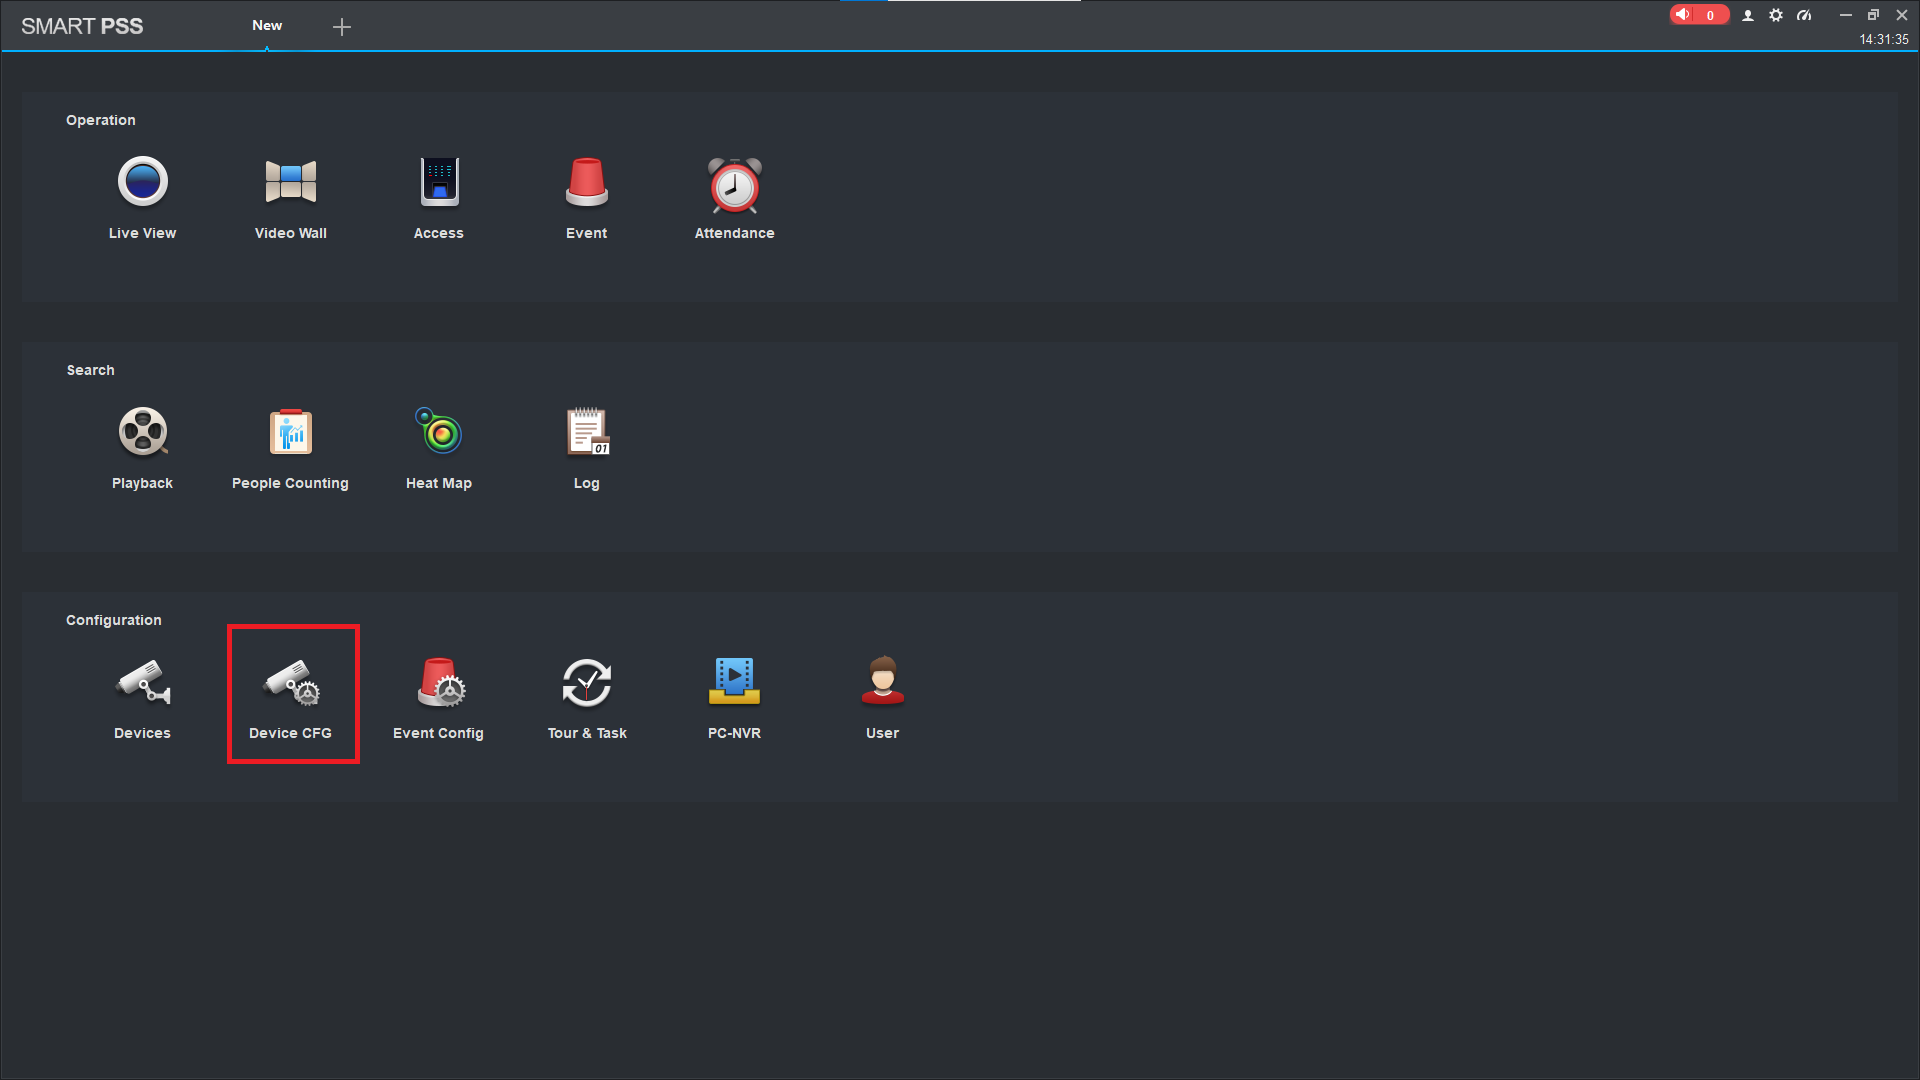
Open Smart PSS and select Device CFG.
Select your device.

Select Link to WEB.

A Browser will open with the login page. Once Logged in the NVR web interface will appear as below
Accessing the Web Interface via SmartPSS Lite
- Open SmartPSS Lite and select Devices.

2. For the device you want to access the web interface of, select the Globe Icon.
This will direct you to the login page of your device, allowing you to enter the username and password.

If everything is done correctly but the web interface doesn't load, see below.
Web Interface Troubleshooting
Web Interface Troubleshooting
If directly accessing the device using the IP address, ensure that the IP address of your PC is in the same range as the device you are trying to access
If you get an error that says "Unable to open the search page", "This page can't be displayed" or something similar, your PC might not be in the correct IP range. If you are trying to log into a camera with the IP Address of 192.168.1.108, your PC's IP address should be in the 192.168.1.x range.
How to change your Computer's IP Address
Windows 10
- Open Settings.
- Select Network & Internet.
- Select Status, then Change Adapter Options.
-
Right-click the network adapter you want to change the IP address for, and select Properties.
-
Double-click the Internet Protocol Version 4 (TCP/IPv4) item.
- Click Use the following IP address and enter an IP address in the same range as the device you are trying to access. (E.g when trying to access 192.168.1.108 use a IP address in the 192.168.1.x range.) Note: This cannot be the same as the device you are trying to connect to or any other device on the same network. Save your changes on both windows.
- Type the IP address of the device you are trying to access into the address bar of your web browser.
- Once finished configuring the device, change the adapter settings back to normal by following steps 1-5 and clicking Obtain an IP address automatically.
Windows 11
1. In the Windows search bar at the bottom of the page, type Control Panel and press enter.
2. Select Network and Internet.
3. Select Network and Sharing Centre.
4. Select the link for Connections in the network that you want to change the IP address for.
5. Select Properties.
6. Double-click the Internet Protocol Version 4 (TCP/IPv4) item.
7. Click Use the following IP address and enter an IP address in the same range as the device you are trying to access. (E.g when trying to access 192.168.1.108 use a IP address in the 192.168.1.x range.) Note: This cannot be the same as the device you are trying to connect to or any other device on the same network. Save your changes on both windows.
8. Type the IP address of the device you are trying to access into the address bar of your web browser.
9. Once finished configuring the device, change the adapter settings back to normal by following steps 1-6 and clicking Obtain an IP address automatically.
See the video below for a visual guide of the steps above:
Shortcut
1. In the Windows search bar at the bottom of the page, type Ncpa.cpl and press enter.
2. Right-click the network adapter you want to change the IP address for, and select Properties.
3. Select the Internet Protocol Version 4 (TCP/IPv4) item.
4. Click Use the following IP address and enter an IP address in the same range as the device you are trying to access. (E.g when trying to access 192.168.1.108 use a IP address in the 192.168.1.x range.) Note: This cannot be the same as the device you are trying to connect to or any other device on the same network. Save your changes on both windows.
5. Type the IP address of the device you are trying to access into the address bar of your web browser.
6. Once finished configuring the device, change the adapter settings back to normal by following steps 1-3 and clicking Obtain an IP address automatically.
See the video below for a visual guide of the steps above:
Reload the page in Internet Explorer or Microsoft Edge in Internet Explorer mode.
The plugins for our products are designed for Internet explorer, so you may run into issues using another web browser.
The icon for Internet Explorer looks like this  , whereas the icon for Microsoft Edge looks like this
  .
.
Reloading Microsoft Edge in Internet Explorer Mode
- select the 3 dots(
 ) in the top right corner.
 - Select Reload in Internet Explorer Mode.

If the Reload in Internet Explorer Mode option isn't there, follow the steps below:
- Open Microsoft Edge and select the 3 dots(
 ) in the top right corner.
 - Select Settings.
- Select Default Browser.
- Change “Allow sites to be reloaded in Internet Explorer mode (IE mode)” to Allow.

Clear your Browsing History
If using Internet Explorer and the web interface has "sys." or "com." in front of text or it doesn't load some elements correctly, you will need to delete your browsing history to fix it.
Press CTRL + SHIFT + DELETE.
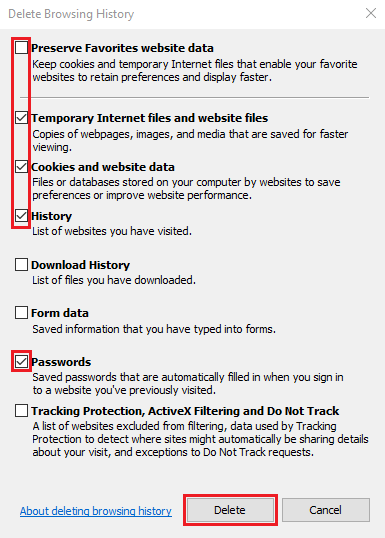
Untick Preserve Favourites website data and Tick Temporary Internet files and website files, Cookies and website data, History and Passwords, then click Delete.

Internet explorer will prompt you when it has finished deleting your browser history. Refresh the page
Delete Internet Explorer's Plugins
Our cameras and NVRs use a plugin made for Internet Explorer and, depending on the firmware of the device, may present a different version of the plugin which can cause conflicts.
To resolve this, close Internet Explorer then find the directory below and delete the webrec folder containing the plugins.
C:\Program Files\webrec\ or C:\Program Files (x86)\webrec\
2. From the Main Menu, select AI > Parameters > Smart Plan.
3. Select a channel with IVS functionality. Click the icon then click Apply to enable IVS. The  icon should be blue.

4. In the left panel, Select the IVS tab.
5. Select the same camera channel you enabled Smart Plan for, then click the plus symbol to create a new IVS rule (Tripwire by default).

6. Click the Draw Rule button to start drawing your detection line.
7. Left-click on the camera image to start drawing the line. Left-click again to finish the line (optionally, you can add additional corners to the line by continuing to left-click. This can be used to create a box). Right-click to finish placing the line.

8. When using select functions such as Tripwire, In the Parameters window, you can alter the Direction that the line must be passed from to activate the event, as indicated by the arrow going across the line (A to B, B to A, or both ways).

9. In the Parameters window, use the Effective Target setting to choose whether the rule triggers on humans, vehicles or both.

10. Once everything has been configured, tick the rule's enable checkbox to turn on the rule.

11. In the bottom right corner, click Apply to save your changes.
DeleteIPC New GUI (White/Blue)
The below instructions are for setting up a Tripwire, however the same process is followed for Intrusion & Abandoned/Missing Object.
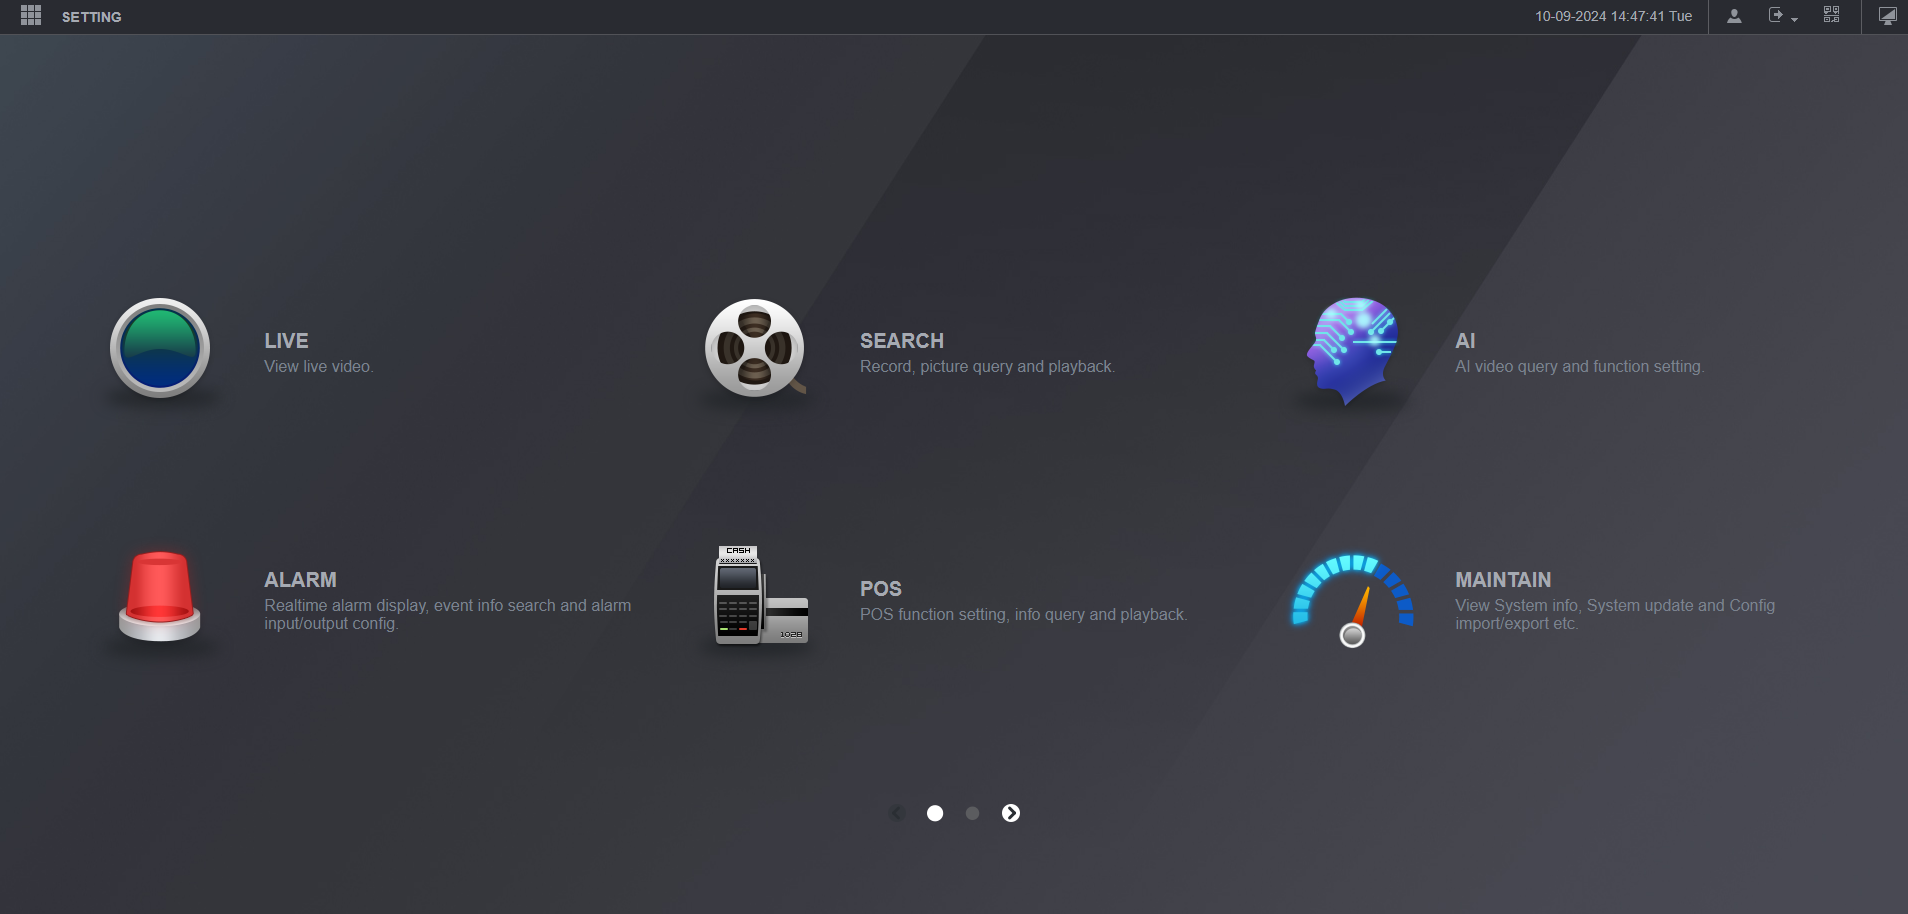
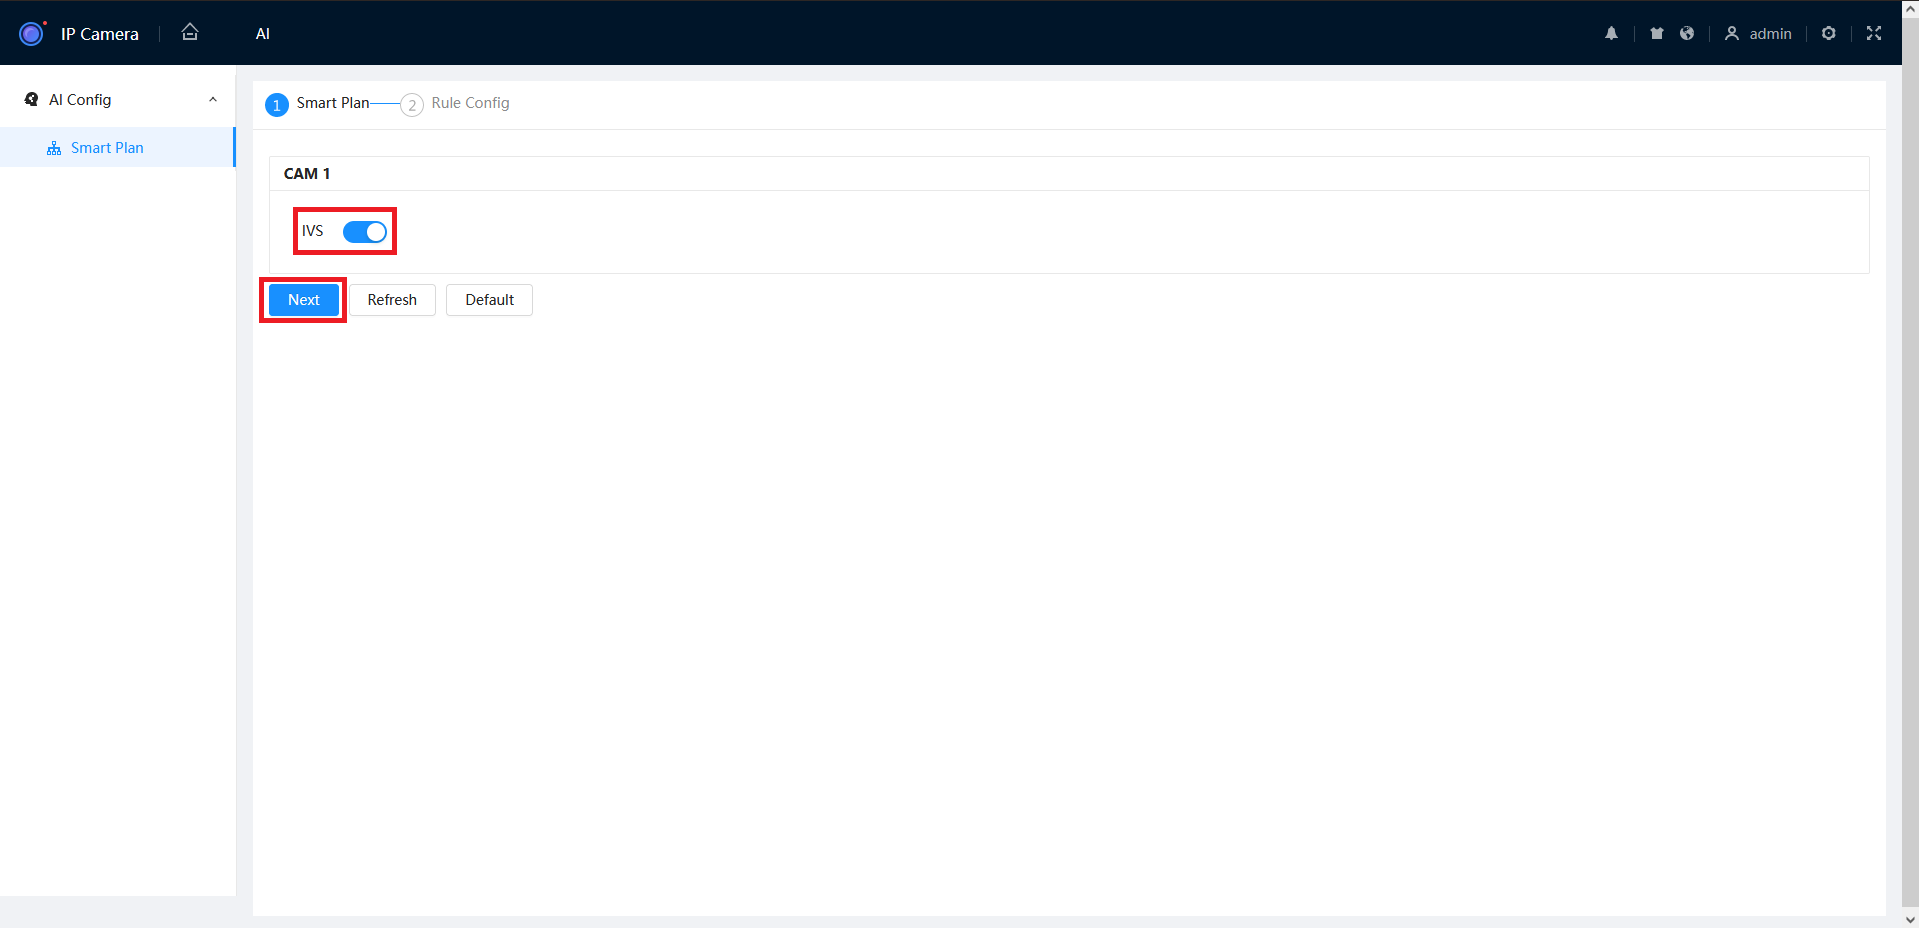
- From the Home page, select AI.

- Enable IVS, then click Next.
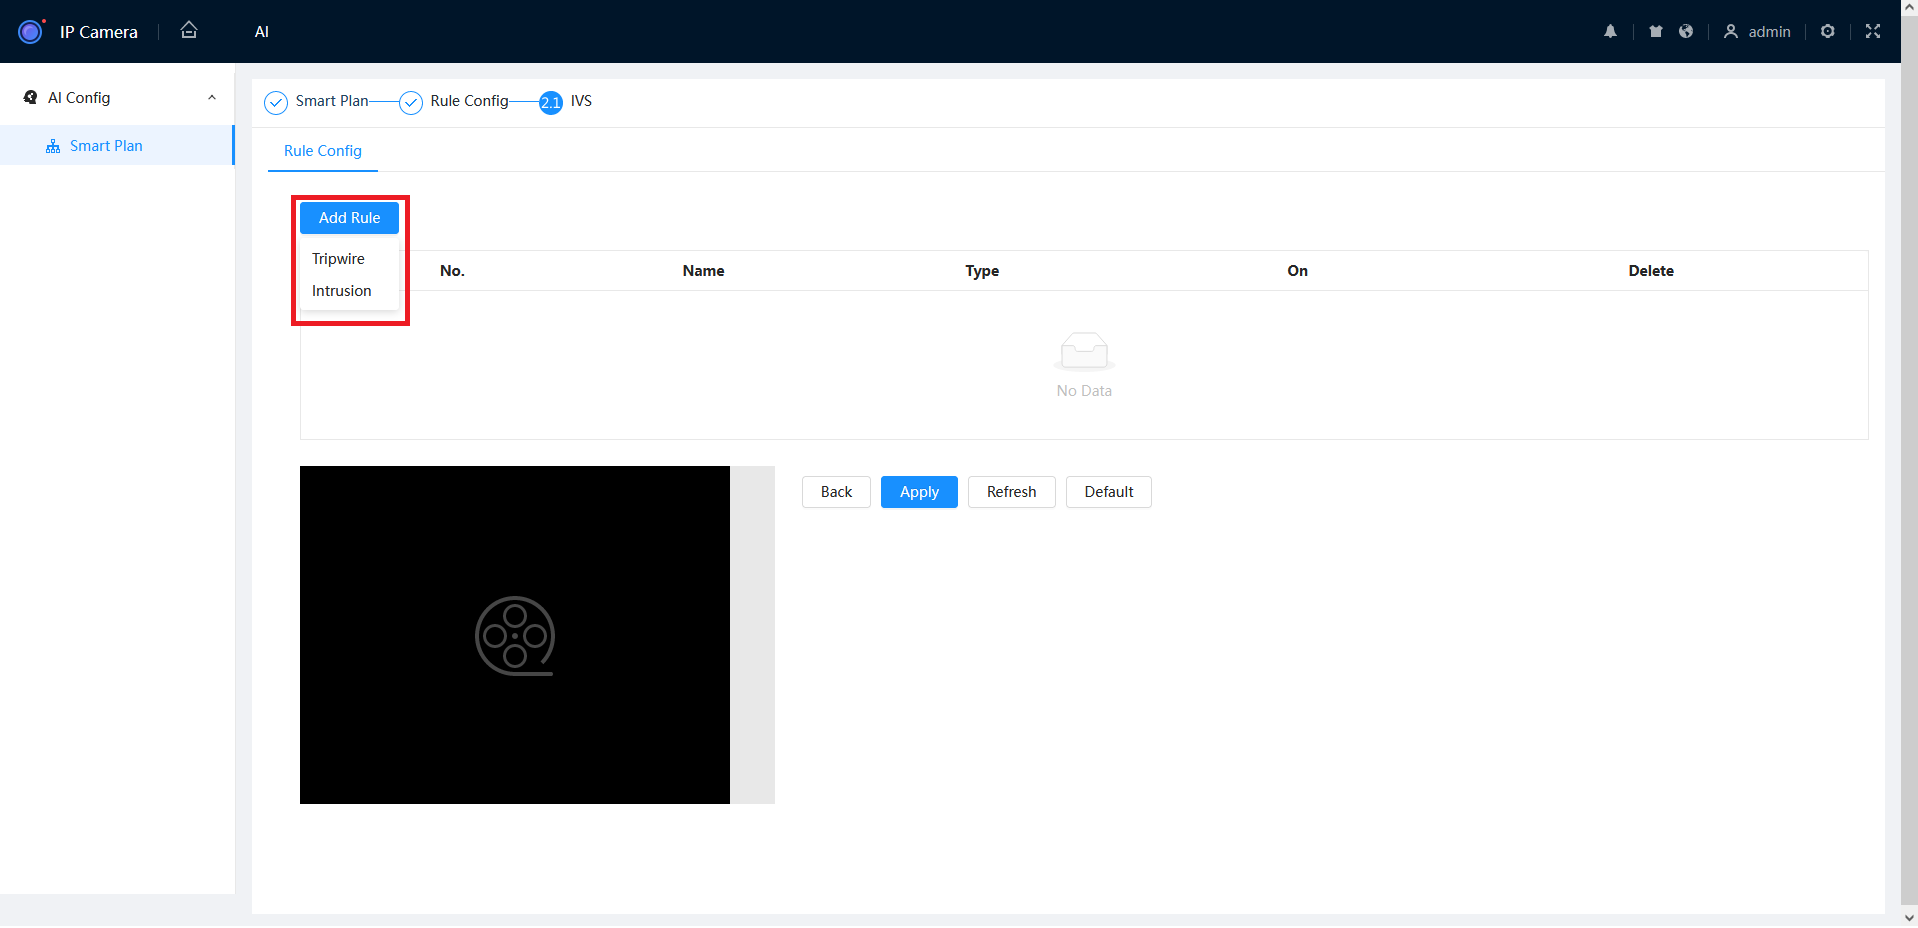
- Click Add Rule, then choose Tripwire.
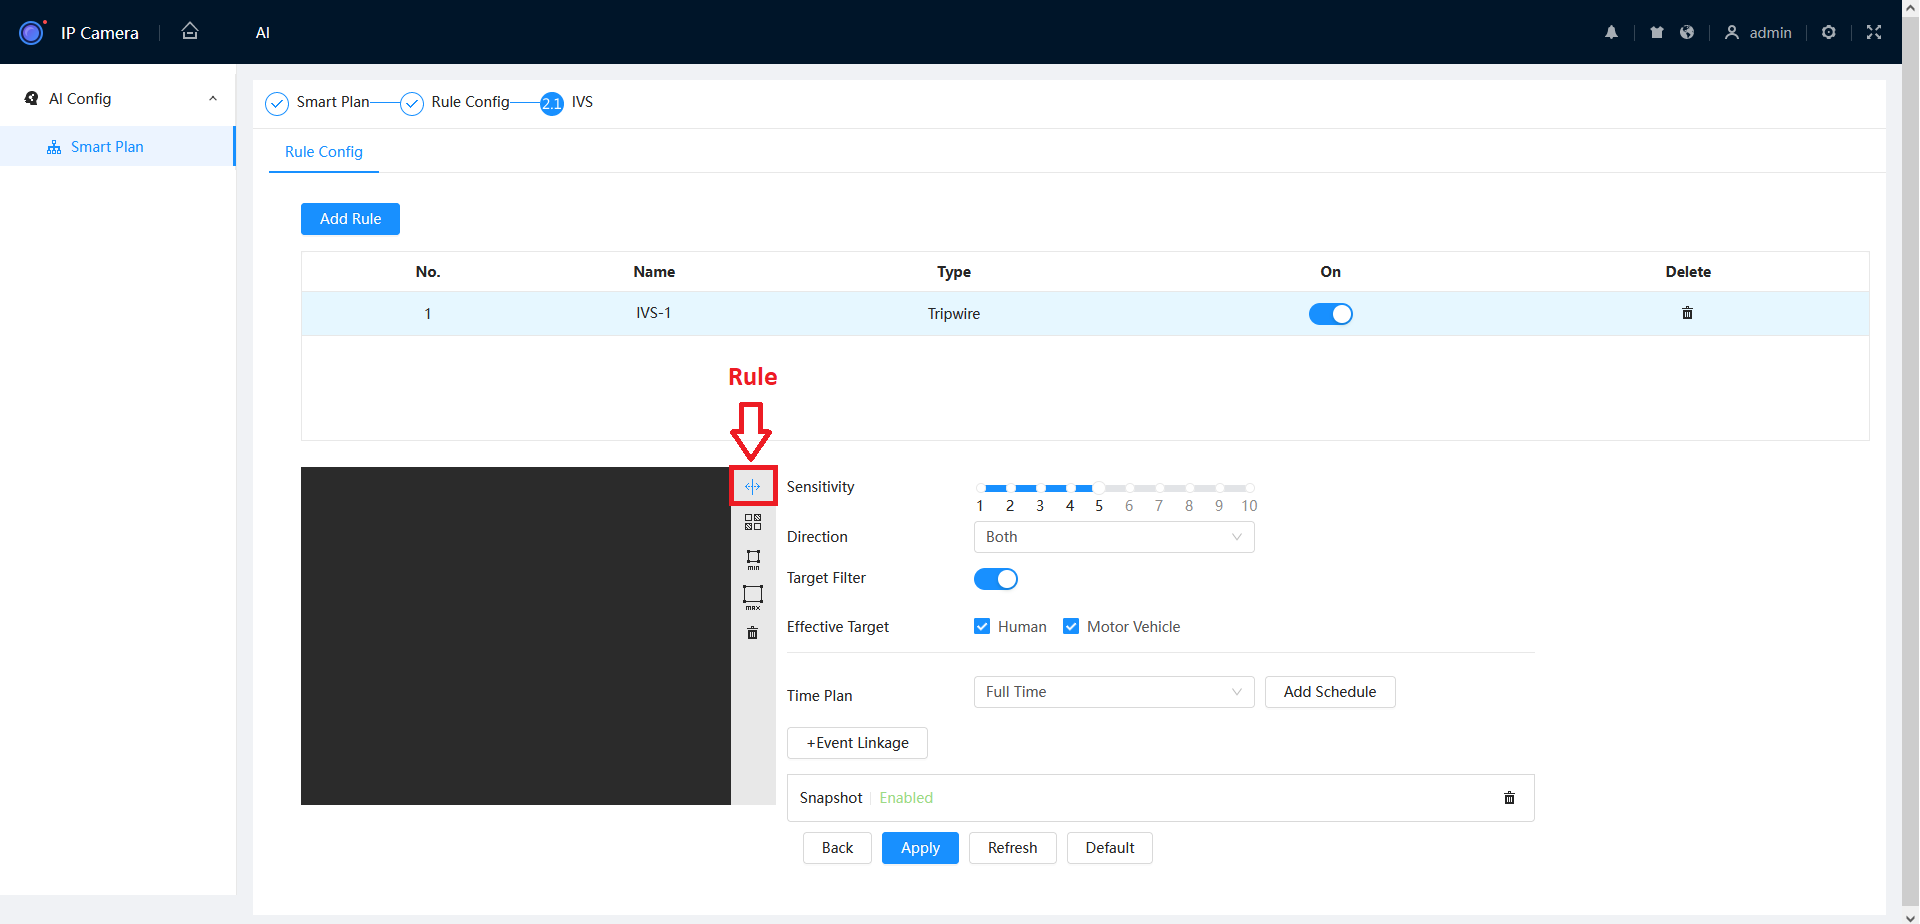
- Click Rule, then Left-click on the camera image to start drawing the Tripwire line. Left-click again to finish the line (optionally, you can add additional corners to the line by continuing to Left-click). Right-click to finish placing the line.
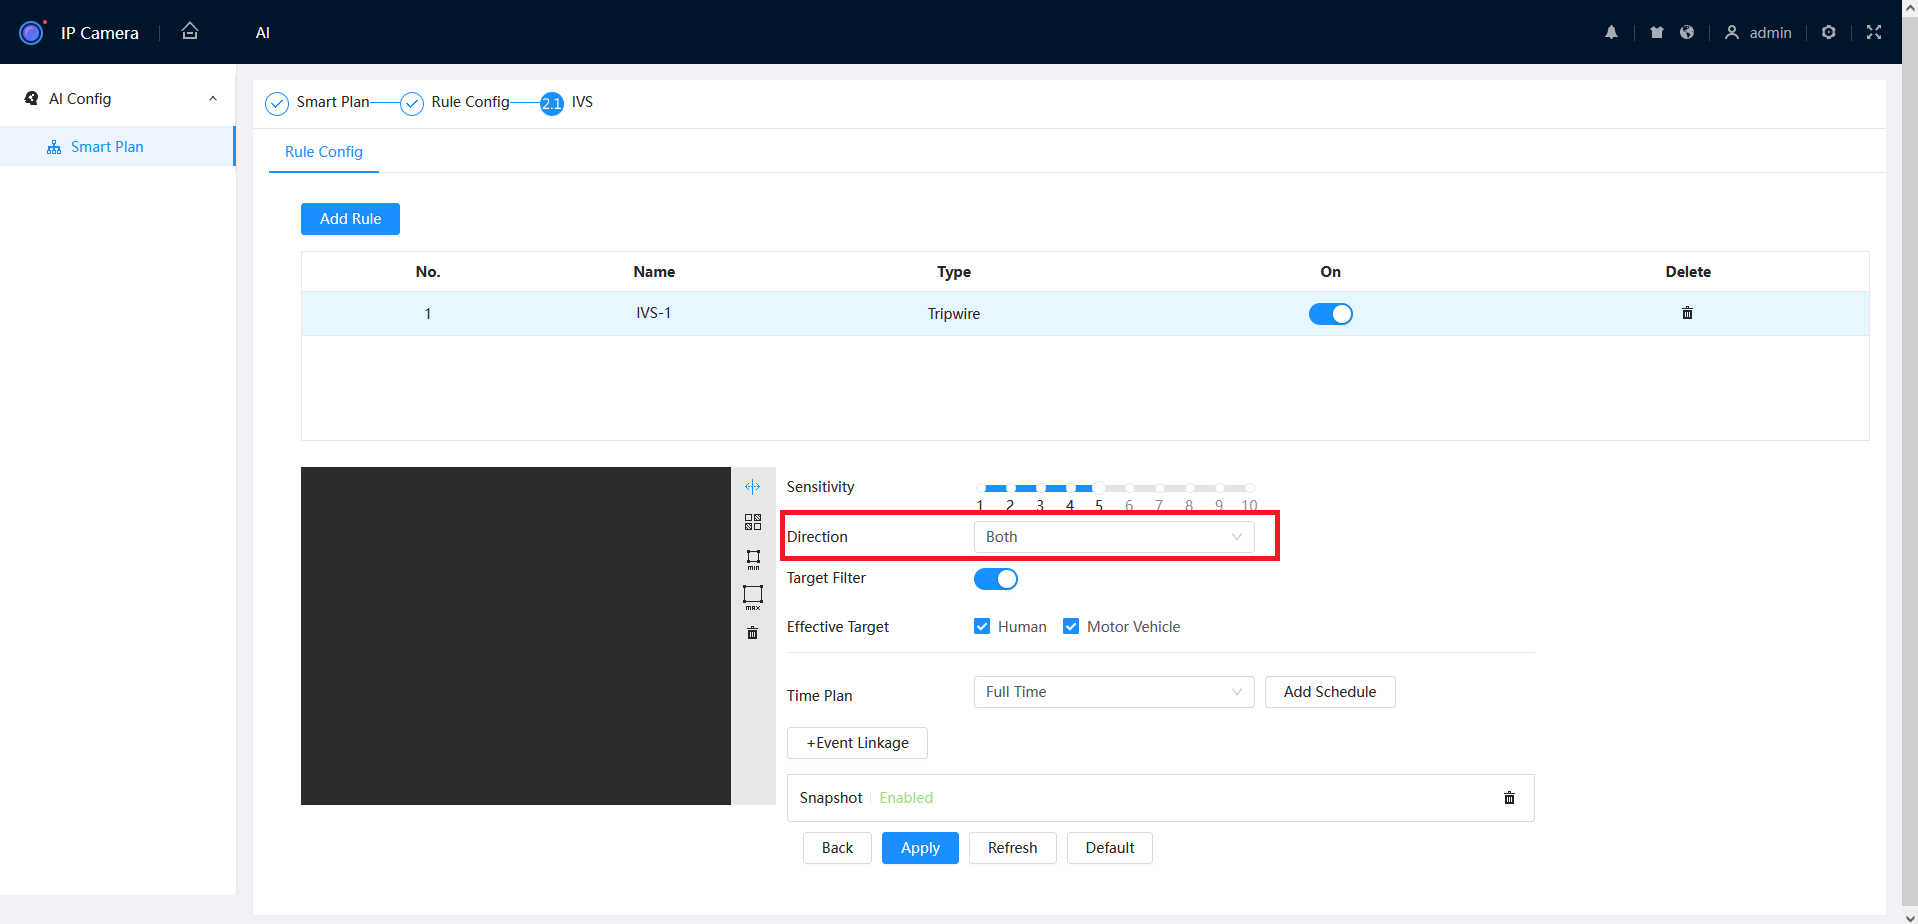
- There are several options on the right you can modify depending on the desired outcome. The main setting to adjust is the Direction that the line must be passed from to activate the event, as indicated by the arrow going across the line (A to B, B to A, or both ways).
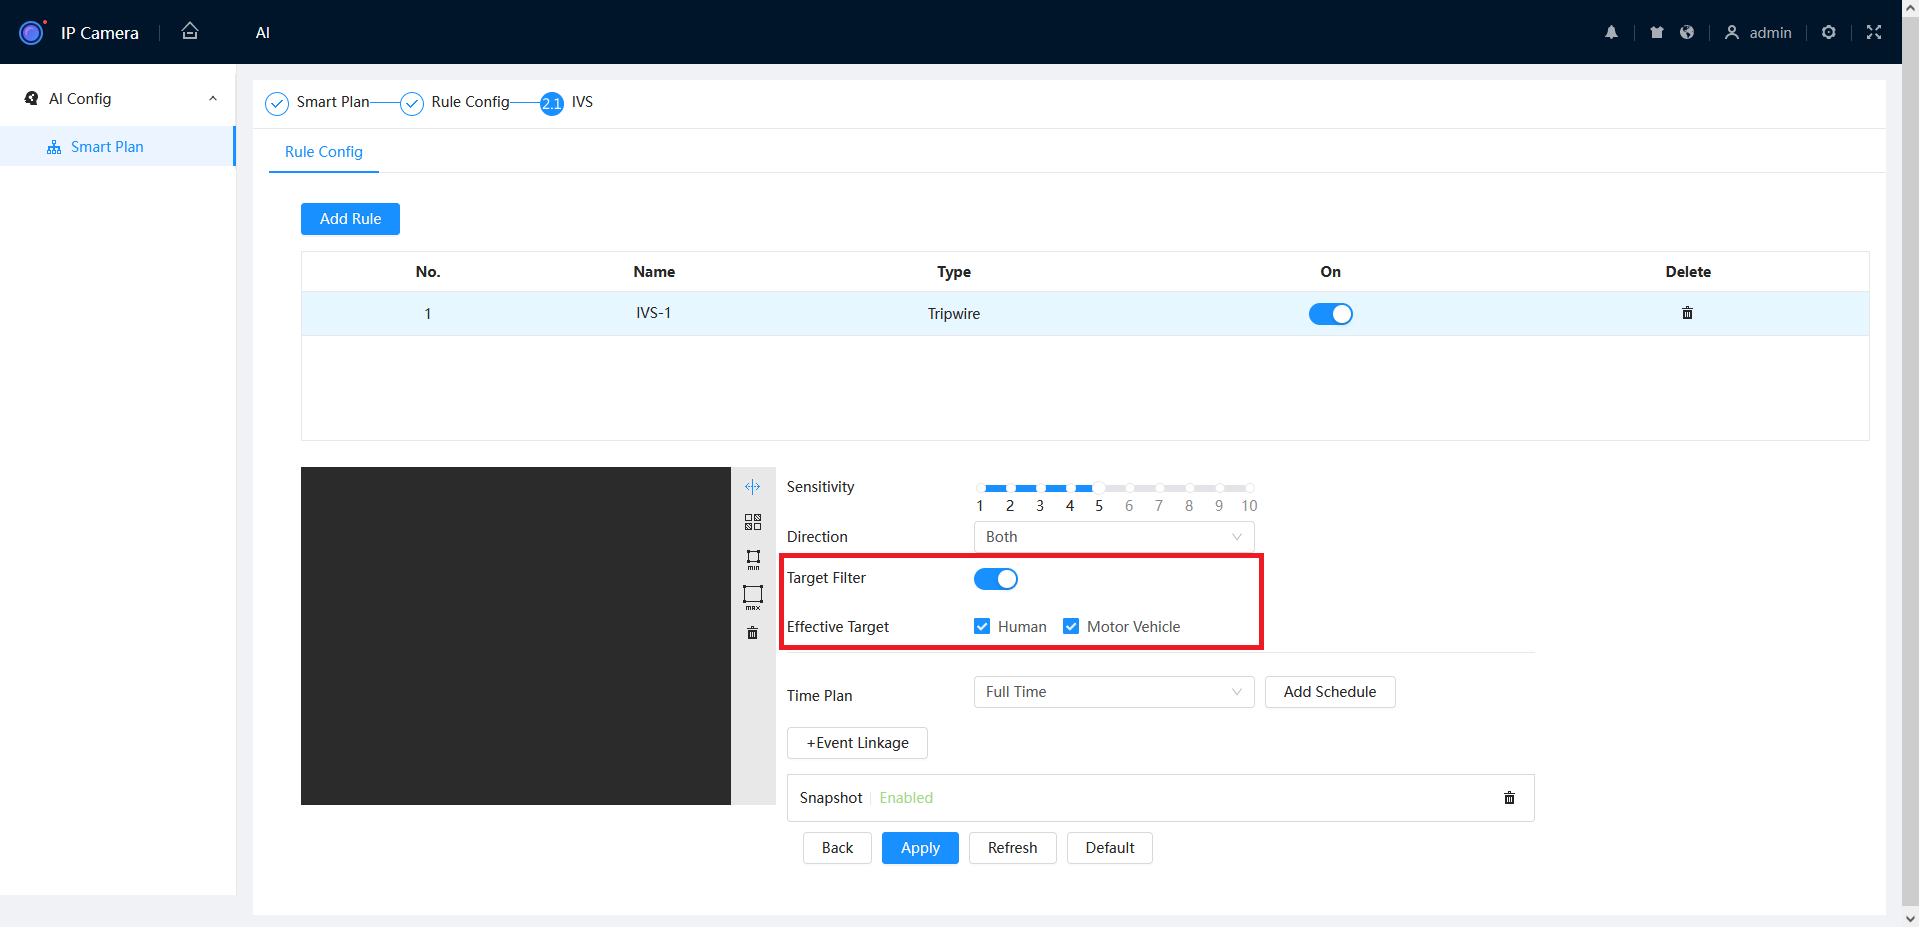
- (NOTE: This step requires an AI camera.) Effective Target enables Perimeter Protection when using Tripwire or Intrusion functions. This will recognize and differentiate between people, vehicles and other moving objects. Turn the option On to enable this function.
- Once the desired settings are configured, click Apply.
IPC Old GUI (Grey)
The below instructions are for setting up a Tripwire, however the same process is followed for Intrusion & Abandoned/Missing Object.
- From the Home page, navigate to Setting > Event > Smart Plan.
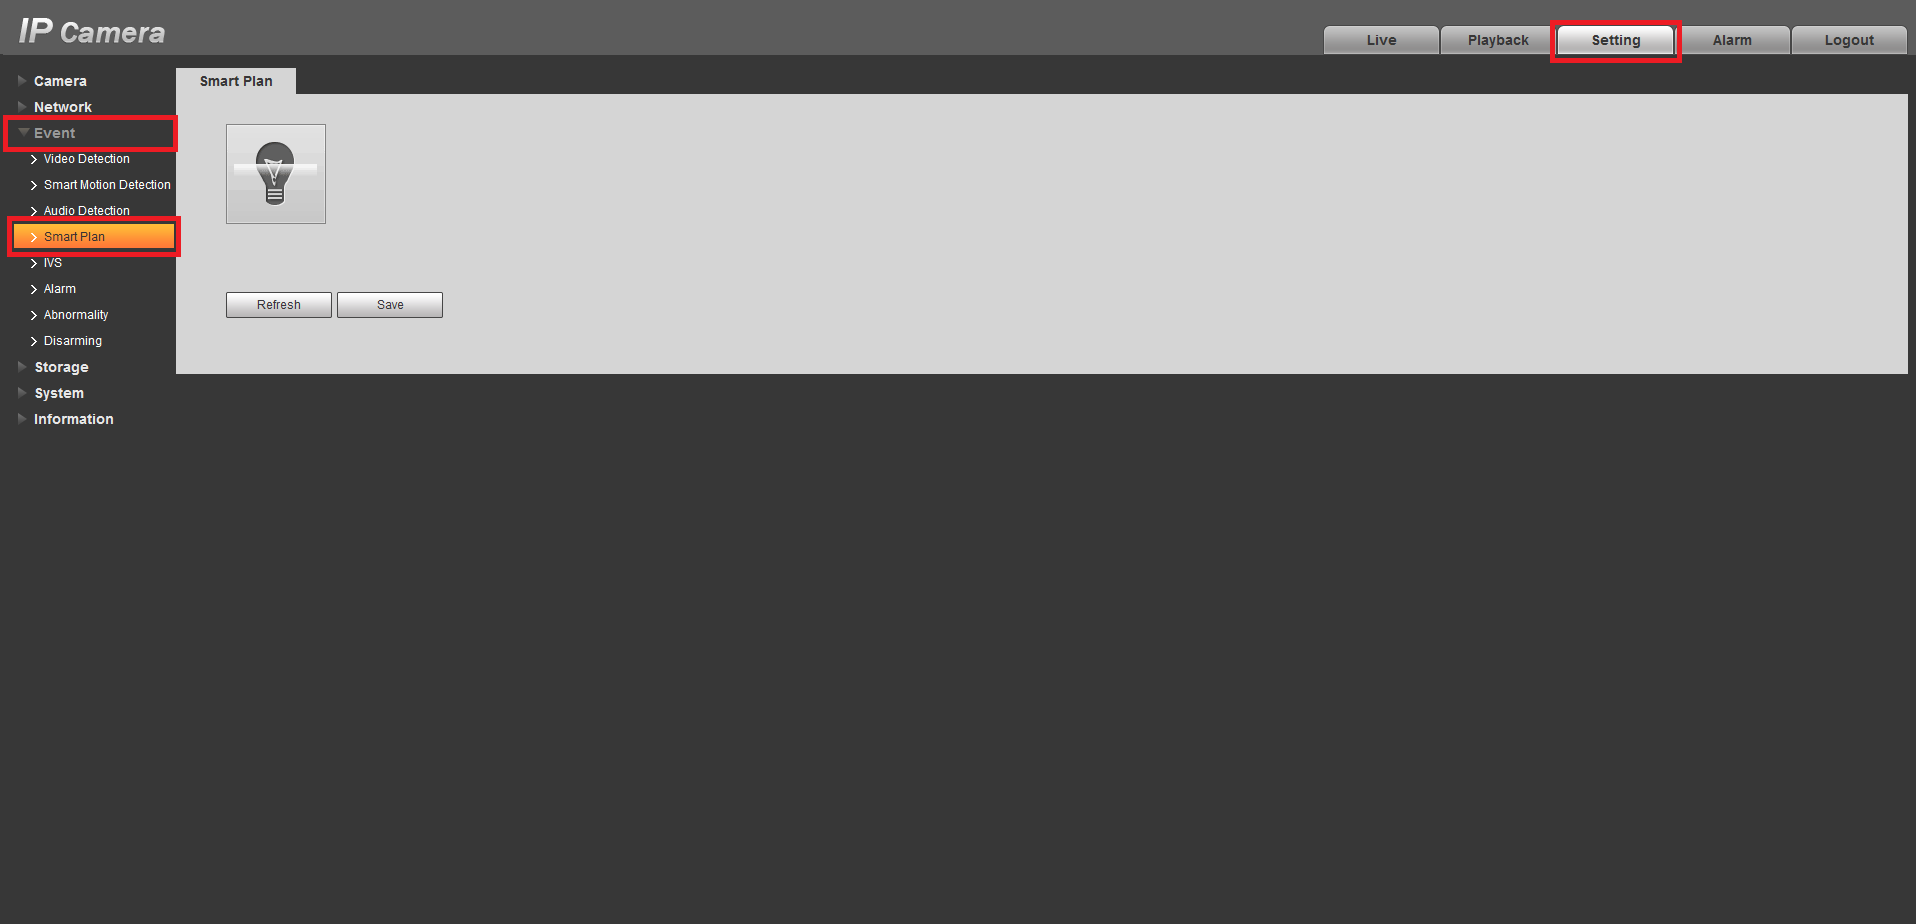
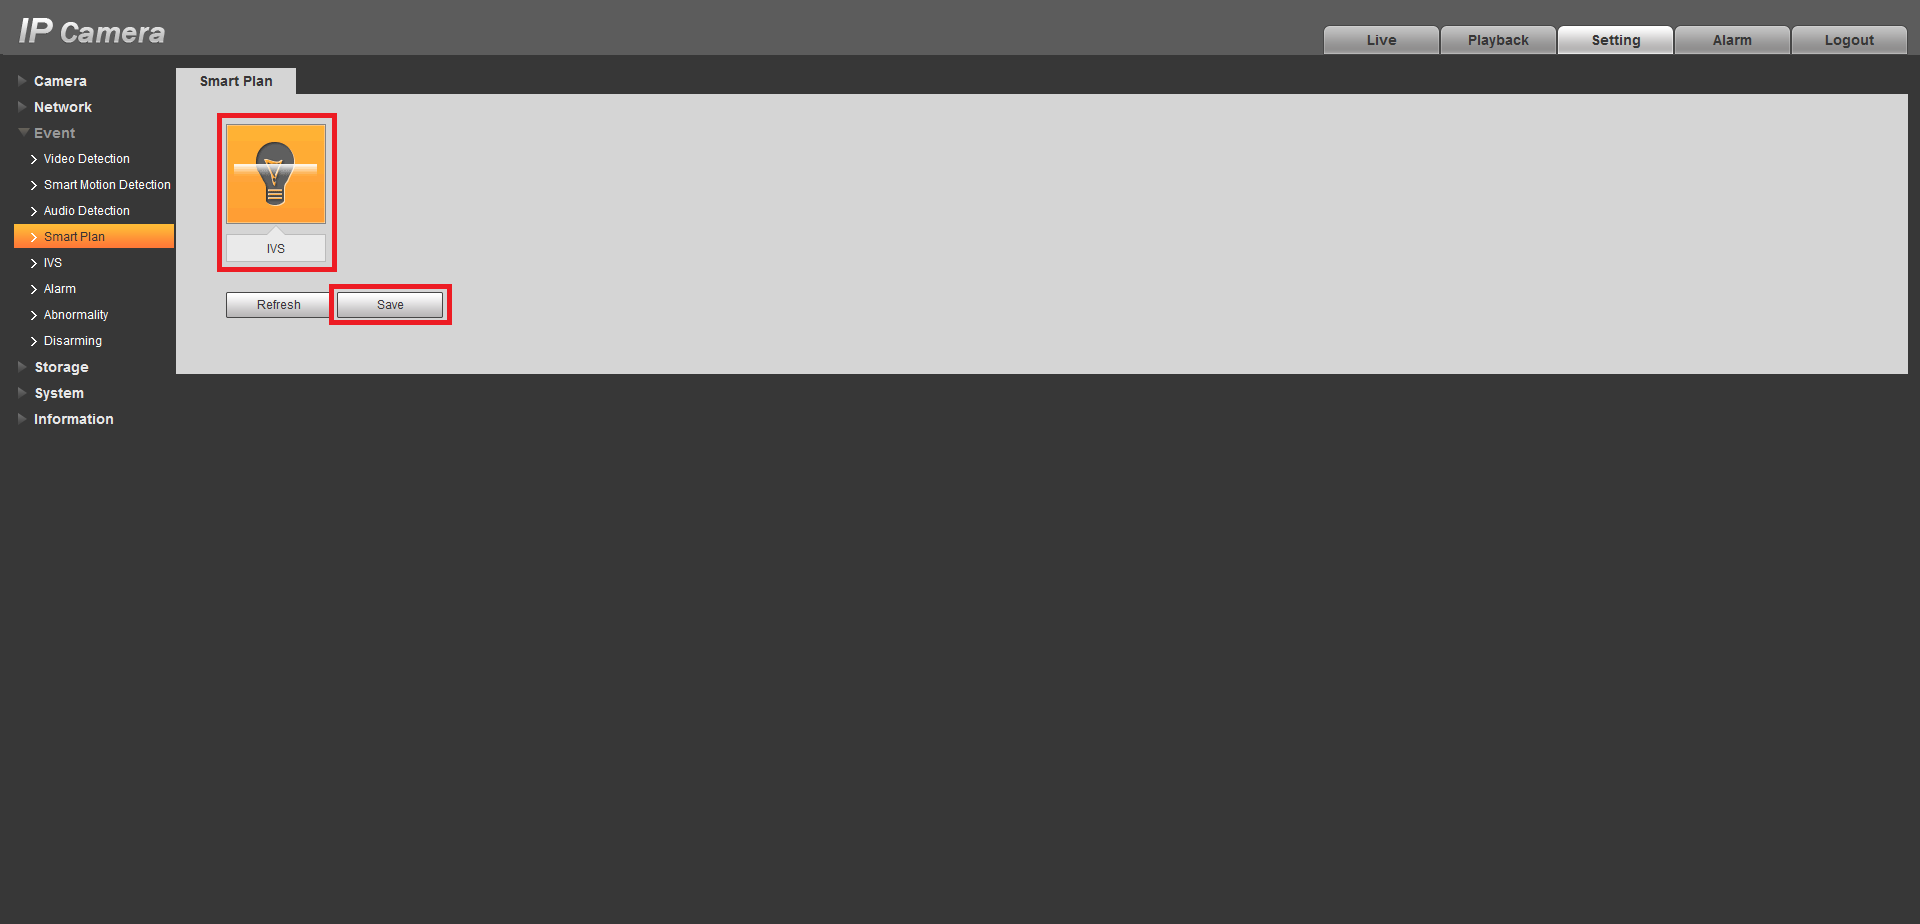
- Click the Light-bulb to enable smart plan, then click Save.
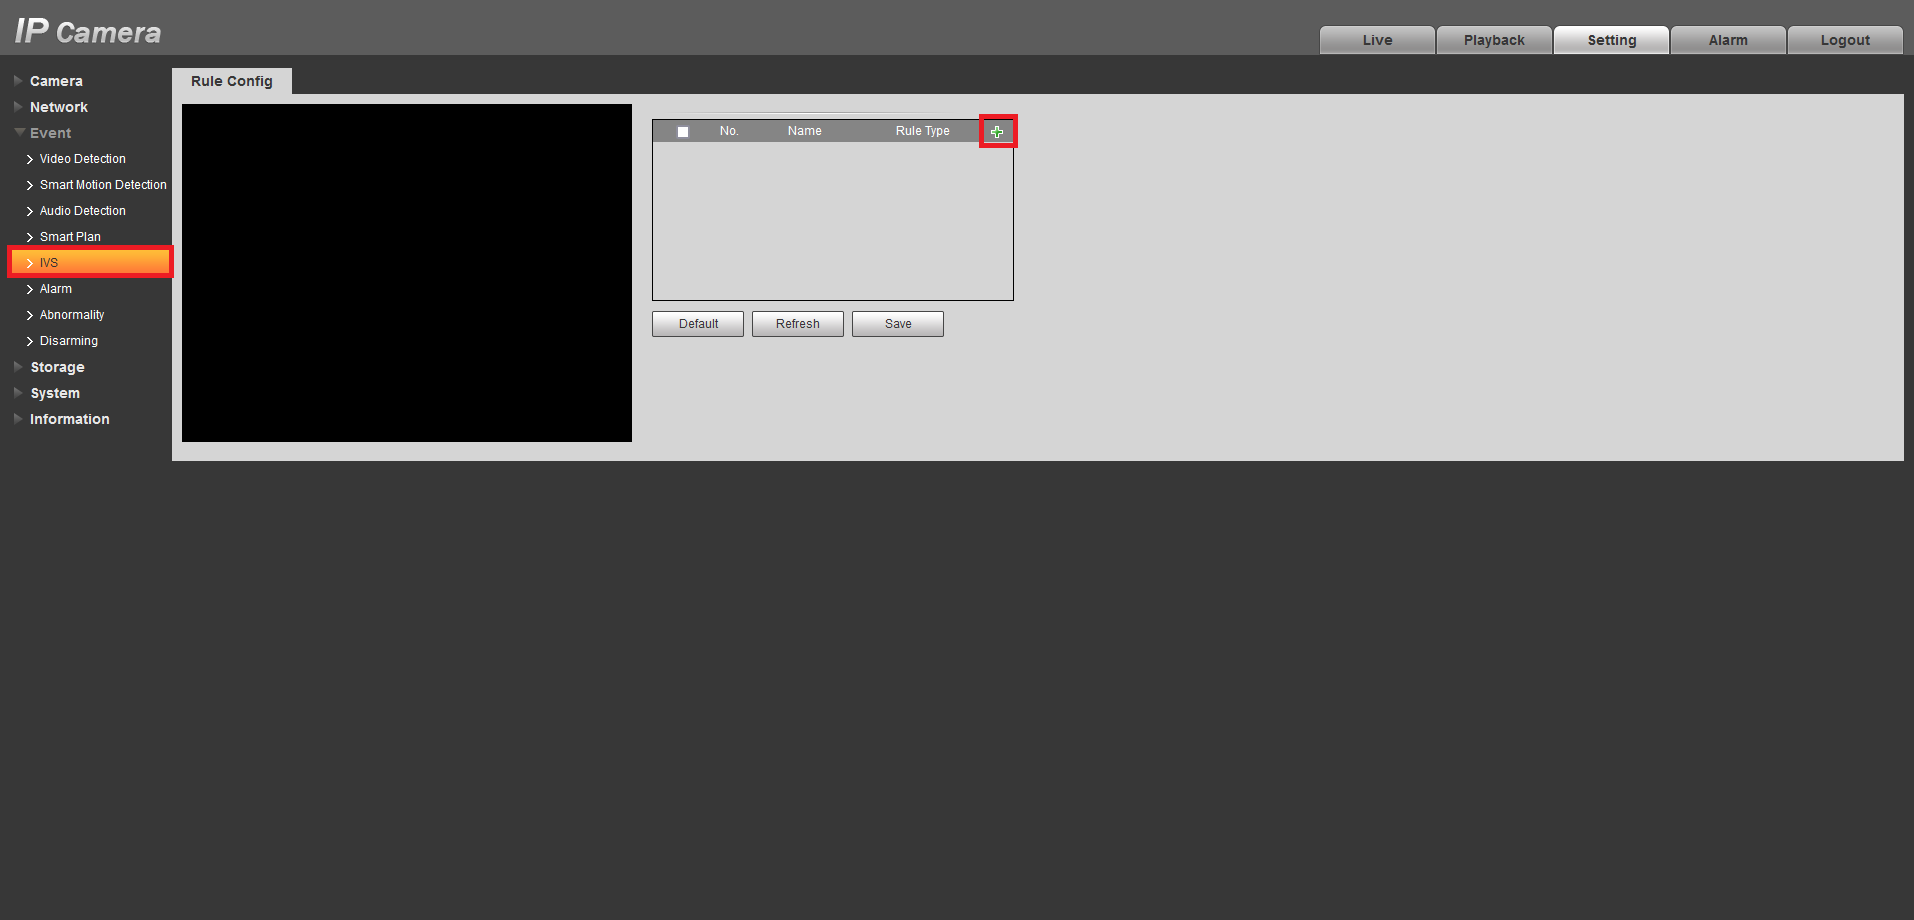
- Navigate to IVS, then press Add.
- Click Draw Rule, then Left-click on the camera image to start drawing the Tripwire line. Left-click again to finish the line (optionally, you can add additional corners to the line by continuing to Left-click). Right-click to finish placing the line.
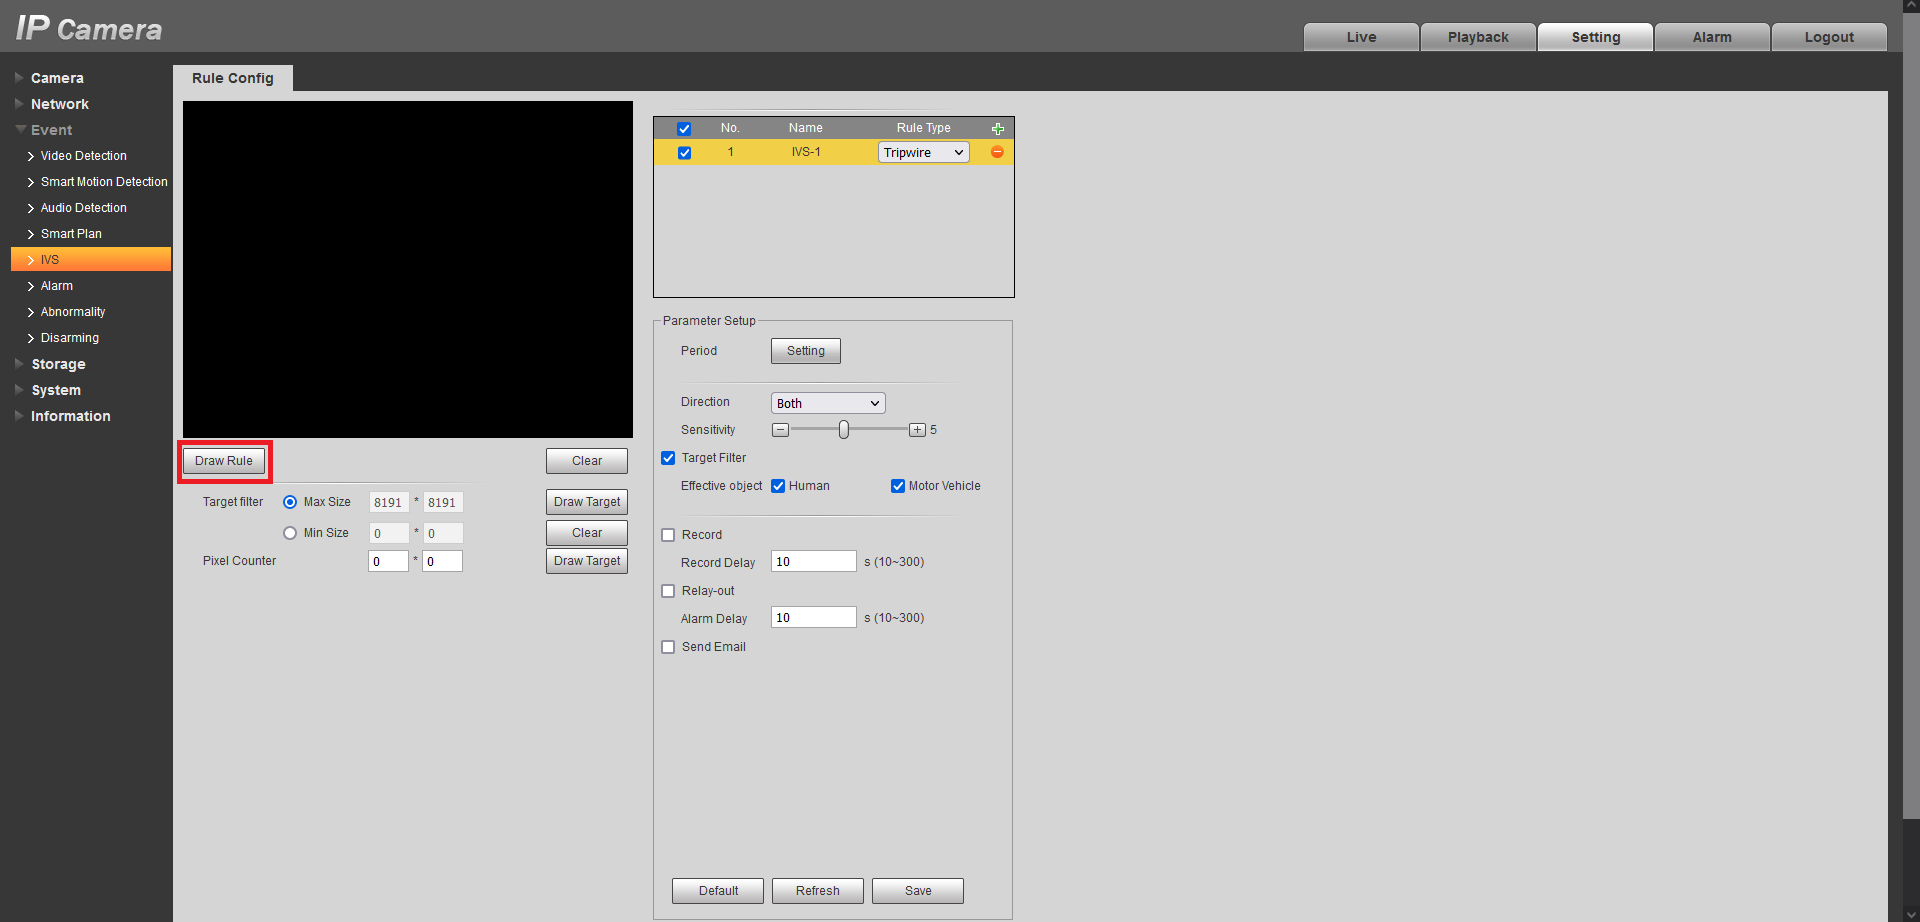
- In the Parameter Setup section there are several options you can modify depending on the desired outcome. The main setting to adjust is the Direction that the line must be passed from to activate the event, as indicated by the arrow going across the line (A to B, B to A, or both ways).
- (NOTE: This step requires an AI camera.) Target Filter enables Perimeter Protection when using Tripwire or Intrusion functions. This will recognize and differentiate between people, vehicles and other moving objects. Turn the option On to enable this function.
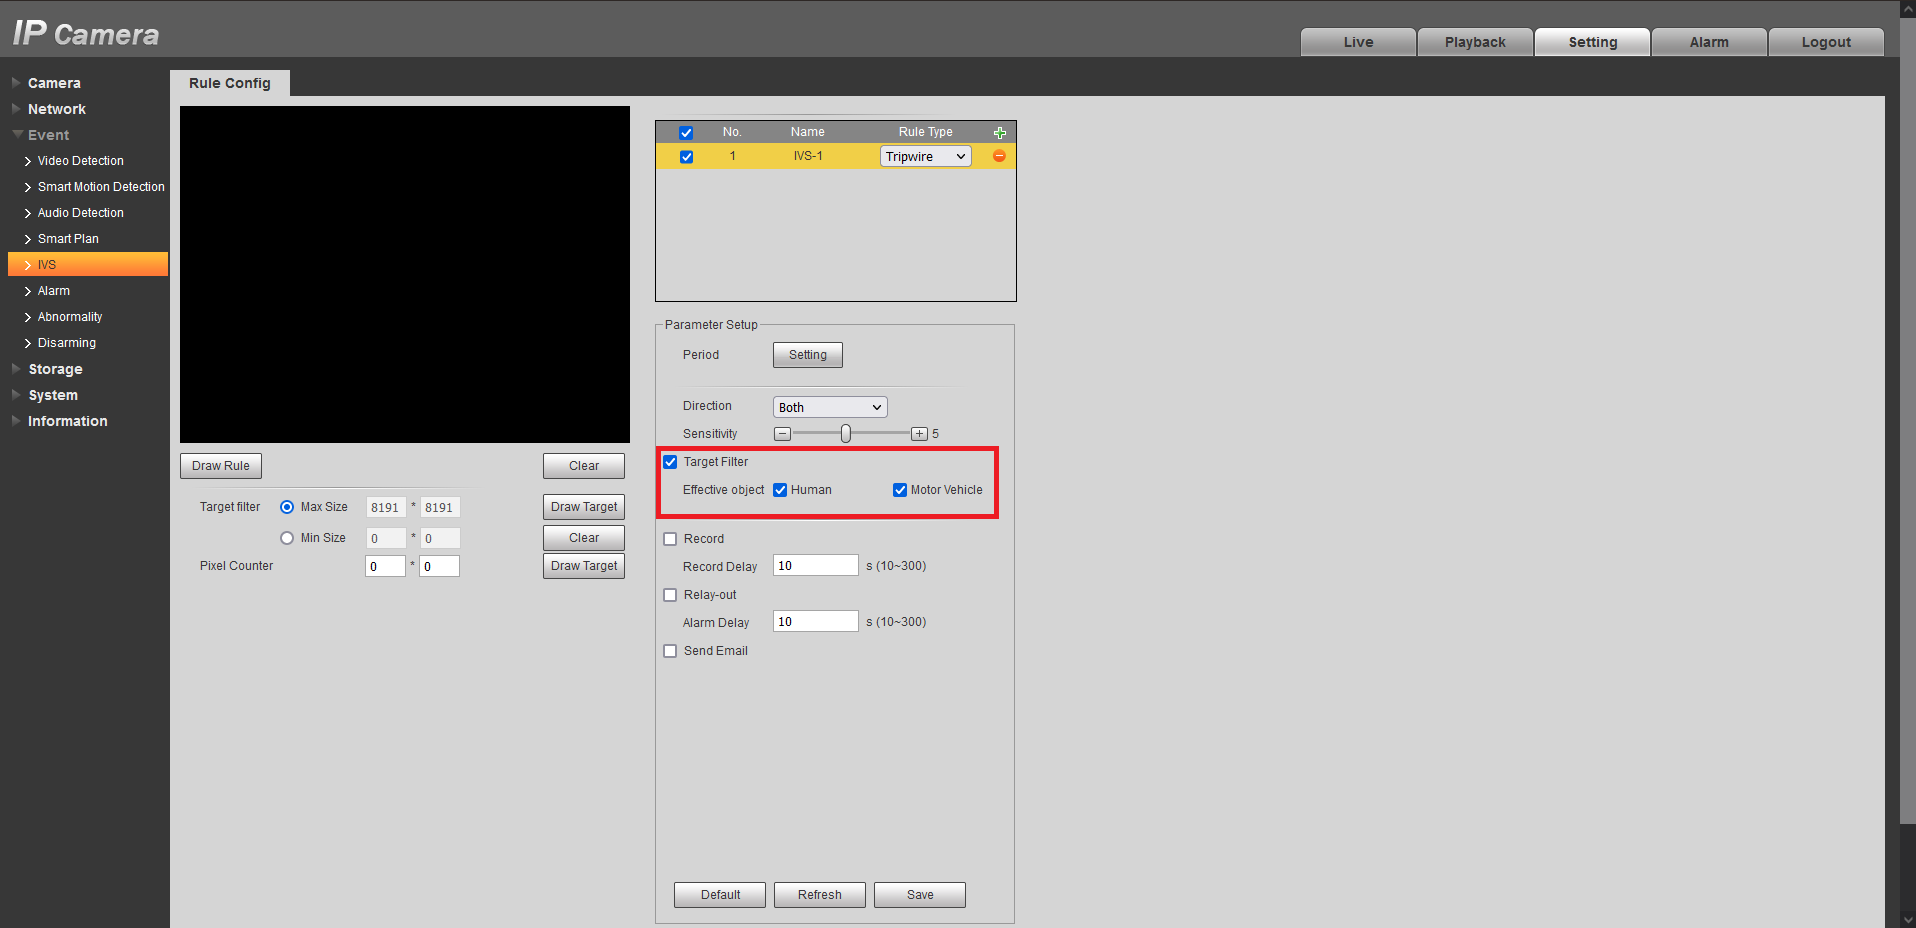
- Once the desired settings are configured, click Save.
Configuring Recording Schedules
You can define the recorded footage schedule in the Record menu, and the recorded image snapshot schedule in the Snapshot menu. By default, cameras are set to non-stop Regular recording (24 hours a day, 7 days a week). Motion detection recording is not set by default. Schedules can be set in hourly periods for individual days for each camera, with colour-coded options for:
- Regular/General for all regular recording.
- MD/Motion for recording on motion detection.
- Alarm for recording on triggering an integrated alarm.
- MD & Alarm for simultaneous alarm/motion detection recording.
- IVS for recording on triggering IVS (Intelligent Video Surveillance) such as a virtual tripwire.
- POS for point of sale transactions.
We recommend adding MD & Alarm & IVS to all channels to accompany your regular recording.
NVR - Configuring Motion Detection & Intelligent Recording
(Black GUI)
- Click the Channel drop down to select All cameras.
- In the days column, toggle the All check box to simultaneously set recording schedule parameters for every day of the week.
- Check the yellow MD check box to select motion detection recording.
- Click the schedule to fill in areas for motion detection recording. We recommend a 24/7 schedule to mirror the Regular recording schedule.
- Repeat steps 3 & 4 with the blue IVS check box to set intelligent recording (tripwire, face detection, etc).
- Click Apply to the confirm recording schedule changes and move on to Snapshot Schedule.

(Blue GUI)
- Click the Channel drop down to select All cameras.
- In the days column, toggle the All check box to simultaneously set recording schedule parameters for every day of the week.
- Check the yellow Motion check box to select motion detection recording.
- Click the schedule to fill in areas for motion detection recording. We recommend a 24/7 schedule to mirror the Regular recording schedule.
- Repeat steps 3 & 4 with the blue IVS check box to set intelligent recording (tripwire, face detection, etc).
- Click Apply to the confirm recording schedule changes and move on to Snapshot Schedule.
Delete
Standalone IP Camera - Configuring Motion Detection & Intelligent Recording
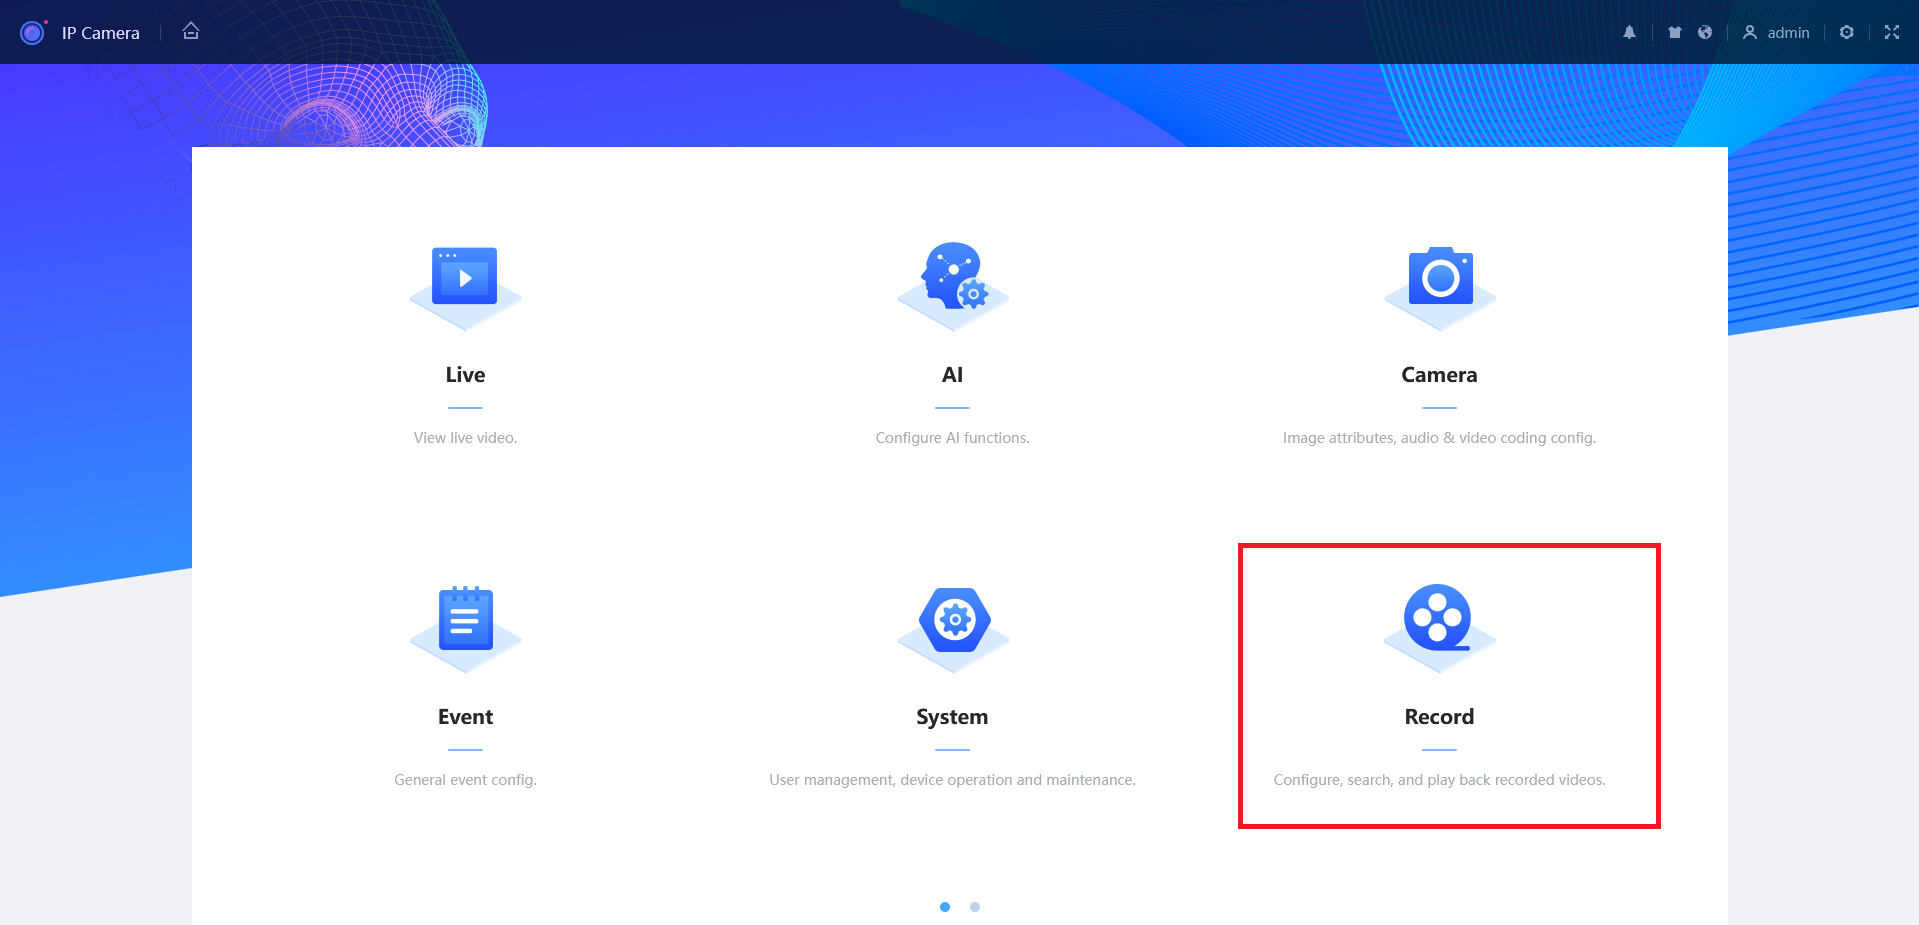
New GUI (White/Blue)
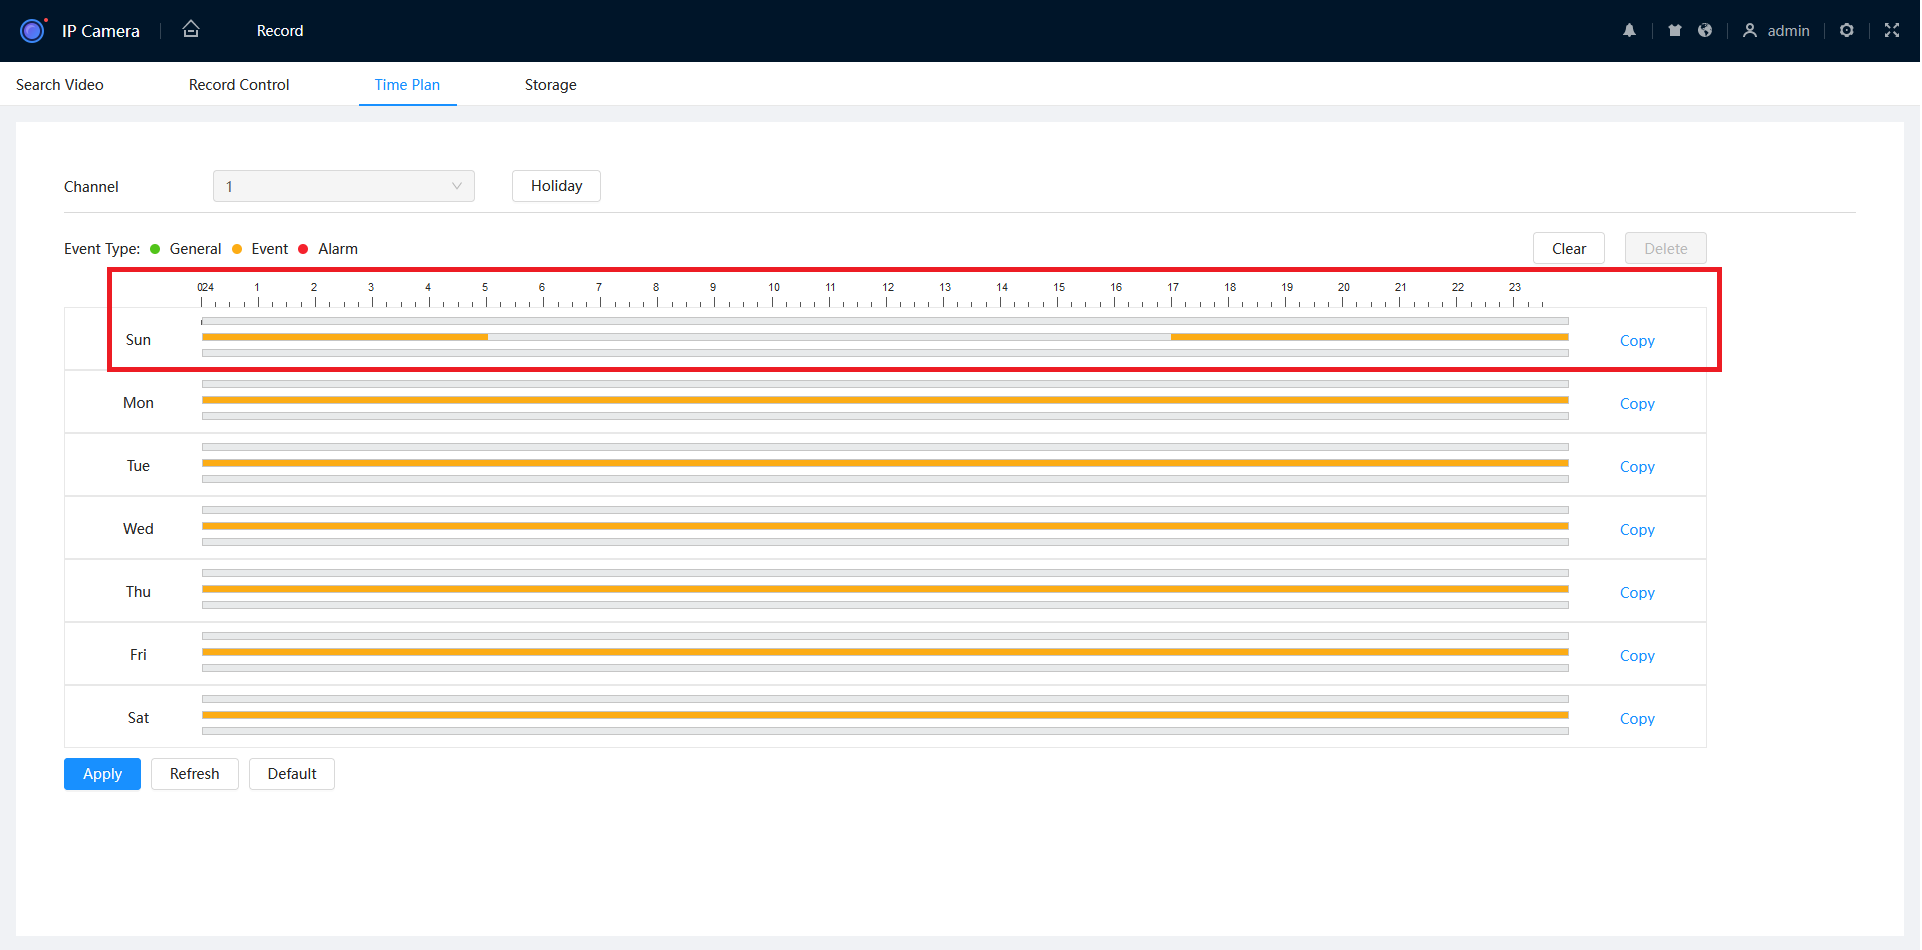
- From the Home page, select Record.
- Select Time Plan.
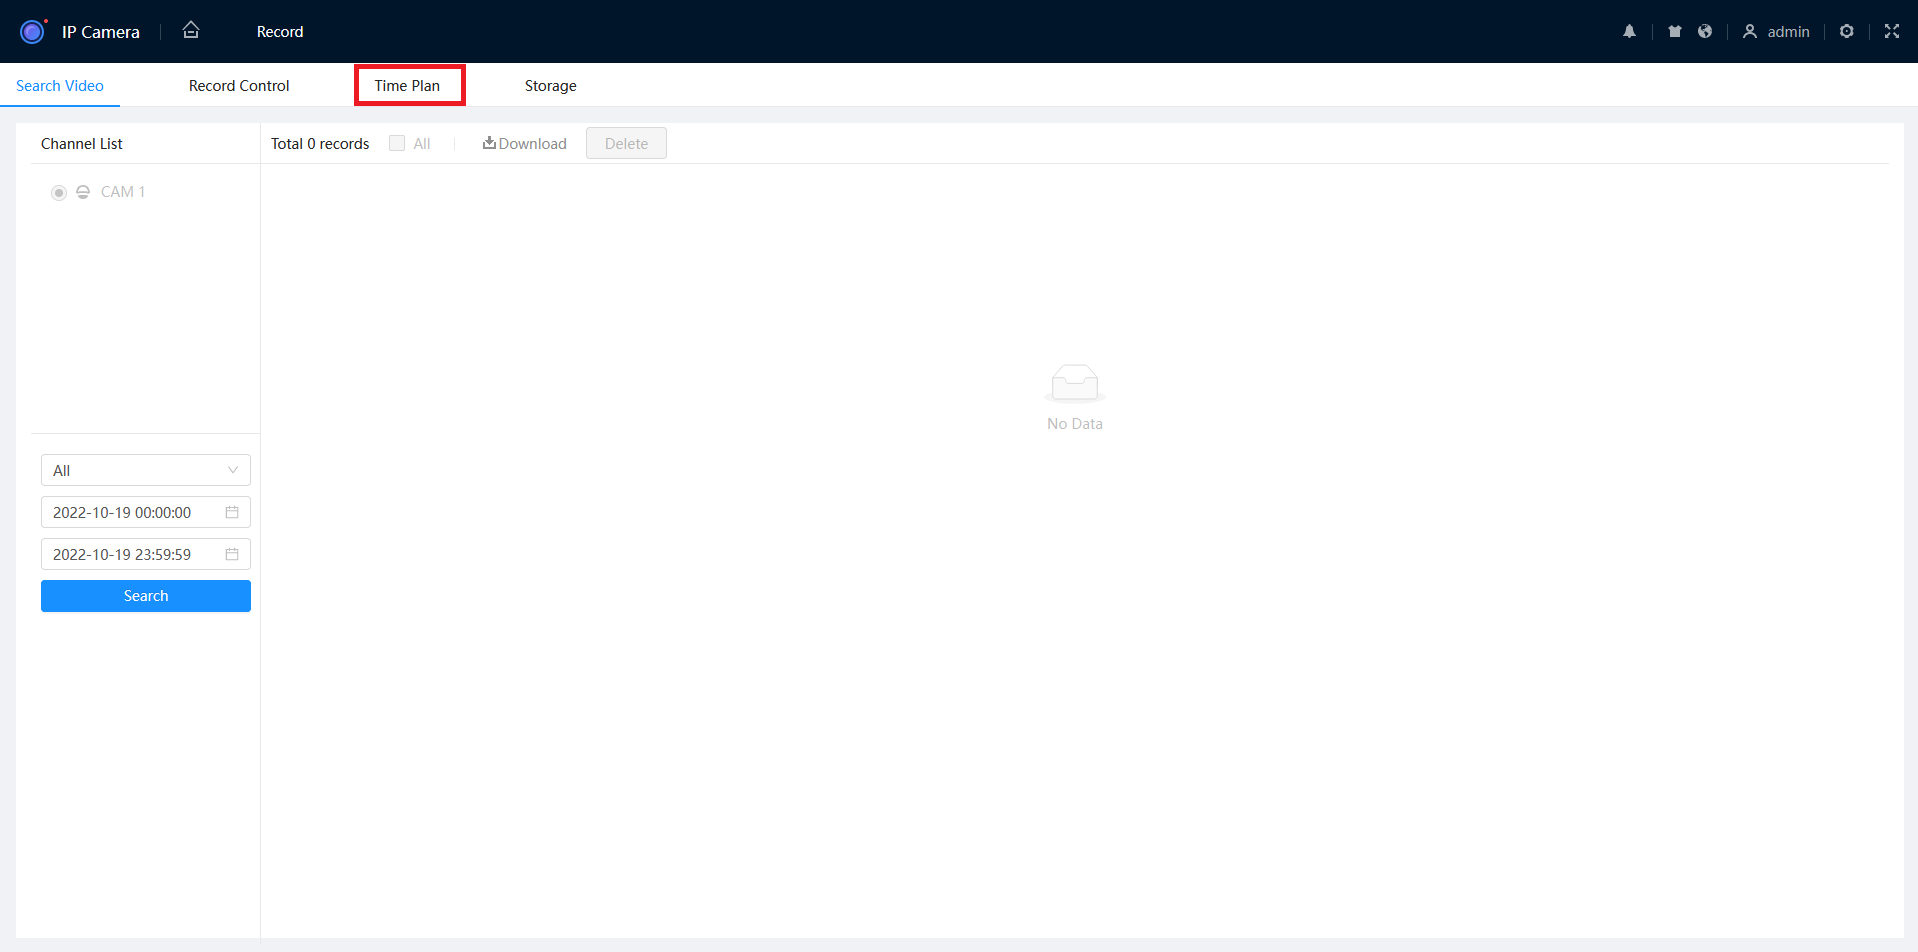
- Use the mouse to drag the Event line to the desired time. In this example we are setting Event recording to be active between 5pm and 5am.
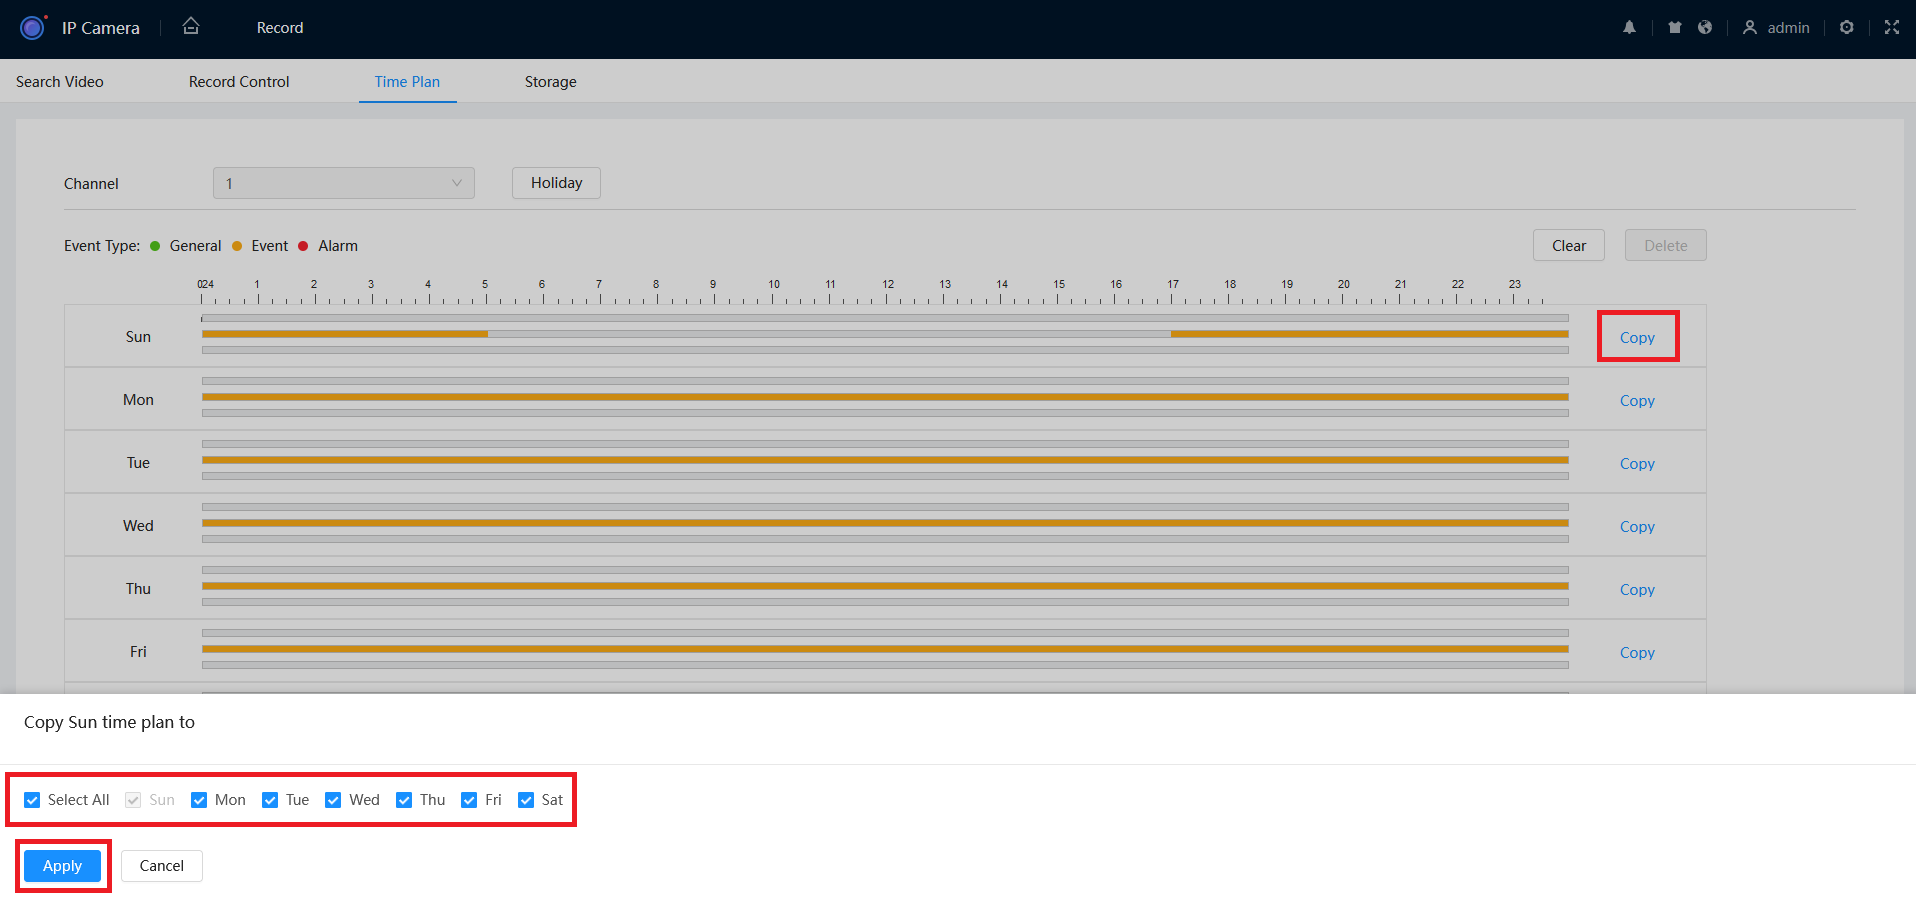
- Press Copy, then select each day that you want to apply this Time Plan too. Once selected, press Apply.
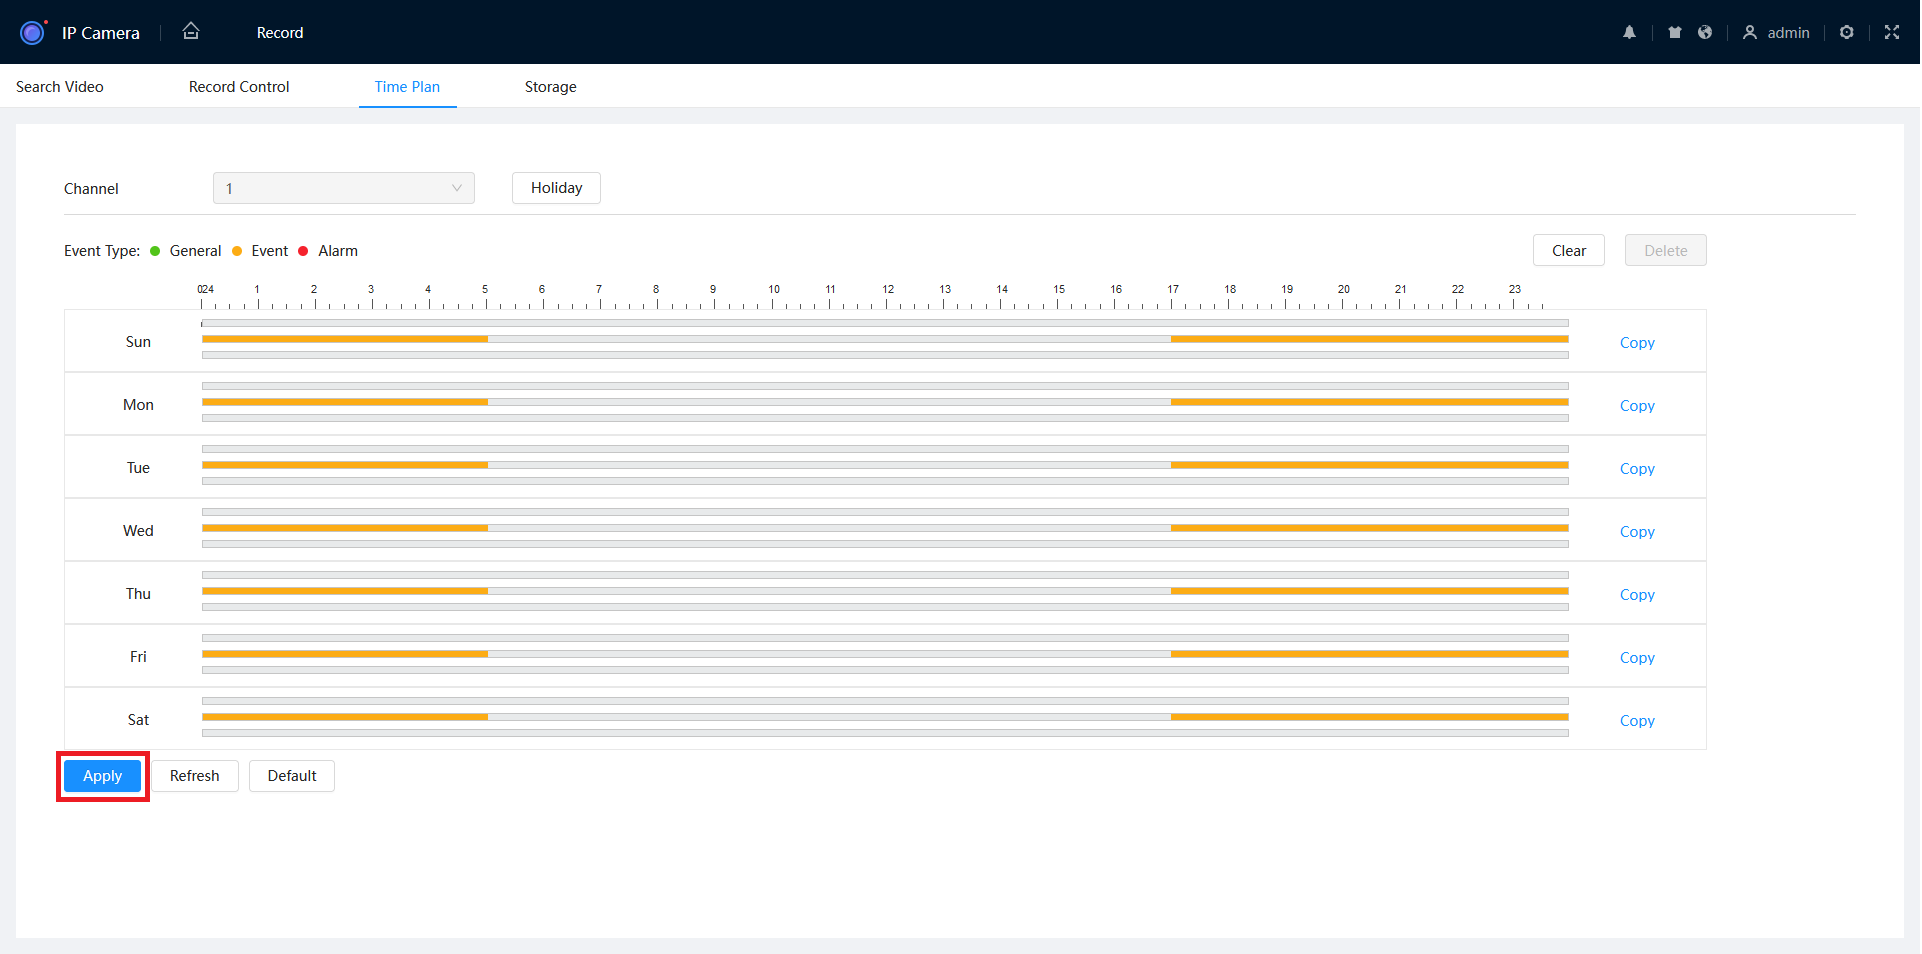
- Press Apply.
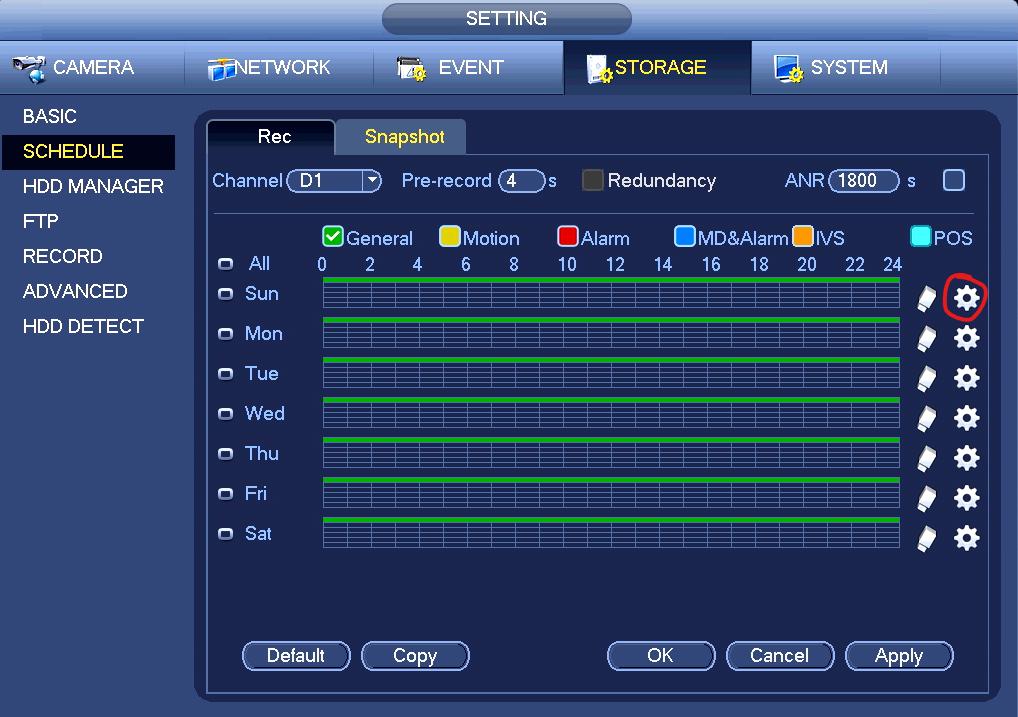
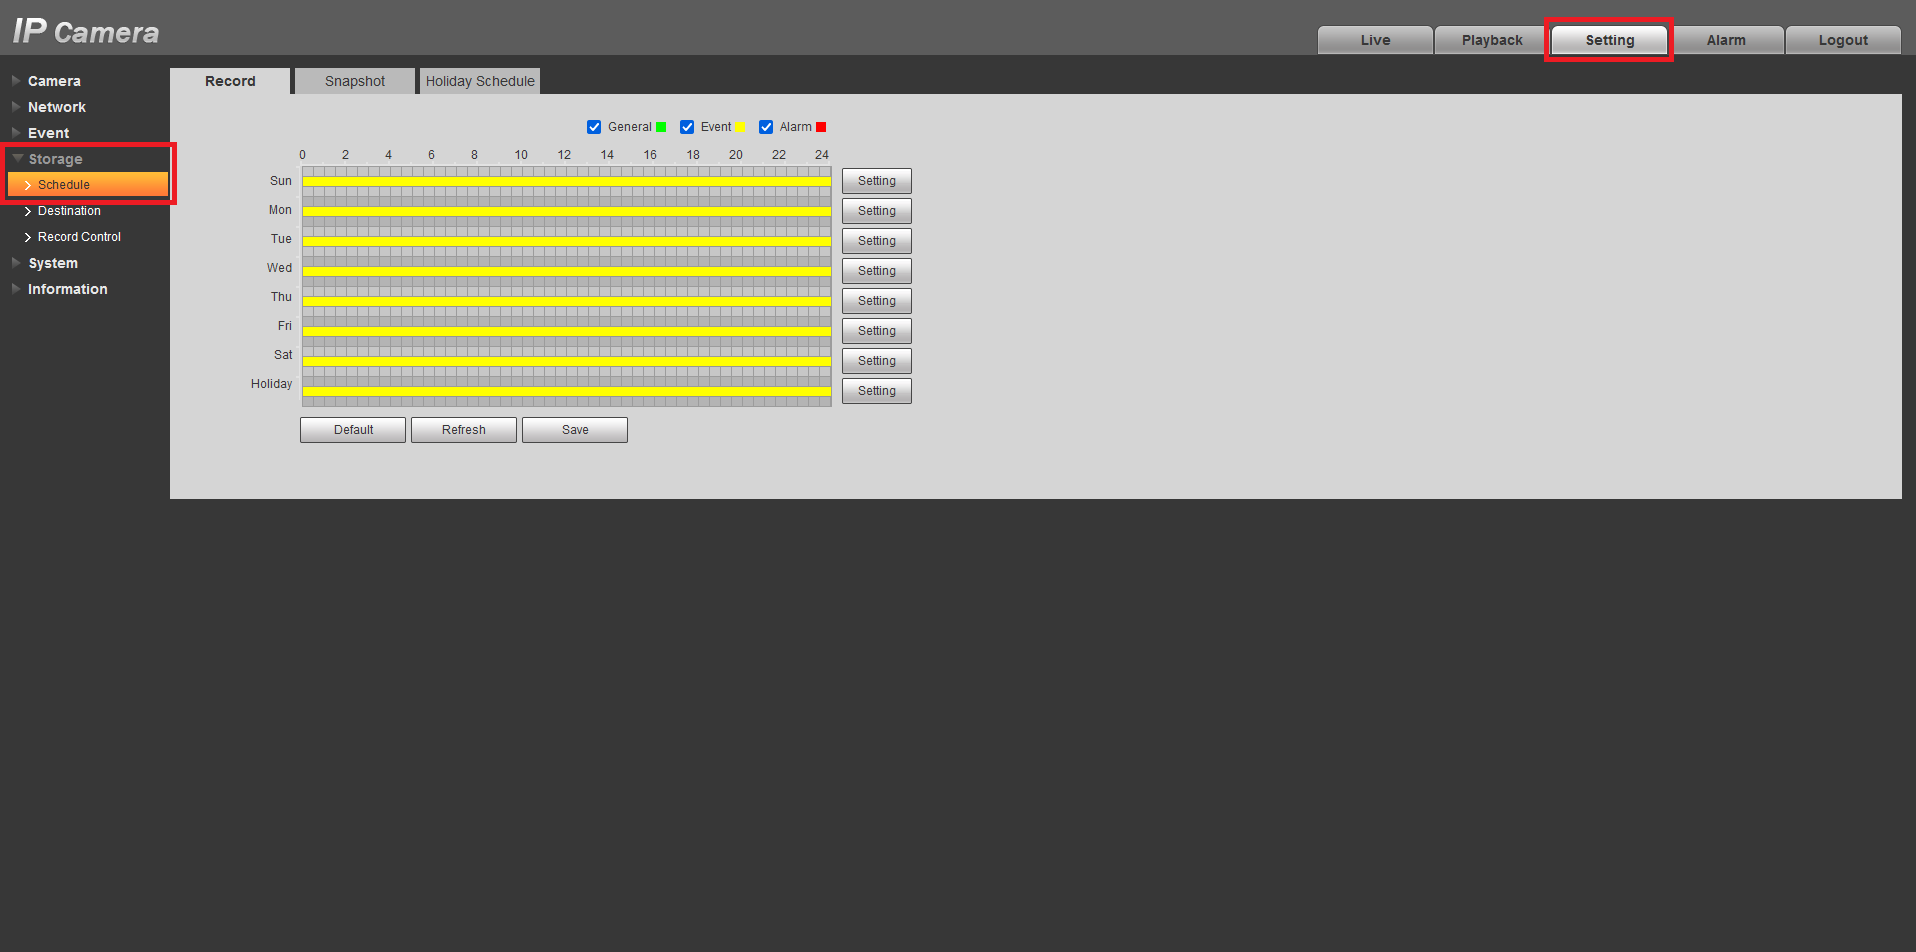
Old GUI (Grey)
- Navigate to Setting > Storage > Schedule.
- Select Setting, then select the days you want to modify.
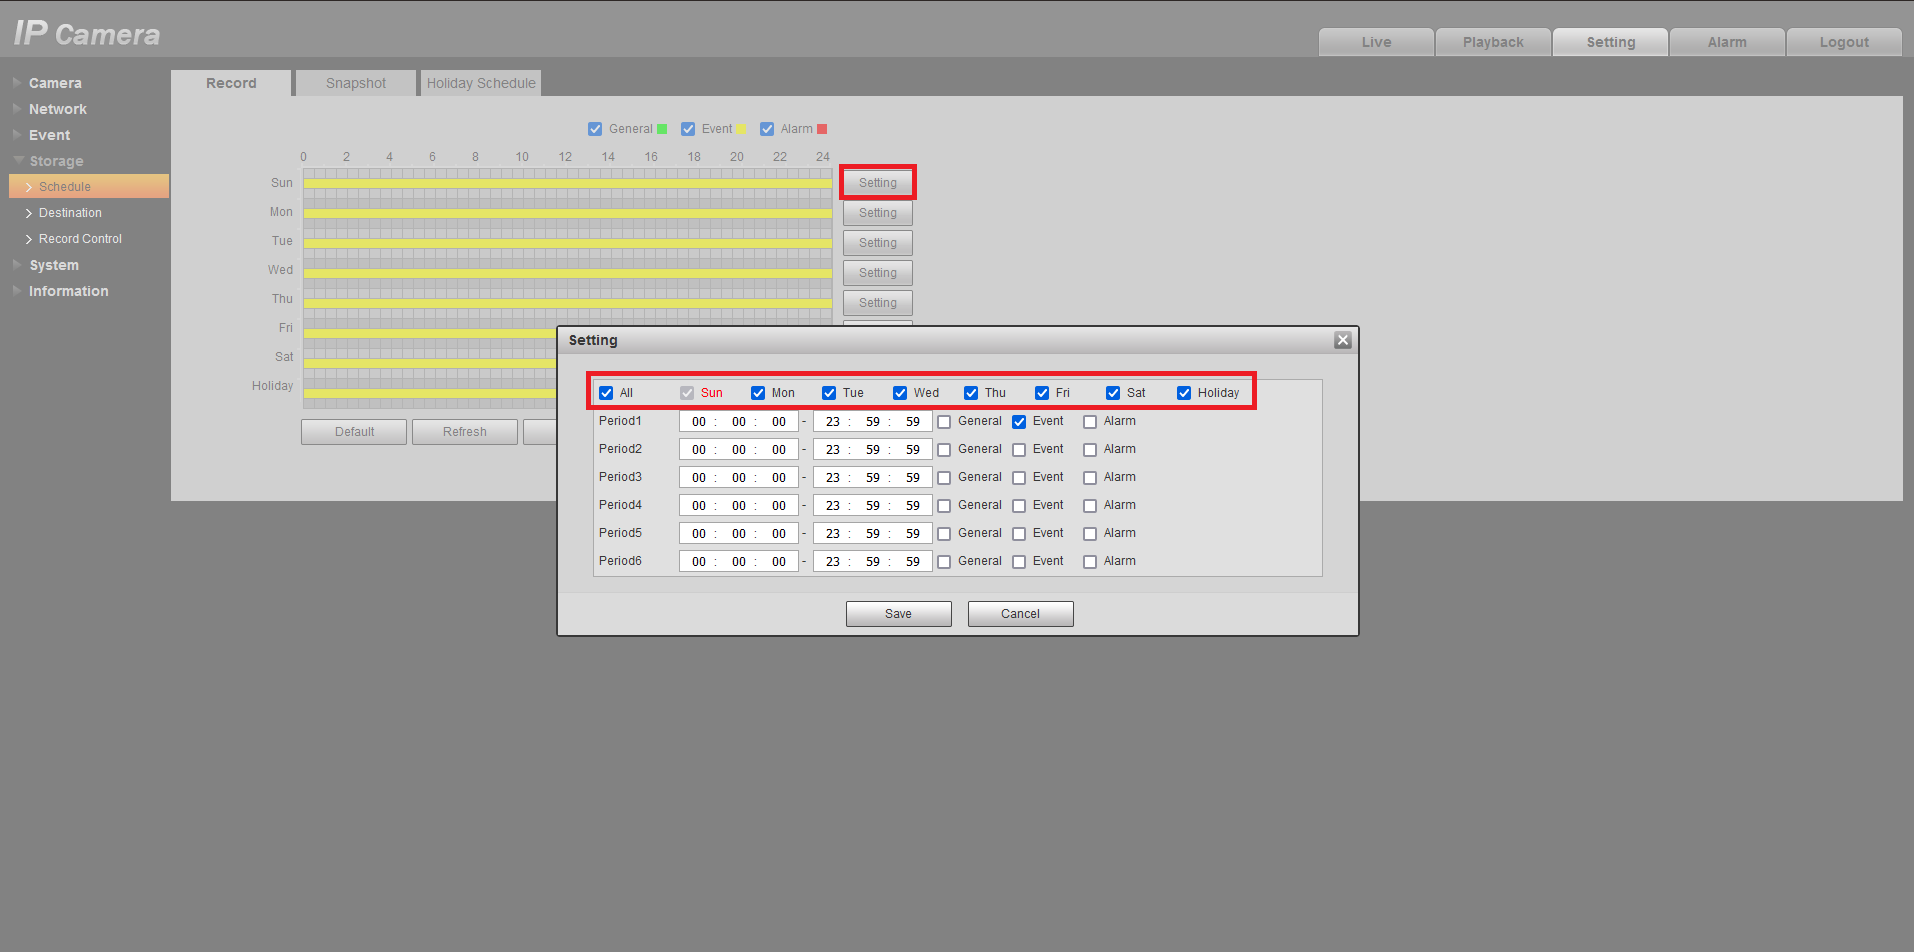
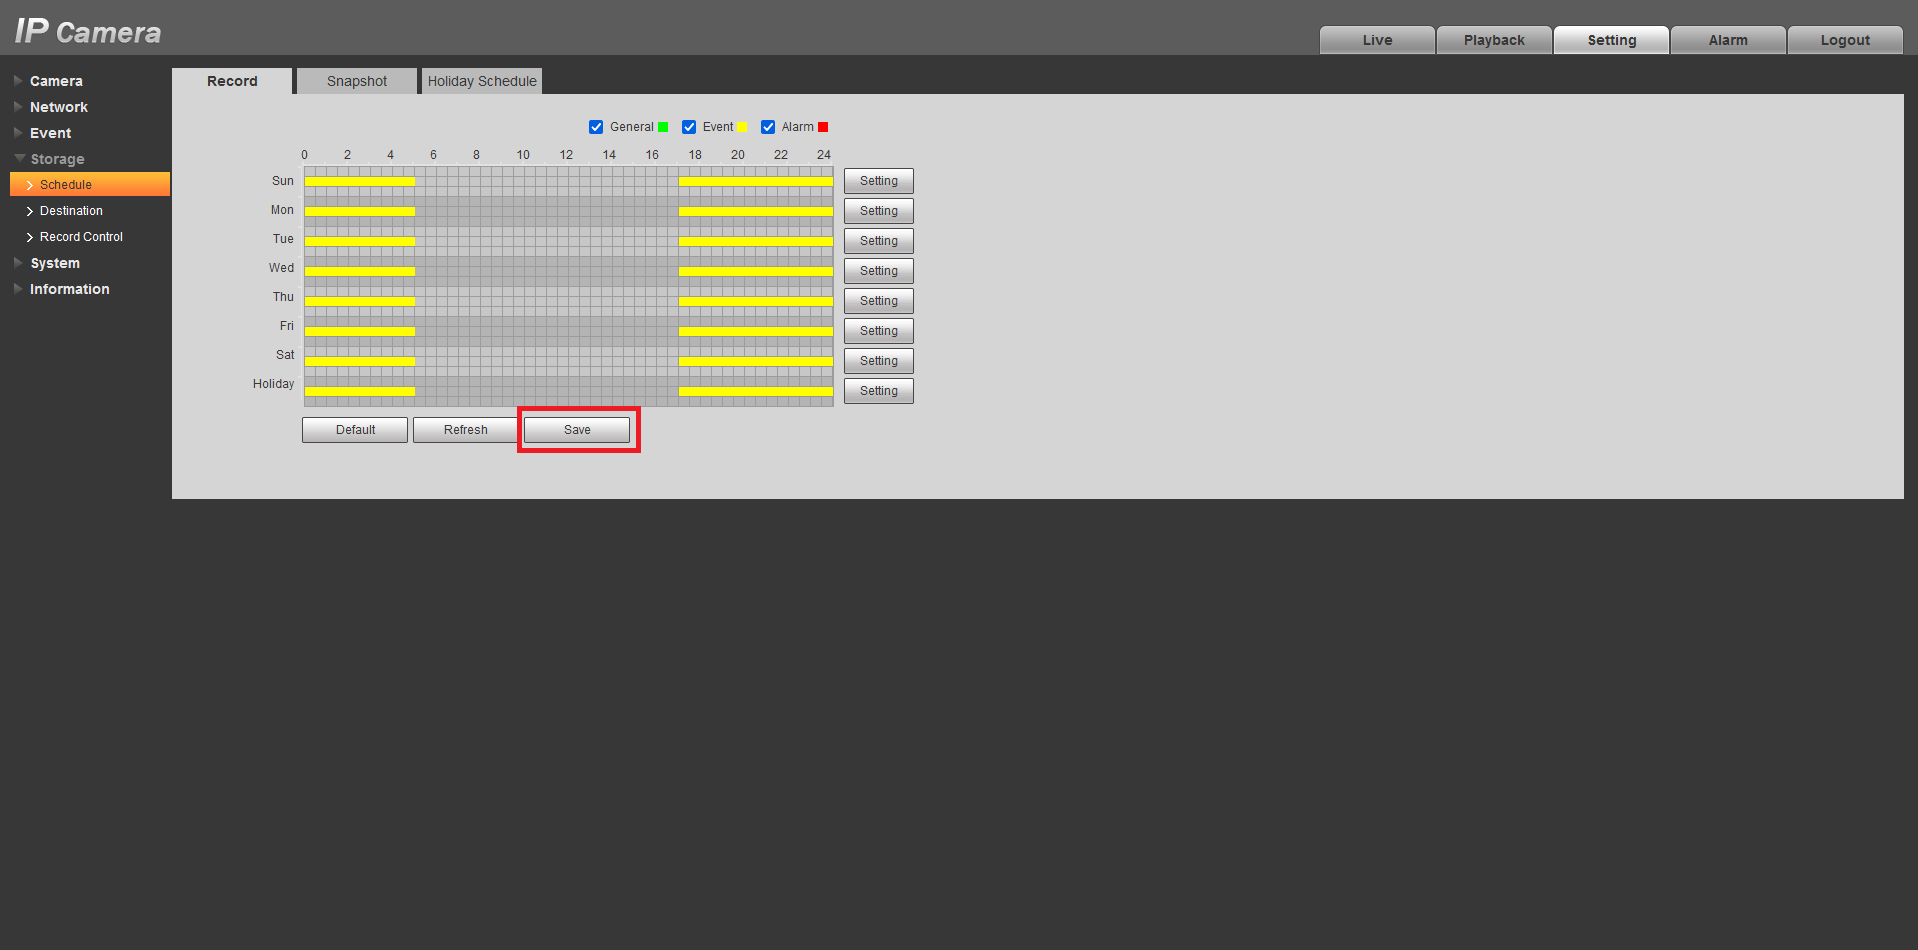
- Adjust the Period Settings to the desired time and recording type, then press Save. In this example we are setting Event recording to be active between 5pm and 5am.
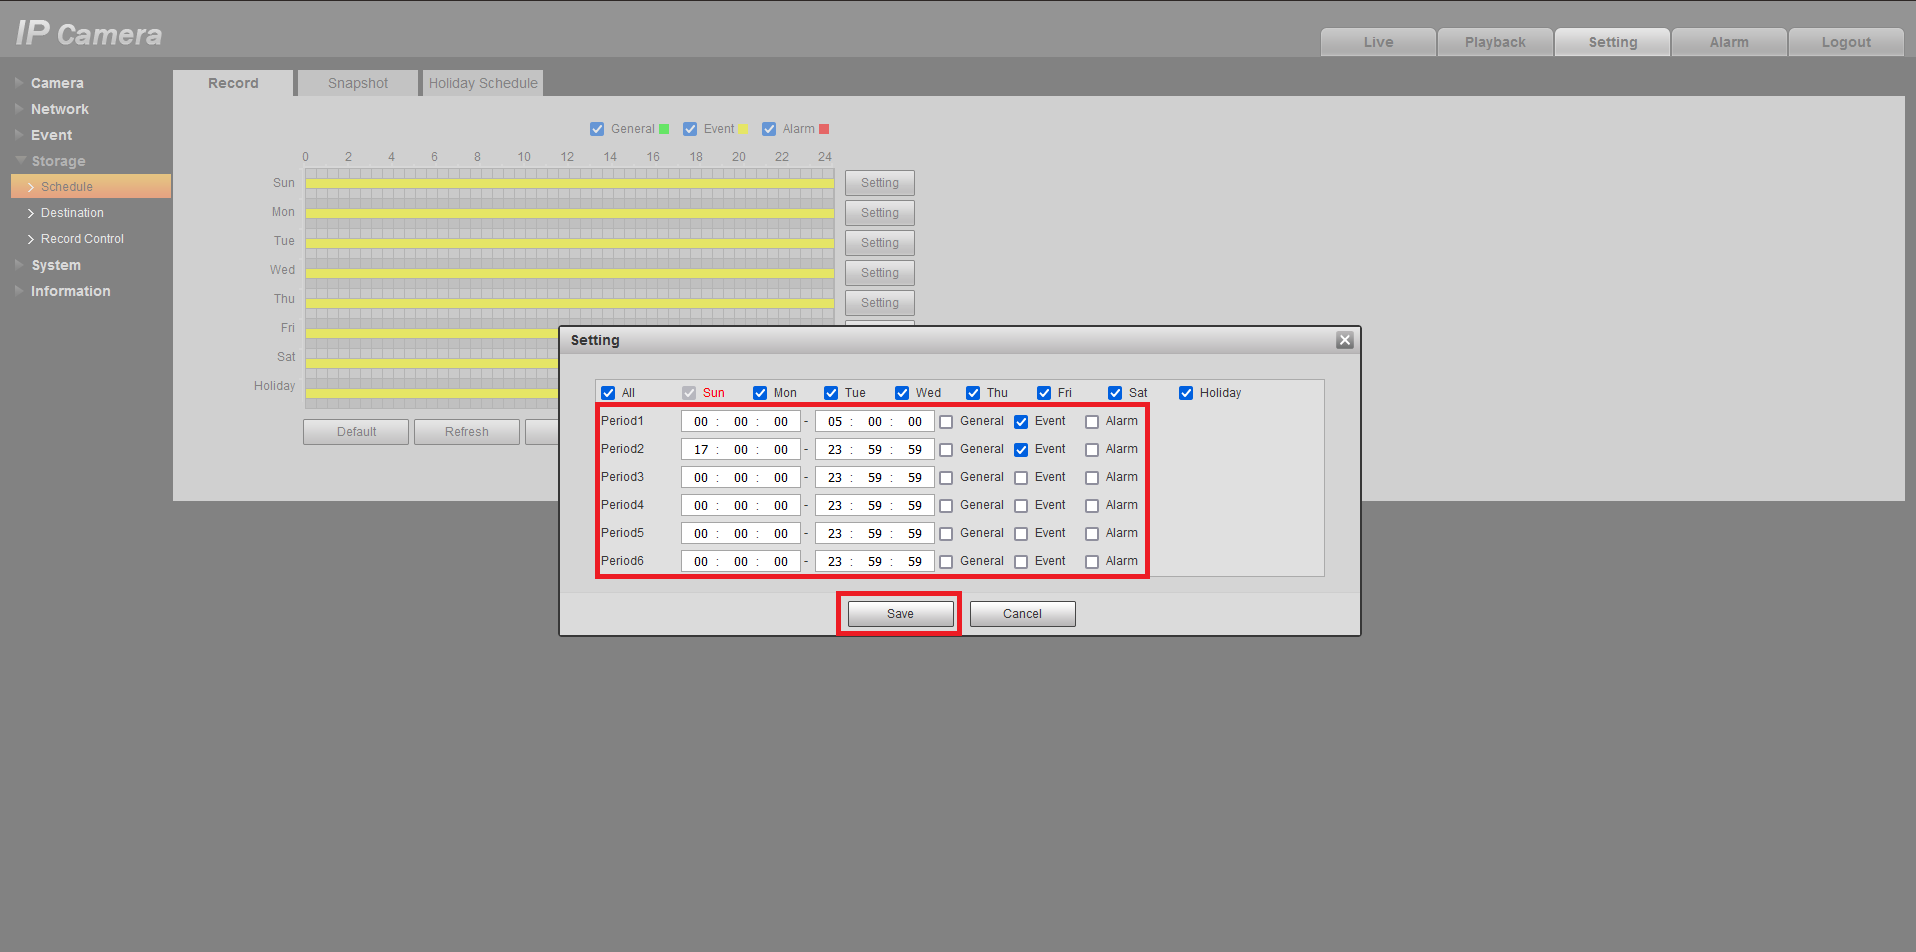
- Press Save.
Configuring Trigger Actions
Event Trigger Actions Explained

-
Schedule: Sets the time when the rule is active and a trigger will occur.

Multiple IVS Rules on Single Camera
If creating multiple IVS rules on a Single camera that are scheduled for different times. Those Schedules must be configured in the Cameras Web interface.
- Anti Dither: The amount of time before an event will get triggered again.
-
Alarm-Out Port: Set if the Event will trigger the local alarm out put on the recorder/Camera

- Post-Alarm: The time the Alarm-out port will be Active for.
-
Show Message: Displays a Message on top of the live view that the Event has Occurred.

- Send Email: Will send the email with the event details. Requires configuration.
- Report Alarm: Sends Trigger Details to the Alarm Centre/Third party monitoring. Requires Configuration.
- Record Channel: Sets if the event will be recorded. (AI search, coloured on playback timeline).
- Post Record: Sets recording time after event occurred.
-
PTZ Linkage: Allows calling PTZ functions from other channels PTZ Linkage

- Tour: Starts a tour of selected channels.
- Picture Storage: Set if the event will take a snapshot of the event.
- Buzzer: Set if the NVR will Beep and event triggers.
- Log: If the Event will be Logged.
- Alarm Tone: Plays a designated .wav file in response to an event trigger. This can be imported via a USB flash drive to the NVR.
- Camera Audio: Selects to play Audio from active deterrent Camera.
-
Remote Warning Light: Select to set off Active deterrent lights.
