Whether you're replacing your router, moving to a new home, or setting up your network for the first time, this guide will walk you through the steps to enable remote access for your security system.
If you have Many Devices on the Same Network Range, It may be easier to change your Router IP.
See This Guide Here On changing Router IP Range
On some Networks, such as a business the P2P protocol may be blocked, in this case contact your IT department about solutions such as Port Forwarding.
Connection Diagram
When wanting to connect your device to a network, ensure that the Lan connection is in the correct port and that there is a green light that is illuminated and an orange light that is flashing.
Correct Lan Connection

NVR Connected to router.

NVR Connected to Switch 
Blue Interface
Change Network Settings
- Open Main Menu and select Network under the setting heading.

2. Enter your network details, Alternatively if you do not know your network details you can set DHCP to automatically get network information from the router. Select Apply.

DCHP Error
If you Encounter an Error that switch cannot be in the same Range, you must update the NVR POE switch to be in a different range. Change your Switch IP to 10.2.2.1 and Apply
Main Menu > Network > Switch.

P2P Setting
- Open Main Menu Select Network under the setting heading.
2. Select P2P Setting, Select Enable and Apply, it may take a minute or two for the status to show Connect Success.

Black Interface
Change Network Settings
- Open Main Menu And Select Network

2. Select TCP/IP and Select Modify NIC1 from the table above

3. Enter your network details, you can test the IP to see if it is free, Alternatively if you do not know your network details you can set DHCP to automatically get network information from the router. Select Ok and Apply.

DHCP Error
If you Encounter an Error that switch cannot be in the same Range, you must update the NVR POE switch to be in a different range. Change your Switch IP to 10.2.2.1 and Apply
Main Menu > Network > Switch.

P2P Setting
- On Main Select Network.
2. Select P2P, Select Enable and Apply, it may take a minute or two for the status to show online.

Remote Viewing (DMSS)
Adding Devices To DMSS
Notifications on DMSS
 |
DMSS is a remote surveillance app that can be used to access your security products remotely. You can configure a whole range of push notifications in the DMSS app.
|
Enabling Notifications On DMSS
1. On the Home Page select the three dots of the device.

2. Then Select Device Details

3. Select Message

4. Select Notification and turn it for its Blue

5. Select Receive Messages and Send Notifications if you want DMSS to log and send Notifications.
Then Select Message Type

6. Select Notification type the you want to receive.
Note you will only receive notifications types that already enabled on your device ( e.g. Intrusion/tripwire is set up and enabled in IVS)

7. Select which Channels you want to get notifications from.

8. Back out to the home screen and select device details again. Ensure that notifications on there is also enabled.

9. An example of a Notification

Notification on Intercom
While adding Intercoms to the DMSS app,
The Intercom unit should be added under a DMSS account.
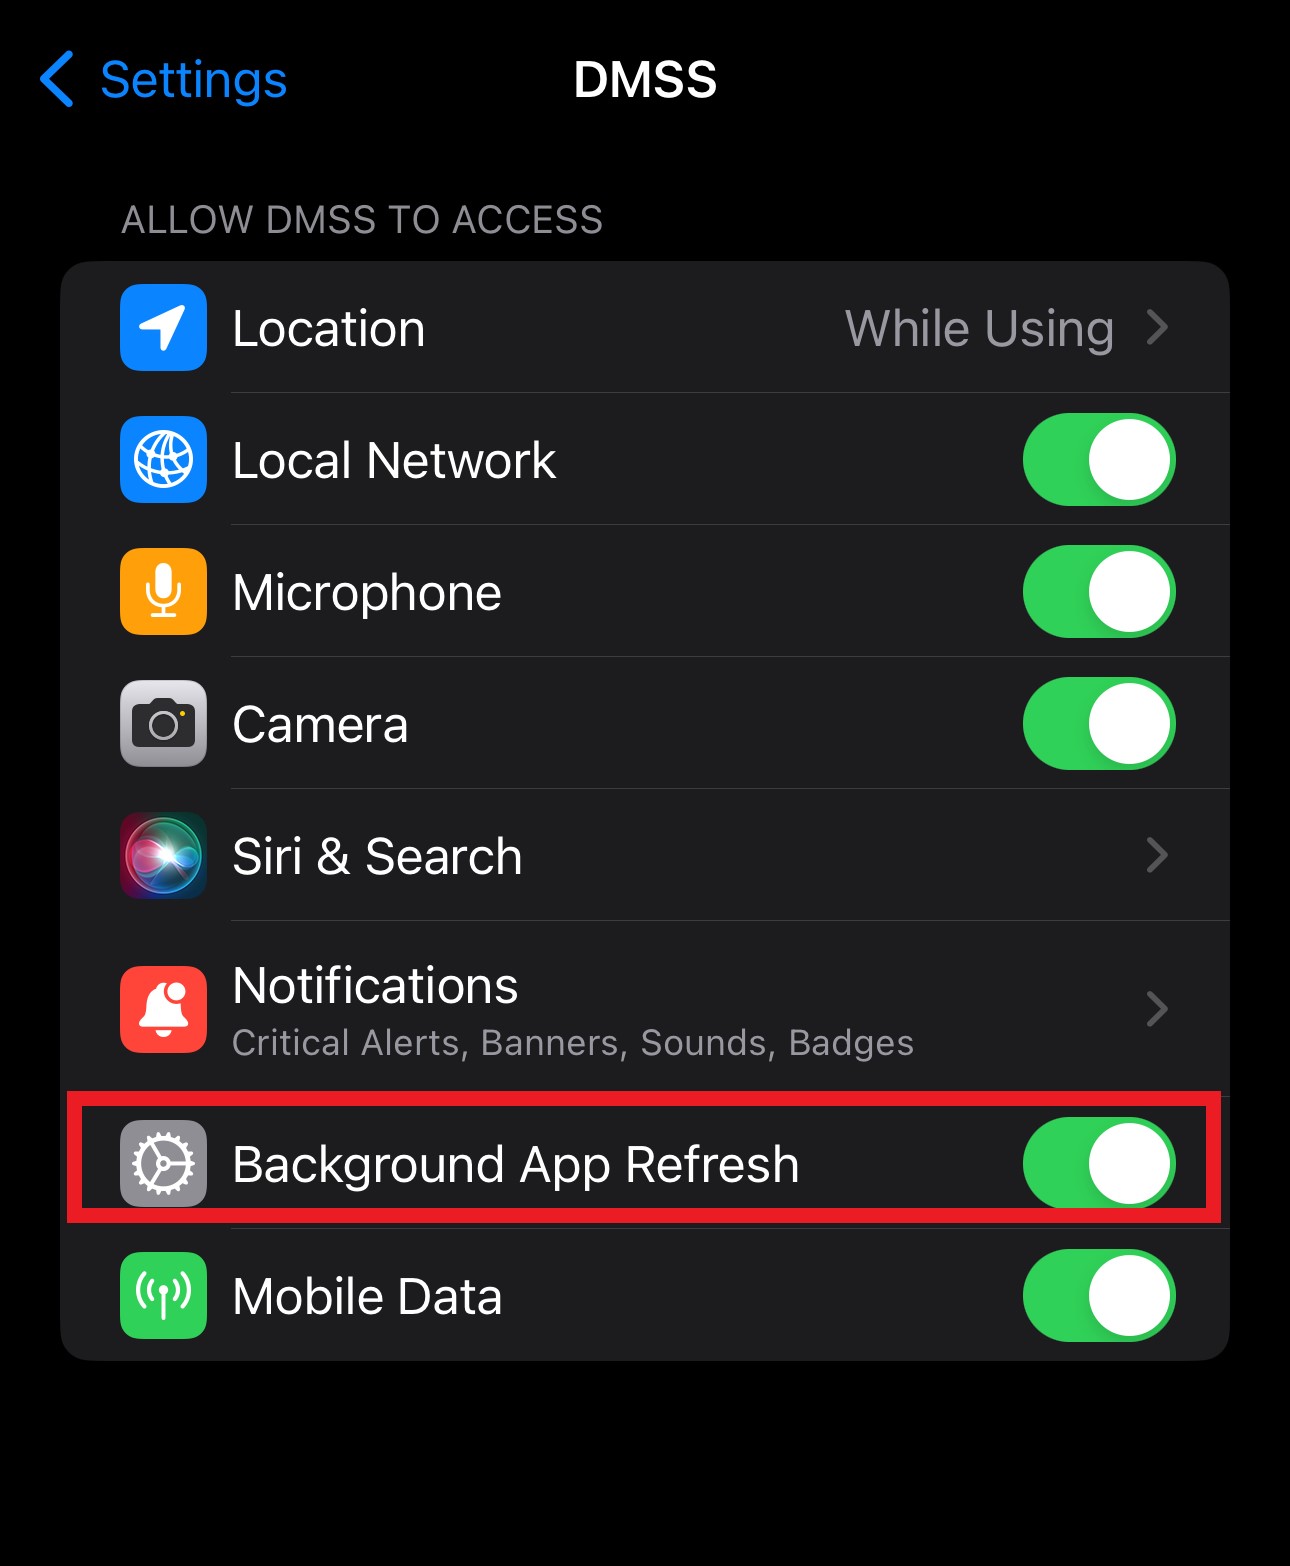
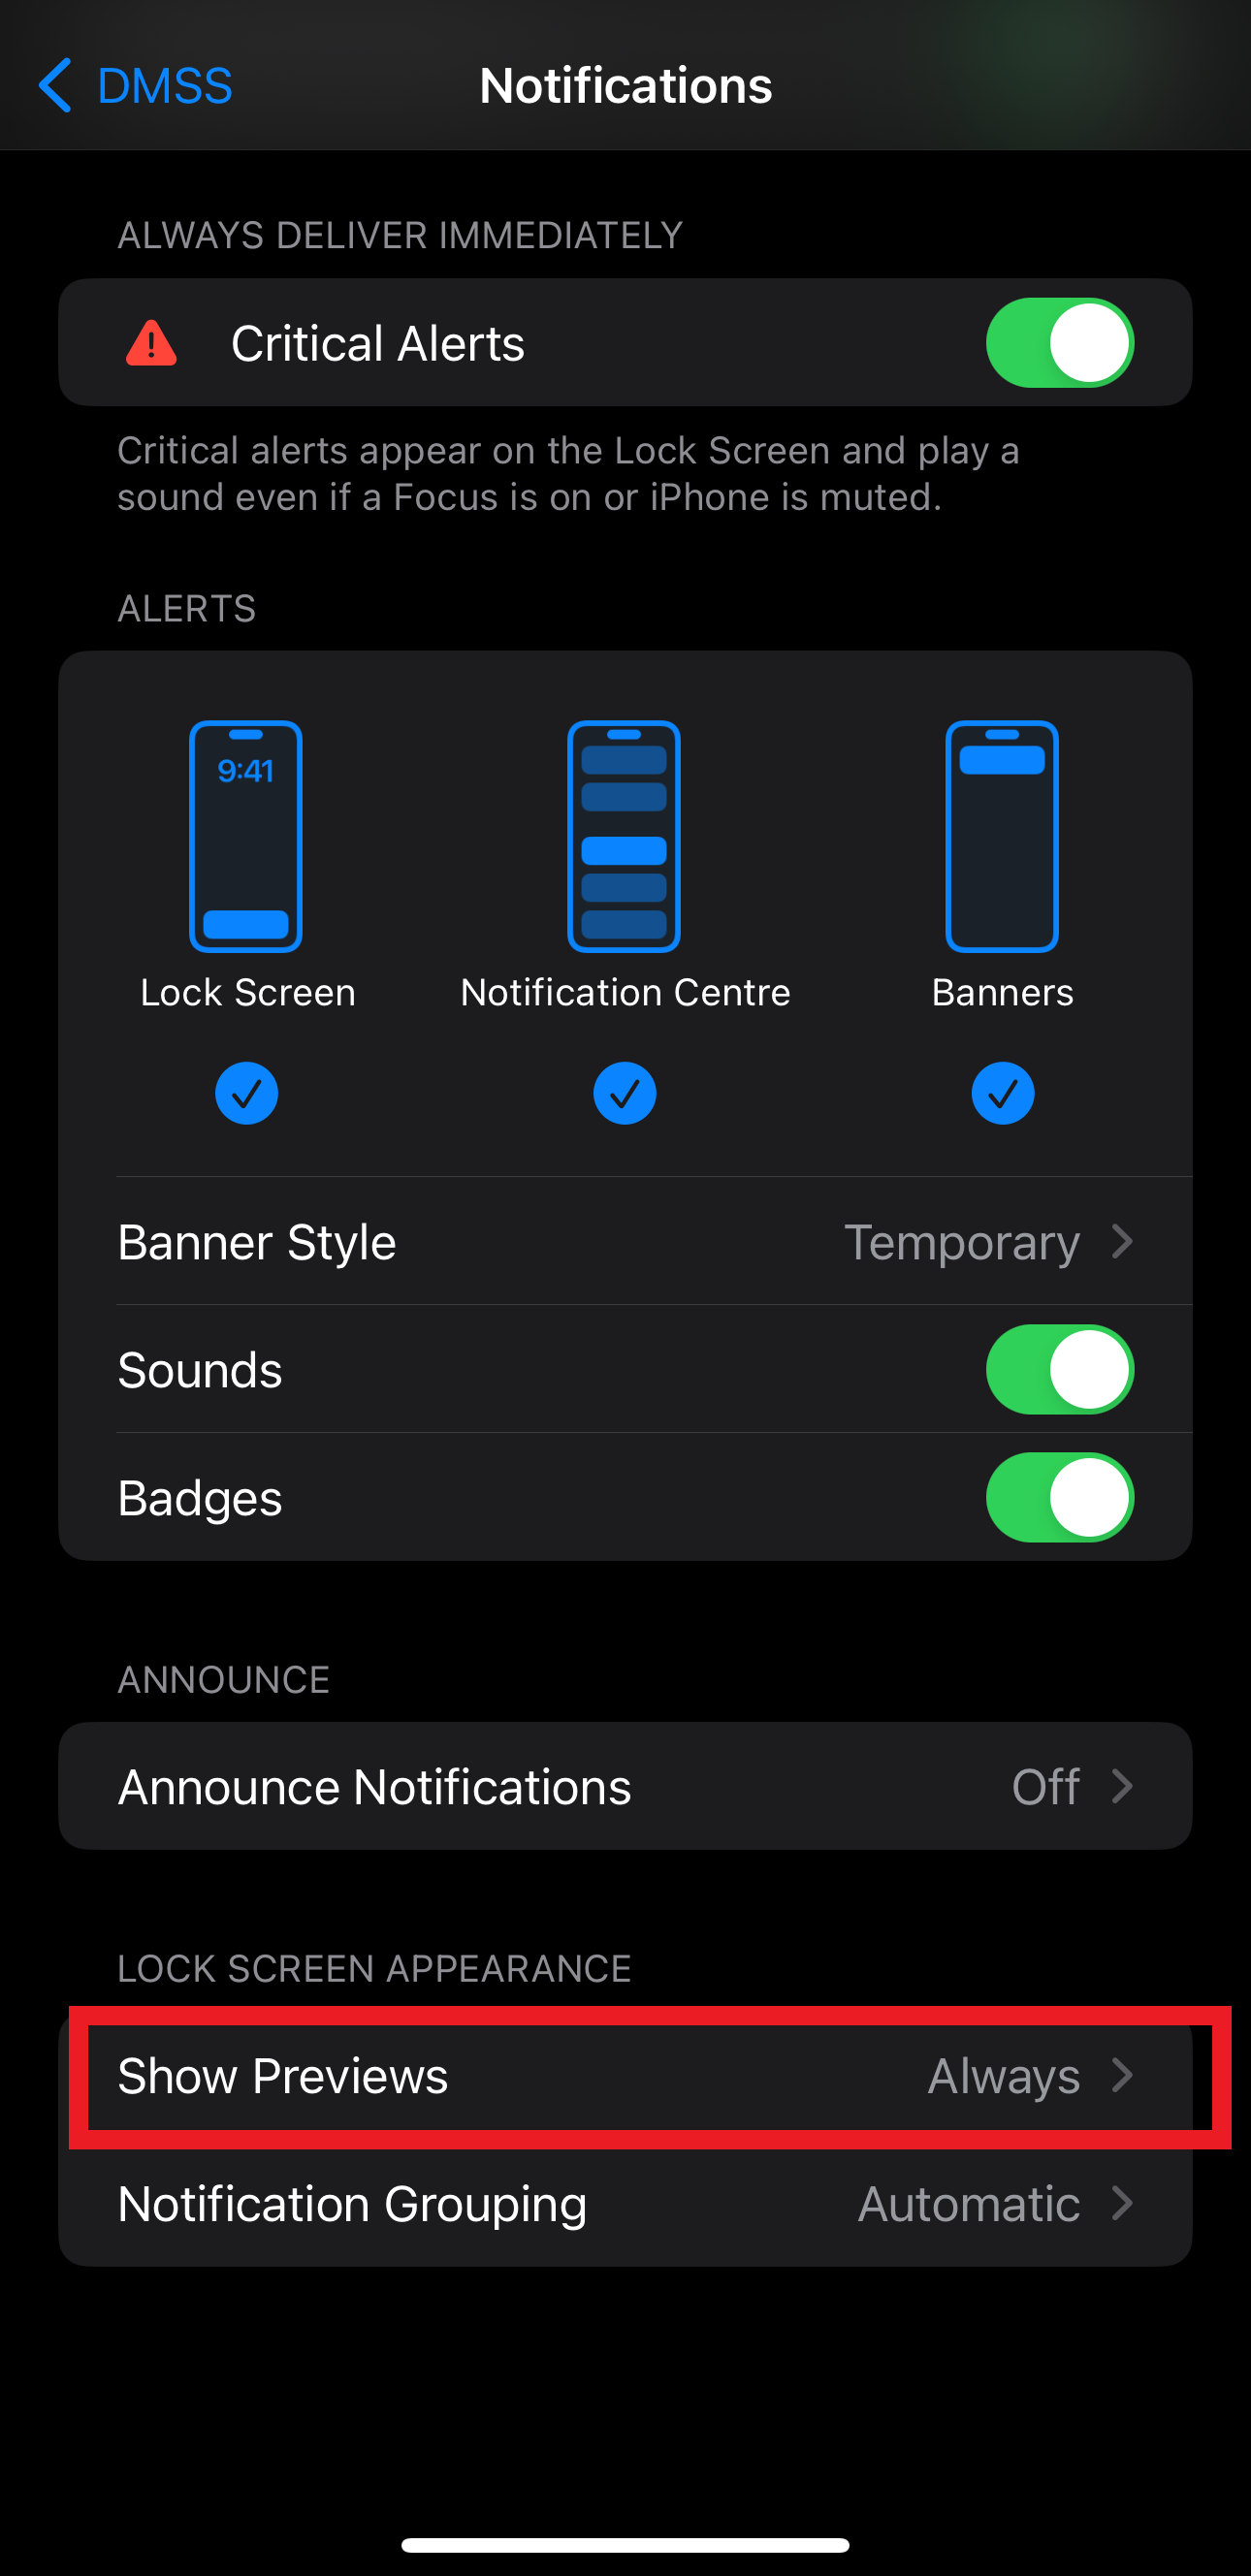
Also, make sure the Background app refresh is 'enabled' and also the show previews is set to 'Always'
Video Guide