For a PTZ, IVS and Face detection are configured per Preset. They can be configured via the Web Interface of the PTZ, or via an NVR.
Tripwire - Draw a line. Detect when the target crosses the line in the defined direction.
Intrusion - Draw a shape. Detect when the target enters/exits the area or appears in the area.
Abandoned Object - Draw a shape. Detect if a target enters the area and stays longer than the set time.
Missing Object - Draw a shape. Detect if an object is removed from the scene longer than the set time.
Face Recognition - Compare face capture data to a list of previously captured faces, or uploaded image data.
Tripwire
Tripwire (via Web Interface 5.0)
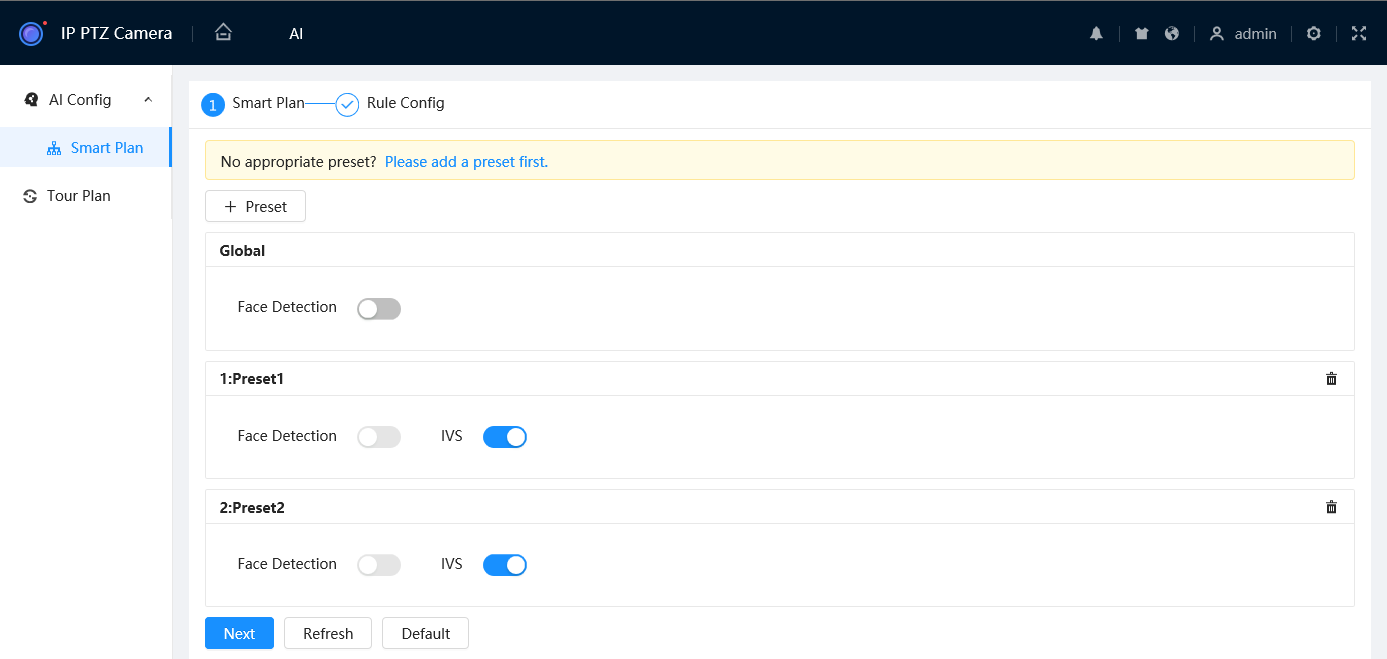
- Navigate to AI > AI Config > Smart Plan.
- Select
 and select the Preset you wish to add the Tripwire on.
- Toggle IVS to On
 for the Preset you wish to add the Tripwire on.
 - Select

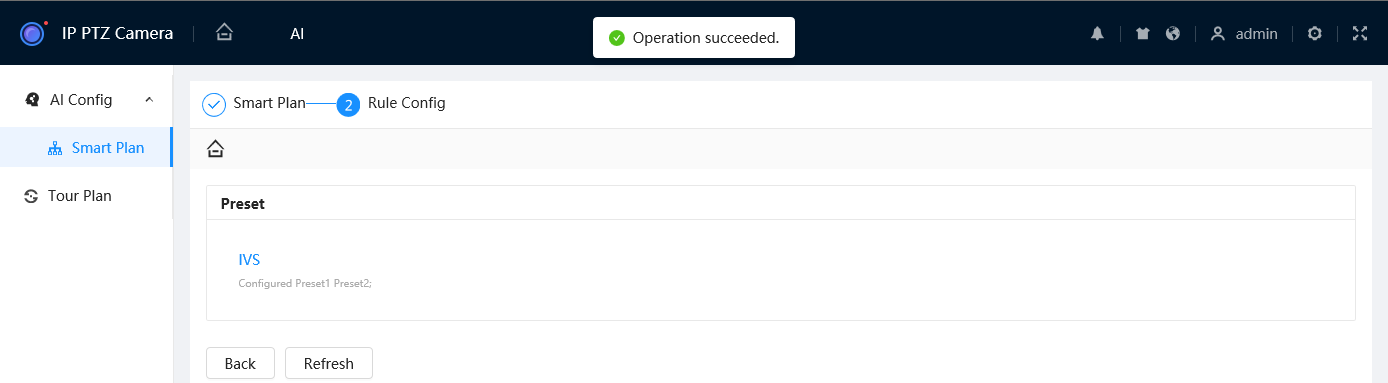
- Select
 .
.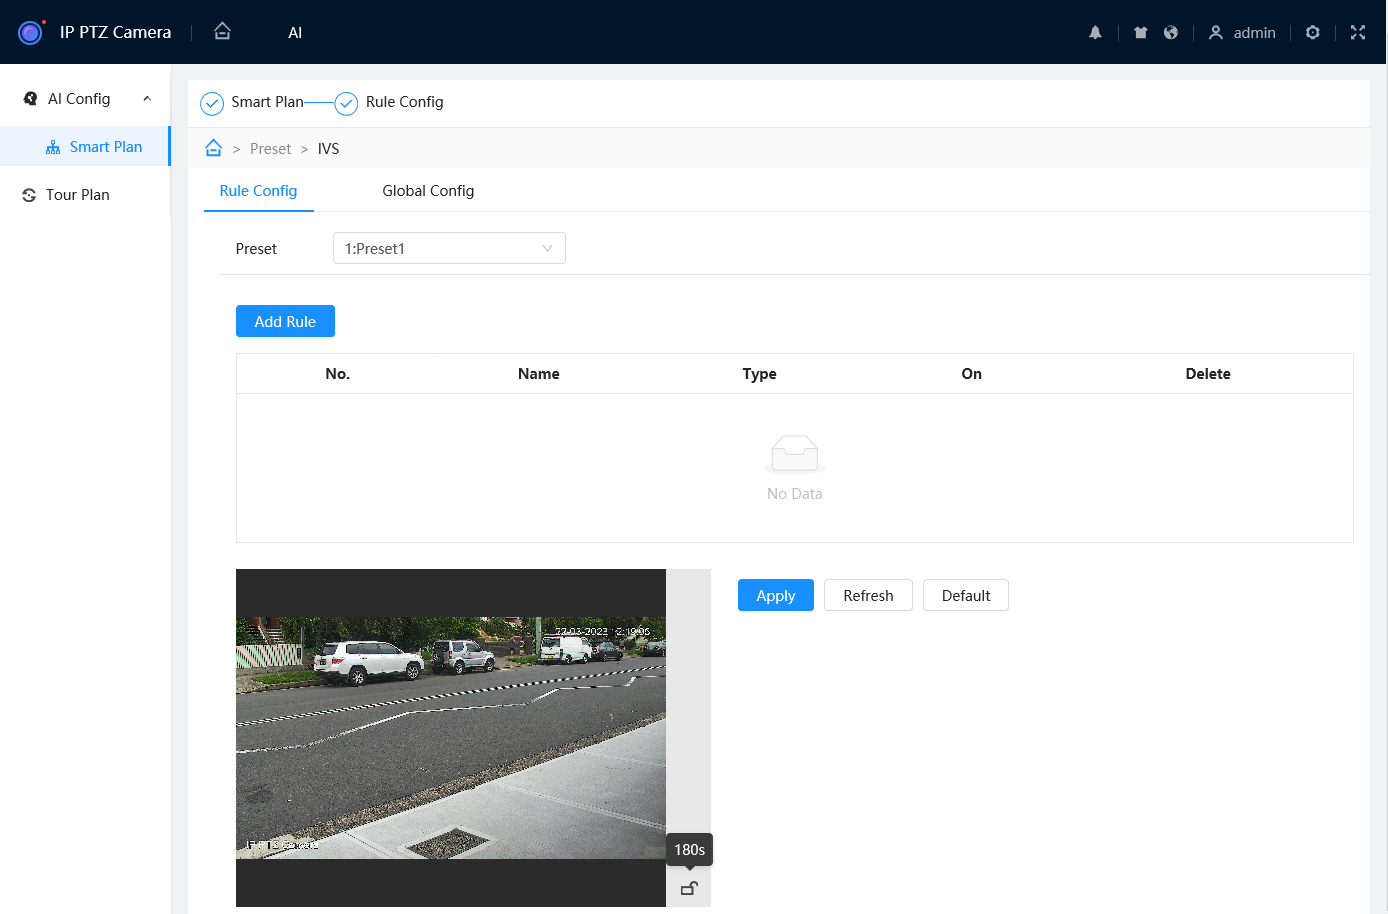
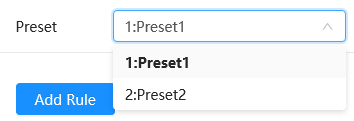
- Select the Preset you wish to add the Tripwire to.
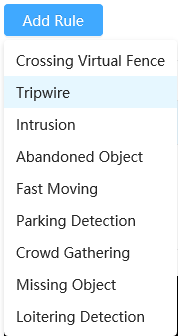
- Select
 , then choose Tripwire to add a Tripwire.
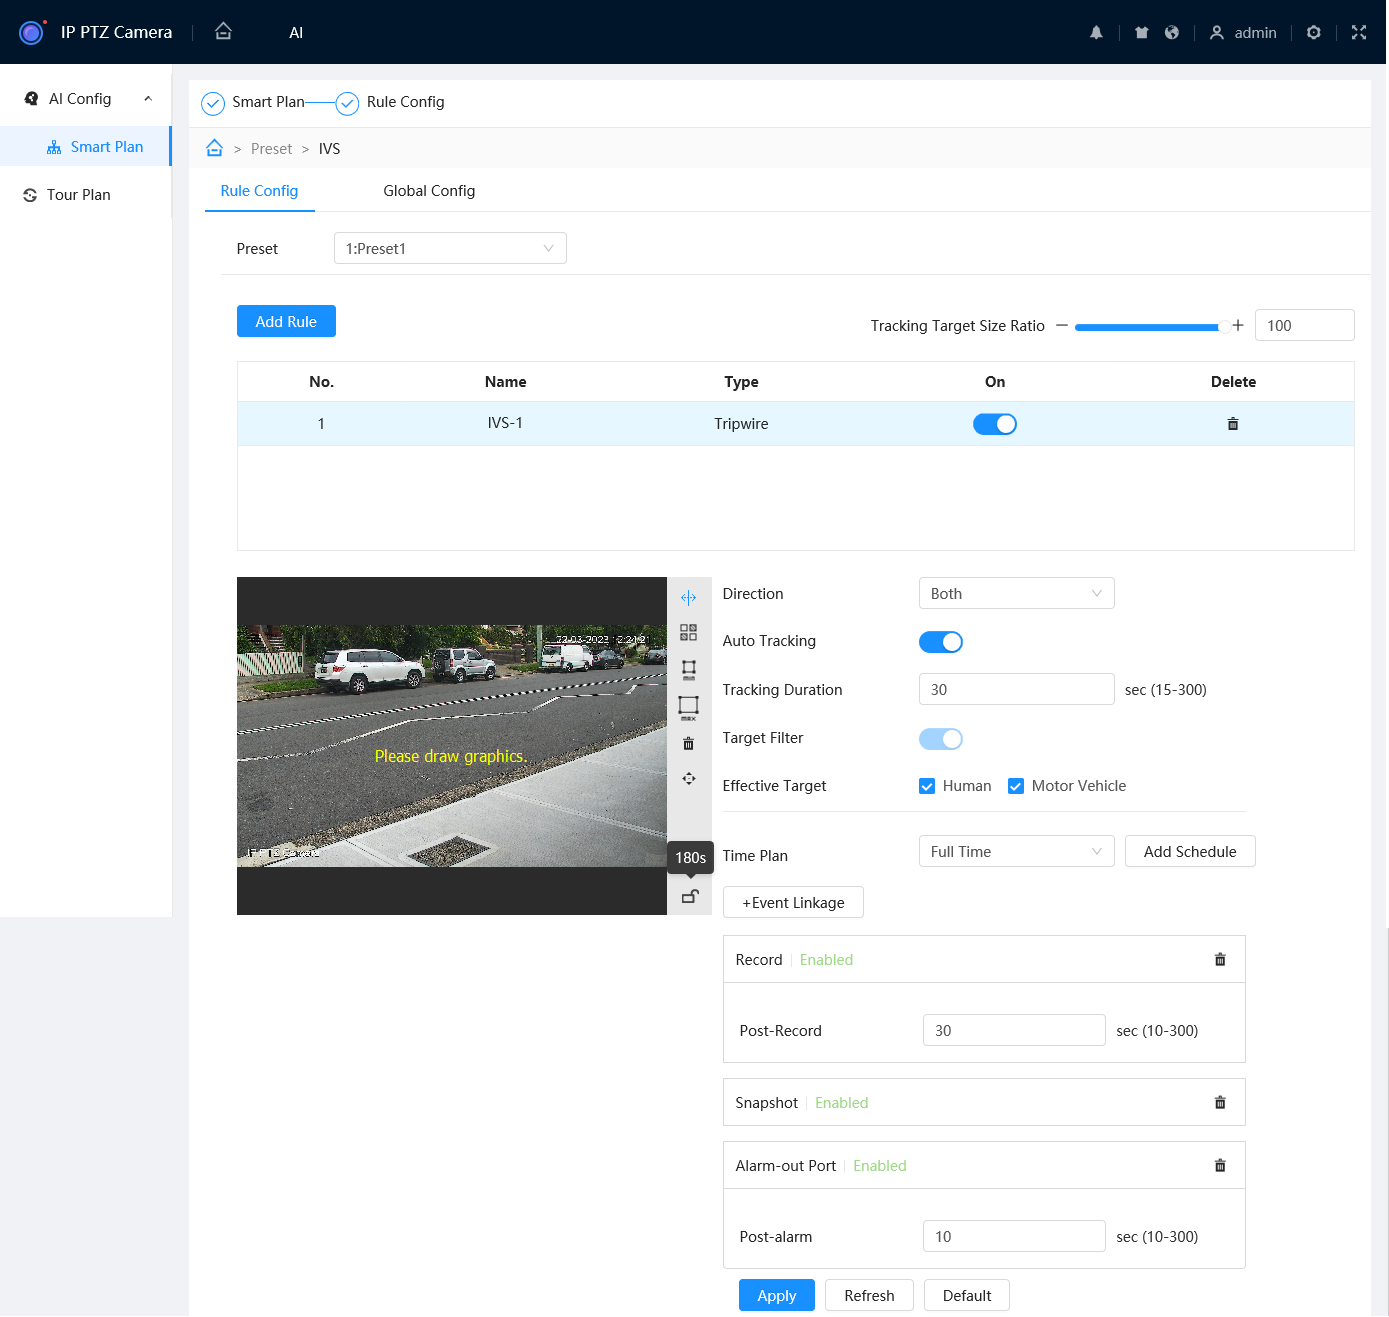
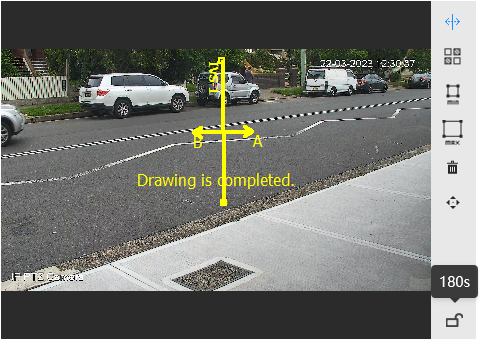
- Ensure
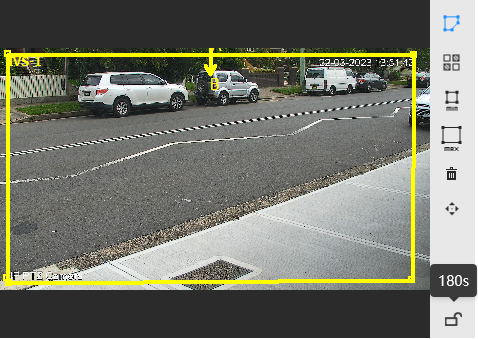
 is selected, then draw the Tripwire. Left-click on the camera feed to start drawing the Tripwire line. Left-click again to finish the line (optionally, you can add additional corners to the line by continuing to left click). Right-click to finish placing the line.
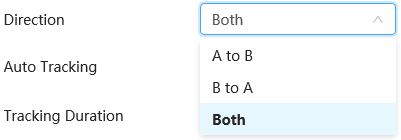
- Set the Direction. Both will do both directions, A to B and B to A will only trigger if the object moves in that direction (Depicted by an arrow on the camera feed).

- Set the Effective Target (AI Camera only).
- (Optional) Select
 , then
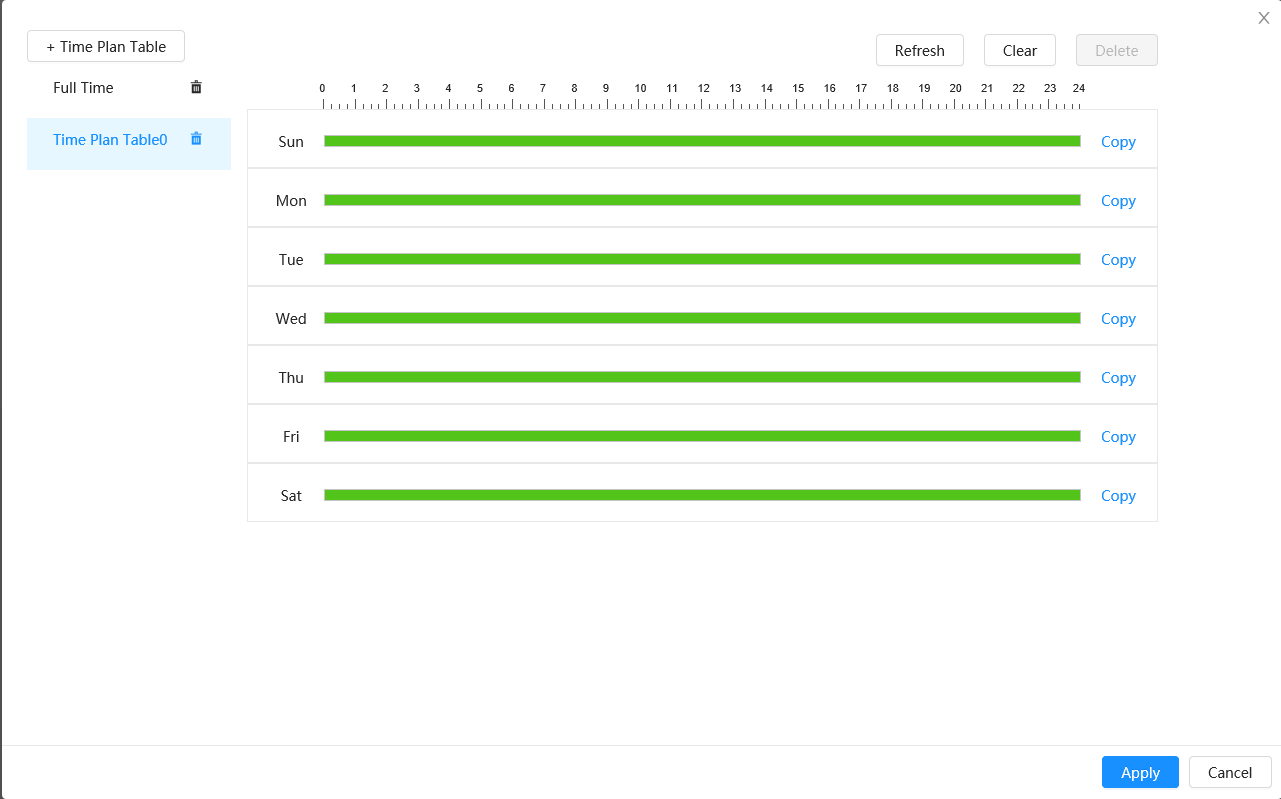
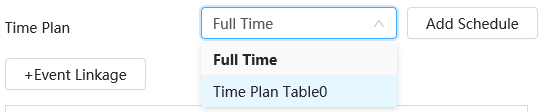
  to add a custom Time Plan to change the active hours of the Tripwire. Adjust the timeline so the green sections are the active hours and white are the inactive hours you wish to use for the rule. Select
  to save your changes, then select the new Time Plan from the list.
- (Optional) Enable Auto Tracking and set the Tracking Duration. This will allow the PTZ to zoom in and follow a target that triggers the Tripwire.
- (Optional) Use Min
 and Max
  to adjust the Min & Max filters. The Tripwire will only trigger if the target is between the Min and Max size.
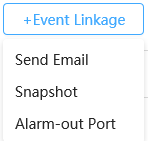
- (Optional) Add event links (Send Email, Snapshot, Alarm-Out Port, etc) by selecting
 . These Events usually require additional setup.
 - Select
 to save your Tripwire
 - Repeat steps 7-12 for each Tripwire you wish to add.
Tripwire (via Web Interface 3.0)
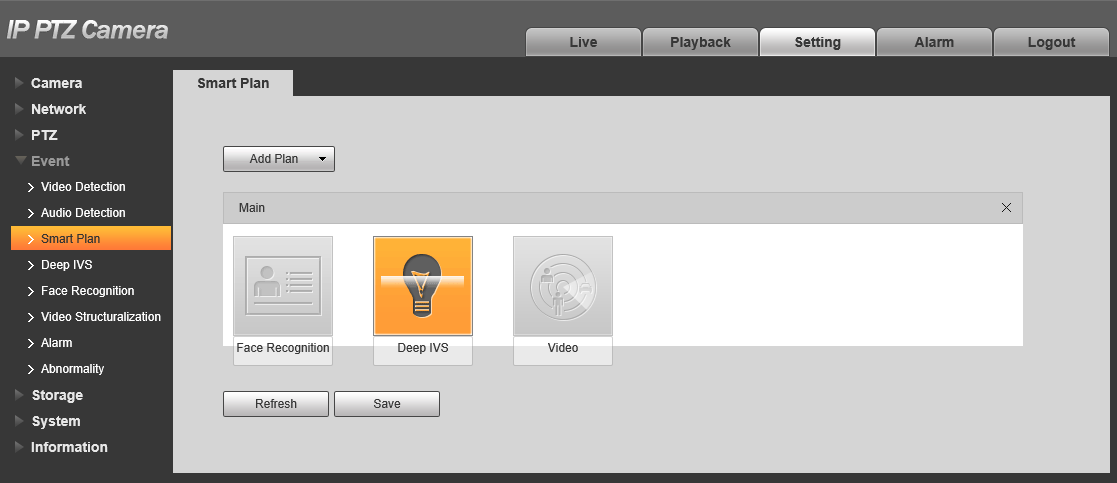
- Navigate to Setting > Event > Smart Plan
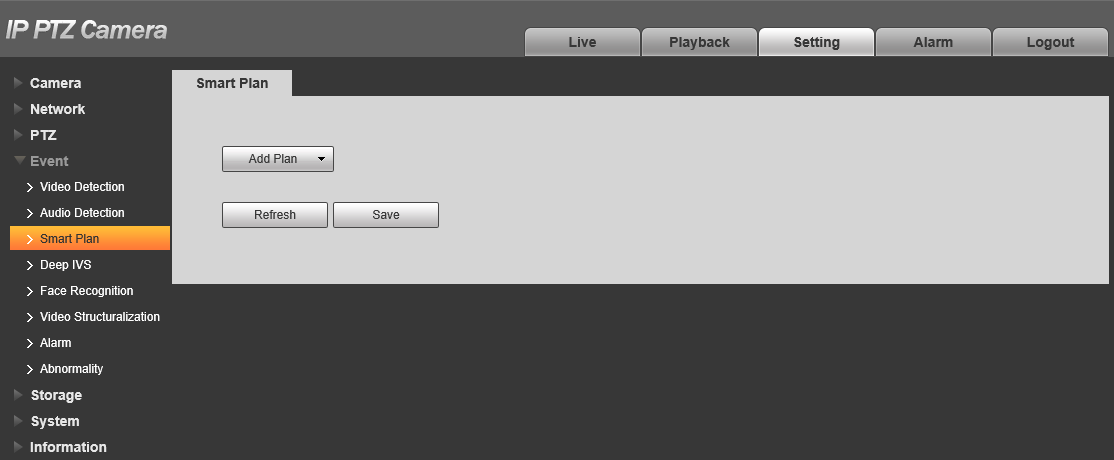
- Click Add Plan and select the Preset you wish to configure the tripwire on.

- Click Deep IVS.
- Click
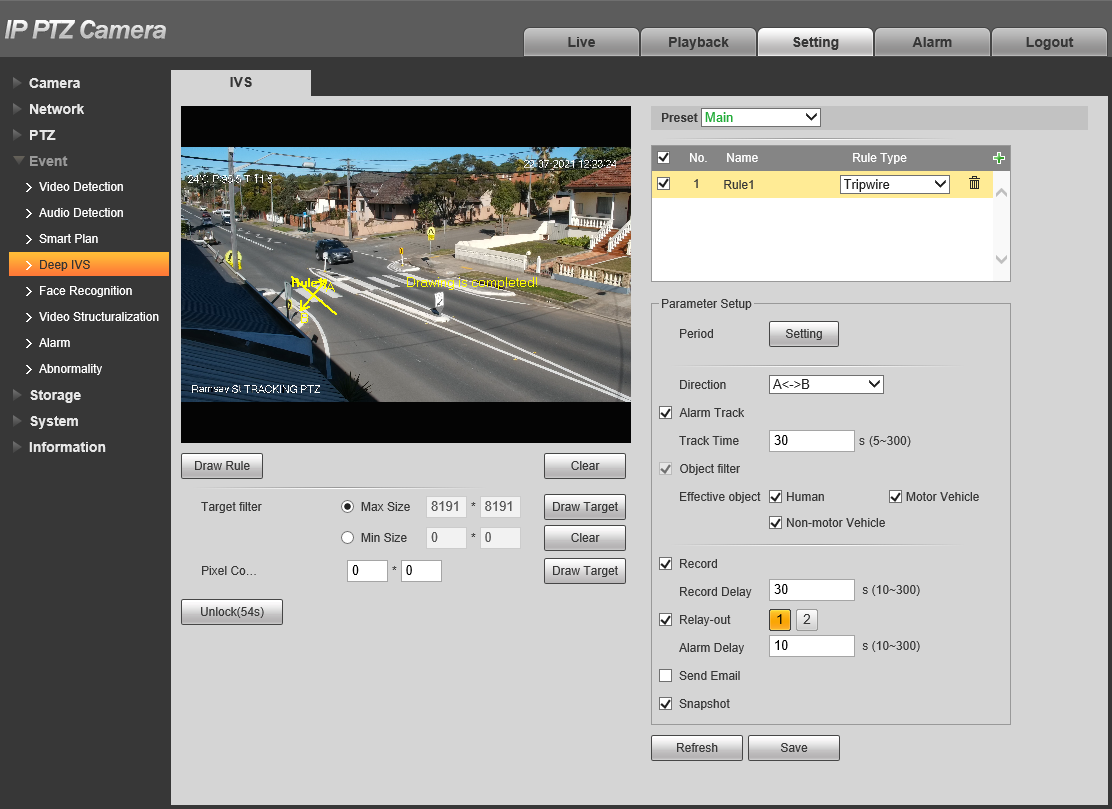
- Navigate to Setting > Event > Deep IVS

- Select the Preset you want to create the tripwire on.
- Click
 to add an IVS rule
- Set the Rule Type to Tripwire.
- Click
 .
.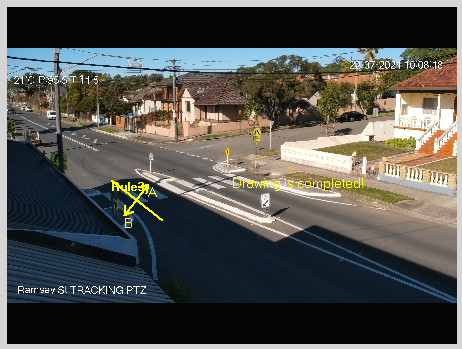
- Draw the Tripwire. Left-click on the camera feed to start drawing the Tripwire line. Left-click again to finish the line (optionally, you can add additional corners to the line by continuing to left click). Right-click to finish placing the line.

- Set the Direction of the Tripwire.
A<->B will do both directions
A will do A direction only (Depicted by an arrow on the camera feed)
B will do B direction only (Depicted by an arrow on the camera feed
- Set the Effective object (AI Camera only).

- (Optional) Set the period by clicking
 .
. - Repeat steps 7-13 for each additional Tripwire you wish to add.
- Click
 .
.
Additional Settings
| Parameter | Description |
| Max Size/Min Size | Set the size range of targets. Targets larger than the max size, or smaller than the min size will not trigger the tripwire. |
| Lock/Unlock | Locks/Unlocks the PTZs position while IVS is being configured. |
| Alarm Track | Enable to set the PTZ with track the target when the tripwire is tripped. |
| Track Time | Set how long the PTZ will track for. Requires Alarm Track to be enabled. |
| Record | Enable this option if you wish for the camera to record when The tripwire is triggered. This requires IVS to be scheduled on an NVR under Storage > Schedule > Record, and Auto to be selected for Record Mode under Storage > Record Control. |
| Record Delay | How long the camera will continue to record as part of the "IVS event" after the event has finished. |
| Relay-out | Enabling this will cause the relay of the camera to trigger when the tripwire is triggered. |
| Alarm Delay | How long the relay will stay triggered for after the tripwire is triggered. Requires Relay-out to be enabled. |
| Send Email | Send an Email when the tripwire is triggered. Requires configuration under Network > SMTP(Email) |
| Snapshot | A Snapshot will be taken when the tripwire is triggered is detected. IVS Snapshots will need to be set in the Schedule under Storage > Schedule > Snapshot |
Tripwire (via NVR)
-
Right-click on the Live view Page

- Select PTZ Control.
- Click the
 to open additional settings.
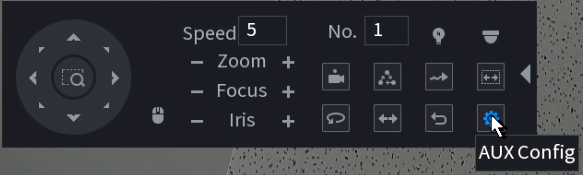
- Click the
 to open PTZ Config.
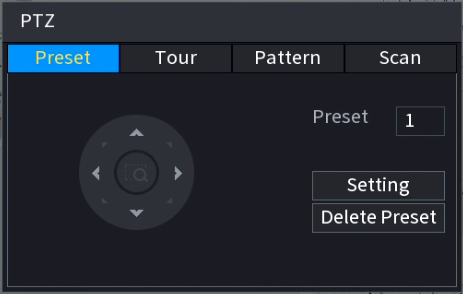
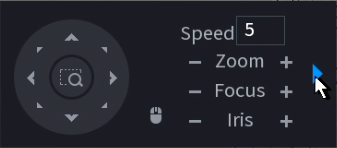
- Use the PTZ controls to move the PTZ to where you want to create the Preset.
- Click Setting to Save the Preset.
- Right-Click to Exit the PTZ Control Menu.
-
Right-Click and select Main Menu.
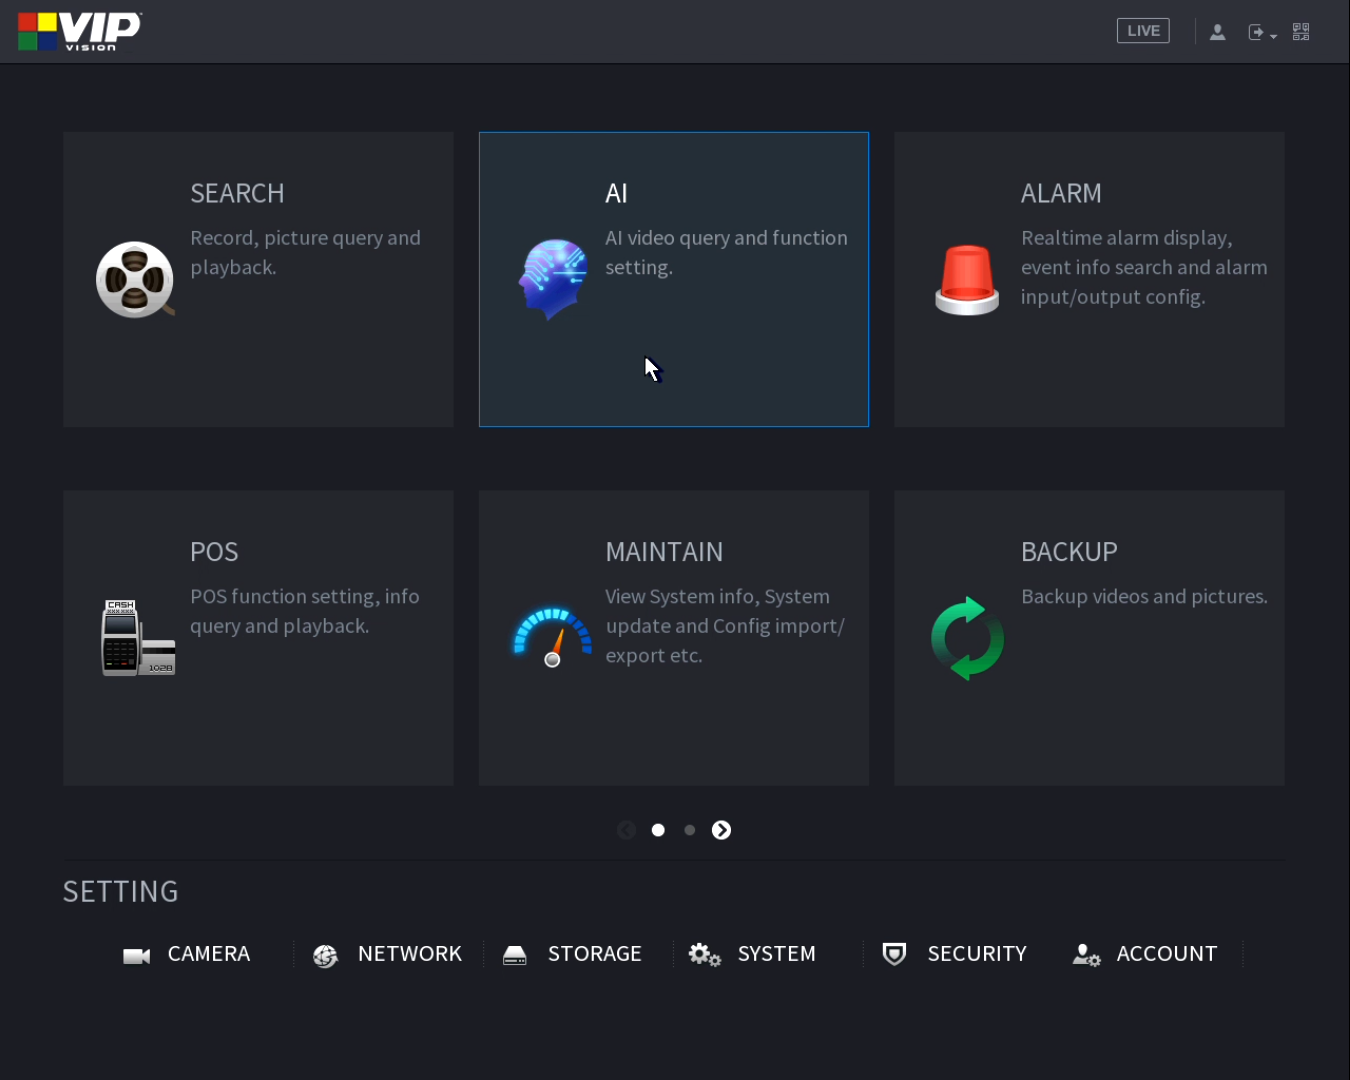
- Select AI.
- Select Parameters > Smart Plan
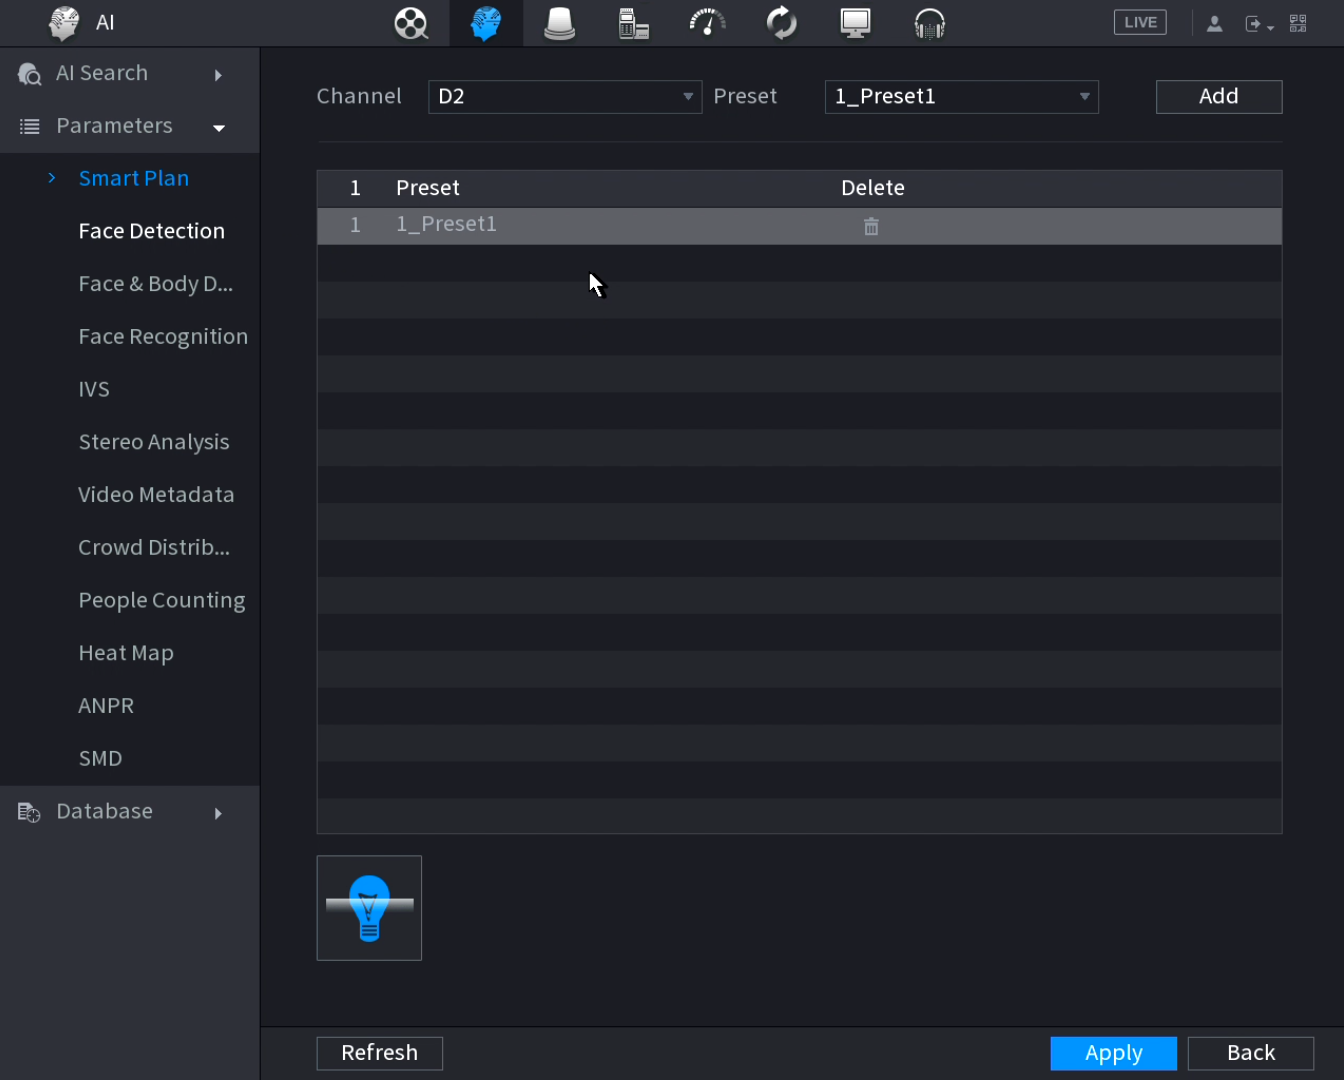
- Set the channel to the PTZ's channel.
- Set the Preset to the preset created earlier.
- Click Add.
- Select the IVS Option
 for Smart Plan.
 - Select Parameters > IVS.
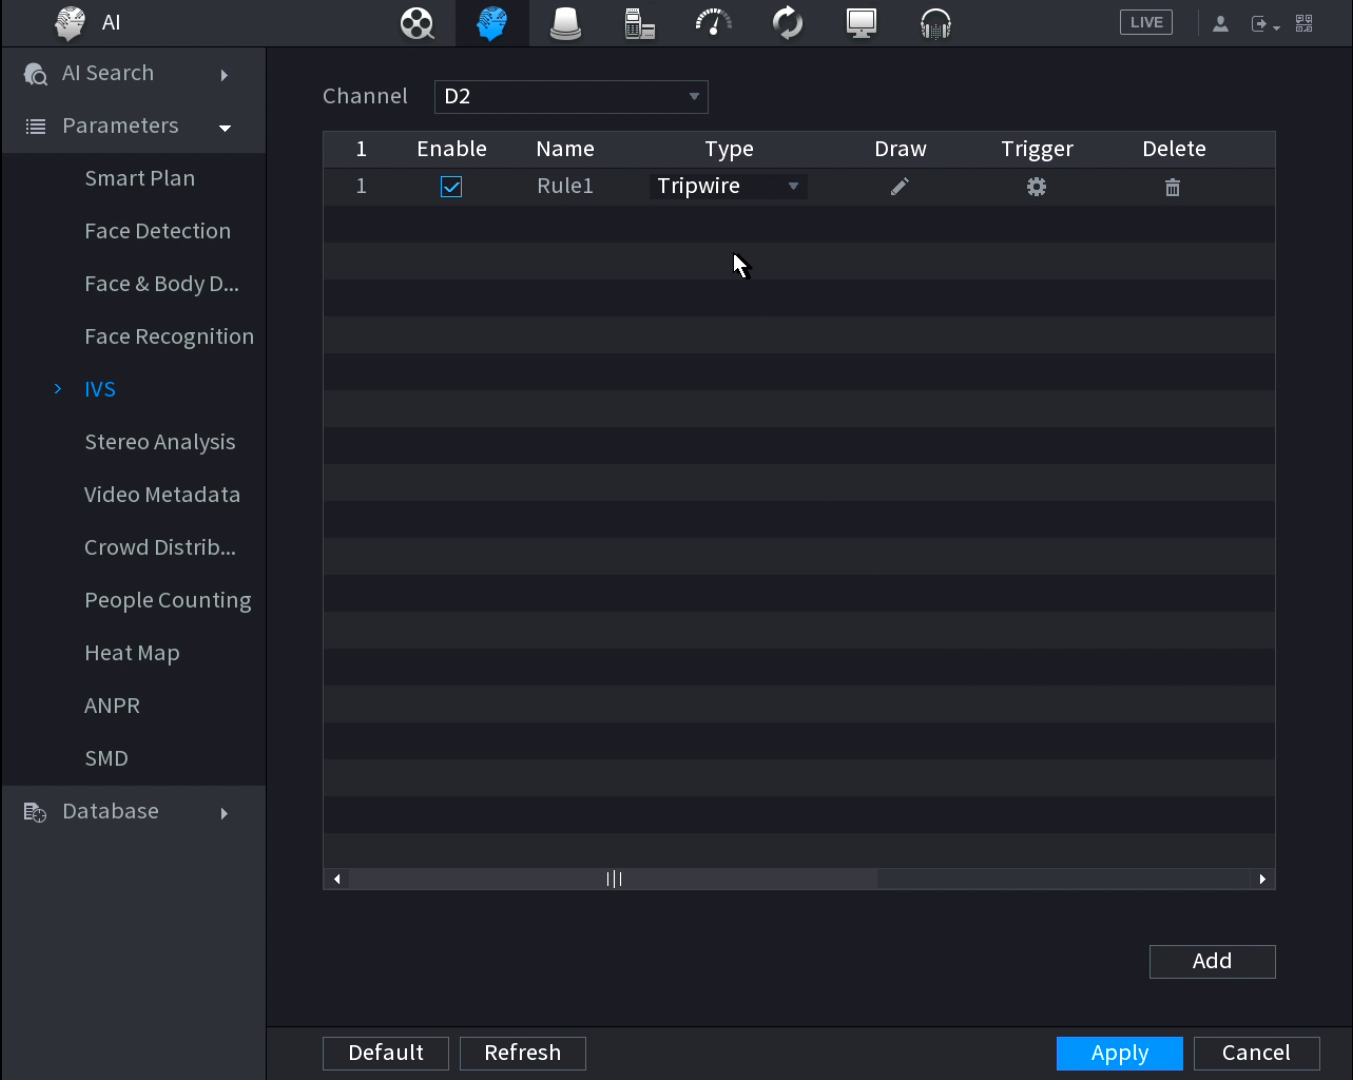
- Set the Channel to the PTZ's channel.
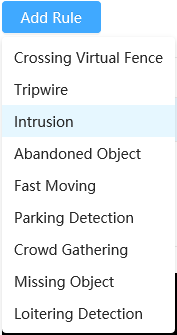
- Click
 .
.
- Set the Type to Tripwire.
- Click the Draw
 icon.
icon.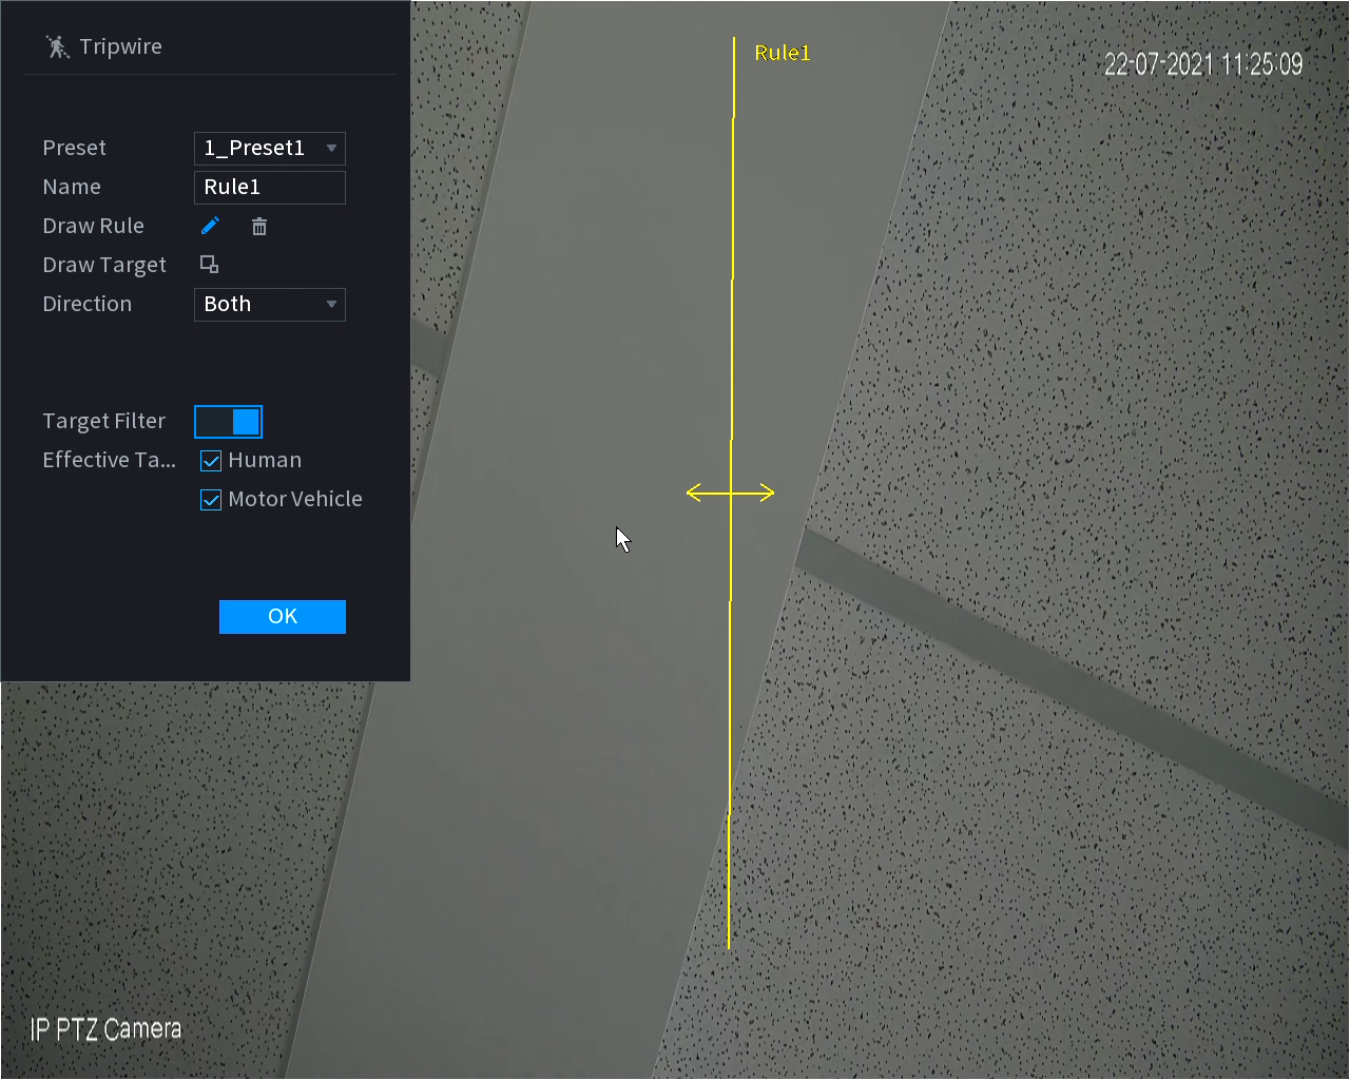
- Set Preset to the Preset created earlier.
- Select the Draw Rule
 Icon.
Icon. - Left-click on the camera feed to start drawing the Tripwire line. Left-click again to finish the line (optionally, you can add additional corners to the line by continuing to left click). Right-click to finish placing the line.
- Set the Direction the target must move to trigger the Tripwire.
Both will do both directions
A to B will only trigger in the direction from A to B only (Depicted by an arrow on the camera feed)
B to A will only trigger in the direction from B to A only (Depicted by an arrow on the camera feed) - (AI Cameras Only) Turn Target Filter On, and select Humans and/or Motor Vehicle. The Tripwire will only activate for the selected targets.
- (Optional) Set the Name of the Rule
- (Optional) Select Draw Target to configure the Min/Max size filters for the target.
- Click OK.
- Click Apply.
Additional settings
Click the Trigger Icon  to configure additional settings.
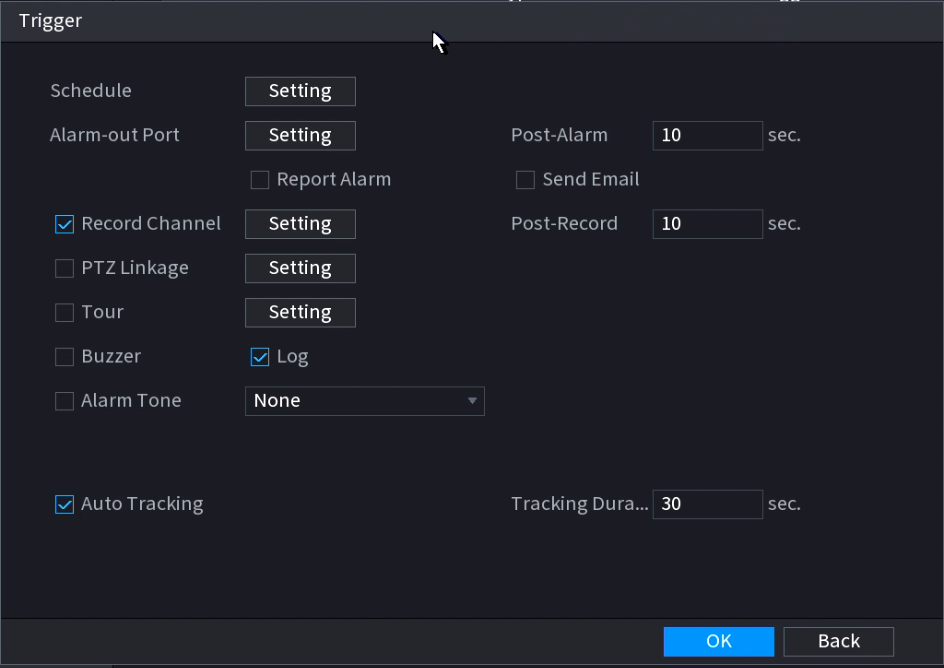
| Parameter | Description |
| Schedule | Schedule the active ours of the IVS rule. This will only work from the NVR if AI by NVR is used. |
| Alarm Out | Sets an external alarm to activate whenever a face is detected. |
| Post-Alarm | Sets how long the system waits after a trigger before detecting again (10 seconds by default) |
| Alarm Track | Enable to set the PTZ with track the target when the tripwire is tripped. |
| Report Alarm | Updates the alarm system status on the network (Unused for this system). |
| Send Email | Notifies a specified email address whenever the event is triggered (Requires internet connection & setup) |
| Record | Enable this option if you wish for a camera to record when The intrusion is triggered. Sets which camera to record to when the event is triggered. This requires IVS to be scheduled on an NVR under Storage > Schedule > Record, and Auto to be selected for Record Mode under Storage > Record Control. |
| Post-Record | How long the camera will continue to record as part of the "IVS event" after the event has finished. |
| PTZ Linkage | Set PTZ behaviours in response to a event trigger, such as selecting a Tour to perform, etc |
| Tour | Set Tour behaviours in response to a event trigger. |
| Buzzer | Sets the NVR to beep whenever an event is triggered |
| Log | Log IVS details in the Log (enabled by default) |
| Alarm Tone | Plays a designated .wav file in response to an event trigger. This can be imported via a USB flash drive to the NVR. |
| Auto Tracking | Enable to allow auto tracking. |
| Tracking Duration | Set how long the PTZ will track for. Requires Alarm Track to be enabled. |
Intrusion
Intrusion (via Web Interface 5.0)
- Navigate to AI > AI Config > Smart Plan.
- Select and select the Preset you wish to add the Intrusion on.
- Toggle IVS to On for the Preset you wish to add the Intrusion on.
- Select
- Select .
- Select the Preset you wish to add the Intrusion to.
- Select , then choose Intrusion to add a Intrusion.

- Ensure is selected, then draw the Intrusion. Left-click on the camera feed to start drawing the Intrusion shape. Left-click to place additional corners. Right-click to finish placing the shape.

- Set the Action. Appears will trigger if the target appears inside the intrusion (E.g. if the intrusion covers an area with a door.) Cross will trigger if the target crosses the intrusion line.
- If Cross was selected, set the Direction.

- Set the Effective Target (AI Camera only).
- (Optional) Select , then to add a custom Time Plan to change the active hours of the Intrusion. Adjust the timeline so the green sections are the active hours and white are the inactive hours you wish to use for the rule. Select to save your changes, then select the new Time Plan from the list.
- (Optional) Enable Auto Tracking and set the Tracking Duration. This will allow the PTZ to zoom in and follow a target that triggers the Tripwire.
- (Optional) Use Min and Max to adjust the Min & Max filters. The Intrusion will only trigger if the target is between the Min and Max size.
- (Optional) Add event links (Send Email, Snapshot, Alarm-Out Port, etc) by selecting . These Events usually require additional setup.
- Select to save your Intrusion
- Repeat steps 7-12 for each Intrusion you wish to add.
Intrusion (via Web Interface 3.0)
- Navigate to Setting > Event > Smart Plan

- Click Add Plan and select the Preset you wish to configure an intrusion on.
- Click Deep IVS.
- Click .

- Navigate to Setting > Event > Deep IVS

- Select the Preset you want to create the intrusion on.
- Click to add an IVS rule

- Set the Rule Type to Intrusion.
- Click .

- Draw the Intrusion. Left-click on the camera feed to start drawing the Intrusion shape. Left-click to place additional corners. Right-click to finish placing the shape.
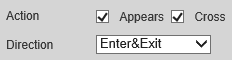
- Set the Action of the intrusion.
Appears will trigger if the target appears inside the intrusion. E.g. if the intrusion covers an area with a door.
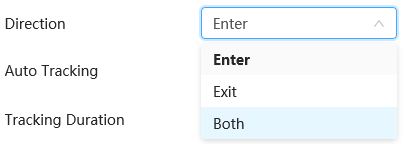
Cross will trigger if the target crosses the intrusion line. - If Cross is selected, set the Direction of the Intrusion.
Enter&Exit will trigger when the target enters and exits the intrusion.
Enter will only trigger when the target enters the intrusion.
Exit will only trigger when the target exits the intrusion.
- Set the Effective object (AI Camera only) .
- Set the period by clicking .
- Repeat steps 1-8 for each additional Intrusion you wish to add.
- Click .
Additional Settings
| Parameter | Description |
| Max Size/Min Size | Set the size range of targets. Targets larger than the max size, or smaller than the min size will not trigger the intrusion. |
| Lock/Unlock | Locks/Unlocks the PTZs position while IVS is being configured. |
| Alarm Track | Enable to set the PTZ with track the target when the tripwire is tripped. |
| Track Time | Set how long the PTZ will track for. Requires Alarm Track to be enabled. |
| Record | Enable this option if you wish for the camera to record when The intrusion is triggered. This requires IVS to be scheduled on an NVR under Storage > Schedule > Record, and Auto to be selected for Record Mode under Storage > Record Control. |
| Record Delay | How long the camera will continue to record as part of the "IVS event" after the event has finished. |
| Relay-out | Enabling this will cause the relay of the camera to trigger when the intrusion is triggered. |
| Alarm Delay | How long the relay will stay triggered for after the intrusion is triggered. Requires Relay-out to be enabled. |
| Send Email | Send an Email when the intrusion is triggered. Requires configuration under Network > SMTP(Email) |
| Snapshot | A Snapshot will be taken when the intrusion is triggered is detected. IVS Snapshots will need to be set in the Schedule under Storage > Schedule > Snapshot |
Intrusion (via NVR)
-
Right-click on the Live view Page
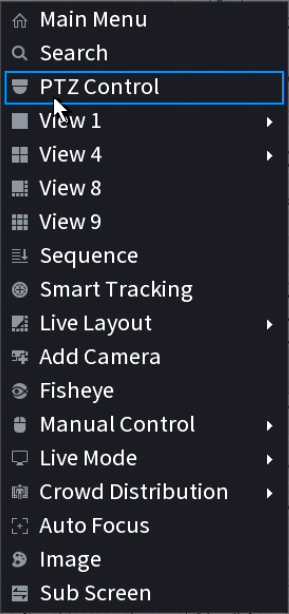
- Select PTZ Control.
- Click the to open additional settings.
- Click the to open PTZ Config.
- Use the PTZ controls to move the PTZ to where you want to create the Preset.
- Click Setting to Save the Preset.
- Right-Click to Exit the PTZ Control Menu.
-
Right-Click and select Main Menu.
- Select AI.
- Select Parameters > Smart Plan
- Set the Channel to the PTZ's channel.
- Set the Preset to the preset created earlier.
- Click Add.
- Select the IVS Option for Smart Plan.
- Select Parameters > IVS.
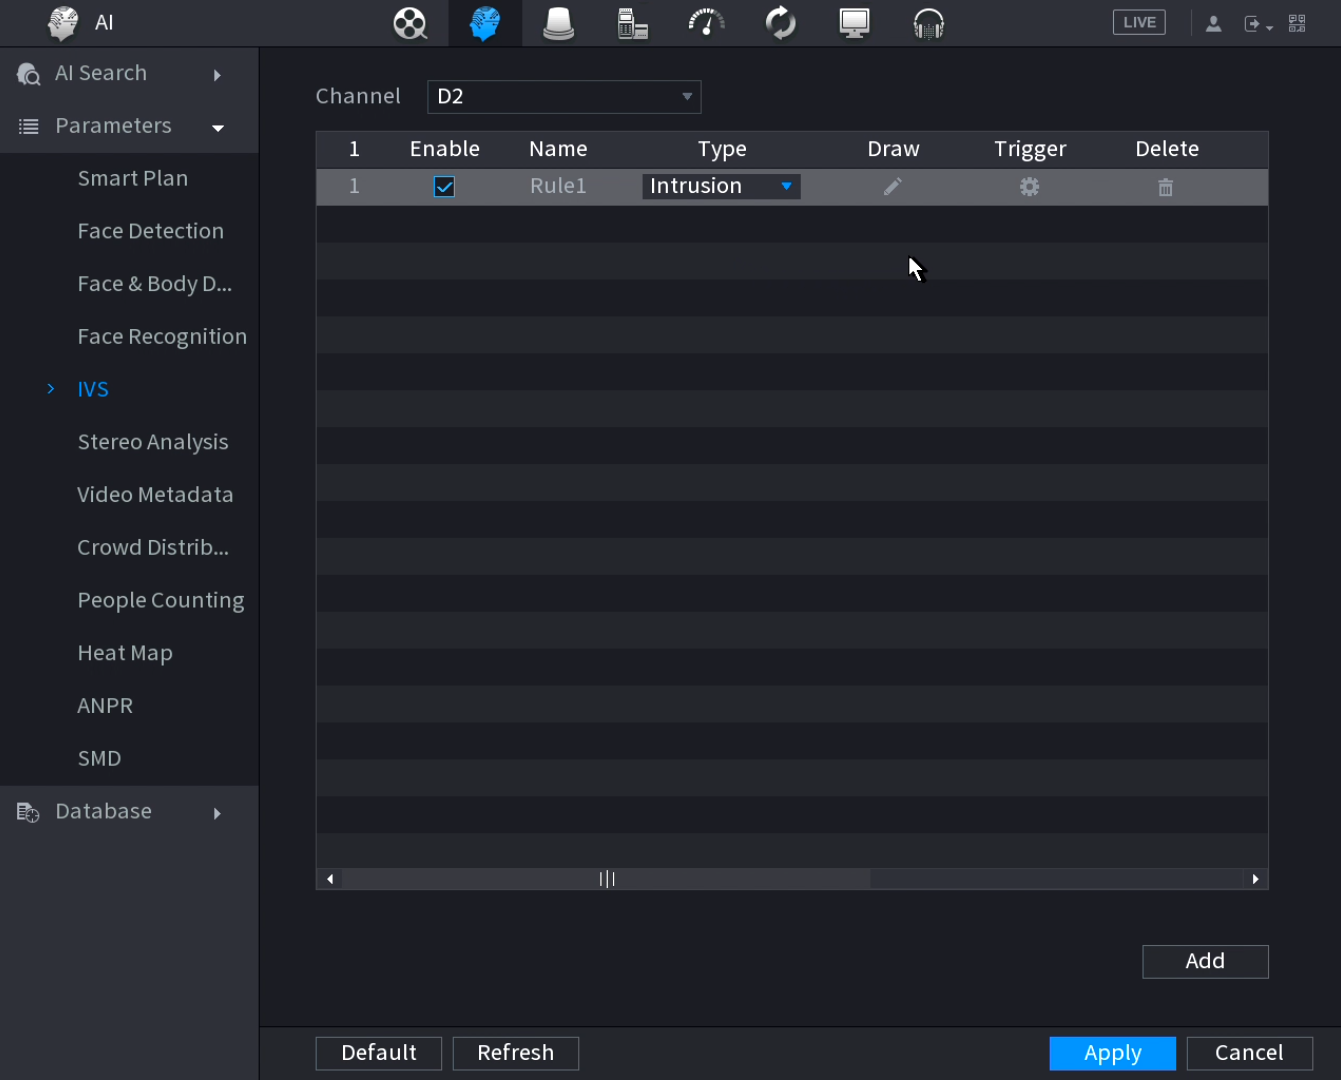
- Set the channel to the PTZ's channel.
- Click .
- Set the Type to Intrusion.
- Click the Draw icon.
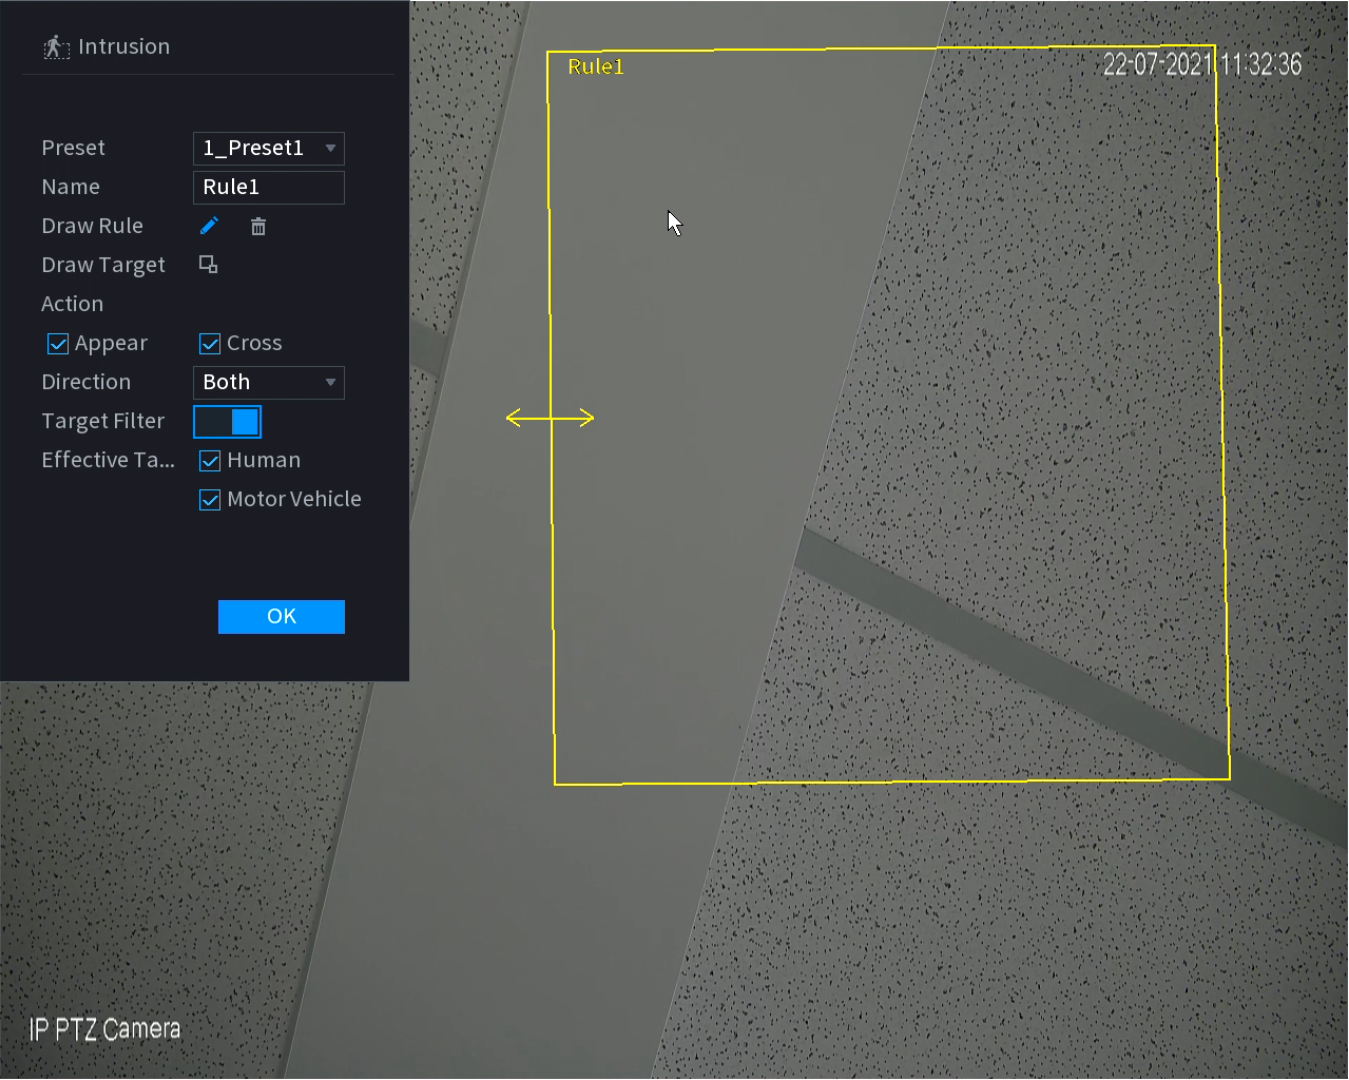
- Set Preset to the Preset created earlier.
- Select the Draw Rule Icon.
- Left-click on the camera feed to start drawing the Intrusion shape. Left-click to place additional corners. Right-click to finish placing the shape.
- Set the Action of the intrusion.
Appears will trigger if the target appears inside the intrusion. E.g. if the intrusion covers an area with a door.
Cross will trigger if the target crosses the intrusion line. - If Cross is selected, set the Direction of the Intrusion.
Enter&Exit will trigger when the target enters and exits the intrusion.
Enter will only trigger when the target enters the intrusion.
Exit will only trigger when the target exits the intrusion. - (AI Cameras Only) Turn Target Filter On, and select Humans and/or Motor Vehicle. The Intrusion will only activate for the selected targets.
- (Optional) Set the Name of the Rule
- (Optional) Select Draw Target to configure the Min/Max size filters for the target.
- Click OK.
- Click Apply.
Additional settings
Click the Trigger Icon to configure additional settings.
| Parameter | Description |
| Schedule | Schedule the active ours of the IVS rule. This will only work from the NVR if AI by NVR is used. |
| Alarm Out | Sets an external alarm to activate whenever a face is detected. |
| Post-Alarm | Sets how long the system waits after a trigger before detecting again (10 seconds by default) |
| Alarm Track | Enable to set the PTZ with track the target when the tripwire is tripped. |
| Report Alarm | Updates the alarm system status on the network (Unused for this system). |
| Send Email | Notifies a specified email address whenever the event is triggered (Requires internet connection & setup) |
| Record | Enable this option if you wish for a camera to record when The intrusion is triggered. Sets which camera to record to when the event is triggered. This requires IVS to be scheduled on an NVR under Storage > Schedule > Record, and Auto to be selected for Record Mode under Storage > Record Control. |
| Post-Record | How long the camera will continue to record as part of the "IVS event" after the event has finished. |
| PTZ Linkage | Set PTZ behaviours in response to a event trigger, such as selecting a Tour to perform, etc |
| Tour | Set Tour behaviours in response to a event trigger. |
| Buzzer | Sets the NVR to beep whenever an event is triggered |
| Log | Log IVS details in the Log (enabled by default) |
| Alarm Tone | Plays a designated .wav file in response to an event trigger. This can be imported via a USB flash drive to the NVR. |
| Auto Tracking | Enable to allow auto tracking. |
| Tracking Duration | Set how long the PTZ will track for. Requires Alarm Track to be enabled. |
Abandoned Object & Missing Object
To configure Abandoned/Missing Object, follow the instructions for Intrusion but select Abandoned/Missing Object as the Rule Type.
Face Detection/Recognition
Face Recognition (via Web Interface 3.0)
- Navigate to Setting > Event > Smart Plan

- Click Add Plan and select the Preset you wish to configure the face recognition on.
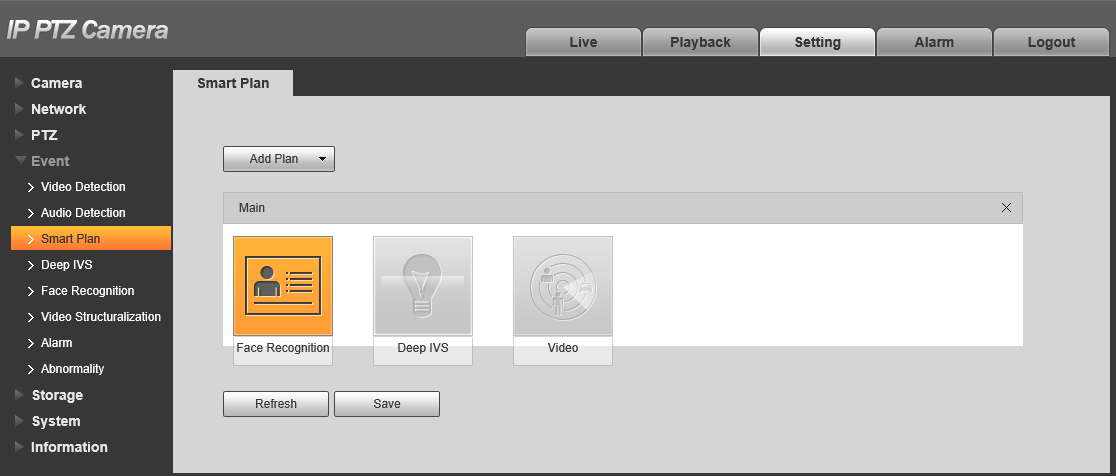
- Click Face Recognition.
- Click .
- Navigate to Setting > Event > Face Recognition > Face Detection
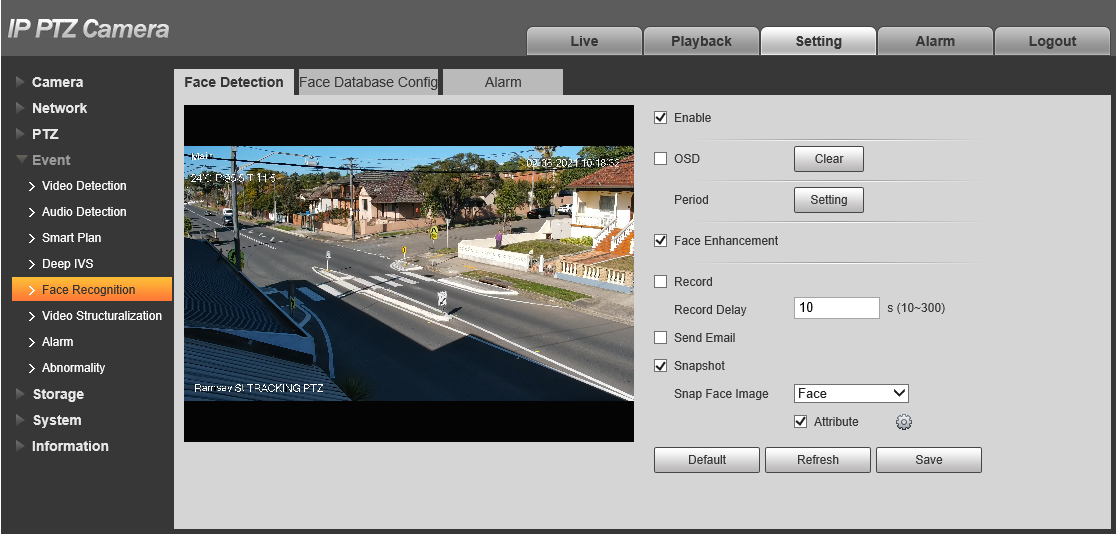
- Tick Enable to enable Face Detection.
- Tick Face Enhancement to enhance face captures.
- Enable Snapshot for the PTZ to save a snapshot when a face is detected.
- Set Snap Face Image to Face.
- Enable Attribute if you wish to detect specific face attributes, then click
 to set the face attributes (Age, Gender, Expression, Glasses, Mask, Moustache&Beard).
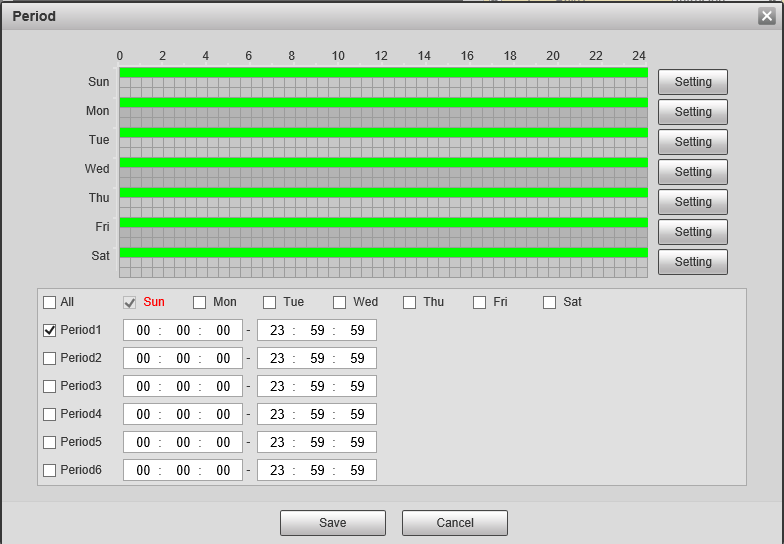
- Set the period by clicking .
- Click Save.
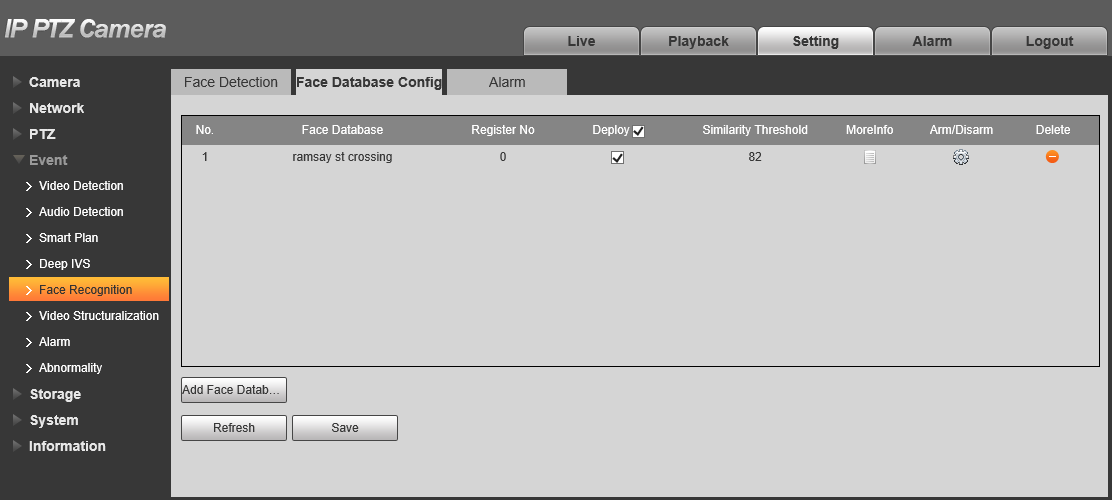
- Navigate to Setting > Event > Face Recognition > Face Database Config.
- Click Add Face Database.
- Tick Deploy.
- (Optional) Adjust the Similarity Threshold and/or the Arm/Disarm period.
- Click Save
Additional Settings
Adding Faces to the Face Database
- Navigate to Setting > Event > Face Recognition > Face Database Config.
- Click MoreInfo
 .
.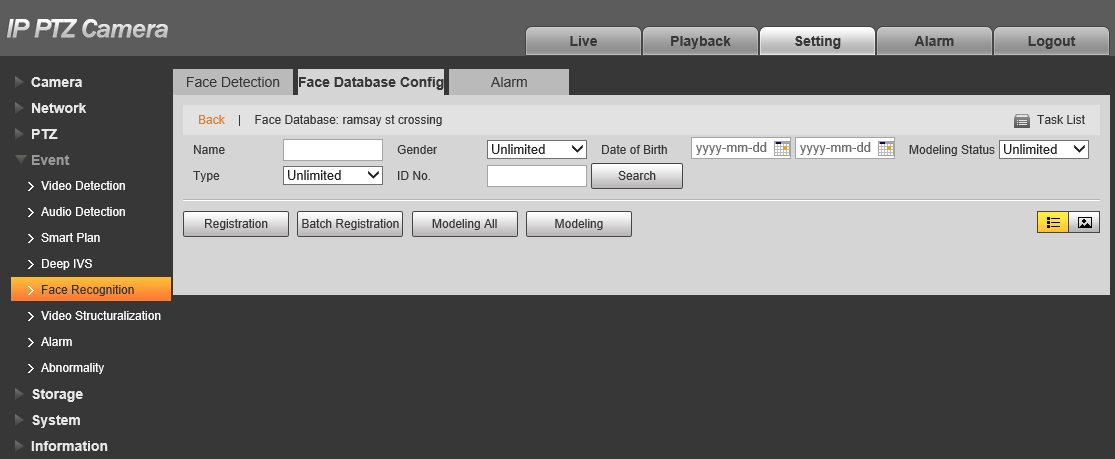
- Click Registration.
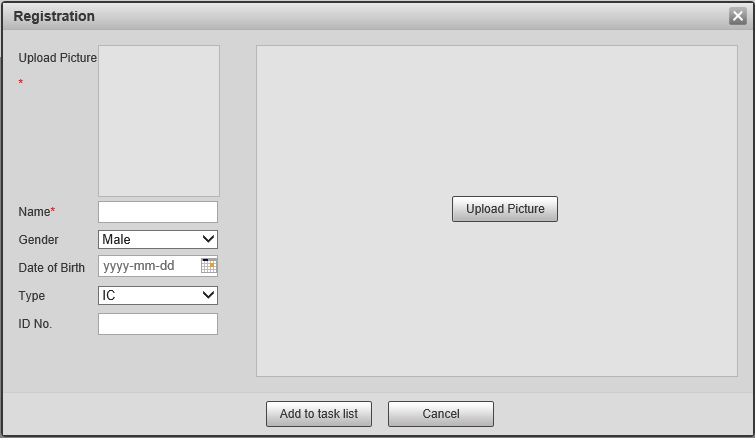
- Click Upload Picture, then select a picture from your computer.
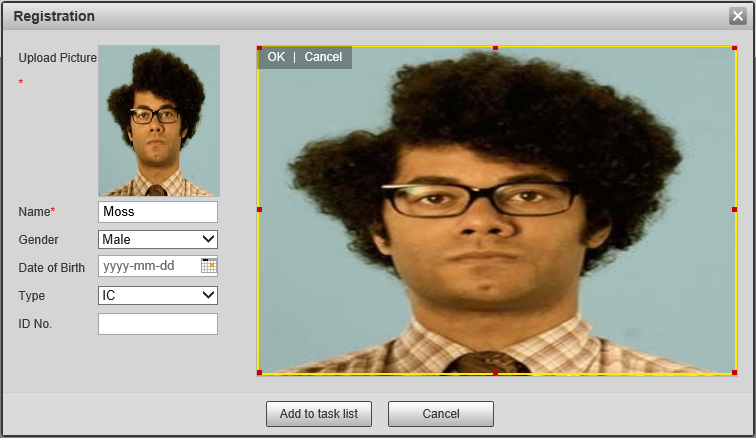
- Enter a Name and set the Gender. Then optionally add a Date of Birth, Type and ID No.
- Click Add to task list.
- Click Task list
 to view the list of current Add/Modify/Delete Tasks for the database.
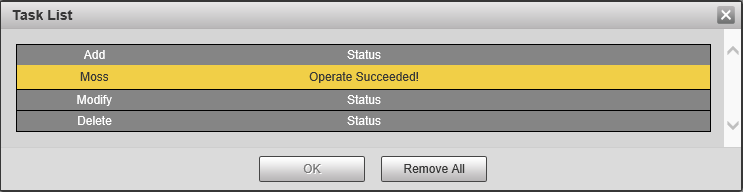
- When the status says Operate Succeeded! the image has been successfully uploaded.
- Click Search to see the list of faces in the Database.
 will allow you to switch between image and detail mode.
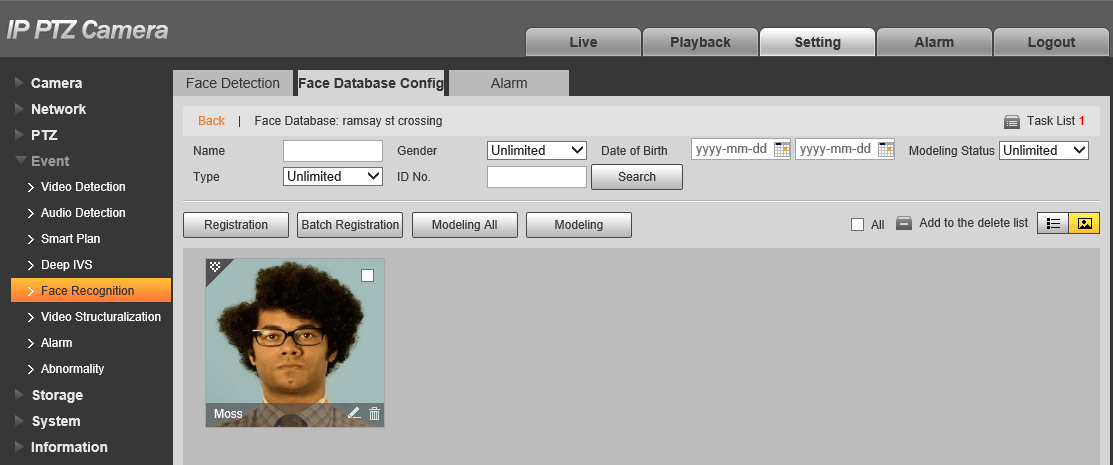
Alarm Out
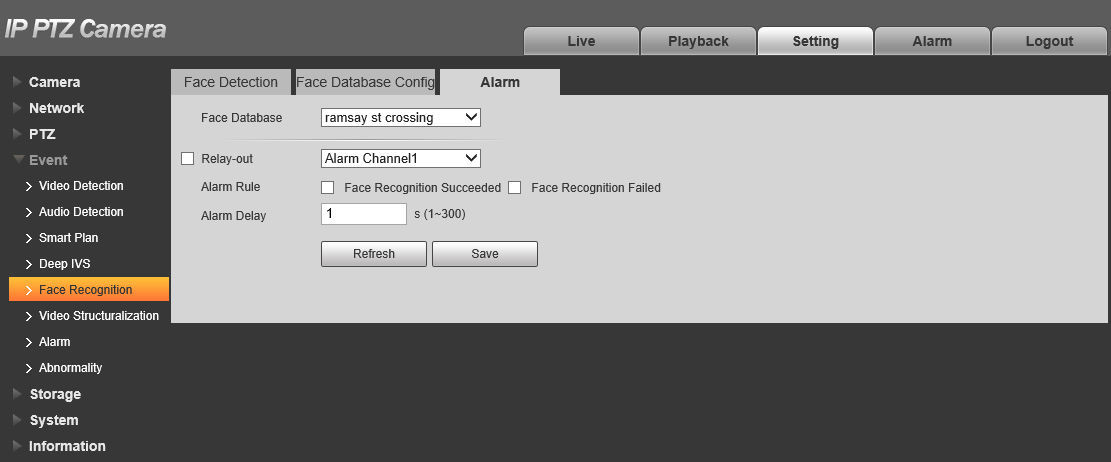
- Navigate to Setting > Event > Face Recognition > Alarms
- Select the Face Database.
- Enable Relay-Out and select the Alarm Channel.
- Enable Face Recognition Succeeded and/our Face Recognition Failed to trigger the Alarm Output when a Face is and/or isn't recognised.
- Set the Alarm Delay. This is how long the alarm will trigger for.